Easy Strawberry Oat Bars Delightful and Simple Treat

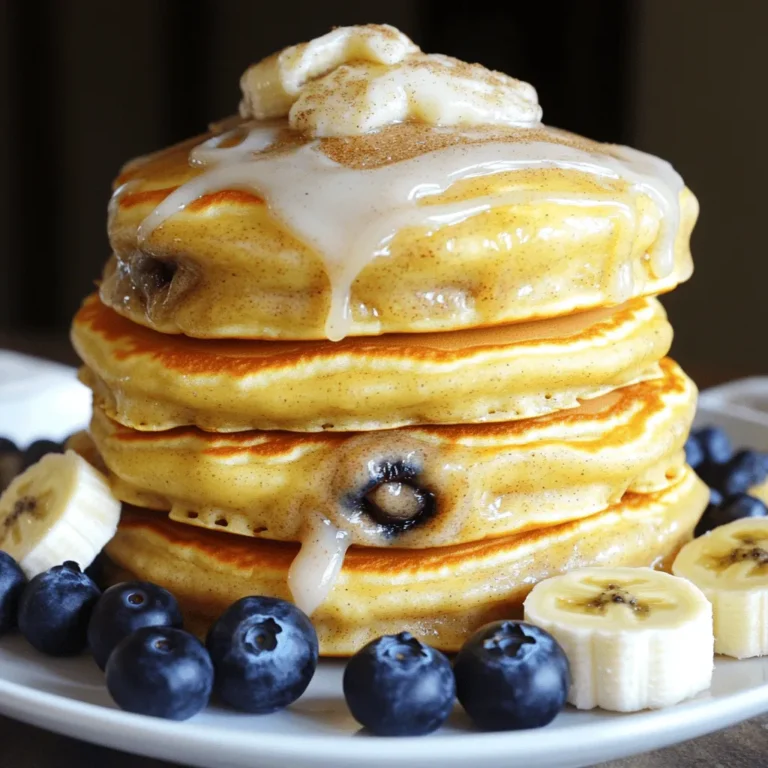
Looking for a sweet and easy treat? You’re in the right place! These Easy Strawberry Oat Bars are simple to make and delicious to eat. With just a few ingredients, you can whip up a snack that everyone will love. Whether you want a cozy dessert or a grab-and-go breakfast, this recipe checks all the boxes. Let’s get started on these delightful bars together!
Ingredients
Detailed Ingredient List
To make Easy Strawberry Oat Bars, gather the following ingredients:
– 1 ½ cups rolled oats
– ½ cup almond flour
– ½ cup brown sugar, packed
– 1 teaspoon baking powder
– ¼ teaspoon salt
– ½ teaspoon cinnamon
– ½ cup unsalted butter, melted
– 1 large egg
– 1 teaspoon vanilla extract
– 1 ½ cups fresh strawberries, hulled and chopped
– 2 tablespoons honey or maple syrup
– Zest of 1 lemon
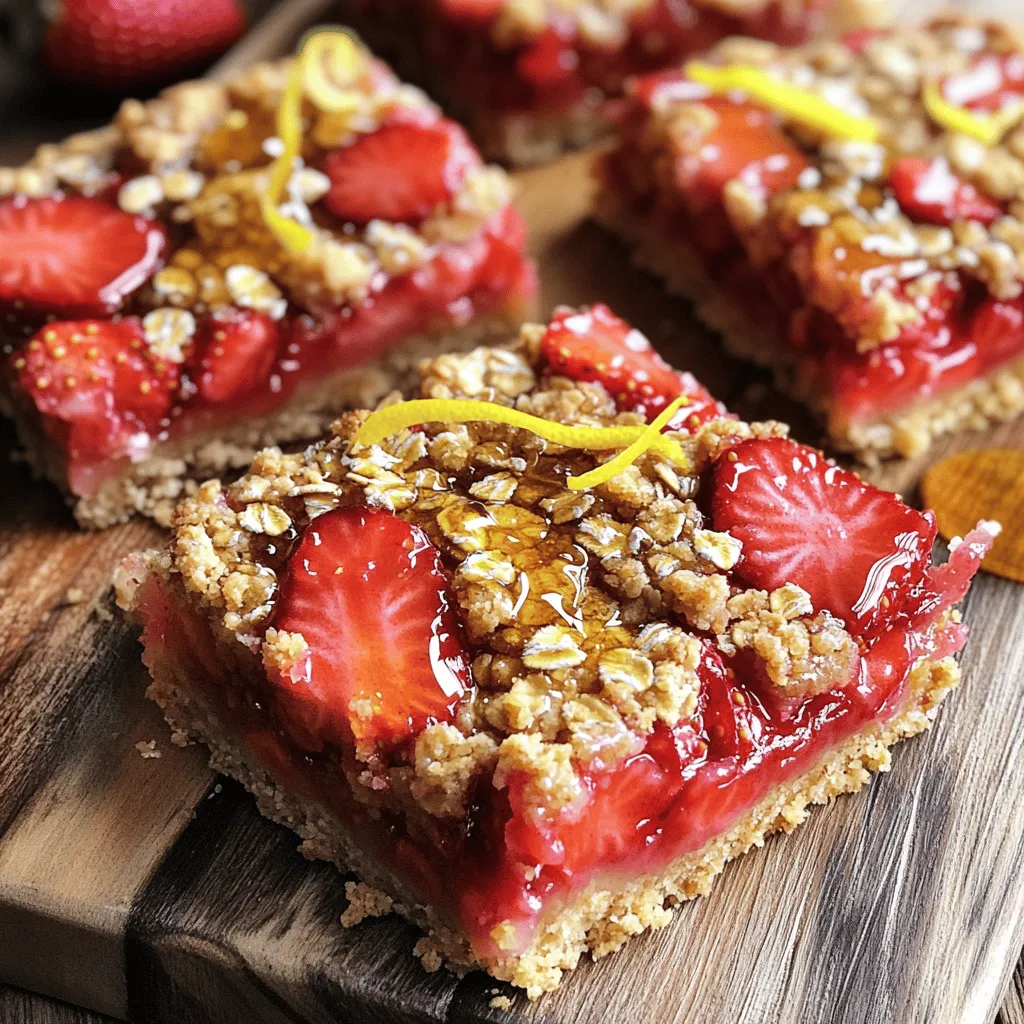
These ingredients are simple yet pack a delightful punch. The oats give a hearty base, while strawberries bring a fresh burst of flavor.
Substitutions for Common Ingredients
You can easily swap some ingredients if needed. Here are a few ideas:
– Use whole wheat flour instead of almond flour for a heartier texture.
– Swap brown sugar for coconut sugar for a lower glycemic option.
– Replace unsalted butter with coconut oil for a dairy-free treat.
– Use flaxseed meal mixed with water as a vegan egg substitute.
These swaps help you cater the recipe to your taste or dietary needs.
Optional Add-ins for Enhanced Flavor
Want to take your bars to the next level? Here are some fun add-ins:
– Mix in ½ cup of chopped nuts like walnuts or almonds for crunch.
– Add ½ teaspoon of vanilla bean paste for a richer flavor.
– Toss in some chocolate chips for a sweet twist.
– Sprinkle in seeds like chia or hemp for added nutrition.
These optional ingredients let you get creative while enjoying the classic strawberry taste. For the full recipe, check the details above!
Step-by-Step Instructions
Preparation Steps for Easy Strawberry Oat Bars
Start by gathering your ingredients. You will need rolled oats, almond flour, brown sugar, and more. Preheat your oven to 350°F (175°C). This step is key for baking. Grease an 8×8 inch baking dish or line it with parchment paper. This makes it easier to remove the bars later.
In a big bowl, mix the rolled oats, almond flour, brown sugar, baking powder, salt, and cinnamon. Stir well to blend everything. In another bowl, whisk the melted butter, egg, and vanilla extract. This adds flavor and moisture to your bars. Now, pour this wet mixture into the dry mix. Stir until just combined.
Press about two-thirds of this oat mixture into the bottom of your prepared dish. This will form the base. Next, chop fresh strawberries and combine them with honey and lemon zest in a skillet. Cook this mix over medium heat for about five minutes. The strawberries will soften and become juicy.
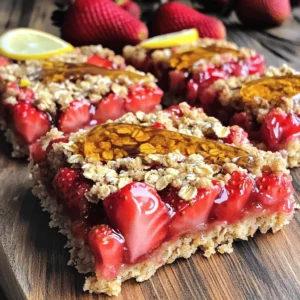
Once done, spread this strawberry mix evenly over the oat base. Crumble the remaining oat mix on top of the strawberries. This adds a nice texture.
Baking Process and Temperature
Place the dish in your preheated oven. Bake for 25-30 minutes. The top should turn golden brown and feel firm. Keep an eye on it, so it doesn’t overbake.
After baking, let the bars cool in the pan for at least 15 minutes. If you used parchment paper, this is the time to lift the bars out. Cool them completely on a wire rack before cutting them into squares.
Tips for Ensuring Perfect Texture
For a chewy texture, do not overmix the wet and dry ingredients. Press the base firmly, but not too hard. This keeps it light. Use fresh strawberries for the best flavor. If you want, use a mix of fruits for variety.
If the bars seem too crumbly, try adding a bit more melted butter next time. This can help them stick together better. Enjoy your Easy Strawberry Oat Bars as a delightful snack! For the full recipe, check the provided instructions.
Tips & Tricks
Common Mistakes to Avoid
When making Easy Strawberry Oat Bars, avoid these common mistakes:
– Not measuring ingredients: Use a measuring cup for each ingredient.
– Overmixing: Mix wet and dry ingredients until just combined to keep bars soft.
– Skipping the parchment paper: This helps with easy removal and cleanup.
– Not cooling before cutting: Let the bars cool completely, or they may crumble.
How to Make Ahead and Freeze
You can easily make these bars ahead. Bake and cool them completely. Then, wrap each bar in plastic wrap. Place the wrapped bars in a freezer bag. They last up to three months. Thaw them in the fridge overnight before enjoying.
Serving Suggestions for Strawberry Oat Bars
Serve your bars in fun ways:
– Top with yogurt: A dollop of yogurt adds creaminess.
– Drizzle with honey: A little extra honey enhances sweetness.
– Add fresh fruit: Scatter fresh strawberries on top for color and flavor.
– Pair with a drink: Enjoy with tea or milk for a tasty snack.
For the full recipe, check out Easy Strawberry Oat Bars.
Variations
Different Fruit Options for Customization
You can swap strawberries for other fruits. Think blueberries, raspberries, or peaches. Each fruit brings its own flavor. Blueberries add sweetness, while raspberries add a tart touch. You can even mix fruits together for a tasty twist. Just remember to adjust the sugar if needed.
Vegan Version Modifications
Making these bars vegan is simple. Replace the egg with a flax egg. Mix one tablespoon of flaxseed meal with three tablespoons of water. Let it sit until it thickens. You can also use coconut oil instead of butter. This keeps the bars rich and flavorful without dairy.
Gluten-Free Adaptations
To make these bars gluten-free, choose certified gluten-free oats. Almond flour is already gluten-free, so you’re set there. You can also try using coconut flour or a gluten-free flour blend. Just adjust the liquid in your recipe since these flours absorb moisture differently.
Feel free to explore the Full Recipe for more details on how to achieve these variations!
Storage Info
Best Practices for Storing Leftovers
To keep your Easy Strawberry Oat Bars fresh, store them in an airtight container. Use parchment paper between layers to prevent sticking. Place them in a cool, dry spot or in the fridge for longer freshness. This method keeps the bars soft and tasty.
How Long Do Strawberry Oat Bars Last?
When stored properly, these bars last about 5 days at room temperature. If you refrigerate them, they can stay fresh for up to 7 days. Always check for any signs of spoilage before eating.
Reheating Tips for Enjoyment
If you want to enjoy your bars warm, simply microwave them for 10-15 seconds. This will bring back some of the fresh-baked goodness. You can also enjoy them cold, paired with yogurt for a refreshing treat. For the best flavor, I recommend serving them soon after baking. For the full recipe, check the earlier section.
FAQs
Can I use frozen strawberries instead of fresh?
Yes, you can! Frozen strawberries work well in this recipe. Just thaw them first and drain any extra juice. This helps keep the bars from getting too soggy.
How can I make these bars healthier?
To boost the health factor, consider these tips:
– Use whole grain oats for more fiber.
– Replace brown sugar with maple syrup or honey.
– Add nuts or seeds for healthy fats.
– Swap almond flour with a nut-free option if needed.
What should I serve with Easy Strawberry Oat Bars?
These bars pair well with many tasty treats. Try serving them with:
– A scoop of yogurt for creaminess.
– Fresh fruit slices for extra flavor.
– A drizzle of honey for sweetness.
Can I replace almond flour with regular flour?
Yes, you can use regular flour instead of almond flour. However, this might change the texture a bit. Almond flour adds moisture and nutty flavor that regular flour lacks.
Is it possible to double the recipe?
Absolutely! Just double all the ingredients. Use a larger baking dish, like a 9×13 inch pan, to fit everything. Keep an eye on the baking time, as it may need a little longer. For the full recipe, check the earlier section!
In this article, we explored how to make simple, tasty strawberry oat bars. We covered the ingredients, including substitutes and add-ins. I shared step-by-step instructions for prep and baking. Tips helped you avoid common mistakes and offered serving ideas. We also looked at different fruit variations and storage tips. These bars are fun to customize and easy to store. Enjoy making your own batch!


![- 2 ripe avocados, peeled and pitted - 1/2 cup unsweetened cocoa powder - 1/4 cup maple syrup (or honey) - 1/4 cup almond milk (or any milk of your choice) - 1 teaspoon vanilla extract - A pinch of sea salt - Dark chocolate shavings or berries for garnish (optional) You can swap maple syrup for agave syrup or date syrup. These options give similar sweetness. If you want a sugar-free version, try using a sugar substitute. For non-dairy milk, coconut milk or soy milk work well. Each milk adds a unique flavor and texture. The health benefits of each ingredient are notable. Avocados provide healthy fats and fiber. Cocoa powder is rich in antioxidants. Maple syrup and honey add natural sweetness and vitamins. Almond milk is low in calories and dairy-free. This dessert is not just tasty; it’s also good for you! For those who want to add a twist, consider adding a dash of espresso powder. This can enhance the chocolate flavor. Try using different toppings like crushed nuts for added crunch. Each ingredient brings a special touch to the mousse. You can learn more about these ideas in the [Full Recipe]. To make your chocolate avocado mousse, start by gathering your ingredients. You will need ripe avocados, cocoa powder, maple syrup, almond milk, vanilla extract, and a pinch of sea salt. 1. In a food processor, add the avocados and cocoa powder. 2. Pour in the maple syrup and almond milk. 3. Add the vanilla extract and sea salt. 4. Blend the mixture on high until it is creamy and smooth. 5. If you notice lumps, scrape down the sides of the bowl. This ensures even blending. Achieving a creamy texture is crucial for this mousse. The smoother it is, the better it will taste. If it feels too thick, add a little more almond milk. Blend again until smooth. After blending, transfer the mousse into serving cups or bowls. For the best flavor, chill it in the refrigerator for at least 30 minutes. This helps the mousse firm up and allows the flavors to meld beautifully. When serving, choose elegant glass cups to showcase the rich, dark color of the mousse. You can garnish with dark chocolate shavings or fresh berries. A sprig of mint adds a nice touch too. This will make your dessert look fancy and appetizing. For the full recipe, refer to the earlier section. Enjoy your simple and satisfying treat! How to know if your mousse is ready You want your mousse to be smooth and creamy. It should not feel grainy or chunky. Blend until it feels silky. If you see any lumps, keep blending. The mousse should easily fall off a spoon. Adjusting sweetness post-blending After blending, taste your mousse. If you want it sweeter, add more maple syrup or honey. Blend again for a few seconds. Always taste before adding more. This way, you keep control over the sweetness. Common mistakes to avoid 1. Don't rush the blending. Take your time for a smooth texture. 2. Avoid using unripe avocados. They will not blend well and taste bitter. 3. Don’t skip chilling. It helps the mousse firm up and flavors blend. Recommended kitchen tools for easy preparation You’ll need a good food processor or blender. A spatula helps scrape down the sides. Use measuring cups for accurate amounts. Bowls for serving are also nice. Food processor vs. blender: which to use? Both work well, but I prefer a food processor. It blends better for this creamy dessert. A blender may work too, but watch for lumps. If you have both, try the food processor first. {{image_2}} If you want to tweak this chocolate avocado mousse, you have great options. - Vegan Chocolate Avocado Mousse: To make it vegan, swap maple syrup for agave syrup. Use plant-based milk, like coconut or soy. This keeps the mousse creamy and rich without any animal products. - Keto-friendly adaptation: For a keto version, use erythritol instead of maple syrup. This keeps sugar low while still giving a sweet taste. Also, try using unsweetened coconut milk for a richer flavor. - Flavored variations: You can add fun flavors. Mix in a shot of espresso for coffee lovers. A few drops of peppermint extract can give a refreshing twist. Try orange zest for a zingy surprise. Serving this mousse can be just as fun as making it. - Pairing options: Fresh fruits like strawberries or raspberries pair well. Nuts like chopped almonds or walnuts add a nice crunch. You can also top it with coconut flakes for extra flavor. - Creative dessert ideas: Use the mousse as a filling in pastries or cakes. It can be a layer in a parfait with yogurt and granola. You can even spread it on toast for a decadent breakfast treat. Check out the Full Recipe for more details on how to make this delightful treat! To store leftovers, put the mousse in an airtight container. This keeps it fresh and prevents it from absorbing other smells. The mousse can last in the fridge for about 2 to 3 days. If you see any browning, just give it a quick stir before eating. You do not need to heat the mousse. This dessert is best served cold. If you want to use the mousse in other treats, try it in parfaits or as a cake filling. You can also spread it on toast or mix it into smoothies for a sweet boost. Enjoy being creative with this delicious treat! Can I use frozen avocados? Yes, you can use frozen avocados. Just thaw them before blending. Frozen avocados still give a creamy texture. What makes this dessert healthy? This dessert is healthy because it uses avocados. Avocados provide good fats, fiber, and vitamins. They replace heavy cream found in traditional mousse. How do I make this mousse sugar-free? To make this mousse sugar-free, use a sugar substitute. Try stevia or erythritol instead of maple syrup. Start with a small amount and adjust to taste. Why does my mousse taste too strong? If your mousse tastes too strong, it may have too much cocoa. Reduce the cocoa powder next time. You can also add more maple syrup to balance the flavor. What if my mousse didn't set properly? If your mousse didn't set, you might need more chill time. Refrigerate it longer to firm up. If it’s still too soft, add more cocoa powder next time. Can I make this dessert ahead of time? Yes, you can make this dessert ahead of time! Just store it in the fridge for up to three days. It tastes even better after resting. Caloric content per serving Each serving of this mousse has about 200 calories. This includes healthy fats and nutrients from the avocados. Health benefits of avocado in desserts Avocados add creaminess and nutrients. They are rich in heart-healthy fats. This makes your dessert filling and nutritious. How does this compare to traditional mousse? This avocado mousse has fewer calories than traditional mousse. Traditional mousse often uses cream and sugar. This recipe uses avocados for a healthier twist. This blog post shared how to make a rich and creamy chocolate avocado mousse. We explored the key ingredients, alternatives, and health benefits. You learned the steps to blend and chill for the right texture. I covered tips for consistency and variations to fit your diet. Lastly, we discussed storage and common questions. Enjoy creating this dessert that’s both tasty and good for you!](http://dailydishly.com/wp-content/uploads/2025/07/9a49dd29-ea84-48e8-b3ba-ec236128fd4d-768x768.webp)
![- 1 ½ cups all-purpose flour - 1 tsp baking powder - ½ tsp baking soda - ¼ tsp salt - ½ cup granulated sugar - ¼ cup brown sugar, packed - 1/3 cup unsalted butter, melted - 1 large egg - 1 tsp vanilla extract - 1/2 cup buttermilk - 1 ½ cups fresh peaches, peeled and diced - 1/3 cup rolled oats - 1 tsp cinnamon Each ingredient plays a key role in making Peach Streusel Muffins perfect. The all-purpose flour gives the muffins their structure. Baking powder and baking soda help them rise and become fluffy. A touch of salt balances the sweetness. In the wet ingredients, the sugars add sweetness and flavor. The melted butter brings moisture and richness. The egg binds the mixture and helps with rise. Vanilla extract adds a lovely aroma, while buttermilk gives a soft texture and enhances flavor. The filling and topping are where the magic happens. Fresh peaches add juiciness and sweetness. Rolled oats in the topping create crunch. Cinnamon adds warmth and spice, making each bite delightful. Check out the full recipe for easy steps to create these tasty muffins! 1. Preheat your oven to 375°F (190°C). Line a muffin tin with liners or lightly grease it. 2. In a medium bowl, whisk together the all-purpose flour, baking powder, baking soda, and salt. Set this bowl aside for now. 1. In a large bowl, mix together the granulated sugar, brown sugar, and melted butter until well combined. 2. Beat in the egg and vanilla extract until the mixture is fluffy and smooth. 1. Add the buttermilk to the wet mixture and stir until combined. 2. Gradually add the dry ingredients to the wet mixture. Fold gently, just until combined; do not overmix. 3. Carefully fold in the diced peaches, spreading them evenly throughout the batter. 1. In a small bowl, mix the rolled oats, cinnamon, and a pinch of sugar for the streusel topping. 2. Scoop the muffin batter into the prepared muffin tin, filling each liner about two-thirds full. 3. Generously sprinkle the streusel topping over each muffin. 1. Bake the muffins for 18-20 minutes. Check for doneness by inserting a toothpick; it should come out clean. 2. Allow the muffins to cool in the pan for about 5 minutes. Then, transfer them to a wire rack to cool completely before serving. These Peach Streusel Muffins are a delight! For a full recipe, check the earlier section. Enjoy your time in the kitchen! - Ensure ingredients are at room temperature. This helps them mix well. - Do not overmix the batter. Gently fold until just combined for light muffins. - Serve warm with powdered sugar. It adds a sweet touch to each bite. - Garnish with a slice of fresh peach. This makes your muffins look even better. - Consider adding a dash of nutmeg. It gives a warm, spicy flavor to the muffins. - Use different fruits for variation. Blueberries or raspberries work great too! For the full recipe, check [Full Recipe]. These tips will help you create the best peach streusel muffins! {{image_2}} You can switch up the fruit in these muffins! Instead of peaches, use blueberries or raspberries. Both fruits add a burst of flavor. If you want more texture, try adding chopped nuts. Walnuts or pecans work great for extra crunch. If you're gluten-free, you can still enjoy these muffins. Use almond flour or oat flour instead of regular flour. For those avoiding dairy, simply swap in dairy-free butter and milk. This way, everyone can enjoy a tasty treat! Make mini muffins for a fun, bite-sized version. They are perfect for kids or snacks. You could also bake this batter in a round pan to create a cake. Just adjust the baking time, as it may need a bit longer. Keep your muffins at room temperature. Place them in an airtight container. This method keeps them soft for a few days. Enjoy them fresh for breakfast or a snack. You can freeze the muffins for up to three months. Wrap each muffin in plastic wrap. Then, place them in a freezer bag. When you want one, reheat it directly from the freezer. Pop it in the oven at 350°F (175°C) for about 10 minutes. They taste almost fresh-baked! Use parchment paper to line your container. This step helps maintain moisture in your muffins. Also, avoid stacking warm muffins. Stacking can make them soggy. Let them cool before storing. These simple tips keep your Peach Streusel Muffins delightful! For the full recipe, check the earlier section. To check if your muffins are done, insert a toothpick into the center. If it comes out clean, your muffins are ready. This simple test saves you from underbaking or overbaking. Trust me, it works every time! Yes, you can use canned peaches instead of fresh ones. Just make sure to drain them well. This keeps your muffins from getting too soggy. Canned peaches can still taste great in your muffins. To stop muffins from sticking to the liners, use high-quality liners. You can also grease the liners lightly with butter or oil. This little step makes a big difference for perfect muffins. If you have leftover streusel topping, store it in the fridge. You can use it for future baking or sprinkle it over yogurt. It adds a nice crunch and sweetness. Don't waste it! Making peach muffins is easy and fun. We covered all the key steps, from mixing the dry and wet ingredients to baking and storing the muffins. You can adjust flavors and fruits based on your taste. Remember the tips for better results, like using room temperature ingredients and avoiding overmixing. With this guide, you can create a delicious treat for any occasion. Enjoy your baking journey and share these for smiles!](http://dailydishly.com/wp-content/uploads/2025/07/b62cebd8-d26b-48c0-b1ab-fab18f37a599-768x768.webp)
![- 1 cup rolled oats - 1 ½ cups almond milk (or any milk of your choice) - 1 medium carrot, finely grated - 1 tablespoon chia seeds - 1 tablespoon maple syrup (or honey) - ½ teaspoon ground cinnamon - ¼ teaspoon nutmeg - ¼ cup crushed pineapple, drained - 2 tablespoons raisins - 2 tablespoons chopped walnuts (optional) - Pinch of salt - Greek yogurt for topping (optional) - Shredded coconut for garnish (optional) To make carrot cake overnight oats, gather the ingredients. Rolled oats serve as the base, giving a hearty texture. Almond milk adds creaminess, but you can use any milk. The finely grated carrot brings sweetness and color. Chia seeds help thicken the mix and add nutrients. Maple syrup sweetens it, but honey works too. Ground cinnamon and nutmeg lend warmth and spice. Crushed pineapple gives a nice tang and moisture. Raisins add chewiness, while walnuts add crunch if you choose to include them. A pinch of salt balances the sweetness. Greek yogurt and shredded coconut are great toppings for added flavor and texture. This mix is simple yet full of flavor. You can find the full recipe in the article. It’s a great way to enjoy breakfast that tastes like dessert! 1. Combine the rolled oats and almond milk in a mixing bowl. This is where the magic starts. The oats soak up the milk and become soft. 2. Add grated carrot, chia seeds, and sweetener. The carrot adds a nice flavor and texture. The chia seeds bring a boost of nutrition. 3. Incorporate spices and remaining ingredients. Mix in cinnamon, nutmeg, crushed pineapple, raisins, and walnuts. These ingredients make your oats taste like carrot cake. 4. Divide mixture into jars or containers. This helps with easy serving. You can use any jar you have at home. 5. Seal and refrigerate overnight or for at least 6 hours. This gives the oats time to soak. The longer they sit, the better they taste. 6. Stir and check consistency in the morning. If the oats are too thick, just add a splash of almond milk. This will make them creamy. 7. Top with yogurt and garnishes before serving. A dollop of Greek yogurt and some shredded coconut look great. Enjoy your tasty, carrot cake-flavored breakfast! For the full recipe, check the [Full Recipe]. To make your carrot cake overnight oats sing, use fresh, finely grated carrot. This brings a sweet, earthy taste that makes each bite special. Also, you can adjust the sweetness to fit your taste. If you like it sweeter, add more maple syrup or honey. For a fun twist, add extra toppings like nuts and fruits. Chopped walnuts or sliced bananas add crunch and flavor. I recommend using Greek yogurt on top for a creamy finish. It makes the oats rich and satisfying. Feel free to experiment with different types of milk. Almond, oat, or coconut milk all work well. You can also add more spices or sweeteners. A dash of ginger or a scoop of maple syrup can take your oats to the next level. {{image_2}} You can make small changes to keep your oats healthy. Try swapping maple syrup for agave syrup. This gives you a lower glycemic index option. You can also use unsweetened coconut yogurt instead of regular yogurt. This choice cuts down on calories and adds a nice flavor. Get creative with your carrot cake overnight oats by adding other fruits. Sliced banana or chopped apple works great. You can also spice things up with ginger or cardamom. These spices will bring out the flavors and make your breakfast even more exciting. Want to keep your meal plant-based? Make sure all your toppings are vegan. You can substitute dairy yogurt with coconut or almond yogurt. This makes your dish creamy while staying true to vegan principles. You still get the great taste without any animal products. If you want to check out the full recipe, you can find it above. Enjoy the fun of making these variations to fit your taste! To keep your carrot cake overnight oats fresh, use airtight containers. This step helps keep the oats moist. I recommend eating them within 3-5 days for the best taste. If you wait too long, the flavor might change. You want that sweet, spiced flavor to shine! Can carrot cake overnight oats be frozen? Yes, you can freeze them! This option is great for meal prep. To freeze, place the oats in airtight containers. Make sure to leave some space for expansion. How to defrost and reheat properly? Simply take them out of the freezer and place them in the fridge overnight. If you need them faster, microwave them for 1-2 minutes. Add a splash of almond milk to help with consistency. Enjoy your meal any time! Overnight oats pack a punch of nutrition. They are high in fiber, which helps with digestion. This means you feel full longer, making them a great choice for breakfast. The oats also provide whole grains, which are good for your heart. With the added carrots and chia seeds, you get vitamins and healthy fats too. They are easy to make, so they fit well into a busy schedule. You can prep them in advance, saving time in the morning. Yes, you can make carrot cake overnight oats in advance. I recommend prepping them the night before. This way, they are ready to grab in the morning. For the best taste, keep them in the fridge for up to five days. Store them in airtight containers to keep them fresh. Just remember, the longer they sit, the softer the oats will become. You can use quick oats, but they change the texture. Quick oats cook faster and absorb liquid more. This might make your oats mushy instead of creamy. Rolled oats give a chewier texture, which is nice in overnight oats. If you prefer quick oats, reduce the soaking time to avoid too much mush. Carrot cake overnight oats combine taste and nutrition. You mix oats, milk, carrots, and spices to create a healthy meal. Refrigerate overnight for an easy breakfast. Customize with fresh fruits, nuts, or yogurt as you like. This dish is fun to make and offers many choices. Store in airtight containers to keep them fresh. Enjoy your easy, tasty start to the day!](http://dailydishly.com/wp-content/uploads/2025/07/5c4a7baf-1a25-4f66-936a-feb9751b1df9-768x768.webp)