Baked Cinnamon Apple Chips Crispy and Simple Snack
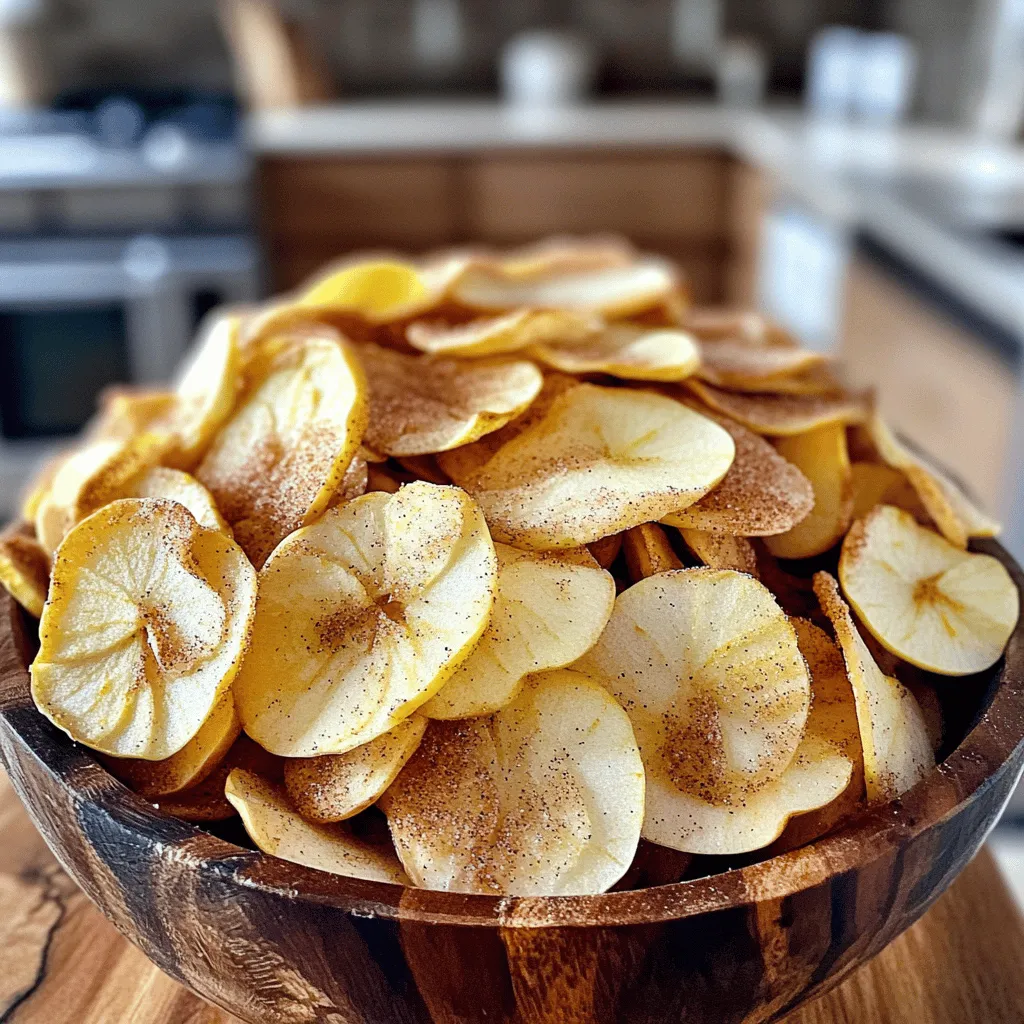
Are you ready for a tasty snack that’s both healthy and easy to make? Baked Cinnamon Apple Chips are your perfect choice! With just a few simple ingredients, you can whip up a crispy treat that satisfies your cravings. Whether you’re looking for a quick snack or a fun recipe to enjoy with friends, these apple chips will hit the spot. Let’s dive into the delightful world of baking apple chips together!
Ingredients
List of Ingredients
– 3 medium-sized apples (Fuji or Honeycrisp recommended)
– 1 tablespoon ground cinnamon
– 1 tablespoon sugar (optional)
– 1 teaspoon lemon juice
– Pinch of salt
Optional Add-ins
– Other spices like nutmeg or ginger can add warmth.
– Sweeteners such as honey or maple syrup can enhance the flavor.
Suggested Apple Varieties
– Best apple types for baking: Fuji and Honeycrisp are ideal. They stay crisp and sweet.
– Flavor profiles of different apples:
– Granny Smith: Tart and crisp, great for a tangy snack.
– Gala: Sweet and juicy, perfect for a sweeter chip.
– Braeburn: Balanced flavor, combines sweetness and tartness well.
Choosing the right apple affects the taste and texture of your chips. Stick with varieties that stay firm when baked. You can find the full recipe in our earlier section.
Step-by-Step Instructions
Preparation Steps
1. Preheat the oven and line baking sheets. Set your oven to 225°F (110°C). While it heats, grab two baking sheets and line them with parchment paper. This step helps prevent the chips from sticking.
2. Wash and core the apples. Rinse your apples under cool water. Use a sharp knife or corer to remove the core. You want clean, fresh apples for the best flavor.
Slicing Techniques
– Using a mandoline vs. a knife. A mandoline slicer gives you even slices quickly. If you don’t have one, a sharp knife works too. Just be careful to slice thinly and evenly.
– Tips for even slicing. Aim for slices about 1/8 inch thick. This thickness helps them bake evenly. If your slices are too thick, they may not get crispy.
Baking Process
1. Arranging apple slices on baking sheets. Lay the apple slices in a single layer on your baking sheets. Make sure they don’t touch or overlap. This step is key for crispiness.
2. Checking for doneness. Bake the apple slices for about 1.5 to 2 hours. Turn the slices halfway through for even cooking. Keep watching them near the end. You want them dry and crisp, not burnt.
These steps help you create tasty, crispy baked cinnamon apple chips. For the full recipe, check out the detailed instructions above. Enjoy your snacking!
Tips & Tricks
Perfecting Crispiness
To get the best apple chips, slice them thin. Aim for about 1/8 inch thick. Thinner slices bake better and become crispier. If your slices are too thick, they won’t crisp up as well.
During baking, turn the slices halfway through. This helps them cook evenly. It also prevents one side from getting too brown. Keep a close eye on them towards the end. You want them golden, not burnt.
How to Avoid Browning
Lemon juice plays a key role in keeping apples fresh. It slows down the browning process. Toss the apple slices in lemon juice right after slicing. This simple step makes a big difference.
Other methods include soaking the slices in saltwater. Just mix a bit of salt in water and soak for a few minutes. Rinse and dry them before baking. This also helps keep the apples looking bright.
Enhancing Flavor
You can add more flavor to your chips. Consider spices like nutmeg or ginger for a new twist. Mixing in a bit of vanilla extract can also boost the taste.
For snacking, these apple chips pair well with dips. Try peanut butter or yogurt for a creamy touch. You can also sprinkle them on salads or add them to granola for extra crunch.
For the full recipe, check out the steps outlined earlier.
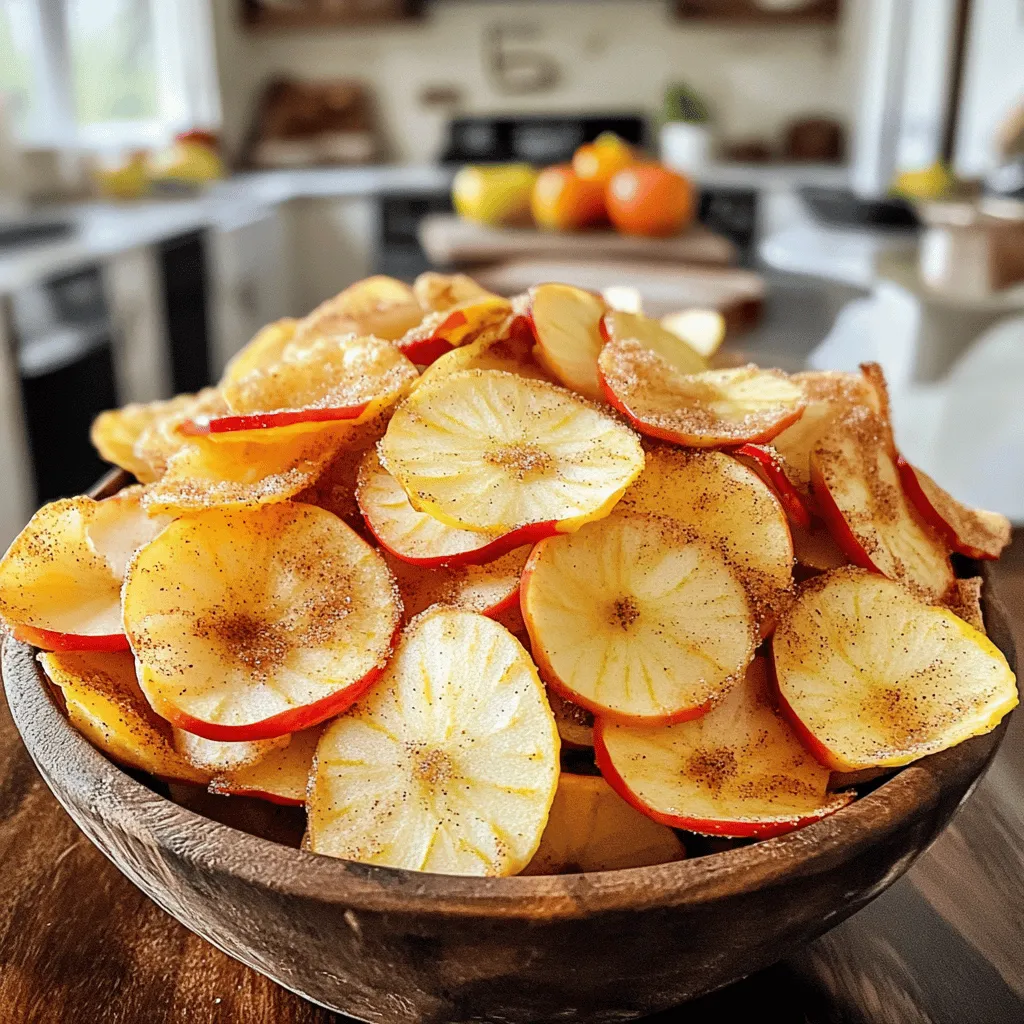
Variations
Flavor Combinations
You can play with flavors in many ways. If you want to try new tastes, swap the cinnamon and sugar for other spices. Nutmeg gives a warm, cozy flavor. Ginger adds a spicy kick, which can be nice for fall.
Adding nuts or coconut is another great idea. Chopped pecans or walnuts add crunch. Shredded coconut gives a tropical twist. Just sprinkle them on before baking. This makes your chips even more fun and tasty.
Different Fruit Chips
You can also make chips from other fruits. Pears are juicy and sweet, making great chips. Slice them thin, just like apples. Bananas are another option. They turn chewy when baked. Just remember, they will bake faster than apples.
Mixing apples with other fruits creates a colorful snack. Try adding berries or peaches. Just slice them thin and use the same baking method. This gives you a mix of flavors and colors.
Serving Suggestions
Apple chips are great on their own, but you can pair them with dips. Yogurt or almond butter makes a tasty combo. You can also try hummus for a savory kick.
You can use apple chips in many recipes, too. Toss them in salads for crunch. Add them to granola for a sweet touch. They make breakfast or snacks more exciting.
For the full recipe, check the link above.
Storage Info
Best Storage Practices
To keep your baked apple chips fresh, store them in an airtight container. I recommend using glass jars or resealable bags. Make sure to seal them tightly. This keeps moisture out and helps the chips stay crispy.
Shelf Life
Baked apple chips can last for up to two weeks when stored properly. After that, they may lose their crunch. Look for signs of spoilage, like softness or a change in color. If they feel chewy, it’s time to toss them.
Making Ahead
Batch cooking is a great way to have snacks ready. I suggest making a larger batch and storing them. You can freeze apple chips too. Just place them in a freezer-safe bag. When you want to enjoy them, let them thaw at room temperature. This keeps them tasty and crunchy! For the complete recipe, check out the Full Recipe above.
FAQs
Can I use any type of apple for this recipe?
Yes, you can use many types of apples. Each kind offers a unique taste and texture. Fuji and Honeycrisp apples are my favorites. They are sweet and crisp. Tart apples like Granny Smith work too, but they may taste more sour. The choice of apple impacts how your chips taste and feel. Experiment with different varieties to find your perfect chip!
How long do I bake the apple chips for?
Baking time can change based on your oven. Typically, I bake them for 1.5 to 2 hours at 225°F (110°C). Make sure to check them often. It might take longer in some ovens or less in others. Turning the slices halfway helps them bake evenly. Keep an eye on them near the end to avoid burning.
Are baked apple chips healthy?
Yes, baked apple chips are a healthy snack! They have less fat than regular chips. Apples are rich in fiber and vitamins. You get the taste of a sweet treat without the guilt. Plus, you control the sugar. This makes them a great option for kids and adults alike.
Can I add sugar to the recipe?
You can add sugar if you want a sweeter chip. Just remember, sugar can change the healthiness of your snack. Using a small amount keeps it tasty without too many calories. You might try honey or maple syrup for a different flavor too. Balance is key when adding sweetness.
How do I make this recipe more kid-friendly?
To make these chips more appealing to kids, add a little more sugar. You can also try using sweeter apples. Let your kids help with the task of sprinkling the cinnamon-sugar mix. They will enjoy the process. Serve these chips with a tasty dip like yogurt or nut butter for added fun!
Can I make these cinnamon apple chips in a dehydrator?
Yes, you can use a dehydrator! Slice the apples as you would for baking. Arrange them on the dehydrator trays. Set the dehydrator to around 135°F (57°C). The drying time will be longer, usually 6 to 8 hours. Check them often to get the right crispiness. Enjoy your homemade chips made with this method!
To sum up, we explored how to make delicious baked apple chips. We covered key ingredients and suggested some tasty add-ins. You learned about the best apple types and their flavors. I shared step-by-step instructions for preparation and baking. We also discussed tips for crispiness and ways to keep apples fresh. These chips offer healthy snacking options and can be easily stored. Experiment with flavors and enjoy the process! Making apple chips is simple and fun, and they taste great, too.

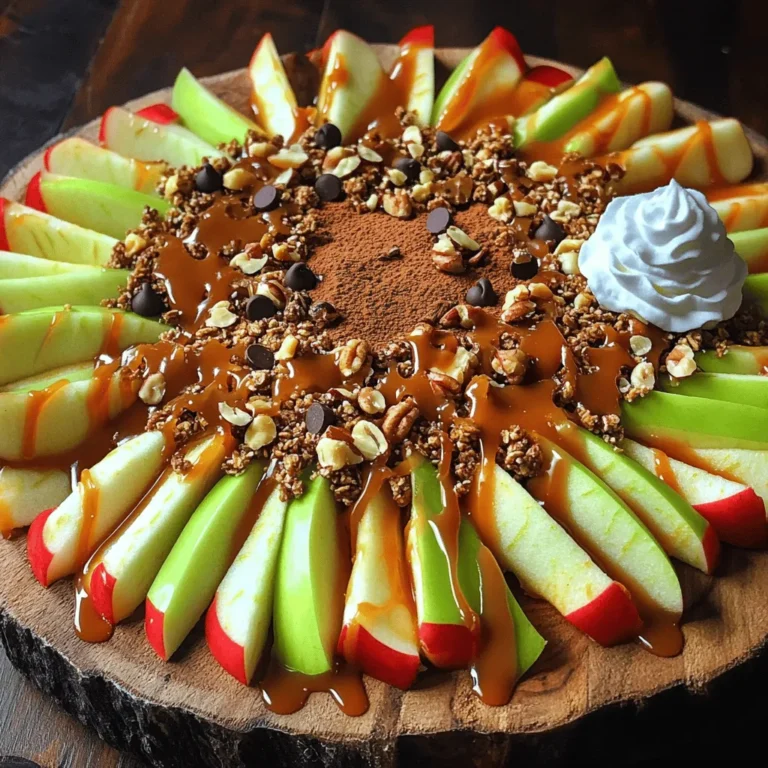
. You learned about tasty no-bake oatmeal cookie bars. We covered the key ingredients and step-by-step instructions for making them. You now know tips for perfect texture and options for variations and storage. These bars are easy to customize. They are healthy snacks that you can enjoy anytime. Keep exploring your flavors and share these bars with friends and family. Enjoy your cooking adventure!](http://dailydishly.com/wp-content/uploads/2025/07/f09ca3d9-767d-43d9-b263-9e4a23fd83a9-768x768.webp)

 for more details. To start, gather your ingredients. You'll need rolled oats, almond milk, apples, maple syrup, and spices. Preheat your oven to 350°F (175°C). Grease a 9x9-inch baking dish with cooking spray. In a large bowl, mix the oats, almond milk, maple syrup, vanilla, baking powder, cinnamon, nutmeg, and salt together. Stir until everything is blended. Now, fold in the diced apples and any nuts or dried fruit you want. Pour this mix into the baking dish. Spread it out evenly. Baking time is key. Bake for 30 to 35 minutes. Look for a golden top. A toothpick should come out clean from the center. If you want a softer texture, add more almond milk. For a firmer bake, use less. This recipe works well with different nuts or fruits, too. Feel free to experiment and find your own perfect texture. Once your bake is out of the oven, let it cool for about 10 minutes. This helps it set up nicely. Cut it into squares. I love to serve it warm with a drizzle of maple syrup and a sprinkle of cinnamon. You can also add yogurt or ice cream for a sweet touch. Try this recipe for a comforting breakfast or snack. For the full details, check the full recipe. To get a creamy texture in your cinnamon apple oatmeal bake, use rolled oats. They soak up the liquid well. Almond milk adds a nice creaminess too. If you want it richer, use full-fat milk. Mixing the wet ingredients first helps everything blend nicely. Stir until everything is combined, but don’t overmix. For even cooking, spread the oatmeal mixture evenly in your baking dish. Make sure your oven is preheated to the right temperature. This helps your bake cook through evenly. Check it a few minutes before the timer goes off. If the top looks golden brown, it’s likely done. A toothpick should come out clean when inserted. You can store any leftovers in an airtight container. Keep them in the fridge for up to five days. To reheat, place a square in the microwave for about 30 seconds. You can add a splash of milk to keep it moist. For a warm treat, you might also bake it for 10 minutes at 350°F. Enjoy your cinnamon apple oatmeal bake any time! For the full recipe, check above. {{image_2}} You can switch up the apples for other fruits. Pears work well and add a sweet touch. You can also use berries, like blueberries or raspberries. These fruits add a nice color and flavor. Feel free to experiment with bananas too. Just slice them and mix them in. Each fruit brings its unique taste, making this dish fun and fresh. If you want a nut-free version, skip the walnuts. You can replace almond milk with oat or soy milk. This keeps the recipe vegan and delicious. You might also add seeds, like sunflower or pumpkin seeds. They add crunch without nuts. Enjoy your creamy bake while keeping it allergy-friendly. Besides cinnamon, you can use other spices. Cardamom adds a floral note that is lovely. Ginger gives a spicy kick that pairs well with apples. You can even add a bit of cocoa powder for a chocolatey twist. Mixing in these flavors can change the whole dish. It allows you to find your perfect blend that excites your taste buds. For the full recipe, check out the details above. Cinnamon Apple Oatmeal Bake is both tasty and healthy. Each serving has about 200 calories. This dish offers a good mix of macronutrients. You get around 6 grams of protein, 4 grams of fat, and 38 grams of carbs. The oats are the main source of carbs, giving you energy for your day. The nuts add healthy fats and protein. Using almond milk helps keep the calories low. The ingredients in this bake are full of health benefits. - Oats: They are great for heart health and digestion. Oats can help lower cholesterol levels. - Apples: They add fiber and vitamins. Eating apples can help keep your heart healthy. - Walnuts: They are high in omega-3 fatty acids. This helps reduce inflammation in the body. - Cinnamon: It may help regulate blood sugar levels. Plus, it gives a warm flavor that brightens the dish. These ingredients make this oatmeal bake a smart choice for breakfast or a snack. This recipe serves about 6 to 8 people. It is easy to adjust the serving sizes. If you want a smaller portion, cut the bake into squares. Each square can be a healthy snack or breakfast. If you have leftovers, store them in an airtight container. Reheat in the microwave for a quick meal. With its balanced nutrients, you can enjoy this dish any time of the day. For the full recipe, check out the details above. Yes, you can make Cinnamon Apple Oatmeal Bake ahead of time. Prepare your mixture and place it in the baking dish. Cover it with plastic wrap and store it in the fridge. You can bake it the next day. This makes for an easy breakfast on busy mornings. To store leftovers, let the bake cool completely. Cut it into squares and place them in an airtight container. You can keep it in the fridge for up to five days. To reheat, simply place a square in the microwave for about 30 to 45 seconds. You can also warm it in the oven at 350°F for around 10 minutes. You can serve this oatmeal bake with a drizzle of maple syrup. A sprinkle of cinnamon adds great flavor, too. For extra creaminess, add a dollop of yogurt on top. A scoop of ice cream makes it a treat! You can also pair it with fresh fruit for a colorful plate. For the complete recipe, check out the Full Recipe. Cinnamon Apple Oatmeal Bake is easy to make and full of flavor. We covered key ingredients, preparation steps, and cooling methods to get it just right. I shared tips for a creamy texture and cooking evenly. Plus, you learned fun variations and storage advice. Embrace your creativity in the kitchen. This dish is versatile and healthy, making it a great choice for any meal. Enjoy exploring different flavors and combinations. Happy baking!](http://dailydishly.com/wp-content/uploads/2025/06/ad0fc4db-106a-47e6-9ea2-42d3ddbbc125-768x768.webp)
![- 1 ½ cups all-purpose flour - 1 teaspoon baking powder - ½ teaspoon baking soda - ¼ teaspoon salt - ½ cup unsalted butter, softened - 1 cup granulated sugar - 2 large eggs - ½ cup plain yogurt - 2 tablespoons lemon zest (from about 2 lemons) - ¼ cup fresh lemon juice - 3 tablespoons poppy seeds - Optional: Glaze made from ½ cup powdered sugar and 2 tablespoons lemon juice When making Lemon Poppy Seed Bread, I find that using fresh ingredients makes the biggest difference. Fresh lemons give your bread a bright flavor. You want ripe lemons for zest and juice. Look for lemons that feel heavy for their size and have a smooth skin. These lemons are juicy and full of flavor. For yogurt, I prefer plain yogurt. It adds moisture and a slight tang. Greek yogurt works well too, but regular plain yogurt keeps the texture light. If you want to switch things up, consider using sour cream instead. It can give your bread a rich flavor. - Selecting ripe lemons for zest and juice: Look for heavy, smooth-skinned lemons. - The best type of yogurt to use: Use plain yogurt or sour cream for moisture. If you need gluten-free options, try using a gluten-free flour blend. Mix it with a bit of xanthan gum for texture. For a vegan version, substitute unsalted butter with coconut oil or a vegan butter. You can replace eggs with a mashed banana or unsweetened applesauce. This will still keep the bread moist and tasty. Let’s make cooking easier and more fun with these simple tips! If you want to dive deeper into the recipe, check out the Full Recipe for all the steps. 1. Preheat your oven to 350°F (175°C). Grease and flour a 9x5 inch loaf pan. This step helps the bread rise well and not stick. 2. In a medium bowl, whisk together the dry ingredients: flour, baking powder, baking soda, and salt. Set this mix aside for later. 3. In a large bowl, cream the softened butter and granulated sugar together. Use an electric mixer on medium speed for about 3 to 4 minutes. This makes the mixture light and fluffy. 4. Add the eggs one at a time, mixing well after each. This helps to blend everything smoothly. 5. Stir in the yogurt, lemon zest, and lemon juice until fully mixed. Each ingredient adds a burst of flavor to the bread. 6. Gradually add the dry ingredients to the wet mixture. Stir gently until just combined. Do not overmix; this keeps the bread soft. 7. Fold in the poppy seeds, being careful not to overmix again. They add a nice crunch and visual appeal. 1. Pour the batter into the prepared loaf pan. Smooth out the top with a spatula to ensure even baking. 2. Bake in the oven for about 55 to 60 minutes. Check if it's done by inserting a toothpick into the center. If it comes out clean, your bread is ready! 1. Let the bread cool in the pan for about 10 minutes. This makes it easier to remove without breaking. 2. Transfer it to a wire rack to cool completely. This prevents sogginess and keeps the crust nice. 3. Slice the bread and serve it on a platter. If you like, drizzle the optional glaze over the top. Garnish with thin lemon slices and a sprinkle of poppy seeds for a beautiful finish. For the complete recipe, refer to the [Full Recipe]. Enjoy your baking! To bake the best Lemon Poppy Seed Bread, avoid common mistakes. First, do not skip the baking powder or baking soda. They help the bread rise and stay fluffy. Mix the dry and wet ingredients gently. Overmixing can make the bread tough. Make sure your butter is softened, not melted. This helps create the right texture. A beautiful presentation makes your bread shine. Slice the bread and arrange it on a nice platter. Drizzle a glaze on top for extra flair. You can make the glaze by mixing powdered sugar and lemon juice. Garnish with thin lemon slices and a sprinkle of poppy seeds. This adds color and makes it look fancy. Want a stronger lemon flavor? Use lemon extract in addition to fresh juice. This boosts the citrus taste. You can also add mix-ins like chopped nuts or dried fruit. These add texture and flavor. Feel free to explore your own ideas to customize your bread! For the full recipe, check out the complete guide. {{image_2}} To make gluten-free lemon poppy seed bread, start with a good flour blend. Look for blends that contain rice flour, almond flour, or tapioca starch. These work well in most recipes. You may need to adjust the liquid in your recipe. Gluten-free flours often absorb more moisture. So, add a little extra yogurt or lemon juice if needed. For a vegan version, swap out the eggs and butter. Use flaxseed meal mixed with water as an egg substitute. One tablespoon of flaxseed meal mixed with three tablespoons of water equals one egg. For butter, use coconut oil or a vegan alternative. This keeps your bread moist and tasty. To maintain the batter's texture, ensure you mix well, so it remains light and fluffy. You can add nuts or dried fruits for extra flavor. Walnuts or almonds give a nice crunch. Dried cranberries or blueberries add sweetness. If you want more citrus, try adding orange or lime zest. This will brighten the flavor of the bread. You can even mix different citrus fruits for a unique twist. Don't hesitate to experiment, and see what flavors you love best! To keep your Lemon Poppy Seed Bread fresh, you have two main options: room temperature and refrigeration. Storing it at room temperature is best if you plan to eat it within a few days. Place the bread in an airtight container. This keeps it soft and moist. If you want to store it longer, refrigeration works too. Just know that it may dry out a bit. Using airtight containers is key. They block air and moisture. This helps prevent your bread from going stale. If you choose to refrigerate it, wrap the bread tightly in plastic wrap first. Then, place it in the container. This double layer helps keep the bread fresh. Freezing is a great way to save your Lemon Poppy Seed Bread for later. To freeze it, let the bread cool completely first. Once cool, slice it into pieces if you prefer. Wrap each slice in plastic wrap. Then, place the wrapped slices in a freezer-safe bag or container. This method saves space and makes it easy to grab a slice when you want one. When you’re ready to enjoy it, thaw the bread in the fridge overnight. If you want it warm, you can reheat it in the oven. Preheat the oven to 350°F (175°C) and bake for about 10 to 15 minutes. This brings back its fresh-from-the-oven taste. For optimal flavor and freshness, Lemon Poppy Seed Bread lasts about 3 to 4 days at room temperature. If refrigerated, it can last up to a week. However, freezing extends its shelf life to about 2 to 3 months. Keep an eye out for signs of spoilage. If you see mold or if the bread smells off, it's time to toss it. Freshness is key to enjoying this delightful bread. Always trust your senses! Lemon poppy seed bread stays fresh for about 3 to 5 days at room temperature. To keep it fresh longer, store it in an airtight container. You can also wrap it tightly in plastic wrap or foil. This helps block out air and moisture. If you want to enjoy it later, freeze it for up to three months. Yes, you can make this bread ahead of time. Bake it and let it cool completely. Then, wrap it tightly and store it in the fridge for up to a week. For longer storage, freeze it. Just remember to slice it before freezing. This makes it easy to grab a slice whenever you want. Lemon poppy seed bread pairs well with many items. For breakfast, try it with fresh fruit or yogurt. You can also enjoy it with coffee or tea. For dessert, a scoop of vanilla ice cream or a dollop of whipped cream adds a nice touch. You can even drizzle some honey or jam on top for extra flavor. Absolutely! To make mini loaves, use small loaf pans. Adjust the baking time to about 30 to 40 minutes. Check for doneness with a toothpick. It should come out clean when the bread is done. This way, you can share or gift smaller portions easily. In this blog post, we've covered everything about Lemon Poppy Seed Bread. You learned the full list of ingredients and tips for choosing fresh ones. You also found step-by-step instructions for baking, plus tips and tricks for perfect results. Variations like gluten-free and vegan options were discussed, along with storage tips to keep your bread fresh. Enjoy making this tasty loaf that gives you bright flavors. With these ideas, you can bake with confidence and impress anyone who tries your bread. Happy baking!](http://dailydishly.com/wp-content/uploads/2025/06/d333cd57-b5c0-4704-bdd2-e8fc2d1dc8a6-768x768.webp)