
Lemon Garlic Roasted Chickpeas Crunchy and Flavorful
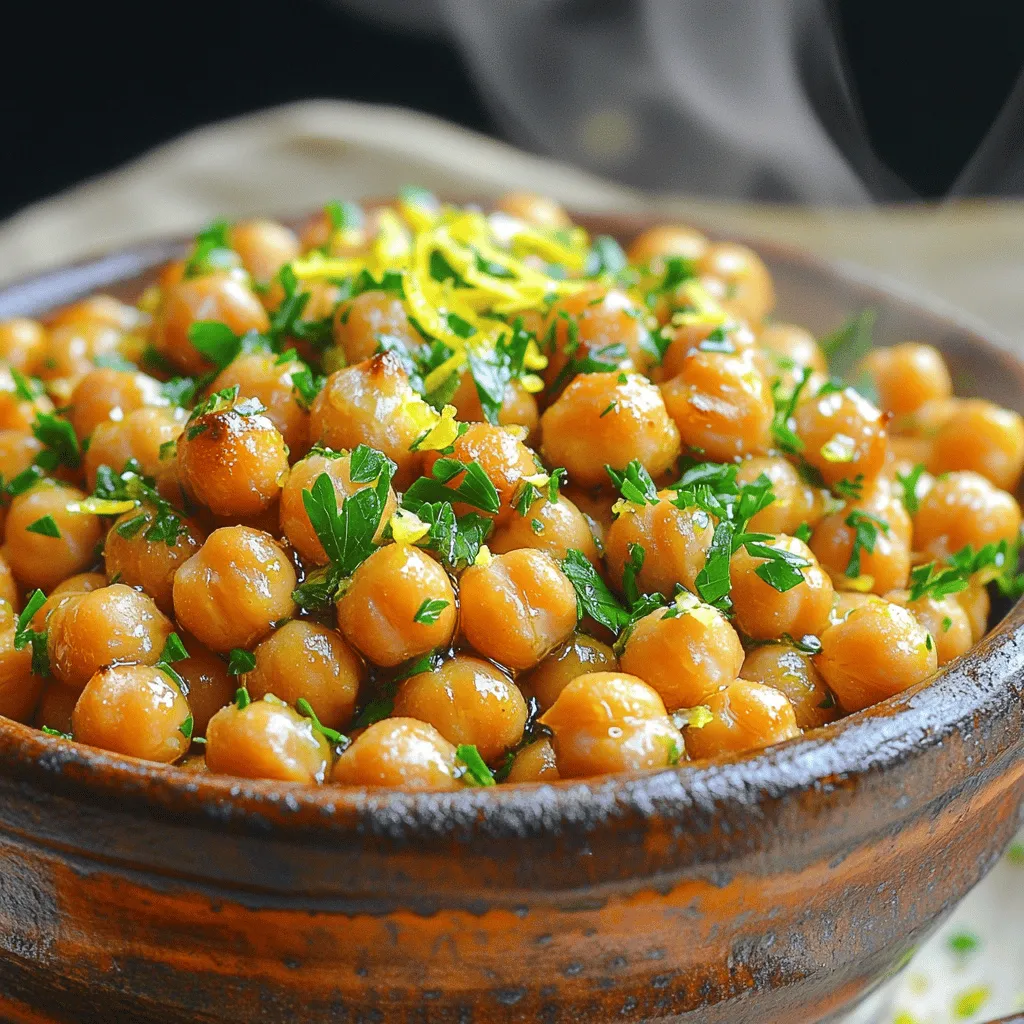
If you’re craving a snack that’s both crunchy and full of flavor, look no further than these Lemon Garlic Roasted Chickpeas! Packed with zesty lemon and fragrant garlic, this easy recipe transforms a simple can of chickpeas into a delicious treat. Whether you’re snacking on them solo or serving as a side, these chickpeas are a must-try. Let’s dive into the simple steps and key ingredients for this mouthwatering dish!
Ingredients
Main Ingredients
– 1 can (15 oz) of chickpeas
– 2 tablespoons olive oil
– Zest of 1 lemon
– 2 tablespoons fresh lemon juice
– 3 cloves garlic, minced
Chickpeas form the base of this dish. They are packed with protein and fiber. When roasted, they turn crunchy and tasty. Olive oil adds richness to the mix. The lemon zest and juice give a bright, fresh taste. Fresh garlic brings depth and fragrance to each bite.
Spices and Seasonings
– 1 teaspoon smoked paprika
– 1/2 teaspoon cayenne pepper
– Salt and pepper to taste
Smoked paprika adds a warm, smoky flavor. The cayenne pepper brings a kick of heat. You can adjust the cayenne to fit your taste. Salt and pepper are key to enhancing the flavors in this dish.
Garnishing Ingredients
– Fresh parsley, chopped for garnish
Chopped parsley adds a pop of color and freshness. It also brightens up the dish, making it look more appealing. I love to sprinkle it on top right before serving.
For the full recipe, check out the Zesty Lemon Garlic Roasted Chickpeas.
Step-by-Step Instructions
Preparing the Oven and Chickpeas
First, I preheat the oven to 400°F (200°C). This heat helps to make the chickpeas crisp. Next, I drain and rinse the chickpeas from the can. Rinsing removes the canning liquid, which can taste salty. I place the chickpeas on a paper towel and pat them dry. This step helps them roast better.
Making the Flavor Mixture
In a small bowl, I whisk together the olive oil, lemon zest, lemon juice, minced garlic, smoked paprika, cayenne pepper, salt, and pepper. This mixture gives the chickpeas a bright and bold flavor. The lemon zest adds freshness. The garlic brings depth, and the spices add warmth. You can taste the mixture before adding it to the chickpeas for a flavorful boost.
Roasting Process
Now, I drizzle the flavor mixture over the chickpeas, coating them evenly. I make sure every chickpea gets a good amount. Then, I spread them out on a baking sheet in a single layer. This ensures they roast evenly. I roast them in the oven for 25-30 minutes. Halfway through, I shake the baking sheet to promote even cooking. Once they are golden and crispy, I take them out and let them cool for a few minutes. You can adjust the seasoning if needed and garnish with fresh parsley before serving. For the complete guide, check the Full Recipe.
Tips & Tricks
Achieving a Crispy Texture
To make your lemon garlic roasted chickpeas extra crispy, start by patting them dry. This step removes moisture that can make them soggy. After drying, spread the chickpeas in a single layer on the baking sheet. This ensures they roast evenly and get that perfect crunch.
Seasoning Enhancements
For spice lovers, adjust the cayenne pepper to your taste. More cayenne brings heat, while less keeps it mild. If you want a brighter flavor, add more lemon zest. It lifts the dish and adds fresh notes that pair well with garlic.
Presentation Suggestions
Serving is part of the fun! Place the roasted chickpeas in a bowl or on a platter. You can sprinkle extra lemon zest or fresh parsley on top for a pop of color. This little touch makes your dish look more appealing and appetizing. Enjoy these crunchy bites as a snack or as a topping on your favorite salads. For the full recipe, see the section above.
Variations
Flavor Profile Adjustments
You can change the taste of your roasted chickpeas with different spices. Try adding curry for warmth or cumin for a smoky note. You might enjoy a sweet version, too! Mix in some cinnamon and sugar for a tasty twist.
Dietary Modifications
These chickpeas are already vegan and gluten-free. If you want to cut down on salt, use low-sodium options. This way, you can enjoy them guilt-free while still getting great flavor.
Serving Ideas
Roasted chickpeas make a perfect snack. They are crunchy and full of flavor. You can also serve them as a side dish. Try pairing them with dips like hummus or adding them to salads. They add a nice crunch and boost the nutrition. For the full recipe, check out the link above.
Storage Info
Short-Term Storage
To keep your lemon garlic roasted chickpeas fresh, use an airtight container. Glass jars or plastic containers with tight lids work best. Store them at room temperature. Avoid warm places to keep them crunchy longer.
Long-Term Storage
If you want to save some for later, you can freeze them. Spread the cooled chickpeas on a baking sheet in a single layer. Freeze until solid, then transfer to a freezer bag. To reheat, bake them straight from the freezer at 400°F (200°C) for about 10-15 minutes. This keeps them crispy.
Shelf Life
In the fridge, roasted chickpeas last 3-5 days. Check for any off smells or soft texture. If you see these signs, it’s best to toss them. Always trust your senses; they help you know when food is not good anymore.
FAQs
Can I use dried chickpeas instead?
Yes, you can use dried chickpeas! First, soak them overnight in water. Then, cook them until tender. This can take about 1-2 hours. After cooking, drain and rinse them. Follow the same steps in the recipe. This will give you a fresh taste.
How do I make them spicier or milder?
To adjust the heat, add more or less cayenne pepper. Start with a small amount. You can always add more later. For a milder taste, reduce the cayenne. You can also use sweet paprika instead of smoked paprika. This will keep the flavor, but lower the heat.
What can I substitute for lemon?
If you need a lemon substitute, try lime juice. It offers a similar tangy flavor. You can also use vinegar, like apple cider or white wine vinegar. Just use less than the lemon juice amount. This will keep your dish bright and tasty.
How do I reheat leftover roasted chickpeas?
For reheating, the oven is the best option. Preheat your oven to 375°F (190°C). Spread the chickpeas on a baking sheet. Heat for about 10-15 minutes until crispy. You can also use an air fryer for a quick and even reheat.
What other dishes pair well with Lemon Garlic Roasted Chickpeas?
These chickpeas work great in many dishes! Try adding them to salads for crunch. They also make a tasty topping for soups. You can mix them into grain bowls for extra protein. For more ideas, check out the Full Recipe for inspiration.
Full Recipe
Zesty Lemon Garlic Roasted Chickpeas
Lemon garlic roasted chickpeas are a delightful snack. They are crunchy, zesty, and packed with flavor. You will love how easy they are to make and enjoy. Here’s how you can create this tasty treat.
Ingredients:
– 1 can (15 oz) of chickpeas, drained and rinsed
– 2 tablespoons olive oil
– Zest of 1 lemon
– 2 tablespoons fresh lemon juice
– 3 cloves garlic, minced
– 1 teaspoon smoked paprika
– 1/2 teaspoon cayenne pepper (adjust to taste)
– Salt and pepper to taste
– Fresh parsley, chopped for garnish
Instructions:
1. Preheat your oven to 400°F (200°C).
2. Spread the rinsed chickpeas on a baking sheet. Pat them dry with a paper towel.
3. In a bowl, mix olive oil, lemon zest, lemon juice, garlic, smoked paprika, cayenne, salt, and pepper.
4. Pour this mix over the chickpeas and toss gently.
5. Roast them for 25-30 minutes. Shake the sheet halfway for even cooking.
6. Once they are golden and crispy, remove from the oven.
7. Cool for a few minutes, then adjust seasoning. Garnish with parsley before serving.
These chickpeas are not just tasty; they also add a healthy crunch. They are perfect for snacking or topping salads. The bright lemon flavor pairs well with the garlic and spices. You can find the full recipe above to guide you through each step. Enjoy your cooking!
These Lemon Garlic Roasted Chickpeas are easy and fun to make. We covered the main ingredients, spices, and step-by-step instructions. You learned tips for crispy texture and various serving ideas. Experiment with your favorite flavors to keep things exciting. Store them properly to enjoy later. Whether as a snack or a side, these chickpeas are a tasty choice. Get creative with your seasonings and pairings. Enjoy making and sharing this healthy dish!

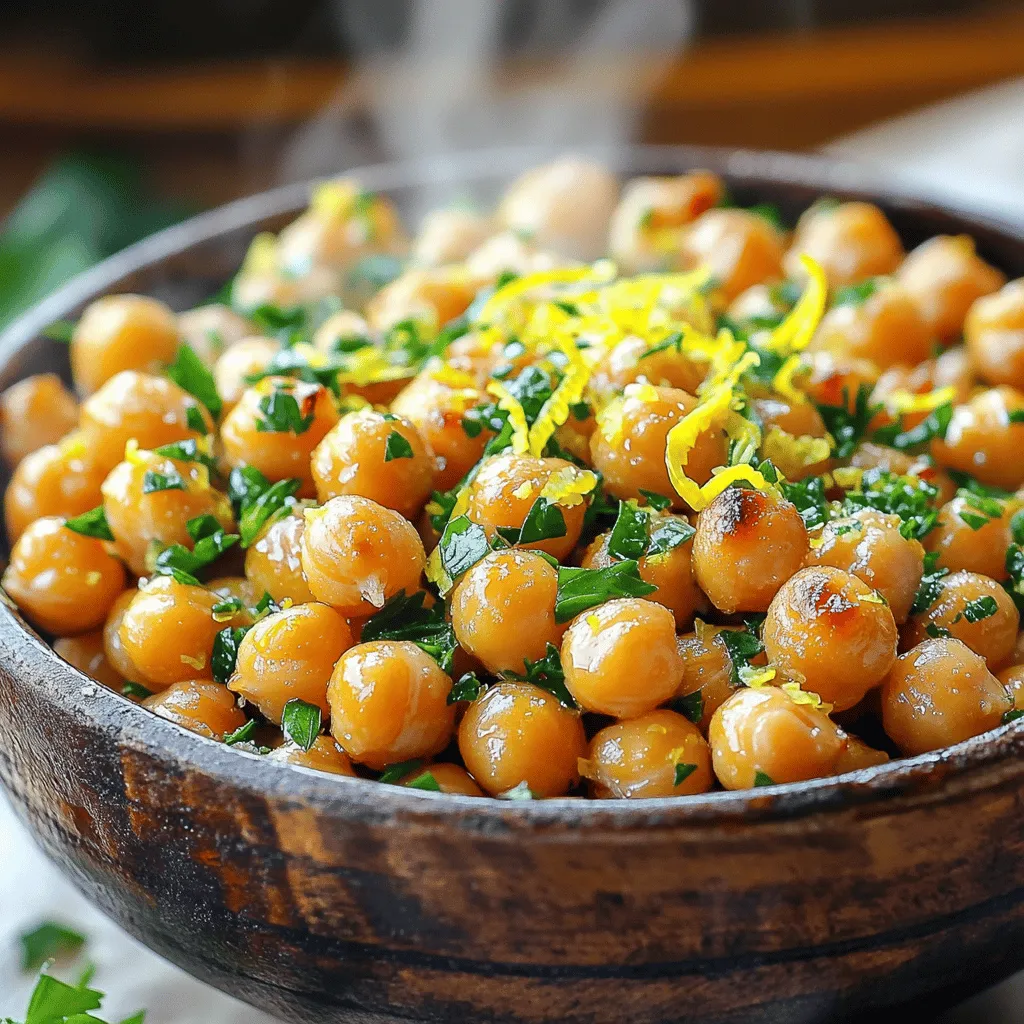
![- 1 large head of cauliflower - 3 tablespoons olive oil - 1 cup grated Parmesan cheese - 2 teaspoons garlic powder - 1 teaspoon onion powder - 1 teaspoon smoked paprika - Salt and black pepper to taste - Fresh parsley, chopped Gathering the right ingredients is key to making Parmesan roasted cauliflower. Start with one large head of cauliflower. Cut it into small florets. This shape helps the cauliflower cook evenly and get that crispy texture we love. Next, you'll need three tablespoons of olive oil. It adds healthy fat and helps the cheese stick. You'll also need one cup of grated Parmesan cheese. This cheese gives a salty, nutty flavor. Now, let’s talk seasonings. You’ll want two teaspoons of garlic powder for that aromatic kick. One teaspoon of onion powder adds sweetness. Smoked paprika, at one teaspoon, brings a nice depth of flavor. Don’t forget salt and black pepper to taste. These simple seasonings make the dish shine. Finally, fresh parsley will be your garnish. It adds color and a fresh taste. This ingredient list is simple but powerful. You can find the full recipe for more details on prep and baking. Enjoy your cooking! 1. First, preheat your oven to 425°F (220°C). This heat helps the cauliflower become crispy. 2. Next, line a baking sheet with parchment paper. This makes for easy cleanup. 3. In a large bowl, toss the cauliflower florets with 3 tablespoons of olive oil. Make sure every piece is coated well. 1. In a small bowl, combine 1 cup of grated Parmesan cheese, 2 teaspoons of garlic powder, 1 teaspoon of onion powder, and 1 teaspoon of smoked paprika. 2. Add salt and black pepper to taste. Mix well to combine all the flavors. 3. Sprinkle the Parmesan mixture over the cauliflower. Toss until each floret is evenly coated with the seasoning mix. 1. Spread the seasoned cauliflower in a single layer on your prepared baking sheet. 2. Roast in the oven for 25-30 minutes. Flip the cauliflower halfway through cooking. This ensures even browning. 3. Once the cauliflower is golden brown and tender, remove it from the oven. Let it cool slightly. 4. For a final touch, garnish with fresh chopped parsley before serving. For the complete details, check the [Full Recipe]. To get crispy cauliflower, start by cutting the florets into similar sizes. This helps them cook evenly. Toss the florets with olive oil until they are well coated. Use enough oil to help with crisping but don’t drown them. For perfect tenderness, roast the cauliflower at 425°F (220°C). This high heat gets a nice brown color while keeping the inside soft. Flip the florets halfway through cooking for even browning. Use a nice serving platter to show off your roasted cauliflower. A sprinkle of fresh parsley adds a pop of color. Drizzle a little olive oil on top for extra shine and flavor. This dish pairs well with grilled chicken or fish. It also goes great with a hearty salad for a fresh meal. Sometimes, cauliflower can get soggy. Avoid this by not overcrowding the baking sheet. If they are too close, steam builds up, which makes them soft. If the edges burn, check your oven temperature. You might need to lower it slightly. For more flavor, try adding lemon zest or a squeeze of lemon juice before serving. This brightens up the dish beautifully. {{image_2}} You can spice things up with chili flakes for a kick. This simple addition makes a bold flavor. You can also try herbs like thyme or rosemary. These fresh herbs add a nice touch and depth. If you want a twist, try using cheddar or goat cheese. These options bring a new taste to the dish. For those who prefer dairy-free, there are great vegan cheeses. These can mimic the creamy texture of Parmesan. Feel free to mix in other veggies like broccoli or bell peppers. This adds color and nutrition to your meal. You can also toss in nuts or seeds for extra crunch. Almonds or sunflower seeds work well here. You can customize this dish to fit your taste and diet. For the full recipe, check out the detailed instructions above. To keep your Parmesan roasted cauliflower fresh, store it in an airtight container. This helps lock in moisture and flavor. You can use glass or plastic containers with tight lids. Make sure the cauliflower is completely cool before sealing it. If you want to keep it extra fresh, place a paper towel inside the container. This absorbs extra moisture. The best way to reheat your leftovers is in the oven. Preheat the oven to 350°F (175°C). Place the cauliflower on a baking sheet and heat for about 10-15 minutes. This keeps the cauliflower crispy. You can also use an air fryer for a quicker option. Just set it to 350°F and heat for about 5-7 minutes. If you want to freeze the cauliflower, store it in a freezer-safe bag. It can last up to 3 months. Just remember to let it cool completely before freezing. Your Parmesan roasted cauliflower lasts about 3-5 days in the fridge. Always check for signs of spoilage. Look for a slimy texture or an off smell. If you notice either, it’s best to toss it out. Enjoy your dish while it's fresh for the best taste! For more details, check the full recipe. You can use several alternatives for Parmesan cheese. Here are some great options: - Nutritional yeast for a cheesy flavor and vegan diet. - Pecorino Romano for a similar taste with a sharper bite. - Grana Padano, which is less salty and creamy. These substitutes work well in the Parmesan Roasted Cauliflower recipe. Just keep in mind the flavor may change slightly. Yes, you can prep this dish in advance! Here are some tips: - Cut the cauliflower into florets and store them in the fridge. - Mix the seasoning and cheese ahead of time. - Combine the cauliflower and seasoning just before roasting for the best flavor. This way, you save time and still enjoy a fresh, crunchy dish! Absolutely! Grilling adds a nice smoky flavor. Here’s how to do it: 1. Preheat your grill to medium-high heat. 2. Toss the seasoned cauliflower in a grill-safe basket or on skewers. 3. Grill for about 10-15 minutes, turning occasionally until tender and charred. This method gives you a tasty twist on the original recipe! You can easily lighten up this dish. Consider these changes: - Use less Parmesan cheese or a lower-fat version. - Swap olive oil for a cooking spray or reduce the amount used. - Add more veggies like bell peppers or zucchini for volume without many calories. These tweaks help you enjoy a delicious and healthy Parmesan Roasted Cauliflower! For the full recipe, check out the detailed cooking instructions. This blog post covered how to make Parmesan Roasted Cauliflower. We explored the main ingredients, seasonings, and garnishes needed for the dish. I also provided a step-by-step guide for preparation and roasting. Plus, I shared cooking tips and flavor variations to elevate your meal. In summary, with proper storage and reheating tips, you can enjoy this dish multiple times. Experiment with alternatives and enjoy the crispy, cheesy goodness of roasted cauliflower!](http://dailydishly.com/wp-content/uploads/2025/06/1026dd12-7014-4148-8186-1edda0f6a7e3-768x768.webp)


![- Chickpeas and seasoning - 1 can (15 oz) chickpeas, drained and rinsed - 2 tablespoons olive oil - 1 teaspoon smoked paprika - 1/2 teaspoon garlic powder - 1/2 teaspoon cumin - Salt and pepper to taste Chickpeas are the star of this dish. They are high in protein and fiber. Their nutty flavor pairs well with spices. I love using smoked paprika for a warm taste. The garlic powder adds depth, while cumin brings a nice earthiness. You can adjust the salt and pepper to your liking. - Fresh vegetable ingredients - 4 cups mixed greens (spinach, arugula, and lettuce) - 1 cup cherry tomatoes, halved - 1/2 cucumber, diced - 1/4 red onion, thinly sliced Fresh vegetables add crunch and color. Mixed greens provide a lovely base. Cherry tomatoes burst with flavor and sweetness. Diced cucumber gives a refreshing bite. Red onion offers a sharp contrast. Feel free to mix and match your favorite greens. - Optional toppings and dressing ingredients - 1/4 cup feta cheese, crumbled (optional) - 2 tablespoons tahini - 1 tablespoon lemon juice - Fresh parsley for garnish Feta cheese adds creaminess and saltiness. If you want to keep it vegan, skip the feta. The tahini dressing is rich and nutty. A little lemon juice brightens the flavors. Fresh parsley gives a pop of green and freshness. You can use other herbs too, like basil or cilantro. For the full recipe, check the complete list above. 1. Start by preheating your oven to 400°F (200°C). Line a baking sheet with parchment paper. This helps the chickpeas crisp up nicely. 2. In a medium bowl, take your drained chickpeas. Add 2 tablespoons of olive oil, 1 teaspoon of smoked paprika, 1/2 teaspoon of garlic powder, 1/2 teaspoon of cumin, and a pinch of salt and pepper. Toss everything well until the chickpeas are coated. 3. In a large bowl, mix the salad components. Combine 4 cups of mixed greens, 1 cup of halved cherry tomatoes, 1/2 diced cucumber, and 1/4 sliced red onion. This mix adds crunch and freshness. 1. Spread the seasoned chickpeas on the lined baking sheet. Make sure they are in a single layer for even cooking. 2. Bake them in the preheated oven for 25-30 minutes. Halfway through, shake the pan. This helps them cook evenly and become crispy. Watch closely near the end to avoid burning. 1. Once the chickpeas are golden and crispy, remove them from the oven and let them cool for a minute. 2. Top your salad mix with the crispy chickpeas. Drizzle your tahini dressing over everything. To make the dressing, whisk together 2 tablespoons of tahini, 1 tablespoon of lemon juice, and a pinch of salt and pepper in a small bowl. You can add a bit of water if you want it thinner. 3. If you like, sprinkle 1/4 cup of crumbled feta cheese on top. Finish with fresh parsley for that pop of color. Follow these steps from the Full Recipe to create a tasty, crunchy salad that’s sure to impress! To boost flavor, consider adding spices like cayenne pepper or turmeric. You could also mix in fresh herbs such as cilantro or basil. Each herb or spice brings a unique taste. For the dressing, try using yogurt instead of tahini for a creamier texture. You can also add a splash of balsamic vinegar for a tangy kick. A sprinkle of lemon zest can brighten the dish too. To get crispy chickpeas, drying them well is key. After rinsing, pat them dry with a towel. This step helps them crisp up nicely. When baking, spread them out on the pan without overcrowding. This allows hot air to circulate. You can also shake the pan halfway through baking for even crispness. If you have an air fryer, use it! It cooks chickpeas faster and often makes them crispier. Cook them at 400°F for about 15 minutes, shaking halfway through. For the full recipe, check out the Crispy Chickpea Delight Salad section. Enjoy your cooking! {{image_2}} You can change up the greens in this salad. Try kale, romaine, or even cabbage. Each green adds its own flavor and texture. If you want a vegan option, leave out the feta cheese. You can still enjoy a tasty salad without it. Consider adding avocado for creaminess instead. Want to boost the protein? Add grilled chicken or shrimp. You can even toss in quinoa for a hearty touch. For toppings, think nuts or seeds. Toasted almonds or sunflower seeds add a nice crunch. You could also sprinkle some fresh herbs like basil or cilantro for extra flavor. These small changes can make your crispy chickpea salad feel new and exciting. For the complete recipe, check out the [Full Recipe]. To keep your salad fresh, store it in an airtight container. Make sure to refrigerate it right away. The greens will stay crisp for a day or two. Avoid mixing the dressing with the salad until you are ready to eat. This keeps everything from getting soggy. For the crispy chickpeas, store them in a separate container. Use a glass jar or a paper bag. This helps them stay crunchy longer. If you store them with the salad, they will lose their crispiness. When you reheat crispy chickpeas, use the oven for best results. Preheat your oven to 350°F (175°C). Spread the chickpeas on a baking sheet. Heat them for about 5 to 10 minutes. Check often to avoid burning. If you want to use the microwave, place the chickpeas on a plate. Cover them with a paper towel. This helps absorb moisture. Heat them in short bursts of 30 seconds until warm. Avoid heating too long, as they will get soggy. Enjoy your crispy chickpeas as a tasty snack or salad topping! You can use almond butter or sunflower seed butter instead of tahini. Both have a nice, creamy texture. They add a different flavor but still taste great in the salad. You can also try using Greek yogurt for a tangy twist. This salad is mostly gluten-free already! Just make sure the tahini and any store-bought ingredients are gluten-free. Always check labels for hidden gluten. Using fresh produce and canned chickpeas keeps it safe. Yes, you can prep parts of the salad ahead. Keep the crispy chickpeas separate until serving. This way, they stay crunchy. You can mix the greens and veggies in advance and dress them just before eating. Absolutely! This salad works well for meal prep. Just store the chickpeas, salad, and dressing in separate containers. You can enjoy it all week. It makes a great lunch or dinner option. To get crispy chickpeas, dry them well before seasoning. Use a towel to remove moisture. Bake them at a high temperature, around 400°F (200°C). Shake the pan halfway through baking for even crispiness. For even better results, try using an air fryer! Check the [Full Recipe] for more details. In this blog post, we explored a tasty chickpea salad recipe. We covered key ingredients, like chickpeas and fresh veggies, to create a great meal. You learned step-by-step instructions for preparation, baking, and assembly. I shared tips on enhancing flavors and achieving the perfect crispiness. You also discovered variations to suit your taste, storage tips for leftovers, and answers to common questions. Try this chickpea salad and make it your own. You will love the flavors and textures! Enjoy!](http://dailydishly.com/wp-content/uploads/2025/06/a0161600-1d29-449f-a743-39fb8b2e717a-768x768.webp)
![- 1 can (15 oz) chickpeas, drained and rinsed - 1/2 cup sun-dried tomatoes, chopped - 1/4 cup red onion, finely chopped - 1/2 cucumber, diced Chickpeas are the star of this salad. They add protein and fiber. Sun-dried tomatoes bring a burst of flavor and a bit of sweetness. Fresh veggies, like cucumber and red onion, add crunch and color. Together, they make a hearty base. - 2 tablespoons olive oil - 1 tablespoon lemon juice - 1 teaspoon dried oregano - Salt and pepper to taste The dressing is simple yet full of taste. Olive oil adds richness, while lemon juice gives a bright kick. Oregano adds an earthy note. Salt and pepper round out the flavors nicely. - 1/4 cup feta cheese, crumbled - 2 tablespoons fresh parsley, chopped Feta cheese adds a creamy, tangy element. Fresh herbs like parsley give a burst of freshness. You can add these if you want more flavor and texture. If you want the full recipe, check it out [Full Recipe]. - Combine Key Ingredients Start by taking a large mixing bowl. Add one can of drained and rinsed chickpeas. Then, toss in half a cup of chopped sun-dried tomatoes. Next, add a quarter cup of finely chopped red onion and half a diced cucumber. Finally, sprinkle in a quarter cup of crumbled feta cheese. - Whisk the Dressing In a small bowl, mix two tablespoons of olive oil with one tablespoon of lemon juice. Then, add one teaspoon of dried oregano. Season with salt and pepper to taste. Whisk these ingredients together until well combined. This dressing is key to bringing out the flavors. - Toss Ingredients Together Pour the dressing over the salad mix. Gently toss everything together to coat the ingredients evenly. Be careful not to mash the chickpeas or feta. You want everything to stay nice and whole. - Letting Flavors Meld Once tossed, let the salad sit for at least 15 minutes. This time helps the flavors blend. You can cover it and set it aside. It will taste even better after it rests. - Chilled or Room Temperature You can serve this salad chilled or at room temperature. Both options work well. It makes a great side dish or a light lunch. Enjoy the freshness of the sun-dried tomatoes and the crunch of the cucumber. You can save time by preparing ingredients in advance. Chop the cucumbers, red onions, and sun-dried tomatoes the day before. Store them in airtight containers in your fridge. This way, when you're ready to make the salad, it’s quick and easy. You can also mix the dressing ahead of time. Just give it a good shake before using it. To boost flavor, let the salad marinate. After mixing all the ingredients, cover the bowl. Place it in the fridge for at least 30 minutes. This waiting time helps the flavors blend well. You can also add some balsamic vinegar to the dressing for a deeper taste. Seasoning matters! Use fresh herbs like basil or mint for a bright taste. You can also try adding a pinch of red pepper flakes for a bit of heat. Always taste the salad before serving. Adjust salt and pepper to suit your liking. If you prefer a creamier salad, add more feta cheese or a dollop of Greek yogurt. For a lighter version, reduce the olive oil. You can also add more lemon juice for extra zing. Feel free to adjust the chickpeas too; add more for a heartier salad. {{image_2}} You can boost your Sun-Dried Tomato Chickpea Salad by adding proteins. One great choice is grilled chicken. Just cook the chicken until it’s golden and slice it thin. Add the slices right on top of your salad. This makes it heartier and perfect for lunch. Another option is incorporating tuna. Drain a can of tuna and mix it in. The tuna adds a nice flavor and a bit of richness. Both options give you a tasty way to enjoy the salad. For a vegetarian twist, try non-dairy cheese options. There are many brands that mimic feta well. Crumble it on top like regular feta. This keeps the creaminess without dairy. If you prefer a vegan version, consider other legumes. Black beans or kidney beans work well. They add protein and fiber while keeping the salad filling and delicious. As the seasons change, you can mix in fresh veggies. In summer, consider adding bell peppers. They add crunch and color. You can also toss in cherry tomatoes for extra sweetness. For fall, think about adding roasted squash or sweet potatoes. These ingredients bring warmth and earthiness to the salad. Each season offers new flavors to explore in your Sun-Dried Tomato Chickpea Salad. How long will it last? This salad stays fresh in the fridge for about three days. Make sure to store it in an airtight container. This keeps the flavors locked in and the veggies crisp. Can I freeze the salad? I do not recommend freezing this salad. The fresh veggies and feta do not hold up well after freezing. If you freeze it, the texture will change, and it may become mushy. What are the best practices for serving leftovers? You can enjoy this salad cold right from the fridge. If you prefer it warm, gently heat it in the microwave for about 30 seconds. Stir it well to ensure even heating. Just remember, warm is nice, but cold is better for this dish! To make this salad, you start with simple steps. The full recipe shows you how. First, gather your ingredients. You need chickpeas, sun-dried tomatoes, red onion, cucumber, and feta cheese. 1. In a bowl, mix the chickpeas, sun-dried tomatoes, diced cucumber, red onion, and feta cheese. 2. For the dressing, whisk olive oil, lemon juice, dried oregano, salt, and pepper in a small bowl. 3. Pour this dressing over the salad and mix gently. 4. Add chopped parsley and toss once more. 5. Let it sit for at least 15 minutes. This helps the flavors blend. You can serve it cold or at room temp. Yes, you can use dried chickpeas! However, you need to prepare them first. - Soak the dried chickpeas overnight in water. This helps them soften. - The next day, drain and rinse them. - Cook them in boiling water for about 1 to 1.5 hours until they are tender. - Once cooked, drain and cool them before using in your salad. This salad pairs well with many dishes. Here are some ideas: - Serve it alongside grilled chicken for a protein boost. - Pair it with some crusty bread for a tasty meal. - Enjoy it as a side with fish or a light pasta dish. - It also works great as a filling for wraps or pita pockets. Feel free to mix and match! In this post, we explored the sun-dried tomato chickpea salad. We looked at key ingredients, like chickpeas and fresh veggies. We also discussed making a tasty dressing with olive oil and lemon juice. You learned how to prepare and assemble the salad, plus tips for flavor and storage. This salad is both simple and flexible. You can customize it to your taste. Enjoy your delicious creation!](http://dailydishly.com/wp-content/uploads/2025/07/f0fe0f85-1842-4358-ad7f-ac591425fdaf-768x768.webp)