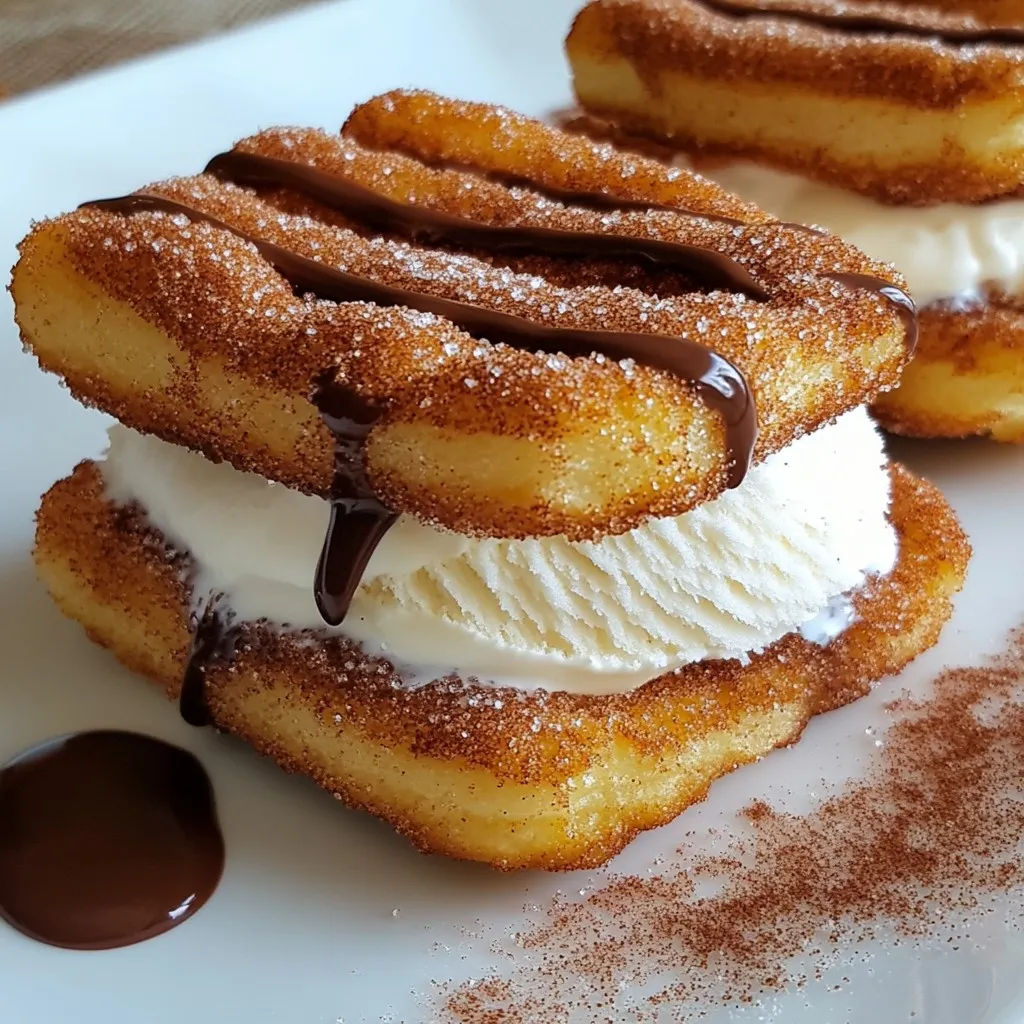
Churro Ice Cream Sandwiches Tasty and Fun Treat
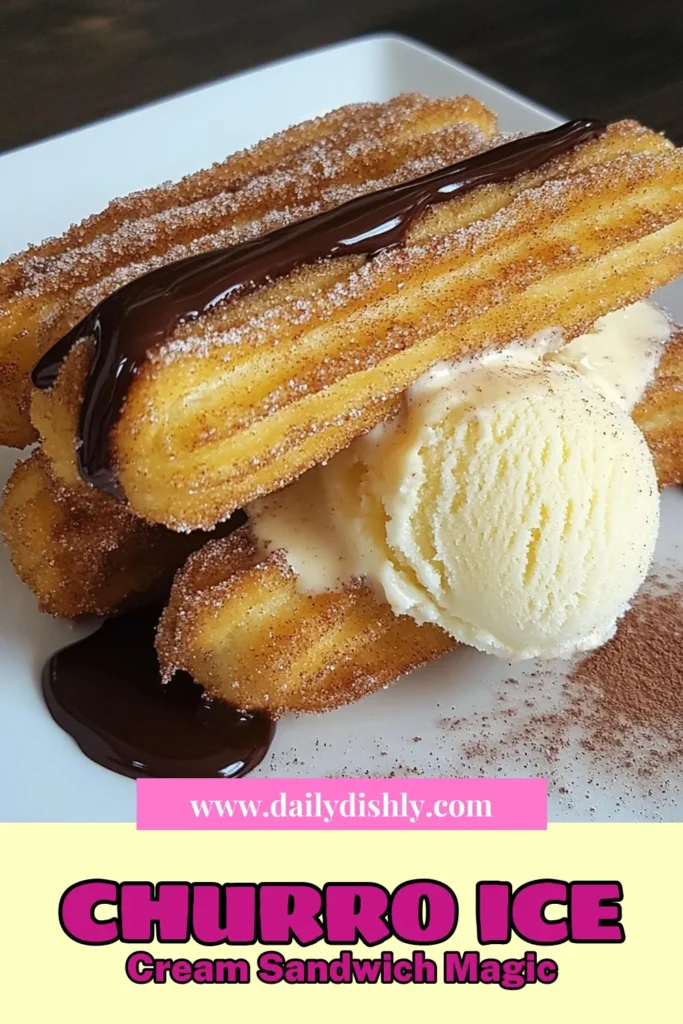
Are you ready for a sweet twist on a classic treat? Churro ice cream sandwiches blend warm, crunchy churros with creamy, cool ice cream, creating a fun dessert you won’t forget. In this blog post, I’ll guide you through each step, from making churro dough to choosing the perfect ice cream flavor. Get ready to impress your friends and family with this tasty and playful treat!
Why I Love This Recipe
- Indulgent Flavor Combination: The crispy churros paired with creamy ice cream create an irresistible treat that satisfies both your sweet tooth and your cravings for texture.
- Fun to Make: Piping the churros is a delightful activity that adds a playful element to your cooking, making it a great recipe to involve kids or friends in.
- Customizable Options: You can easily switch up the ice cream flavors or add toppings like chocolate sauce or sprinkles to create a unique dessert every time.
- Perfect for Any Occasion: Whether it’s a summer BBQ or a cozy winter night, churro ice cream sandwiches are a hit that can elevate any gathering.
Ingredients
Detailed List of Ingredients
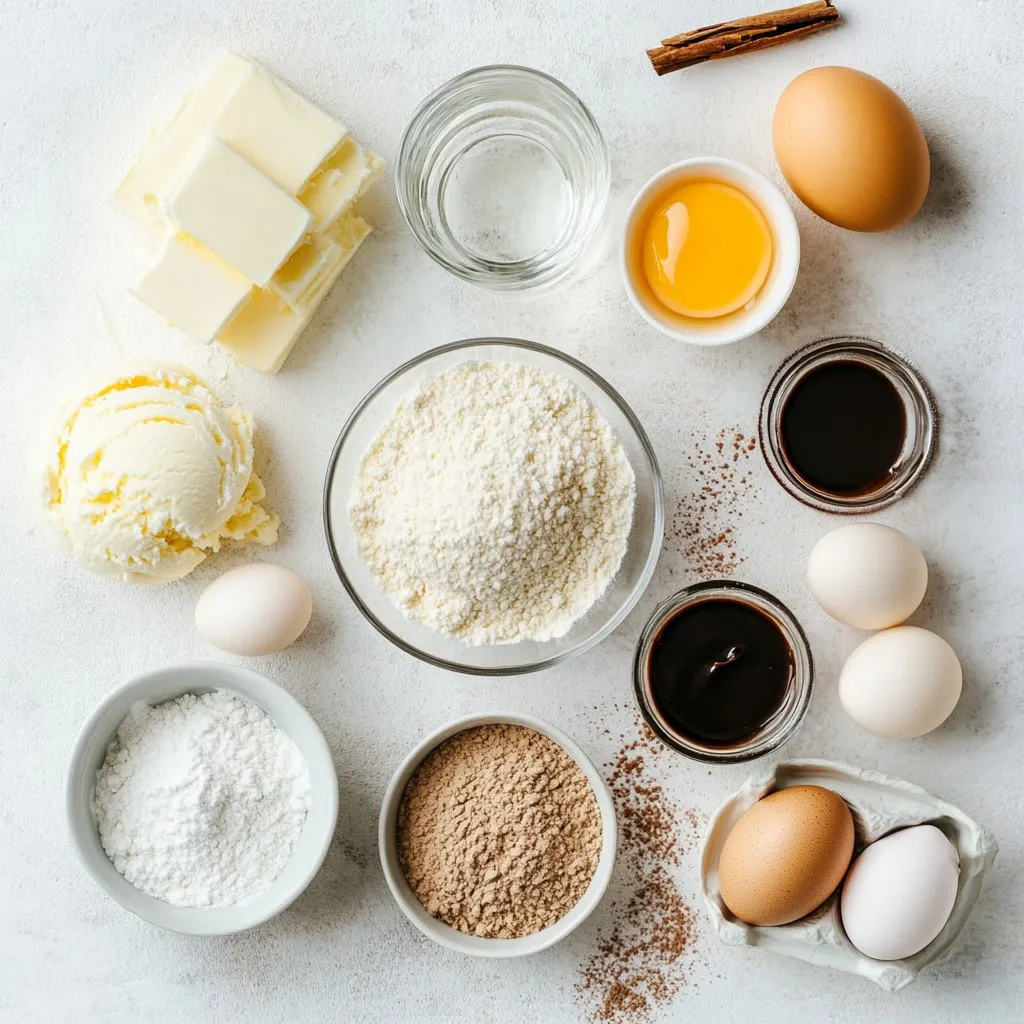
To make delicious churro ice cream sandwiches, gather these ingredients:
– 1 cup all-purpose flour
– 1/2 cup water
– 1/2 cup unsalted butter
– 1/4 teaspoon salt
– 1 teaspoon sugar
– 3 eggs
– 1 cup sugar (for coating)
– 1 tablespoon ground cinnamon
– 1 pint of your favorite ice cream (vanilla, chocolate, or dulce de leche)
– Chocolate sauce for drizzling (optional)
Equipment Needed
You will need a few tools to create these tasty treats:
– Medium saucepan
– Mixing spoon
– Piping bag with a large star nozzle
– Baking sheet
– Parchment paper
– Plate for coating
– Ice cream scoop
Tips for Ingredient Quality
Using high-quality ingredients makes a big difference. Here are some tips:
– Flour: Choose all-purpose flour for the best texture.
– Butter: Use unsalted butter for better control of salt levels.
– Ice Cream: Pick a creamy ice cream for a smooth and rich flavor.
– Cinnamon: Fresh ground cinnamon adds a warm aroma.
– Sugar: Use granulated sugar for the coating, as it sticks well.
These tips help make your churro ice cream sandwiches not just good, but great! Enjoy the fun of making and sharing them!
Step-by-Step Instructions
Preparing the Churro Dough
To start, gather your ingredients. You need flour, water, butter, salt, sugar, and eggs. In a medium saucepan, mix the water, butter, salt, and 1 teaspoon of sugar. Heat this over medium heat until it boils.
Once it boils, reduce the heat to low. Now, add the flour all at once. Stir it hard until the dough pulls from the sides of the pan. This should take about 1-2 minutes. Remove the pan from the heat and let the dough cool for a few minutes.
Next, add the eggs one at a time. Mix well after each egg until the dough is smooth and shiny. This is key for great churros.
Baking the Churros
Now, preheat your oven to 375°F (190°C). Prepare a baking sheet by lining it with parchment paper.
Take a piping bag and fit it with a large star nozzle. Fill the bag with your churro dough. Pipe 4-inch long strips onto the parchment paper. Make sure to leave space between each strip.
Bake the churros for 20-25 minutes. They should be golden brown and puffy. Once done, remove them from the oven and let them cool for a few minutes.
Assembling the Ice Cream Sandwiches
While the churros cool, mix 1 cup of sugar with the ground cinnamon on a plate for coating. Roll each churro in this cinnamon-sugar mix until they are fully coated.
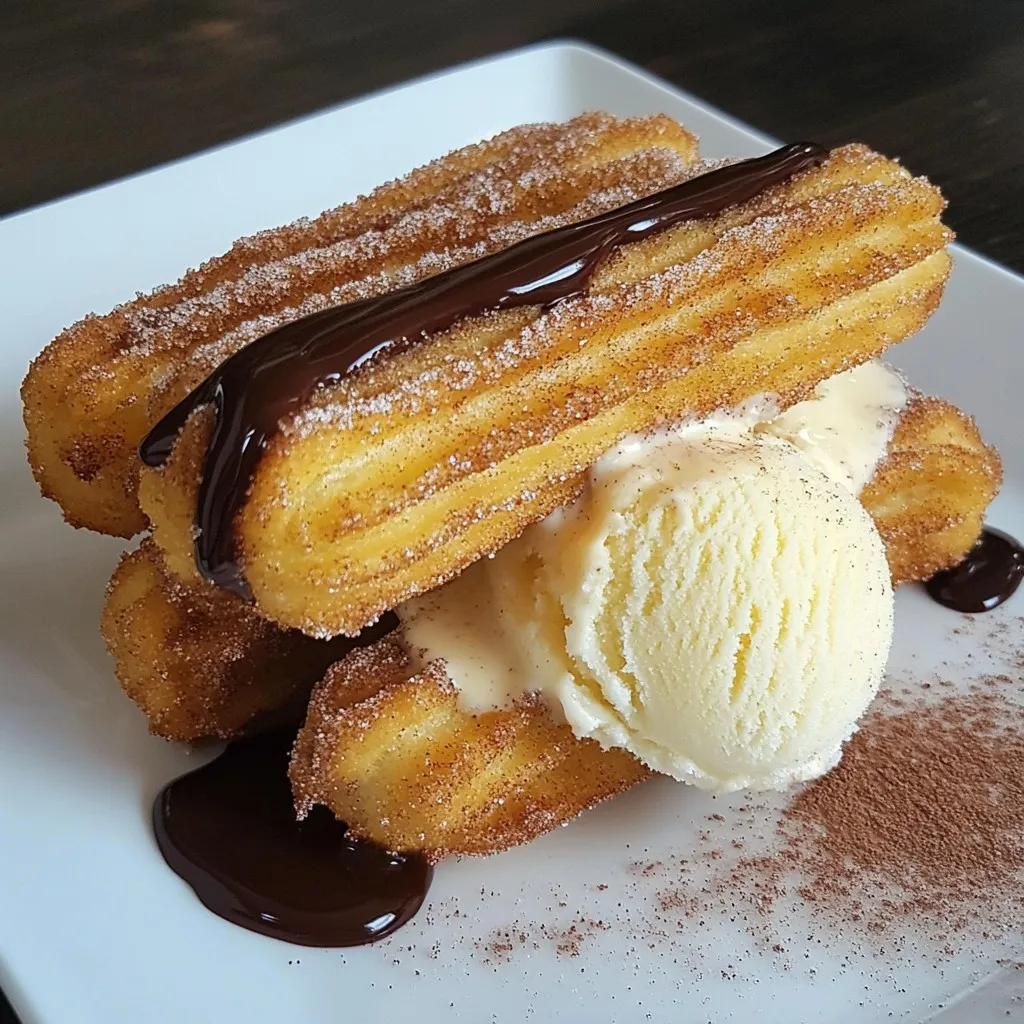
To assemble the ice cream sandwiches, take one churro and place a scoop of your favorite ice cream on it. Top it with another churro to make a sandwich.
If you like, drizzle chocolate sauce over the top. Serve these tasty treats right away for a perfect dessert!
Tips & Tricks
Perfecting Your Churros
To make churros that are crisp on the outside and soft on the inside, follow these steps:
– Use fresh ingredients. Fresh flour and eggs improve texture.
– Ensure your dough is smooth. Mix well after adding each egg.
– Pipe churros with a star nozzle. This shape helps them cook evenly.
– Don’t overbake. Remove churros when they turn golden brown.
Ice Cream Pairing Suggestions
Choose ice cream that contrasts with the warm churros. Here are some top picks:
– Vanilla: Classic and creamy, it balances the spice of churros.
– Chocolate: Rich and decadent, it adds a fun twist.
– Dulce de leche: This flavor enhances the churros’ sweetness.
Consider mixing flavors for a fun, bold taste.
Serving and Presentation Ideas
Make your churro ice cream sandwiches look inviting. Try these ideas:
– Use a decorative plate. It adds flair to your dessert.
– Lightly dust with cinnamon sugar. It looks appealing and flavorful.
– Add a small scoop of extra ice cream on the plate. This tempts guests to dig in.
– Drizzle chocolate sauce over the top. This adds a fun touch and extra sweetness.
Pro Tips
- Perfect Piping: Ensure your dough is smooth and glossy before piping to achieve beautifully shaped churros.
- Temperature Check: Use a thermometer to check the oil temperature if frying churros; it should be around 350°F (175°C) for the best fry.
- Churro Cooling: Allow churros to cool slightly before coating them in cinnamon sugar to prevent the sugar from melting.
- Flavor Variations: Experiment with different ice cream flavors or add toppings like sprinkles or nuts for extra flair!
Variations
Flavor Variations for Churros
Churros are great on their own, but you can add fun flavors. Try adding vanilla extract or cocoa powder to the dough. This gives your churros a sweet twist. You can also mix in orange zest for a bright taste. If you want something bold, try adding espresso powder. Each flavor makes your churros unique and tasty.
Alternative Ice Cream Flavors
The ice cream you choose can change everything. Vanilla is classic and pairs well with churros. Chocolate adds richness and pairs perfectly with cinnamon. For a twist, use dulce de leche for a caramel taste. If you like fruity flavors, try strawberry or mango. Each scoop brings a new vibe to your sandwich.
Creative Toppings and Add-Ins
Toppings can make your churro ice cream sandwich even better. Drizzling chocolate sauce is always a hit. You can also sprinkle chopped nuts for crunch. Want something fun? Add sprinkles or crushed cookies on top. A dollop of whipped cream makes it extra special. Get creative and mix your favorite toppings for a treat that wow!
Storage Info
Best Methods to Store Churro Ice Cream Sandwiches
To keep your churro ice cream sandwiches fresh, store them in an airtight container. Use parchment paper to separate the layers. This prevents them from sticking together. Place the container in the fridge if you plan to eat them within a few days. If you want to save them longer, freezing is a better option.
Reheating Tips for Churros
If your churros lose their crispness, you can reheat them. Preheat your oven to 350°F (175°C). Place the churros on a baking sheet. Heat for about 5 to 7 minutes. This will make them crispy again. Avoid using the microwave, as it can make them soggy.
Freezing Ice Cream Sandwiches
To freeze your churro ice cream sandwiches, wrap each one in plastic wrap. Then, place them in a freezer-safe bag. They can last for up to a month in the freezer. When ready to eat, let them sit at room temperature for a few minutes. This will soften the ice cream slightly for easier biting.
FAQs
How do you make churros without eggs?
You can make churros without eggs by using a simple dough. Combine flour, water, butter, salt, and sugar. Heat these ingredients until they form a dough. Instead of eggs, use a bit of baking powder to add fluffiness. The final result will still be delicious.
Can I use a store-bought churro mix?
Yes, you can use a store-bought churro mix. This saves time and effort. Just follow the package instructions. It’s a great option if you want churros quickly. However, homemade churros taste fresher and allow for customization.
What are the best ice cream flavors for churro sandwiches?
The best ice cream flavors for churro sandwiches are vanilla, chocolate, and dulce de leche. Vanilla pairs well with the cinnamon flavor. Chocolate adds a rich taste, and dulce de leche complements the churros perfectly. You can also try cookies and cream or even strawberry for a twist.
You learned how to make tasty churro ice cream sandwiches. We covered the ingredients, step-by-step advice, and fun variations. Use the tips and tricks to perfect your churros and choose the best ice cream flavors. Storing and reheating methods will keep your treats fresh. Enjoy creating your own delicious snacks. Remember, the best part is sharing them with others! Stay creative and have fun in the kitche

Churro Ice Cream Sandwiches
Ingredients
- 1 cup all-purpose flour
- 1 cup water
- 1 cup unsalted butter
- 1 teaspoon salt
- 1 teaspoon sugar
- 3 units eggs
- 1 cup sugar (for coating)
- 1 tablespoon ground cinnamon
- 1 pint your favorite ice cream (e.g., vanilla, chocolate, or dulce de leche)
- 1 serving chocolate sauce for drizzling (optional)
Instructions
- In a medium saucepan, combine water, butter, salt, and 1 teaspoon of sugar. Bring to a boil over medium heat.
- Once boiling, reduce heat to low and add flour all at once, stirring vigorously until the mixture pulls away from the sides of the pan and forms a ball (about 1-2 minutes).
- Remove from heat and let it cool slightly.
- Incorporate the eggs one by one, mixing well after each addition until the dough is smooth and glossy.
- Preheat your oven to 375°F (190°C) and line a baking sheet with parchment paper.
- Transfer the dough into a piping bag fitted with a large star nozzle. Pipe 4-inch long strips onto the parchment paper, leaving some space between them.
- Bake for 20-25 minutes or until they are golden brown and a bit puffy. Remove from the oven and let cool for a few minutes.
- Meanwhile, on a plate, mix 1 cup of sugar with the ground cinnamon for coating.
- Roll the churros in the cinnamon-sugar mixture until fully coated.
- To assemble, place a scoop of ice cream in between two churros to create a sandwich.
- Drizzle with chocolate sauce if desired. Serve immediately for the best texture or freeze for later enjoyment.

![To make these chocolate-covered banana bites, you will need simple, fresh ingredients. Here is the list: - 2 large bananas - 1 cup dark chocolate chips (or semi-sweet) - 1 tablespoon coconut oil - 1/4 cup chopped nuts (walnuts, almonds, or pistachios) - Sea salt for sprinkling - Optional toppings: 1/4 cup shredded coconut or mini marshmallows These ingredients work together for a tasty treat. The bananas add natural sweetness, while the dark chocolate provides rich flavor. Coconut oil helps the chocolate melt smoothly and adds a hint of tropical taste. The nuts give a nice crunch, and sea salt balances the sweetness. You can also mix in optional toppings like shredded coconut or mini marshmallows for fun twists. When choosing bananas, look for ones that are ripe but not too soft. This way, they will hold their shape when coated. For chocolate, dark chocolate chips melt well and taste great, but you can pick semi-sweet if you prefer. Once you gather your ingredients, you’re ready to make a delightful snack. For the complete process, check the Full Recipe. - Peel and slice bananas into bite-sized rounds. - Arrange banana slices on a parchment-lined baking sheet. Start with ripe bananas. They should be firm but not too soft. Slice them about one inch thick. This size helps them hold their shape when coated in chocolate. Lining the baking sheet with parchment paper keeps the bites from sticking. - Combine chocolate chips and coconut oil in a microwave-safe bowl. - Microwave in intervals, stirring, until smooth. Use dark chocolate chips for a rich taste. The coconut oil makes the chocolate smooth and shiny. Heat in short bursts of thirty seconds. Stir after each burst to prevent burning. When melted, the chocolate should be silky and easy to dip. - Use a fork or toothpick to coat banana slices in chocolate. - Allow excess chocolate to drip off. Hold the banana slice with a fork or toothpick. Dip it fully into the melted chocolate. Let any extra chocolate fall back into the bowl. This step ensures a nice, even coat. - Sprinkle nuts onto chocolate-coated banana bites. - Optionally, add shredded coconut or mini marshmallows. While the chocolate is still wet, add your favorite toppings. Nuts give a nice crunch. Coconut and marshmallows add a fun twist. Get creative with your choices! - Place the baking sheet in the freezer. - Chill for 15-20 minutes until the chocolate sets. Freezing helps the chocolate harden quickly. This step gives you a perfect bite. Keep an eye on them to make sure they don’t freeze too long. - Arrange on a serving platter. - Sprinkle with sea salt for extra flavor. Once chilled, place the banana bites on a nice platter. A light sprinkle of sea salt can enhance the flavor. These treats are perfect for sharing with friends or family. For the complete recipe, check out the [Full Recipe]. For melting, I recommend dark chocolate or semi-sweet chocolate. Both types melt well and give a rich flavor. Avoid chocolate with added ingredients, as they may not melt smoothly. To stop chocolate from seizing, add a bit of coconut oil. This helps keep the chocolate smooth and shiny while you dip your bananas. You can get creative with toppings! Try adding chopped nuts like walnuts or almonds for crunch. For a fun twist, sprinkle on shredded coconut or mini marshmallows. Bananas pair well with peanut butter too. Drizzle some on top after dipping for a tasty combo. If you're feeling adventurous, add a pinch of cinnamon for warmth. Present your chocolate-covered banana bites on a colorful platter. For a fun touch, use mini cupcake liners. They look cute and make for easy serving. Pair these bites with a glass of cold milk or a warm cup of tea. They also go well with vanilla ice cream for a sweet dessert combo. Enjoy your tasty creation! {{image_2}} You can easily make these bites vegan or dairy-free. Use plant-based chocolate chips instead of dark chocolate. Look for brands that are labeled dairy-free. You can also skip the nuts if you need a nut-free version. Simply leave them out or choose seeds like pumpkin or sunflower for crunch. You can switch up the chocolate for fun. Try white chocolate for a sweet twist. Milk chocolate is another tasty choice. If you want to get creative, add spices like cinnamon or nutmeg. Extracts like vanilla or almond also bring unique flavors. These small changes make a big impact on taste. Bananas are great, but other fruits work well too. Strawberries and apples both taste amazing with chocolate. You can even mix bananas with berries. Slice them small to make bite-sized treats. This way, you get a variety of flavors in one bite. Enjoy experimenting with different fruits! To keep your chocolate-covered banana bites fresh, store them in the fridge. Use an airtight container to prevent odors. Place parchment paper between layers if stacking them. This keeps the chocolate from sticking. If you want to store them longer, freezing works well too. Just place them on a baking sheet first. Once frozen, transfer them to a freezer-safe bag. This prevents them from clumping together. To thaw, just leave them in the fridge for a few hours before enjoying. When stored well in the fridge, these treats last about a week. If you freeze them, they can last up to two months. Check for signs of spoilage like brown spots on the bananas or a change in texture. If they look or smell off, it’s best to toss them. If you have leftover melted chocolate, don’t waste it! You can reuse it for other treats. Drizzle it on popcorn, or dip pretzels for a sweet and salty snack. You can also make chocolate-covered strawberries or marshmallows. Just be sure to reheat it gently to keep it smooth. For the best results, use the Full Recipe to make your banana bites. Enjoy the fun of creating delicious snacks while managing your storage effectively! Yes, you can use milk chocolate. It adds a sweeter taste. Dark chocolate has a richer flavor. Dark chocolate also has more health benefits, like antioxidants. It has less sugar than milk chocolate, making it a better choice for some. If you prefer sweet, go for milk chocolate. If you want a deeper flavor, stick with dark. To keep the chocolate firm, store the bites in a cool place. A fridge works great, but avoid the freezer after setting. You can also use a chocolate with a higher cocoa content. This type melts less easily. If you serve them warm, try using coconut oil. It helps the chocolate stay solid longer. Yes, you can make these bites ahead of time. They store well in the fridge for about a week. Just place them in an airtight container. If you want to keep them longer, you can freeze them. Make sure to separate layers with parchment paper to avoid sticking. Thaw them in the fridge before serving for the best taste. Chocolate-covered banana bites can be healthy in moderation. Bananas provide potassium and fiber. Dark chocolate has antioxidants, which are good for you. However, watch your portions. Eating too many can add extra sugar and calories. Pair these bites with a balanced diet for better health. Enjoy them as a treat rather than a daily snack. For the full recipe, check out the details above. You learned how to make tasty chocolate-covered banana bites. We covered the simple steps, from slicing bananas to melting chocolate. You can mix and match ingredients for fun variations. Remember, storing them well keeps them fresh and tasty for longer. Whether serving these bites at a party or enjoying them yourself, they are a delightful treat. Experiment with toppings and flavors to make them yours. Enjoy creating your own chocolate-covered banana bites!](https://dailydishly.com/wp-content/uploads/2025/06/88d9cc62-4f1a-4e00-b9c6-f86f49f25fdc-768x768.webp)