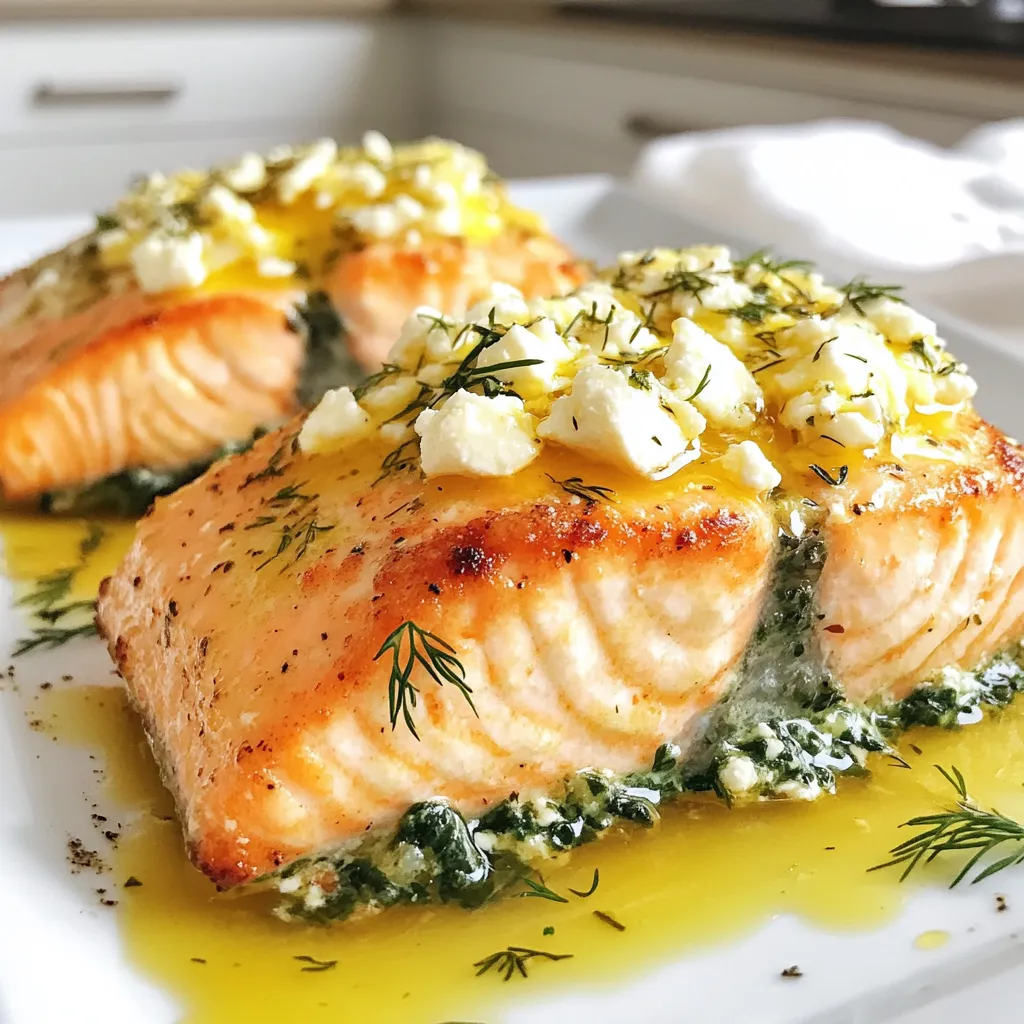
Spinach Feta Stuffed Salmon Tasty and Healthy Recipe
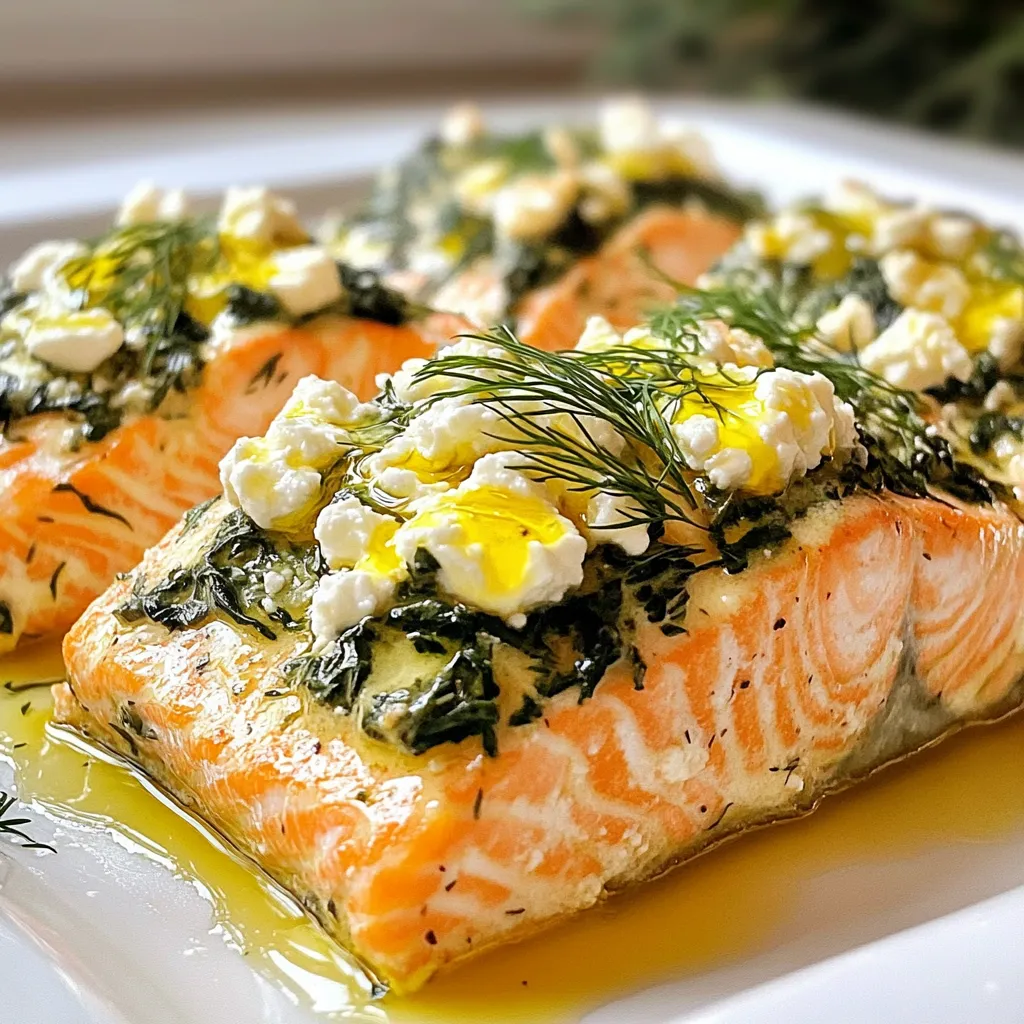

Looking for a healthy dinner that’s bursting with flavor? This Spinach Feta Stuffed Salmon recipe hits the mark! With fresh spinach, creamy feta, and tender salmon, you get a delicious meal that’s easy to make. Join me as I guide you through simple steps to create this tasty dish. Your taste buds will thank you, and your body will too. Let’s dive in!
Why I Love This Recipe
- Delicious Flavor Combination: The blend of spinach and feta creates a creamy and tangy filling that perfectly complements the rich flavor of salmon.
- Healthy Choice: This dish is packed with nutrients from the salmon and spinach, making it a great option for a healthy meal.
- Easy to Prepare: With simple ingredients and straightforward instructions, this recipe is quick to whip up for any occasion.
- Impressive Presentation: Stuffed salmon looks beautiful on the plate, making it perfect for entertaining guests or special occasions.
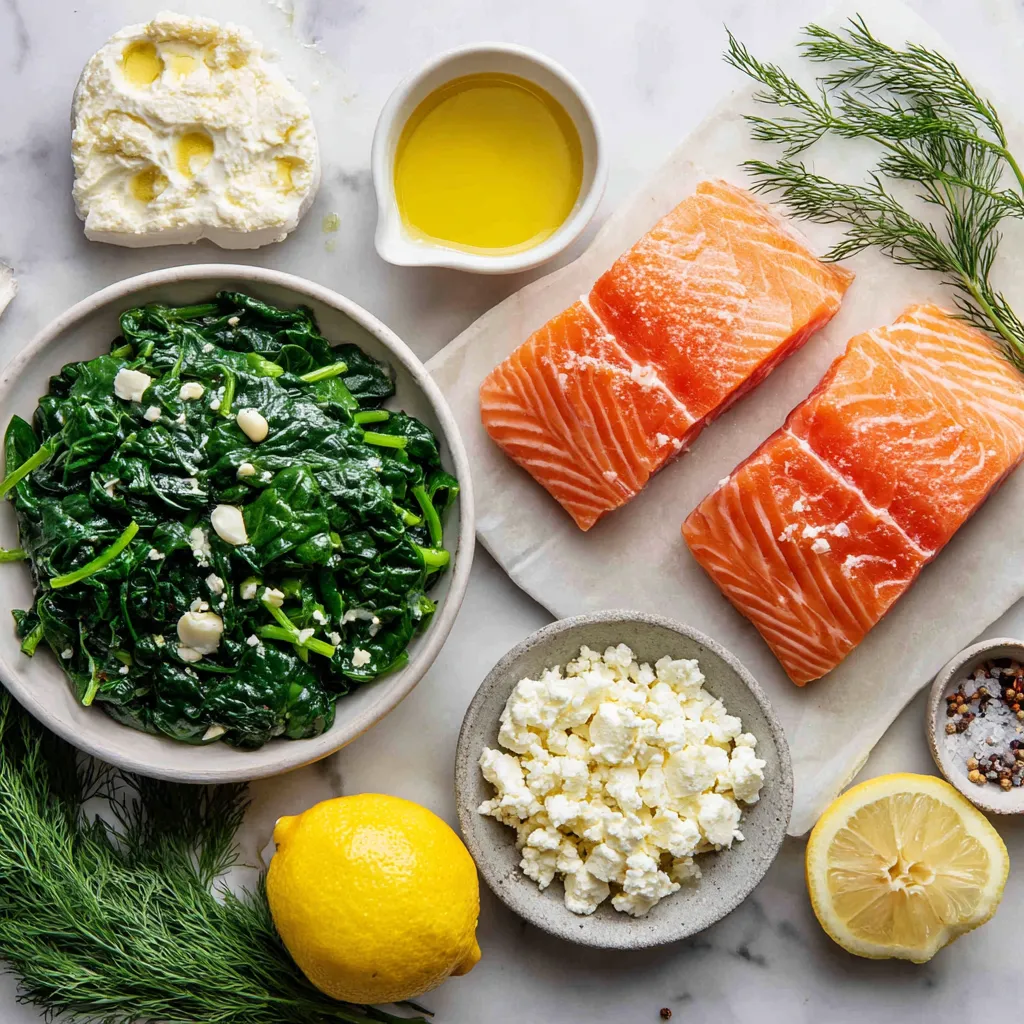
Ingredients
To make Spinach Feta Stuffed Salmon, you need the right ingredients. Here’s what you’ll need:
– Salmon fillets (4 fillets, 6 oz each)
– Fresh spinach (2 cups, chopped)
– Feta cheese (1 cup, crumbled)
– Garlic (2 cloves, minced)
– Cream cheese (1/4 cup, softened)
– Lemon juice (1 tablespoon)
– Olive oil (1 tablespoon)
– Seasoning (Salt and pepper to taste)
– Garnish options (Fresh dill or parsley)
These ingredients create a tasty and healthy dish. Salmon gives you great protein and omega-3s. Spinach adds fiber and iron. Feta cheese gives it a salty kick. Together, they all make a lovely meal.
When buying ingredients, look for fresh salmon with a bright color. Choose spinach that is crisp and bright green. Good feta cheese should be creamy and crumbly. Fresh garlic adds a strong flavor. Use high-quality olive oil for the best taste.
This dish is not only good for you, but it’s also easy to make. You can find these ingredients at your local grocery store. Now, let’s dive into making this delicious meal!
Step-by-Step Instructions
Preparation Steps
1. Preheat your oven to 375°F (190°C). This helps cook the salmon evenly.
2. In a pan, heat 1 tablespoon of olive oil over medium heat. Add 2 minced garlic cloves and sauté for about 1 minute until fragrant.
3. Next, add 2 cups of chopped spinach. Cook until it wilts, which takes about 2-3 minutes. Then remove the pan from heat.
4. In a bowl, mix the sautéed spinach, 1 cup of crumbled feta cheese, 1/4 cup of softened cream cheese, and 1 tablespoon of lemon juice. Stir until everything blends well.
5. To prepare the salmon fillets, take 4 fillets (6 oz each) and cut a pocket into each one. Use a sharp knife and slice through the thickest part but do not cut all the way through.
6. Season both inside and outside of each fillet with salt and pepper to taste.
Cooking Steps
1. Stuff each salmon fillet with the spinach and feta mixture. Gently press down to keep the filling inside.
2. Place the stuffed fillets in a greased baking dish. This will help prevent sticking.
3. Bake in the preheated oven for 20-25 minutes. The salmon should be cooked through and flake easily with a fork.
4. For a golden top, broil the fillets for an extra 2-3 minutes after baking. Watch closely to avoid burning.
5. Once done, take them out of the oven, let them rest for a couple of minutes, and garnish with fresh dill or parsley if you like.
Tips & Tricks
Cooking Tips
– How to avoid overcooking salmon: Use a meat thermometer. The ideal internal temperature is 145°F (63°C). Remove the salmon from the oven when it reaches 140°F (60°C) and let it rest. It will continue to cook.
– Ensuring the stuffing stays inside: Cut a deep pocket in each fillet but don’t slice all the way through. Stuff gently and press lightly to seal the filling. You can also use toothpicks to secure the edges if needed.
– Tips for achieving a golden top: Broil the salmon for 2-3 minutes at the end of baking. Keep an eye on it to prevent burning. A sprinkle of breadcrumbs can also help add texture and color.
Serving Suggestions
– Recommended side dishes: Pair the salmon with steamed asparagus or roasted potatoes. A fresh salad with lemon vinaigrette complements the dish well.
– Best wines to pair with stuffed salmon: A crisp white wine like Sauvignon Blanc works great. Chardonnay is another good option. Both enhance the flavors without overpowering them.
Pro Tips
- Choose the Right Salmon: Opt for wild-caught salmon if possible; it tends to have a firmer texture and richer flavor compared to farmed salmon.
- Keep it Moist: Adding a little cream cheese to the filling helps retain moisture in the salmon while it bakes, resulting in a tender dish.
- Experiment with Herbs: Fresh herbs like dill or parsley can enhance the flavor profile; feel free to add your favorites to the stuffing mix!
- Check for Doneness: Use a fork to gently flake the salmon; it should easily separate and appear opaque when fully cooked.
Variations
Ingredient Substitutions
You can change the cheese in the stuffing. If you don’t have feta, try goat cheese or ricotta. Both add a creamy texture and rich flavor.
You can also swap out spinach for other greens. Kale or Swiss chard works well. Just chop them finely and cook until tender. This keeps the dish fresh and fun.
Flavor Enhancements
Add herbs and spices for more flavor. Dill or basil can brighten up your salmon. You can also sprinkle some red pepper flakes for heat. Just a pinch will do!
Sun-dried tomatoes or olives can add a tasty punch. Chop them finely and mix them into the stuffing. This gives a nice contrast to the creamy cheese.
Storage Info
Storing Leftovers
To keep your Spinach Feta Stuffed Salmon fresh, place leftovers in an airtight container. Store it in the fridge. This method keeps the flavors intact. The dish lasts for about 3 days in the fridge. If you want to enjoy it longer, consider freezing.
Freezing Instructions
You can freeze stuffed salmon fillets for later use. Wrap each fillet in plastic wrap, then place them in a freezer bag. This helps prevent freezer burn. They can stay in the freezer for up to 3 months.
To reheat frozen leftovers, it’s best to thaw them overnight in the fridge. Then, bake at 375°F (190°C) for about 20 minutes. This way, they will taste just as good as fresh.
FAQs
Common Questions
Can I make Spinach Feta Stuffed Salmon in advance?
Yes, you can make this dish ahead of time. Prepare the stuffed salmon and store it in the fridge. Cover it tightly with plastic wrap. You can bake it the next day or even a few hours later. Just add a few extra minutes to the cooking time.
How to tell if the salmon is cooked properly?
To check if the salmon is done, look for a slight flakiness. Use a fork to test the thickest part of the fillet. If it flakes easily and looks opaque, it is ready. The internal temperature should reach 145°F (63°C) for safety.
What can I serve with Spinach Feta Stuffed Salmon?
This stuffed salmon pairs well with many sides. Try a fresh salad, roasted vegetables, or garlic mashed potatoes. Quinoa or rice also make excellent choices. These sides balance the rich flavors of the salmon.
Related Queries
How can I customize this recipe?
You can easily change the recipe to suit your taste. Swap feta cheese for goat cheese or mozzarella. Add sun-dried tomatoes or olives for a different flavor. You can even mix in other herbs like basil or thyme.
Is it healthy to eat stuffed salmon?
Yes, stuffed salmon is a healthy choice. Salmon is high in omega-3 fatty acids, which are good for your heart. The spinach adds vitamins and fiber. Feta cheese adds flavor without too many calories. This dish is nutritious and delicious.
Can I use frozen salmon for this recipe?
Yes, you can use frozen salmon. Just thaw it in the fridge overnight before cooking. Make sure to pat it dry with a paper towel. This helps the stuffing stick better and ensures even cooking.
In this article, we explored how to make Spinach Feta Stuffed Salmon. We covered the ingredients, preparation, cooking steps, and serving tips. You can customize this dish with different ingredients and flavors, making it versatile for any meal. Remember, proper storage keeps your leftovers fresh and tasty. Enjoy your delicious creation and share it with family and friends. This dish is perfect for impressing guests or enjoying a healthy meal at home. Dive in and make this tasty recipe your ow

Spinach & Feta Stuffed Salmon
Ingredients
- 4 fillets salmon (6 oz each)
- 2 cups fresh spinach, chopped
- 1 cup feta cheese, crumbled
- 2 cloves garlic, minced
- 1 quarter cup cream cheese, softened
- 1 tablespoon lemon juice
- 1 tablespoon olive oil
- to taste salt and pepper
- optional fresh dill or parsley for garnish
Instructions
- Preheat your oven to 375°F (190°C).
- In a skillet over medium heat, add olive oil, then sauté the minced garlic until fragrant, about 1 minute.
- Add the chopped spinach to the skillet and cook until wilted, about 2-3 minutes. Remove from heat.
- In a mixing bowl, combine the sautéed spinach, crumbled feta cheese, softened cream cheese, and lemon juice. Mix well until thoroughly combined.
- Using a sharp knife, cut a pocket in each salmon fillet by slicing horizontally through the thickest part, being careful not to cut all the way through.
- Season the inside and outside of each salmon fillet with salt and pepper.
- Stuff each salmon fillet with the spinach and feta mixture, pressing down gently to ensure it stays inside.
- Place the stuffed salmon fillets in a greased baking dish.
- Bake in the preheated oven for 20-25 minutes, or until the salmon is cooked through and flakes easily with a fork.
- For a golden top, you can broil the fillets for an additional 2-3 minutes at the end of baking.
- Remove from the oven, let rest for a couple of minutes, and garnish with fresh dill or parsley if desired.
![- 1 lb boneless, skinless chicken breasts - 2 tablespoons olive oil - Seasonings: chili powder, cumin, smoked paprika, garlic powder - Salt and pepper - Vegetables: red bell pepper, green bell pepper, yellow onion - Tortillas: flour or corn - Garnishes: fresh cilantro, lime wedges When you make easy chicken fajitas, you need fresh and tasty ingredients. Start with 1 pound of boneless, skinless chicken breasts. Cut them into thin strips for quick cooking. Next, add 2 tablespoons of olive oil. This oil helps the flavors stick. For the seasonings, use: - 1 teaspoon chili powder - 1 teaspoon cumin - 1 teaspoon smoked paprika - 1 teaspoon garlic powder These spices give the chicken a bold taste. Don't forget salt and pepper to enhance the flavor. Now, gather your vegetables. You will need: - 1 red bell pepper, sliced - 1 green bell pepper, sliced - 1 yellow onion, sliced These veggies add color and crunch. You will also need tortillas. Choose either 8 small flour or corn tortillas. Finally, fresh cilantro and lime wedges make great garnishes. The cilantro adds freshness, and the lime gives a zesty kick. With these ingredients, you can create a flavorful family dinner that everyone will enjoy. Check the Full Recipe for more tips! Start by mixing the marinade. In a large bowl, combine the olive oil with chili powder, cumin, smoked paprika, garlic powder, salt, and pepper. Stir it well until all the spices blend into the oil. Next, add the sliced chicken to the bowl. Toss the chicken strips in the marinade. Make sure each piece gets coated. Let it sit for 15 to 20 minutes. If you have more time, marinate it in the fridge for up to 2 hours. This gives the chicken great flavor. Heat a large skillet over medium-high heat. Once hot, add the marinated chicken to the skillet. It should sizzle when it hits the pan. Cook for about 5 minutes. Stir occasionally to make sure it cooks evenly. You want the chicken to be cooked through and browned. Check that it is no longer pink in the center. Now it’s time for the veggies! Add the sliced bell peppers and onions to the skillet with the chicken. Stir everything together. Cook for another 5 to 7 minutes. You want the vegetables to be tender but still crisp. This adds a nice texture to the dish. The colors from the peppers and onion will make your fajitas look amazing. For the complete recipe, check the [Full Recipe]. To make the best chicken fajitas, marinating is key. I suggest marinating the chicken for at least 15-20 minutes. If you have more time, try marinating for up to 2 hours in the fridge. This extra time allows the flavors to soak in deeply. For cooking, use medium-high heat. This ensures the chicken gets a nice sear without drying out. When it's time to serve, think about how to make your fajitas pop. I like to serve them on a large platter. You can layer the filling beautifully. Add a sprinkle of fresh cilantro on top for a bright touch. Lime wedges are a must-have for squeezing. They add a nice zing! For sides, consider guacamole, salsa, or a fresh salad. These pair well and add more flavors to your meal. One common mistake is overcooking the chicken. This can make it dry and tough. Keep an eye on it while it cooks. You want juicy, tender pieces. Another mistake is not choosing the right tortillas. Flour tortillas are soft and chewy, while corn tortillas are more traditional. Make sure to warm them up before serving. This step makes them easier to fold and enjoy. For the full recipe, check out the Easy Chicken Fajitas section above. {{image_2}} You can easily swap chicken for other proteins. Beef works great if you slice it thin. Use flank steak or sirloin for the best flavor. Shrimp is another tasty option. Just make sure to cook shrimp until it turns pink. Both options keep the dish fun and delicious. If you want a meatless meal, try using plant-based proteins. Tofu or tempeh can be great choices. You can also load up on veggies. Try mushrooms, zucchini, or even eggplant for a hearty bite. The mix of colors makes your fajitas look as good as they taste. To amp up the flavor, add jalapeños. They give a nice heat to the dish. You can also play with different spices. Try adding oregano or coriander for a unique twist. A squeeze of lime juice brightens the flavors, making your fajitas even more amazing. For the full recipe, check out the Easy Chicken Fajitas. To keep your leftover fajitas fresh, store them in airtight containers. Make sure the fajitas cool down to room temperature first. This helps prevent condensation, which can make them soggy. If you have extra tortillas, store them separately to keep them soft. Reheating chicken fajitas is easy. You can do this in a skillet over medium heat. Add a splash of water to steam them slightly and keep them moist. Stir occasionally for about 5 minutes. If you prefer the microwave, place them in a microwave-safe dish and cover with a damp paper towel. Heat for 1 to 2 minutes, checking every 30 seconds. Freezing chicken fajitas is a great way to save time. First, let the cooked fajitas cool completely. Then, portion them into freezer bags or containers. Remove as much air as possible to prevent freezer burn. You can freeze both the chicken and vegetables together. When you’re ready to eat them, thaw overnight in the fridge. Reheat as mentioned above for a quick meal. To add heat, you can use jalapeños. Slice them thin and toss in with the chicken. You could also add a pinch of cayenne pepper to the marinade. If you want more flavor, try a chipotle in adobo sauce. Just a small amount packs a punch. Adjust the spice to your taste. Yes, you can add many vegetables. Here are some great options: - Zucchini - Mushrooms - Corn - Asparagus - Cherry tomatoes These veggies will add color and flavor to your fajitas. Fajitas are great with various sides. Here are some tasty ideas: - Mexican rice - Refried beans - Guacamole - Salsa - Sour cream - Fresh corn salad These sides will complement your chicken fajitas well. You can find the full recipe for Easy Chicken Fajitas in the earlier section. You’ve learned how to make easy chicken fajitas that burst with flavor. We covered the key ingredients, easy steps, and helpful tips. You can customize your fajitas with different proteins and veggies, too. Remember, the right cooking method and storage will keep them fresh. Enjoy crafting your own delicious meals at home! Now, go ahead and impress your family or friends with your fajita skills!](https://dailydishly.com/wp-content/uploads/2025/06/bddc0842-410c-41cd-a0e7-7c4486f739b3-768x768.webp)