Chicken Caesar Pasta Salad Fresh and Simple Recipe
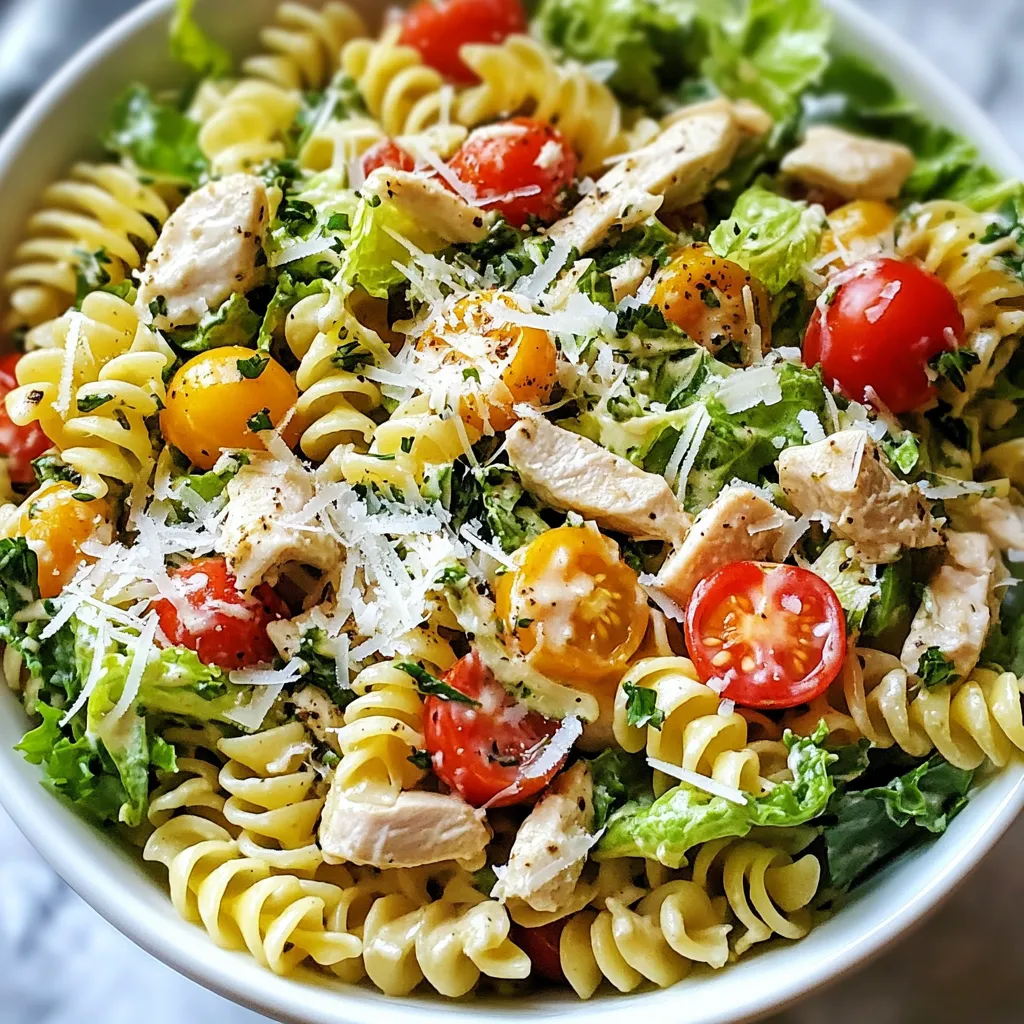

Craving a tasty dish that’s both fresh and simple? Look no further! My Chicken Caesar Pasta Salad recipe is just what you need. It combines delicious chicken, creamy dressing, and pasta, all tossed together in one bowl. Whether you want a quick lunch or a side for dinner, this dish is perfect. Let’s dive into the easy steps to make this flavorful meal. You’ll love how fast and simple it is to prepare!
Why I Love This Recipe
- Quick and Easy: This salad comes together in just 15 minutes of prep, making it a perfect choice for busy weeknights.
- Flavorful and Satisfying: The combination of chicken, pasta, and Caesar dressing creates a deliciously satisfying meal.
- Versatile: You can easily customize the salad with your favorite veggies or proteins, making it suitable for everyone.
- Make-Ahead Friendly: This salad is great for meal prep, as it can be made ahead of time and stored in the fridge.
Ingredients
List of Ingredients
To make Chicken Caesar Pasta Salad, gather these items:
– 2 cups rotini pasta
– 2 cups cooked chicken breast, diced
– 1 cup romaine lettuce, chopped
– ½ cup cherry tomatoes, halved
– ½ cup Parmesan cheese, shredded
– ¼ cup Caesar dressing (store-bought or homemade)
– 1 tablespoon olive oil
– 1 clove garlic, minced
– Salt and pepper to taste
– Fresh parsley, chopped for garnish (optional)
Necessary Kitchen Tools
You will need a few tools to prepare this salad:
– Large pot for boiling pasta
– Large mixing bowl for combining ingredients
– Small skillet for sautéing garlic
– Knife and cutting board for chopping
– Measuring cups and spoons for accuracy
– Colander for draining pasta
Optional Garnishes
These garnishes can enhance the look and taste:
– Fresh parsley, chopped
– Extra Parmesan cheese for serving
– Croutons for added crunch

Step-by-Step Instructions
Cooking the Pasta
First, bring a large pot of salted water to a boil. Add 2 cups of rotini pasta. Cook it according to the package instructions. You want it to be al dente, which means it should still have a little bite. This usually takes about 8-10 minutes. Once the pasta is done, drain it well in a colander. Rinse it under cold water to stop the cooking process. This helps keep the pasta firm and cool for the salad.
Preparing the Chicken
If your chicken is not cooked yet, grill or bake 2 cups of chicken breast. Make sure it cooks fully. The chicken should reach an internal temperature of 165°F. Let it cool for a few minutes, then dice it into bite-sized pieces. If you have leftover chicken, you can use that too. It saves time and adds great flavor.
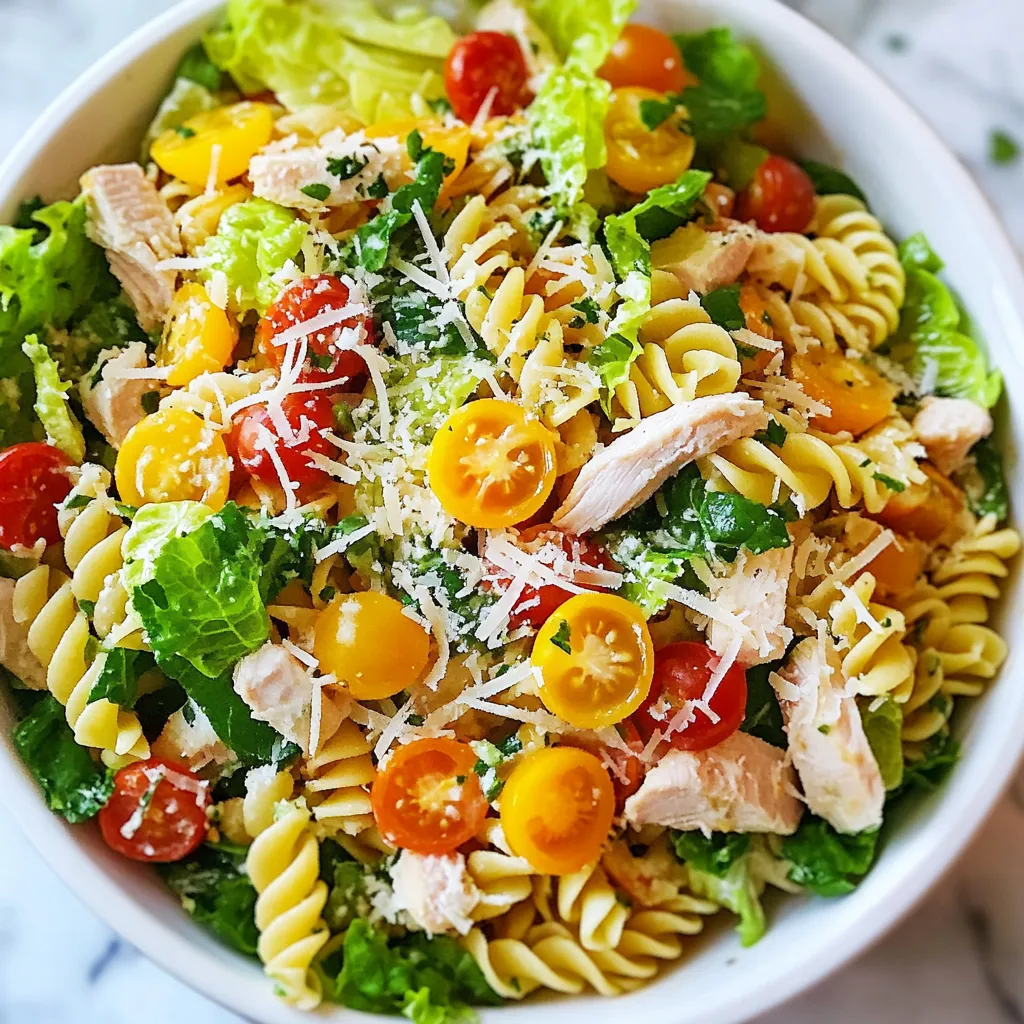
Assembling the Salad
In a large mixing bowl, combine the cooled pasta, diced chicken, 1 cup of chopped romaine lettuce, and ½ cup of halved cherry tomatoes. Sprinkle in ½ cup of shredded Parmesan cheese for that cheesy goodness. In a small skillet, heat 1 tablespoon of olive oil and add 1 clove of minced garlic. Sauté it for about 1 minute until it smells nice. Be careful not to let it brown. Once it’s cool, drizzle Caesar dressing over your salad mix. Toss everything together until it’s well coated. Add salt and pepper to taste. For the best flavor, cover your salad and chill it in the fridge for at least 30 minutes. Before serving, toss it again and add chopped parsley if you like. Enjoy!
Tips & Tricks
Ensuring Perfectly Cooked Pasta
To get great pasta, start with a big pot of salted water. Use about one tablespoon of salt for every quart of water. Bring the water to a rolling boil. Then, add the rotini pasta. Cook it until it is al dente, which means it should still have a little bite. This usually takes about 8 to 10 minutes. After cooking, drain the pasta and rinse it with cold water. This stops the cooking. It will also cool the pasta for your salad.
Best Types of Chicken to Use
You can use any cooked chicken for this salad. I prefer grilled or baked chicken breast. It has a nice flavor and stays juicy. Make sure the chicken reaches 165°F inside. You can also use rotisserie chicken for ease. Just shred it into bite-sized pieces. Both options work well and add protein to your dish.
Flavor Enhancements and Seasoning Tips
To boost the taste, try adding fresh herbs. Chopped parsley adds color and a fresh taste. You can also add a dash of lemon juice for brightness. If you want more flavor, sprinkle in some black pepper and a pinch of salt. For a kick, try adding red pepper flakes. These simple additions can take your salad to the next level!
Pro Tips
- Cook Pasta Al Dente: For the best texture, ensure the rotini pasta is cooked al dente. This prevents it from becoming mushy when mixed with the dressing.
- Use Fresh Ingredients: Fresh romaine lettuce and ripe cherry tomatoes enhance the flavor and texture of your salad. Avoid wilted or overripe produce for the best results.
- Customize Your Dressing: Feel free to adjust the amount of Caesar dressing to your taste. You can also add a squeeze of lemon juice for extra brightness.
- Let It Chill: Allowing the salad to chill for at least 30 minutes helps the flavors meld together, making for a more delicious dish when served.
Variations
Vegetarian Adaptations
You can make a tasty vegetarian version of Chicken Caesar Pasta Salad. Instead of chicken, use chickpeas or grilled tofu. Both options add protein and texture. You can also add nuts for crunch. Try walnuts or almonds for a nice twist.
Adding Extra Vegetables
Want to boost the nutrition? Add more veggies! Some great choices are bell peppers, cucumbers, or even broccoli. These add color and flavor. You can also toss in spinach or kale for extra greens. Just chop them up and mix them in.
Alternative Dressings and Flavor Profiles
Switching up the dressing can change the whole salad. Use a yogurt-based Caesar for a lighter touch. You can also try ranch or Italian dressing. For a spicy kick, a chipotle dressing works well. Don’t be afraid to experiment with flavors that you enjoy!
Storage Info
How to Store Leftovers
To store leftovers, place the Chicken Caesar Pasta Salad in an airtight container. Make sure to cool it first. This helps keep the salad fresh. You can refrigerate it for up to three days. If you want to keep it longer, consider freezing.
Freezing Options
You can freeze Chicken Caesar Pasta Salad, but it may change texture. To freeze, place it in a freezer-safe container. Leave some space at the top for expansion. It’s best to eat it within two months. When ready to eat, thaw it in the fridge overnight.
Best Practices for Maintaining Freshness
To keep your salad fresh, store the dressing separately. Add it just before serving. This keeps the pasta and veggies crisp. Avoid using metal containers, as they can react with the dressing. Use glass or plastic instead. Always check for freshness before eating.
FAQs
Can I use a different type of pasta?
Yes, you can use any pasta you like. Bowtie, penne, or fusilli all work well. Just remember to cook it until al dente. The shape can change the texture, but the taste remains great.
How long can Chicken Caesar Pasta Salad last in the fridge?
Chicken Caesar Pasta Salad can last for about 3 to 4 days in the fridge. Make sure to store it in an airtight container. If you notice any change in smell or color, toss it out.
Can I make this salad ahead of time?
Absolutely! You can prepare this salad a day before serving. Just keep it in the fridge. This allows the flavors to meld nicely. Before serving, give it a quick toss to refresh the ingredients.
This blog post covered how to make a tasty Chicken Caesar Pasta Salad. We went over the key ingredients, tools you need, and optional garnishes to bring out flavor. I shared step-by-step instructions for cooking pasta, chicken, and assembling your salad. You learned tips for perfect pasta, the best chicken types, and flavor ideas. We also noted variations like vegetarian options, extra veggies, and storage tips.
Remember, this salad is flexible and fun. Enjoy your cookin


![- 1 pound boneless, skinless chicken breasts, diced - 1 cup long-grain rice - 2 cups chicken broth - 1 cup diced bell peppers (red and green) - 1 small onion, chopped - 3 cloves garlic, minced - Salt and pepper, to taste - 1 cup frozen peas - 1 cup shredded cheddar cheese - 2 tablespoons olive oil - Fresh parsley, for garnish (optional) I love this dish because it is easy to make and so tasty! Each ingredient plays a key role in the flavor. The chicken adds protein and heartiness. The rice absorbs all the delicious broth, making it comforting. Bell peppers and onions give a nice crunch and sweetness. Garlic adds depth, while peas bring a pop of color and texture. Don't forget about the cheese! It melts on top and makes the dish creamy and rich. You can even mix in some spices like smoked paprika, dried thyme, and oregano to add warmth and complexity. You can find the full recipe for this Chicken and Rice Skillet Casserole at the end of the article. This meal is perfect for busy weeknights or cozy weekends. - Heat 2 tablespoons of olive oil over medium heat in a large skillet. - Cut 1 pound of boneless, skinless chicken breasts into small pieces. - Season the chicken with salt, pepper, smoked paprika, dried thyme, and oregano. - Sauté the chicken in the hot oil until it turns golden brown, about 5-7 minutes. - Once cooked, remove the chicken from the skillet and set it aside. - In the same skillet, add 1 small chopped onion and 1 cup of diced bell peppers. - Cook the veggies until they soften, about 3-4 minutes. - Stir in 3 cloves of minced garlic and cook for one more minute until fragrant. - Mix in 1 cup of uncooked long-grain rice with the cooked vegetables. - Pour in 2 cups of chicken broth and bring everything to a gentle simmer. - Taste the broth and adjust seasoning with salt and pepper, if needed. - Return the cooked chicken to the skillet, stirring to mix well. - Cover the skillet and reduce the heat to low. - Cook for about 18-20 minutes or until the rice is tender and absorbs most of the liquid. - In the last 5 minutes, stir in 1 cup of frozen peas and sprinkle 1 cup of shredded cheddar cheese on top. - Cover again to let the cheese melt before serving. For the full recipe, check the [Full Recipe]. To ensure the rice cooks evenly, rinse it well before use. Rinsing removes excess starch, leading to fluffier rice. Use a medium heat when cooking. This helps the rice absorb the broth without burning. Adjusting seasonings can make a big difference. Taste the broth after adding chicken. You might want to add a little more salt or pepper. If you like it spicy, add a pinch of cayenne. For side dishes, a fresh green salad pairs great. You can also serve crusty bread for dipping. To garnish, sprinkle fresh parsley on top. This adds a pop of color and freshness. Consider adding more cheese on top for a cheesy finish. You can also serve it with sliced avocado or a dollop of sour cream. Use medium heat to start cooking your casserole. After adding the broth, reduce the heat to low. This slow cooking helps the rice fluff up nicely. If you have an electric stove, cook for about 20 minutes. For gas stoves, keep an eye on the time, as they can cook faster. Adjust your cooking time based on the heat you use and your stove type. {{image_2}} You can switch the chicken for other proteins. Turkey works great for a leaner option. Tofu is a wonderful choice for a plant-based meal. Both taste good and cook well in this dish. You can also try different rice types. For gluten-free options, use brown rice or cauliflower rice. These will change the texture but still taste amazing. Want to spice up your casserole? Add fresh herbs like basil or parsley. Dried herbs such as rosemary or sage also work well. If you love heat, throw in some red pepper flakes. You can even use jalapeños for a bigger kick. Experiment with spices to find your perfect blend. You can easily adapt this dish for the oven. Preheat your oven to 375°F. After cooking the chicken and veggies, transfer everything to a baking dish. Pour in the broth and cover with foil. Bake for 30-35 minutes or until the rice is soft. Another way is to use a slow cooker. Just layer all the ingredients in the cooker. Set on low for 4-6 hours and let it do the work. Enjoy a hands-off cooking day! To keep your Chicken and Rice Skillet Casserole fresh, follow these tips: - Refrigeration: Allow the casserole to cool to room temperature before placing it in an airtight container. Store in the fridge for up to three days. - Freezing: If you want to save it longer, freeze individual portions. Use freezer-safe containers or bags. Wrap them well to avoid freezer burn. You can freeze it for up to three months. When it's time to enjoy your leftovers, you have two great options: - Oven: Preheat your oven to 350°F (175°C). Place the casserole in an oven-safe dish. Cover it with foil to keep it moist. Heat for about 20-25 minutes, or until it's hot all the way through. - Microwave: If you're in a hurry, use the microwave. Place your portion in a microwave-safe bowl. Heat on high for about 2-3 minutes. Stir halfway to heat evenly. To keep the texture and flavor, the oven is the best choice. It helps the dish stay creamy and delicious. Enjoy your reheated Chicken and Rice Skillet Casserole just like it was fresh! For the full recipe, check out the Full Recipe section. Yes, you can make this dish ahead. Just cook it fully and cool it down. Store it in an airtight container in the fridge. When you're ready to eat, reheat it on low heat or in the oven. This keeps the flavors fresh and the dish ready to serve. If you need a substitute for chicken broth, try vegetable broth or water. You can also use bouillon cubes mixed with water. These options add flavor and keep your dish tasty and moist. Absolutely! This casserole is perfect for meal prep. You can portion it into single servings. Use small containers for easy grab-and-go meals. It warms up well in the microwave or oven, making it a great choice for busy days. This casserole can last about 3-4 days in the fridge. Make sure to keep it in a sealed container. If you want to keep it longer, you can freeze it for up to 3 months. You can serve this casserole with a simple side salad or some crusty bread. These sides balance the meal and add freshness. You might also enjoy it with steamed veggies or a light soup for a complete dinner. For the [Full Recipe], check out the main article. This chicken and rice skillet casserole is simple to make and delicious. You mix chicken, rice, and veggies, then let it all simmer together. Add cheese on top for a tasty finish. Remember, you can change ingredients or cooking methods to fit your needs. Store leftovers safely for future meals. Overall, this dish is perfect for any weeknight dinner. Enjoy creating your own version, and serve it with your favorite sides.](https://dailydishly.com/wp-content/uploads/2025/06/c524a3fd-62d5-4d38-9ae2-7923776d4e2f-768x768.webp)