
Honey Garlic Turkey Meatballs Easy and Flavorful Dish

Looking for a quick, tasty meal? Honey Garlic Turkey Meatballs are your answer! I’ll show you how to mix tender turkey with sweet honey and zesty garlic. This dish is not only easy to make, but it’s also packed with flavor. Let’s dive into the simple steps, tasty tips, and delicious variations that will make your dinner a hit. You’ll want to make this dish again and again!
Why I Love This Recipe
- Quick and Easy: This recipe is simple to follow and requires minimal prep time, making it perfect for busy weeknights.
- Flavorful Sauce: The honey garlic sauce adds a delightful sweetness and depth of flavor that complements the turkey meatballs beautifully.
- Healthy Option: Using ground turkey instead of beef makes this dish a leaner, healthier alternative without sacrificing taste.
- Versatile Dish: These meatballs can be served as an appetizer, in a sandwich, or over a bed of rice, making them a versatile addition to any meal.
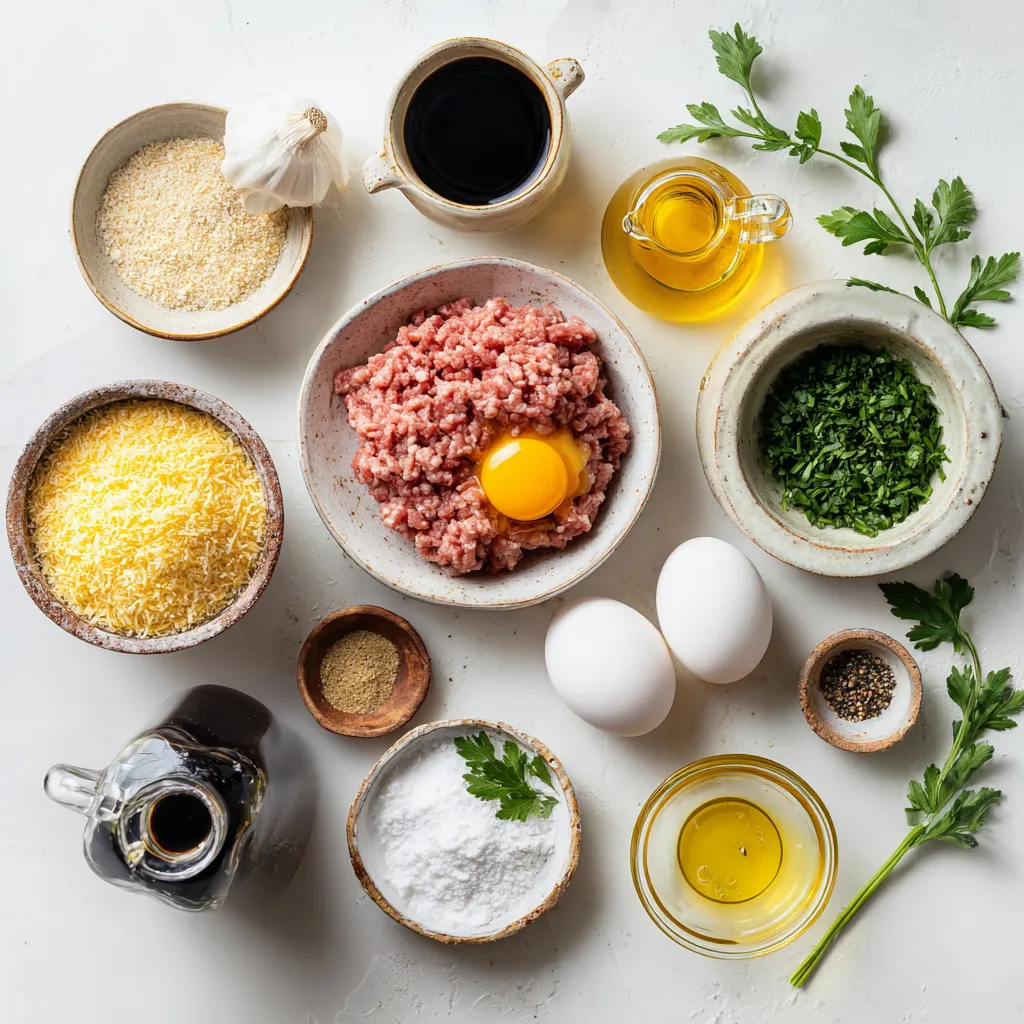
Ingredients
Main Ingredients for Honey Garlic Turkey Meatballs
To make honey garlic turkey meatballs, you need a few key ingredients. Here’s a list:
– 1 lb ground turkey
– 1/4 cup breadcrumbs
– 1/4 cup grated Parmesan cheese
– 1/4 cup chopped fresh parsley
– 1 large egg
– 2 cloves garlic, minced
– 1/2 tsp salt
– 1/4 tsp black pepper
– 1/2 tsp onion powder
– 1/2 cup honey
– 1/4 cup soy sauce (low-sodium)
– 1 tsp sesame oil (optional)
– 1 tsp cornstarch mixed with 2 tsp water
These ingredients work together to create juicy meatballs with a sweet and savory sauce. The turkey keeps them light, while the honey and soy sauce add flavor.
Optional Seasonings and Add-ins
You can customize your meatballs with optional seasonings and add-ins. Here are some ideas:
– Fresh herbs like thyme or basil
– A pinch of red pepper flakes for heat
– Chopped green onions for extra flavor
– Grated carrots for added texture
Feel free to mix and match these options. They can make your dish even more special!
Ingredient Substitutions
If you lack any main ingredients, don’t worry! Here are some easy swaps:
– Use ground chicken instead of turkey.
– Substitute almond flour for breadcrumbs for a gluten-free option.
– Try nutritional yeast instead of Parmesan for a dairy-free version.
– Replace honey with maple syrup for a vegan alternative.
These substitutions help you adjust the recipe to fit your needs without losing flavor. Enjoy experimenting!
Step-by-Step Instructions
Preparing the Meatball Mixture
Start by grabbing a large bowl. In this bowl, add 1 pound of ground turkey. Then, mix in a quarter cup of breadcrumbs. Next, add a quarter cup of grated Parmesan cheese and a quarter cup of chopped fresh parsley. Crack in one large egg and toss in two minced garlic cloves. Now, sprinkle in half a teaspoon of salt, a quarter teaspoon of black pepper, and half a teaspoon of onion powder. Use your hands to mix everything together until well combined. It should feel sticky and hold together nicely.
Baking the Meatballs
Preheat your oven to 400°F (200°C). While the oven heats up, line a baking sheet with parchment paper. Once ready, take the turkey mixture and form it into meatballs, about 1 inch wide. Place the meatballs on the baking sheet, making sure they are spaced apart. Bake them for about 20 minutes. They should turn golden brown and be fully cooked when done. You can check the middle with a meat thermometer; it should read 165°F (74°C).
Making the Honey Garlic Sauce
While the meatballs bake, it’s time for the sauce. In a small saucepan, mix together half a cup of honey and a quarter cup of low-sodium soy sauce. If you like, add 1 teaspoon of sesame oil for extra flavor. Heat over medium heat and stir well. Bring the mixture to a simmer. To thicken the sauce, mix 1 teaspoon of cornstarch with 2 teaspoons of water. Add this to the simmering sauce. Keep stirring until it thickens to your liking.
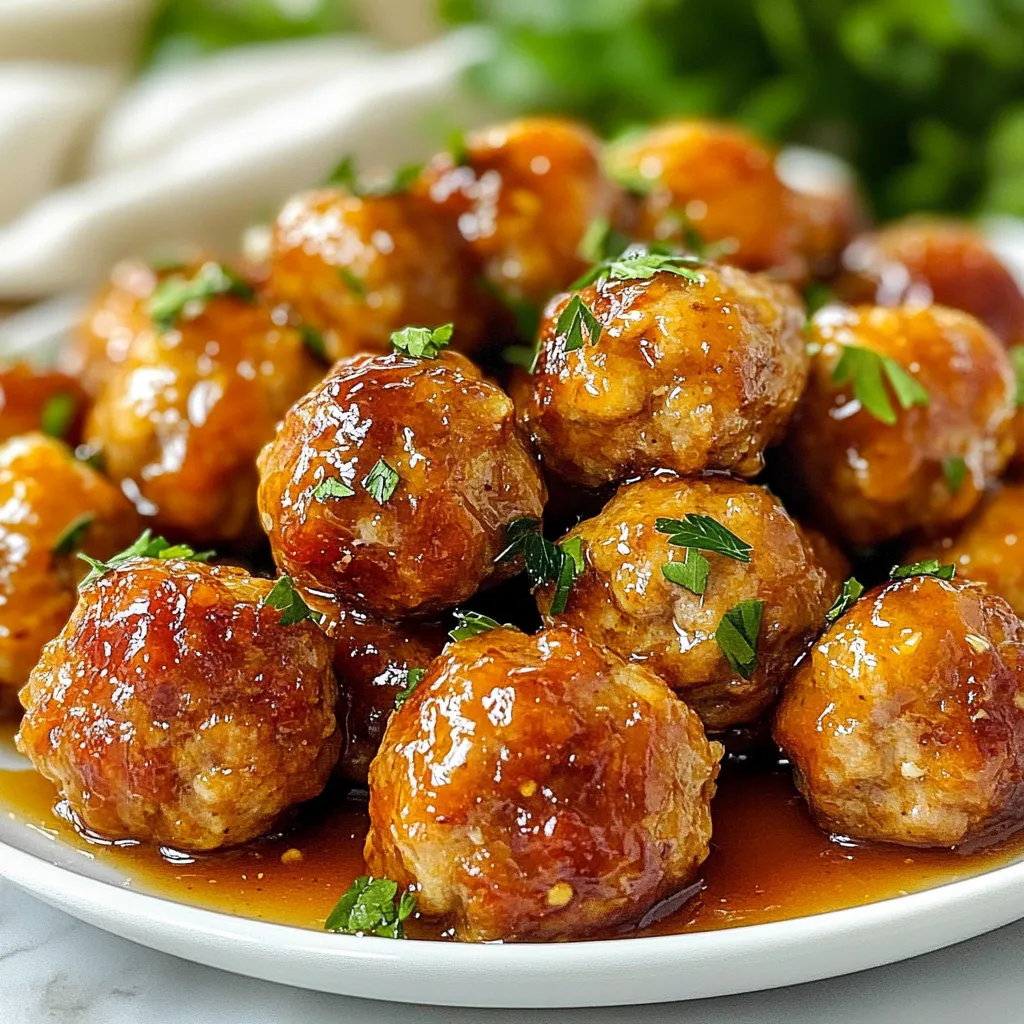
Once the meatballs are ready, take them out of the oven. Place them on a serving dish and drizzle the honey garlic sauce over them. Make sure every meatball gets a nice coat of sauce. Enjoy these bites of flavor right away!
Tips & Tricks
How to Achieve Perfectly Tender Meatballs
To make tender meatballs, use ground turkey with some fat. The fat keeps them moist. Mix the meat gently with your hands. Overmixing can make them tough. Form the meatballs into 1-inch balls for even cooking. Bake at 400°F for 20 minutes. Use a meat thermometer to check for doneness. The center should reach 165°F.
Serving Suggestions and Pairings
Honey garlic turkey meatballs are great on their own. Serve them over rice or noodles for a filling meal. They also pair well with steamed veggies. Try them with a side of a fresh salad. For a fun twist, serve them in a pita or on a slider bun. You can also add them to a stir-fry for extra flavor.
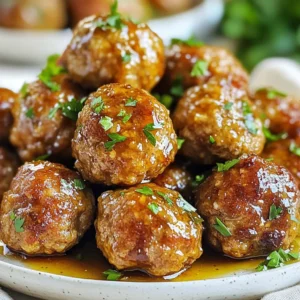
Garnishing Ideas
Garnishing adds a pop of color and flavor. Chopped parsley is a great choice. It adds freshness and looks nice. You can also sprinkle sesame seeds on top for crunch. Chopped green onions can give a nice bite. Drizzle extra honey garlic sauce on top for more sweetness.
Pro Tips
- Use Fresh Herbs: Fresh parsley enhances the flavor of the meatballs and adds a vibrant color. Consider adding other herbs like basil or cilantro for a twist.
- Check for Doneness: Ensure the meatballs are thoroughly cooked by using a meat thermometer; they should reach an internal temperature of 165°F (74°C).
- Adjust Sweetness: If you prefer a less sweet sauce, gradually add honey to taste. You can also balance it with a splash of vinegar for acidity.
- Try Different Proteins: Feel free to substitute ground turkey with chicken, beef, or even plant-based alternatives for a different flavor profile.
Variations
Alternative Proteins to Use
You can swap turkey for other meats. Ground chicken works well and has a lighter taste. For beef lovers, try ground beef for a richer flavor. If you prefer a plant-based option, use lentils or chickpeas. These alternatives give you many choices for different diets.
Different Sauces and Flavor Profiles
While honey garlic sauce is sweet, you can change it up. Use teriyaki sauce for a different flavor. You can also try BBQ sauce for a smoky twist. For a spicy kick, add sriracha or chili paste to your sauce. These changes let you play with flavors and keep meals exciting.
Cooking Methods: Baking vs. Pan-Frying
Baking is easy and healthy. It cooks the meatballs evenly and keeps them moist. Just preheat your oven to 400°F and let them bake for about 20 minutes. If you want a crispier texture, pan-frying is great too. Heat oil in a skillet and cook the meatballs until golden brown on all sides. Each method gives you delicious results, so choose what you like best!
Storage Info
How to Store Leftover Meatballs
After enjoying your honey garlic turkey meatballs, store any leftovers in a sealed container. They stay fresh in the fridge for up to three days. Make sure they cool down to room temperature before sealing. This helps keep them from getting soggy.
Freezing Honey Garlic Turkey Meatballs
To freeze your meatballs, first let them cool completely. Place them in a single layer on a baking sheet. Freeze them for about an hour. Once they are firm, transfer the meatballs to a freezer bag. Label the bag with the date. They can stay frozen for up to three months.
Reheating Instructions
When you’re ready to eat the meatballs again, you can reheat them in different ways. For the oven, preheat it to 350°F (175°C). Place the meatballs on a baking sheet and heat for about 15 minutes. If using a microwave, place a few meatballs on a plate and cover them with a damp paper towel. Heat for 1-2 minutes, checking to see if they are hot. Enjoy your tasty meal!
FAQs
Can I use ground chicken instead of turkey?
Yes, you can use ground chicken. It works just like ground turkey. Both meats are lean and have similar textures. The flavor may change slightly, but the dish will still taste great. You might find ground chicken a bit juicier. Just be sure to follow the same steps in the recipe.
How do I know when the meatballs are fully cooked?
To check if the meatballs are done, use a meat thermometer. Insert it into the center of a meatball. It should read 165°F (74°C). If you don’t have a thermometer, cut one in half. The meat should be brown, and no pink should show. The juices should run clear.
What dishes can I serve with honey garlic turkey meatballs?
These meatballs pair well with many sides. You can serve them with steamed rice or noodles. They also taste great on a bed of greens. Consider adding a fresh salad or veggies. For a fun twist, you can make meatball subs with crusty bread. They are versatile and easy to enjoy!
This post covered how to make honey garlic turkey meatballs. You learned about the key ingredients, tips for the best results, and possible variations. Each step, from mixing to serving, helps you create tasty meals. Always check all cooking times to ensure they are done right. Whether you want to bake or fry, there’s a way to match your taste. Remember, these meatballs freeze well and reheat nicely. Enjoy making this easy dish that everyone will lov
Honey Garlic Turkey Meatballs
Ingredients
- 1 lb ground turkey
- 0.25 cup breadcrumbs
- 0.25 cup grated Parmesan cheese
- 0.25 cup chopped fresh parsley
- 1 large egg
- 2 cloves garlic, minced
- 0.5 tsp salt
- 0.25 tsp black pepper
- 0.5 tsp onion powder
- 0.5 cup honey
- 0.25 cup soy sauce (low-sodium)
- 1 tsp sesame oil (optional)
- 1 tsp cornstarch mixed with 2 tsp water (for thickness)
Instructions
- In a large bowl, combine the ground turkey, breadcrumbs, Parmesan cheese, chopped parsley, egg, minced garlic, salt, pepper, and onion powder. Mix until well combined.
- Preheat your oven to 400°F (200°C) and line a baking sheet with parchment paper.
- Using your hands, form the turkey mixture into meatballs about 1 inch in diameter. Place them on the prepared baking sheet.
- Bake the meatballs in the preheated oven for about 20 minutes, or until they are fully cooked and golden brown.
- While the meatballs are baking, prepare the honey garlic sauce. In a small saucepan over medium heat, combine honey, soy sauce, and sesame oil. Stir well and bring to a simmer.
- Once the sauce is simmering, add the cornstarch mixture to thicken the sauce slightly, stirring constantly until it reaches the desired consistency.
- Once the meatballs are cooked, remove them from the oven and transfer to a serving dish. Drizzle the honey garlic sauce over the meatballs, ensuring they are well coated.
- Serve warm, garnished with additional parsley if desired.


 link. In this blog post, I shared the secrets behind a delicious Honey Garlic Shrimp Stir-Fry. You'll find main ingredients like honey, shrimp, and fresh veggies. I provided clear steps for preparing the sauce, cooking shrimp, and stir-frying vegetables. I also included handy tips, variations, and storage advice. I hope you feel confident to try this simple dish. Enjoy experimenting with flavors and make it your own! Cooking should be fun and satisfying.](https://dailydishly.com/wp-content/uploads/2025/05/962d655e-f29a-4340-8cbb-ef8b8eb83789-768x768.webp)
![To make Chicken and Cheese Enchiladas Casserole, you need the right ingredients. Here they are: - 2 cups cooked chicken, shredded - 1 can (15 oz) black beans, rinsed and drained - 1 cup frozen corn - 1 can (10 oz) enchilada sauce (red or green) - 2 cups shredded cheese (cheddar and Monterey Jack mix) - 8 corn tortillas - 1 small red onion, diced - 1 teaspoon ground cumin - 1 teaspoon chili powder - Salt and pepper to taste - Fresh cilantro, for garnish - Sliced jalapeños, for garnish (optional) Each ingredient serves a purpose. The chicken adds protein, while the beans and corn provide fiber. The enchilada sauce gives a rich flavor. The cheese melts beautifully, creating a creamy texture. Tortillas hold it all together. Don't forget the spices! They bring warmth and depth to the dish. Using fresh ingredients makes a big difference. Fresh cilantro adds color and bright flavor. If you want a kick, sliced jalapeños can spice things up. For a full guide on making this dish, check the Full Recipe. - Preheat the oven to 350°F (175°C). - In a large bowl, mix the cooked chicken, black beans, corn, half the enchilada sauce, cumin, chili powder, diced onion, salt, and pepper. Stir it well. This mix gives your casserole a great flavor. - Take a 9x13 inch baking dish and spread a thin layer of the remaining enchilada sauce on the bottom. - Place 4 corn tortillas over the sauce. Overlap them slightly. This helps keep everything together. - Spoon half of your chicken and bean mix over the tortillas. Then sprinkle half of the cheese on top. - Repeat this with another layer of tortillas, the rest of the chicken mixture, and the remaining cheese. - End with a final layer of tortillas and drizzle any remaining enchilada sauce on top. This keeps the dish moist. - Cover the baking dish with aluminum foil. Bake in the preheated oven for 20 minutes. - After 20 minutes, remove the foil. Bake for an extra 10-15 minutes. This lets the cheese get bubbly and golden brown. - Once done, take it out and let it sit for about 5 minutes before slicing. This helps it hold its shape. - For the full recipe, check the detailed instructions above. To make shredding chicken easy, use two forks. Hold one fork in each hand. Pull the chicken apart in opposite directions. This method works great and saves time. You can also use a stand mixer with a paddle attachment. Just place the cooked chicken in the bowl and mix on low speed. To prevent soggy tortillas, lightly fry them in oil first. This step makes them crisp and adds flavor. You can also warm them in the oven for a few minutes. This keeps them from getting too soft when layered in the casserole. For a great side dish, serve Mexican rice or refried beans. These pair nicely with the creamy casserole. You can also add a fresh green salad on the side. A simple salad with lettuce, tomatoes, and avocado adds freshness. To enhance your casserole's look, garnish with fresh cilantro and jalapeño slices. These colorful toppings add a nice touch. A drizzle of extra enchilada sauce can also make it pop. You can serve the casserole on individual plates for a nice presentation. For the full recipe, check out the Chicken and Cheese Enchiladas Casserole section above. {{image_2}} If you have leftover ingredients, use them! You can swap cooked chicken for shredded beef or even pork. If you have extra veggies, toss in bell peppers or zucchini for added color and nutrients. You can also switch the black beans for pinto beans or kidney beans. They add a nice texture and flavor. For a twist, try chickpeas for a protein boost. Adjust the spice levels to fit your taste. Use mild chili powder for a gentle heat or add cayenne pepper for a kick. You can also mix in diced green chiles for extra flavor without too much heat. If you want a meatless version, skip the chicken and add more beans. You can use lentils or quinoa for protein. Toss in spinach or kale for a healthy touch. Enjoy the variety! For the full recipe, check out the [Full Recipe]. To keep your Chicken and Cheese Enchiladas Casserole fresh, store it in an airtight container in the fridge. It will last for about 3 to 4 days. If you want to keep it longer, freeze it. Wrap it well in plastic wrap and aluminum foil. It can last in the freezer for up to 3 months. Just remember to label it with the date. When you're ready to enjoy leftovers, preheat your oven to 350°F (175°C). Place the casserole in an oven-safe dish. Cover it with aluminum foil to keep it moist. Bake for about 20 minutes. If you prefer to use a microwave, slice a portion and place it on a microwave-safe plate. Heat it for 1-2 minutes, checking often. Make sure it is hot throughout. Avoid overheating, as it can make the dish dry. For the best taste, use the oven when possible. How can I make Chicken and Cheese Enchiladas Casserole gluten-free? To make this casserole gluten-free, use corn tortillas. Check that your enchilada sauce is gluten-free too. Many brands offer gluten-free options. Can I prepare this casserole in advance? Yes, you can prepare it a day ahead. Assemble the casserole, then cover and refrigerate. Bake it just before serving. What are the best sides to serve with Chicken and Cheese Enchiladas Casserole? Some great sides include refried beans, Mexican rice, or a fresh salad. These add color and flavor to your meal. Is it possible to add more vegetables to the recipe? Absolutely! You can add bell peppers, zucchini, or spinach. Just chop them small and mix them in with the chicken. Can I use other types of cheese besides cheddar and Monterey Jack? Yes, feel free to experiment! You can use pepper jack for spice or even queso fresco for a creamy touch. This post covered the tasty Chicken and Cheese Enchiladas Casserole. We looked at the main ingredients, steps to create it, tips to perfect it, and storage methods. You can customize this dish easily with varied ingredients or toppings. Remember, cooking should be fun and creative. I hope you enjoy making this hearty casserole as much as I do. Happy cooking!](https://dailydishly.com/wp-content/uploads/2025/06/88aadb9b-53ae-4392-a371-8958c664e0d2-768x768.webp)
![- Chicken and rice requirements - 4 boneless, skinless chicken thighs - 2 cups long-grain rice - Seasoning and flavor enhancers - 4 tablespoons unsalted butter - 5 cloves garlic, minced - 1 onion, finely chopped - 3 cups chicken broth - 1 teaspoon dried oregano - 1 teaspoon paprika - Salt and pepper to taste - Optional garnishes and additions - 1 cup frozen peas - Fresh parsley, chopped (for garnish) Gathering these ingredients sets the stage for a dish that bursts with flavor. Each item plays a key role. The chicken thighs offer rich taste and tenderness. The long-grain rice absorbs all the savory broth. Butter and garlic create a lovely aroma and depth. Onions bring sweetness, while seasonings elevate the whole dish. Feel free to add peas for a pop of color and nutrition. Fresh parsley adds a lovely touch on top. This simple yet flavorful dish uses ingredients you can find easily. Check out the Full Recipe to see how everything comes together! 1. Sautéing onion and garlic Start by melting 2 tablespoons of butter in a large skillet over medium heat. Add the finely chopped onion. Sauté for about 5 minutes until it turns translucent. Next, toss in 5 cloves of minced garlic. Cook for another minute until it smells amazing. 2. Cooking chicken thighs Season 4 boneless, skinless chicken thighs with 1 teaspoon of dried oregano, 1 teaspoon of paprika, salt, and pepper. Move the onion and garlic to the side of the skillet. Place the chicken thighs in the center. Cook for 6-7 minutes on each side until they are browned and cooked through. Once done, remove the chicken and set it aside. 3. Toasting rice and adding broth In the same skillet, add the other 2 tablespoons of butter. Stir in 2 cups of long-grain rice. Let it toast for about 2-3 minutes. Then, pour in 3 cups of chicken broth. Stir to combine and bring the mixture to a boil. 1. Combining chicken and rice Once the broth boils, reduce the heat to low. Carefully place the cooked chicken thighs on top of the rice. Cover the skillet and let it simmer for 15-20 minutes. You want the rice to be tender and soak up most of the broth. 2. Simmering for perfect texture In the last 5 minutes of cooking, add 1 cup of frozen peas on top of the rice. Do not stir. Let the peas steam with the rice for added color and flavor. 3. Final touches before serving After cooking, turn off the heat. Let the dish sit covered for another 5 minutes. Fluff the rice with a fork and gently mix in the peas. Serve warm and garnish with fresh chopped parsley for a beautiful finish. For the full recipe, check out the complete instructions and tips! To get the best flavor from your chicken, use the right seasonings. I like to mix oregano, paprika, salt, and pepper. This blend gives the chicken a tasty kick. Let the chicken sit for a few minutes after seasoning. This helps the spices soak in. When cooking, aim for a golden brown on each side. Cook the chicken for about 6-7 minutes per side. This timing ensures juicy chicken. Use a meat thermometer to check the inside. It should reach 165°F. To avoid mushy rice, rinse it before cooking. This removes excess starch. Use a 1:1.5 ratio of rice to liquid. For this recipe, use 3 cups of chicken broth for 2 cups of rice. Bring the broth to a boil before adding rice. Once boiling, reduce the heat and cover the skillet. Let the rice simmer for 15-20 minutes. This technique gives you fluffy rice that absorbs all the flavors. Garnishing adds a nice touch. Fresh herbs like parsley brighten the dish. Chop the parsley finely and sprinkle it on before serving. For a great look, serve the chicken on top of the rice. This way, the colors mix well. You can also add a lemon wedge on the side for a pop of freshness. Enjoy your meal! For the full recipe, check [Full Recipe]. {{image_2}} You can switch out the chicken for other meats. Try boneless pork chops or even tofu. Each option brings a new taste. If you want a different grain, choose quinoa or farro. These grains add unique textures and flavors to the dish. Adding vegetables is a great way to boost flavor and nutrition. Consider bell peppers, carrots, or spinach. These veggies cook well and add color. You can also use different herbs and spices. Basil, thyme, or even a kick of chili flakes can change the whole dish. To make this dish gluten-free, use rice and check your broth. Many brands offer gluten-free options. For low-carb choices, replace rice with cauliflower rice. It’s a great substitute and keeps the meal light. You don’t lose flavor, and it stays filling. Explore the [Full Recipe] for more tips and ideas! To keep your Garlic Butter Chicken and Rice fresh, refrigerate it within two hours. Use an airtight container for best results. Store it in the fridge for up to three days. For longer storage, freezing is a great option. Place the dish in a freezer-safe container. It can last up to three months in the freezer. Just remember to label it with the date. When it's time to enjoy leftovers, reheating is key. For rice, add a splash of water before reheating. This helps keep the rice fluffy. You can use a microwave or a stovetop for this. For chicken, use a low heat setting. This keeps the chicken juicy and flavorful. Make sure to cover it while reheating to trap moisture. Enjoy your delicious meal again! For the full recipe, check out the section above. What can I serve with Garlic Butter Chicken and Rice? You can serve this dish with a side of steamed veggies. Broccoli or green beans work well. A fresh salad adds crunch. Garlic bread can also enhance the meal. Can I make this dish ahead of time? Yes, you can prepare Garlic Butter Chicken and Rice in advance. Cook it, then cool it down. Store in an airtight container in the fridge. Reheat before serving, and it will taste great. How do I ensure my chicken is tender? To keep chicken tender, do not overcook it. Use a meat thermometer to check for doneness. Aim for 165°F. Marinating the chicken can also help it stay juicy. Why is my rice still hard? If your rice is hard, it may need more liquid. Add a bit of broth or water and simmer longer. Cover the pot to trap steam, which helps cook the rice. What if I don't have chicken broth? If you lack chicken broth, you can use water. Add extra seasonings to boost flavor. You can also use vegetable broth as a substitute. Can I use brown rice instead? Yes, you can use brown rice instead of white rice. Just know that brown rice takes longer to cook. Increase the simmer time to about 30-40 minutes. Adjust the liquid as needed. This blog post covered a complete guide to making Garlic Butter Chicken and Rice. You learned about the key ingredients and step-by-step instructions. I shared tips to ensure flavorful chicken and perfect rice. You also discovered variations and storage info. In closing, this dish is simple and flexible. Adjust it to your taste and dietary needs. Enjoy your cooking journey and share this recipe with others!](https://dailydishly.com/wp-content/uploads/2025/05/2b69aced-7351-4258-8c9e-dc4a3c9f0304-768x768.webp)