Skip to content
About
Contact
Cookie Policy
Copyright Policy
Disclaimer
Search
Home
Dinner
Appetizer
Desserts
Drinks
About
Contact
Privacy Policy
Toggle Menu
Home
/
Desserts
- Page 24
Desserts
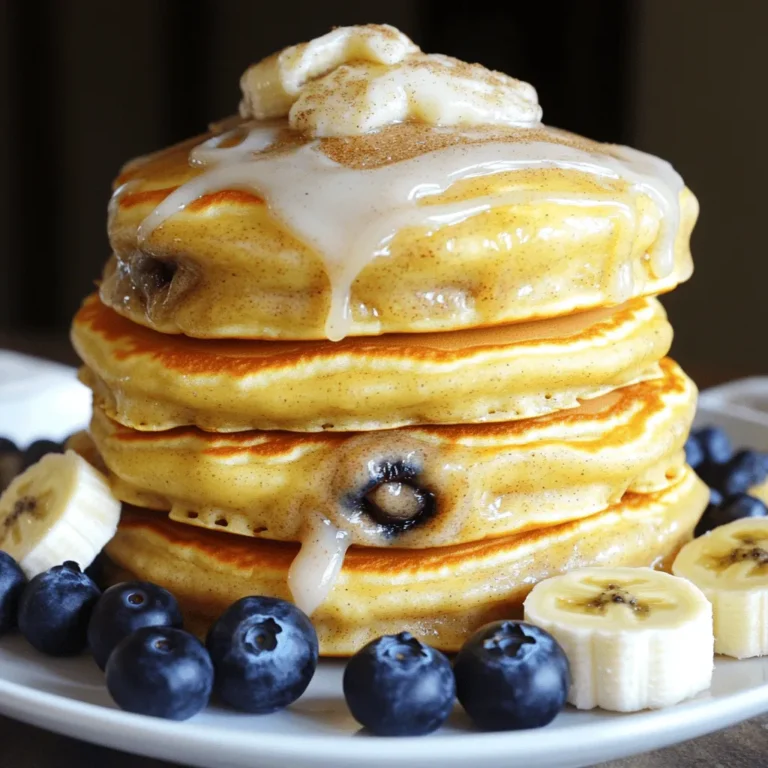
26. Cinnamon Roll Pancakes Delightful and Simple Treat
21. Chocolate Chip Banana Bread Easy and Delicious Recipe
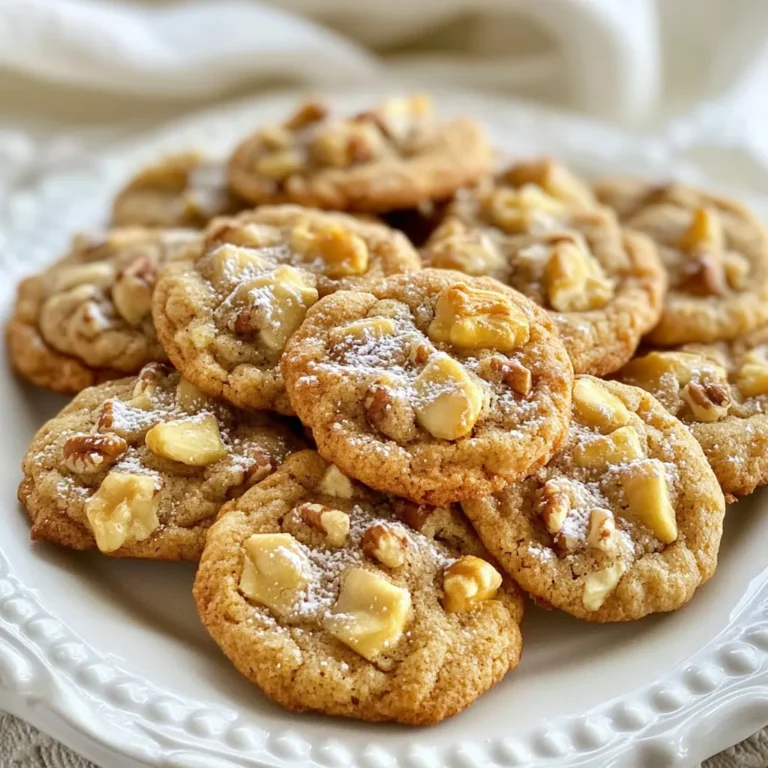
Chocolate Chip Cookie Bars Irresistible and Tasty Treat
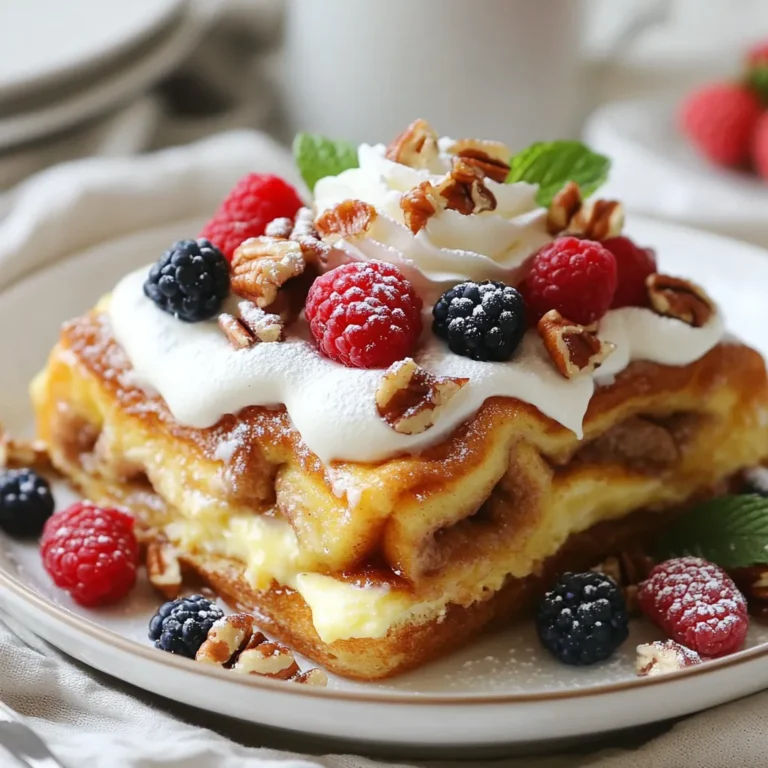
Cinnamon Roll French Toast Casserole Tasty and Easy
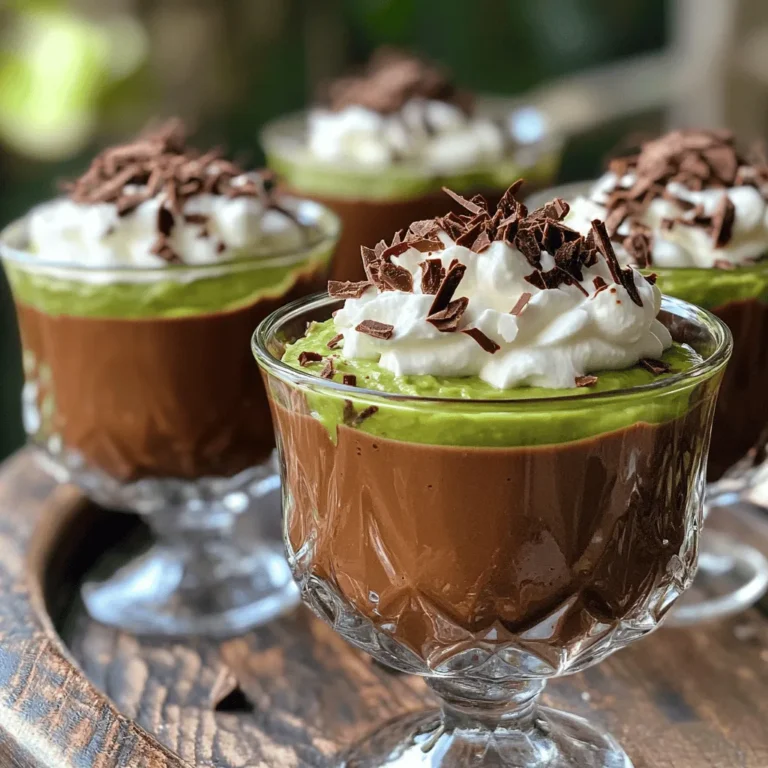
Chocolate Avocado Mousse Creamy and Rich Dessert
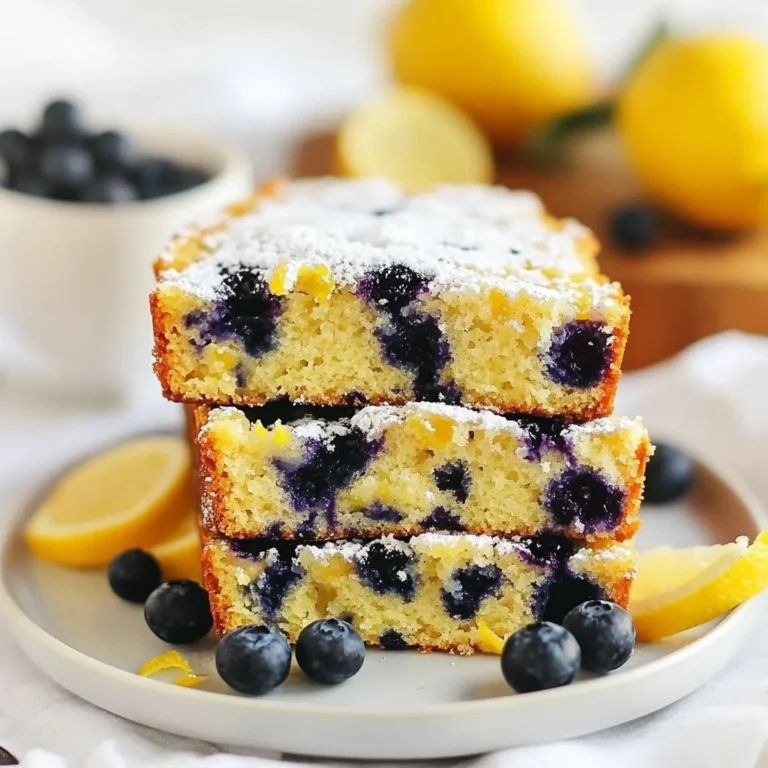
Lemon Blueberry Muffin Bread Delightful and Easy Recipe
Pumpkin Cream Cheese Muffins Flavorful and Easy Recipe
Chocolate Chip Banana Bread Cookies Delightful Treat
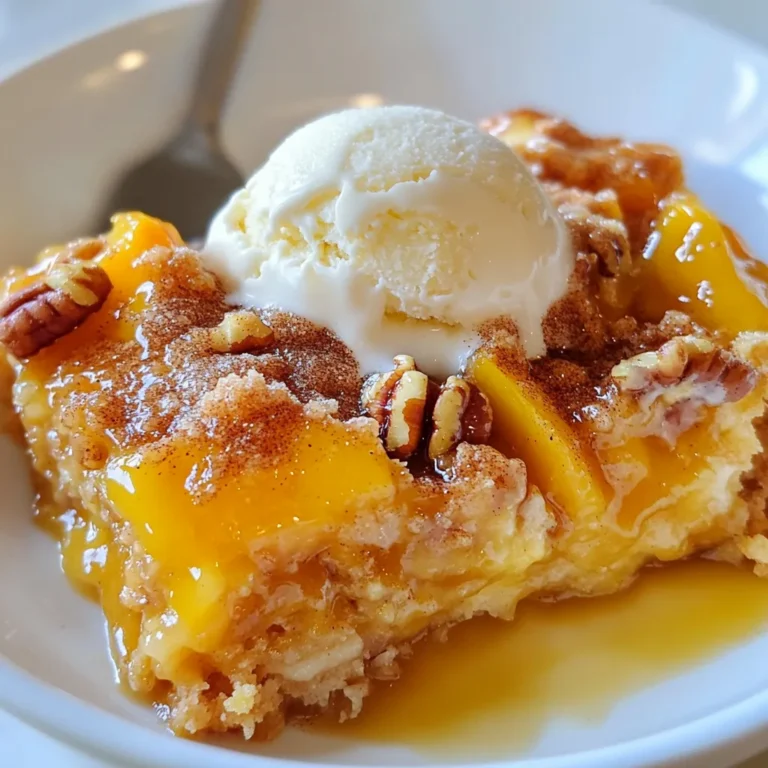
Peach Cobbler Dump Cake Simple and Delicious Treat
Cinnamon Roll Mug Cake Easy and Quick Delight
Page navigation
Previous Page
Previous
1
…
22
23
24
25
Next Page
Next
Home
Dinner
Appetizer
Desserts
Drinks
About
Contact
Privacy Policy
Toggle Menu Close
Search for:
Search


![- 1 cup (2 sticks) unsalted butter, softened - 1 cup brown sugar, packed - 1/2 cup granulated sugar - 2 large eggs - 2 teaspoons vanilla extract These ingredients form the base of your cookie bars. The butter adds richness, while the sugars provide sweetness and moisture. Eggs help bind everything together, and vanilla adds that warm, sweet flavor we all love. - 3 cups all-purpose flour - 1 teaspoon baking soda - 1/2 teaspoon salt The flour gives structure to the bars. Baking soda is a leavening agent, which helps them rise and become soft. Salt enhances flavor and balances the sweetness, making each bite even better. - 2 cups chocolate chips (semi-sweet or milk chocolate) - 1/2 cup chopped walnuts or pecans (optional) Chocolate chips are the star of these bars! You can choose semi-sweet for a balanced taste or milk chocolate for a sweeter bite. If you like a little crunch, add walnuts or pecans for extra texture. Don’t forget to check the [Full Recipe] for precise measurements. - Preheat the oven to 350°F (175°C). - Grease a 9x13-inch baking dish or line it with parchment paper. Start by setting your oven. This step is key. A hot oven helps the bars rise nicely. Greasing or lining the dish makes it easy to remove the bars later. - Cream together butter, brown sugar, and granulated sugar until fluffy. Next, grab a big bowl. Add your softened butter, brown sugar, and granulated sugar. Mix them well. You want the mixture light and fluffy. This step adds air, making your bars soft. - Add eggs and vanilla extract, mix well. - Blend in dry ingredients and fold in chocolate chips and nuts. Now, it’s time for the eggs and vanilla. Add them one at a time. Mix well after each one. In another bowl, whisk the flour, baking soda, and salt. Slowly add this mix to the butter mix. Stir gently. Finally, fold in your chocolate chips and nuts. This is where the magic happens! - Spread dough in the prepared dish and bake for 25-30 minutes. - Cool before cutting into squares. Spread your dough evenly in the dish. Bake it for 25 to 30 minutes. The edges should turn golden brown. Use a toothpick to check if it’s done. After baking, let the bars cool for about 10 minutes. Then transfer them to a wire rack. Once cooled, cut them into squares. Enjoy your sweet treat or share with friends! For the full recipe, check the details above. To get the best cookie bars, measure your flour right. Too much flour makes them dry. Use a spoon to scoop the flour into your measuring cup. Level it off with a knife. This way, you get just the right amount. Also, let your butter and eggs sit out for a bit. Room temperature helps the mix blend better. It makes your bars soft and chewy. When baking, always check if your bars are done. A toothpick works great for this. Stick it in the center of the bars. If it comes out clean or with a few crumbs, they are ready. If it’s wet, give them more time. After baking, cool the bars in the pan for about ten minutes. Then move them to a wire rack. This keeps them from getting soggy. How you serve your cookie bars matters. Use a wooden platter for a nice touch. It makes your dessert look inviting. You can sprinkle powdered sugar on top for a sweet look. For extra delight, drizzle melted chocolate over the bars. This makes them even more tempting. Enjoy these tasty treats with friends and family! For the full recipe, check out the details above. {{image_2}} You can make these cookie bars gluten-free. Just swap all-purpose flour with a gluten-free flour blend. Many blends work well. Look for ones that have a good mix of flours. This will give your bars a nice texture. Follow the same recipe steps. The taste will still be amazing! If you want vegan cookie bars, it’s simple! Use vegan butter instead of regular butter. For eggs, you can use applesauce or flaxseed meal. Mix one tablespoon of flaxseed with three tablespoons of water. Let it sit for five minutes to thicken. This works as a great egg replacement. The bars will taste just as good! You can also change the flavors of your cookie bars. Try adding spices like cinnamon for a warm taste. You can also mix different types of chocolate. Dark chocolate, white chocolate, or even mint chocolate can add a fun twist. Feel free to get creative! Each variation brings a new taste to enjoy. To keep your chocolate chip cookie bars fresh, use airtight containers. You can store them at room temperature for about three days. If you want them to last longer, put them in the fridge. They will stay good there for about a week. Make sure to let them cool completely before storing. This helps keep their soft texture. Freezing cookie bars is easy and smart for longer shelf life. First, cut the bars into squares. Then, wrap each square in plastic wrap. After that, place the wrapped bars in a freezer bag. Remove as much air as possible before sealing. You can freeze them for up to three months. When you’re ready to eat, simply thaw in the fridge overnight. To reheat your cookie bars, use the oven or microwave. If using the oven, set it to 350°F (175°C). Place the bars on a baking sheet for about 5-7 minutes. This helps restore their chewy texture. If you prefer the microwave, heat for about 10-15 seconds. Watch closely so they don’t overheat. Enjoy your warm, gooey treat again! To check if your chocolate chip cookie bars are done, use a toothpick. Insert it into the center of the bars. If it comes out clean or with a few moist crumbs, they are ready. You can also look at the edges. They should be golden brown. The center may still look soft but will set as it cools. Remember, it's better to slightly underbake than to overbake. This keeps them chewy and soft. Yes, you can substitute some ingredients in this recipe. If you don't have brown sugar, you can use white sugar instead. It will change the flavor, but the bars will still taste good. You can also swap out the butter for coconut oil. This gives a nice flavor and makes them dairy-free. If you want a gluten-free option, use a gluten-free flour blend. Just keep in mind that the texture may vary slightly. To make your chocolate chip cookie bars even more delicious, try adding extra treats. You can mix in caramel bits for a sweet surprise. Chopped candy bars like Snickers or Reese's can add fun flavors. You can also use flavored chips, like butterscotch or peanut butter chips, for variety. Experiment with different nuts or dried fruit for more texture. These additions make the bars unique and tasty! To make delicious chocolate chip cookie bars, we focused on key ingredients, mixing steps, and storage tips. By using simple methods and variations, anyone can create their perfect treat. Remember, measuring flour right and cooling your bars properly are essential for success. Whether you prefer classic, gluten-free, or vegan options, the enjoyment of baking is universal. Follow these steps and tips for tasty results every time. You’ll impress friends and family with your skills!](https://dailydishly.com/wp-content/uploads/2025/05/88326a6b-fa01-43d4-bb00-6171d5f3f1c3-768x768.webp)