Lemon Herb Grilled Chicken Flavorful and Easy Recipe
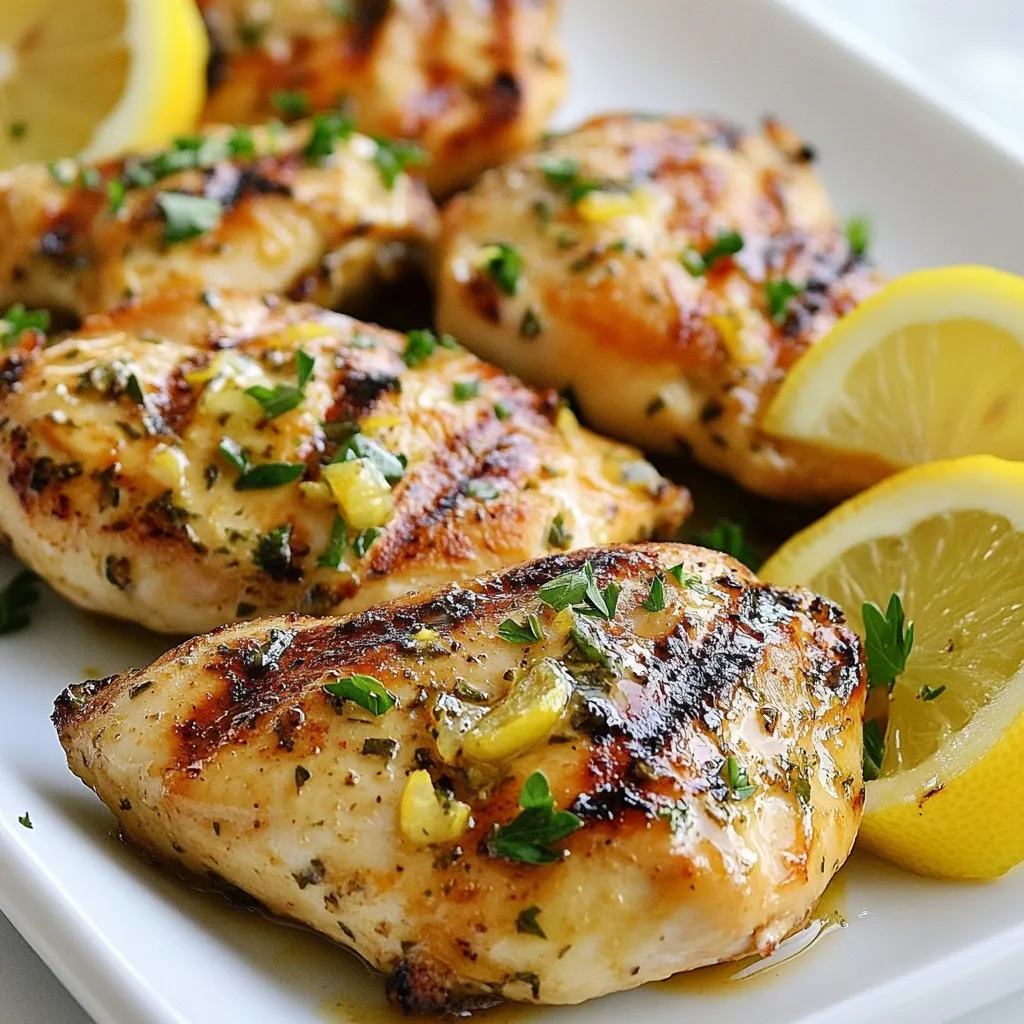

Are you ready to elevate your grilling game? My Lemon Herb Grilled Chicken recipe is here to impress. It’s simple, flavorful, and perfect for any cookout or family dinner. With easy steps and fresh ingredients, you’ll have juicy chicken ready in no time. Let me show you how to make this delicious dish that everyone will love! Dive into this article for tips, tricks, and variations to suit your taste.
Why I Love This Recipe
- Fresh and Flavorful: This marinade combines bright lemon juice and herbs, creating a dish that bursts with fresh flavors.
- Quick Preparation: With just 10 minutes of prep time, this recipe is perfect for a busy weeknight dinner.
- Healthy Option: Grilled chicken is a lean protein, making this dish a healthy choice for any meal.
- Versatile Dish: This grilled chicken pairs well with a variety of sides, from salads to grains, allowing for endless meal possibilities.
Ingredients
List of Ingredients
– 4 chicken breasts (boneless and skinless)
– 1/4 cup fresh lemon juice
– 2 tablespoons olive oil
– Zest of 1 lemon
– 3 cloves garlic, minced
– 2 teaspoons dried oregano
– 2 teaspoons fresh thyme (or 1 teaspoon dried thyme)
– Salt and pepper to taste
– Fresh parsley, chopped (for garnish)
Ingredient Tips for Quality
To make your Lemon Herb Grilled Chicken shine, focus on freshness. Choose fresh chicken breasts; they should be firm and pink. Fresh lemons give the best juice and zest. Look for lemons that feel heavy for their size. Fresh herbs add great flavor. If you can, buy them from a local market. When using dried herbs, check the expiry date. They lose flavor over time. Good olive oil enhances the dish, so pick a high-quality brand.
Nutritional Information
Each serving has about 220 calories. The chicken provides lean protein, which is great for muscle health. The olive oil offers healthy fats, while the lemon juice adds vitamin C. Garlic is not just tasty; it’s also good for your immune system. Overall, this dish is light, fresh, and packed with flavor, making it a smart choice for a healthy meal.

Step-by-Step Instructions
Preparing the Marinade
To make the marinade, grab a mixing bowl. In this bowl, whisk together:
– 1/4 cup fresh lemon juice
– 2 tablespoons olive oil
– Zest of 1 lemon
– 3 cloves garlic, minced
– 2 teaspoons dried oregano
– 2 teaspoons fresh thyme (or 1 teaspoon dried thyme)
– Salt and pepper to taste
Mix these ingredients well. The lemon juice and zest give a bright flavor. The herbs add depth. This marinade is the key to juicy chicken.
Marinating the Chicken
Next, take your chicken breasts. You need four pieces, boneless and skinless. Place them in a resealable plastic bag or a shallow dish. Pour the marinade over the chicken. Make sure each piece is well-coated. Seal the bag or cover the dish tightly.
Refrigerate for at least 1 hour. For the best flavor, marinate overnight. This step helps the chicken absorb all those tasty flavors.
Grilling the Chicken
When you’re ready to grill, preheat your grill to medium-high heat. Take the chicken out of the marinade. Discard any leftover marinade.
Place the chicken on the grill. Cook for 6-7 minutes on one side. Flip the chicken and grill for another 6-7 minutes. You want the internal temperature to reach 165°F (75°C).
Once cooked, remove the chicken from the grill. Let it rest for 5 minutes. This helps keep it juicy.
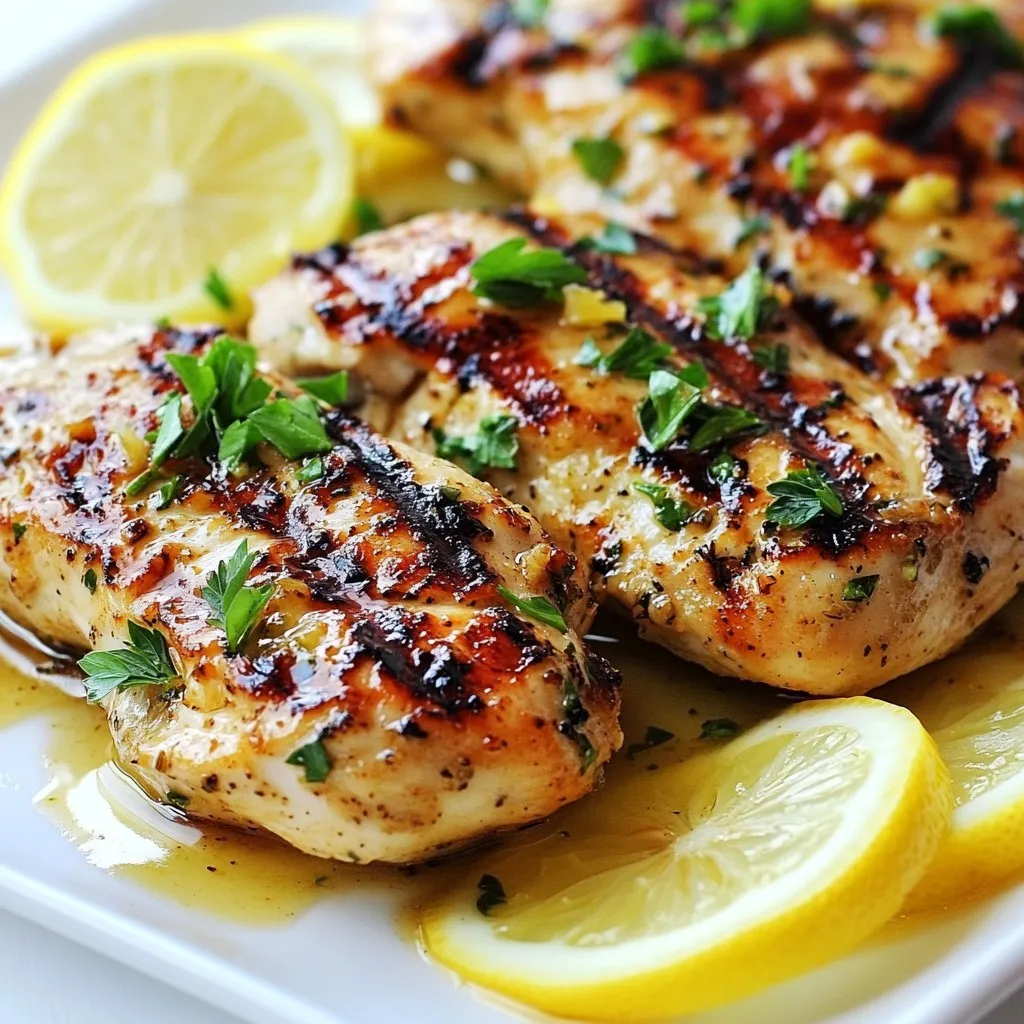
Slice the chicken and serve it. Garnish with fresh parsley and lemon slices for a nice touch. Enjoy your flavorful meal!
Tips & Tricks
Best Practices for Grilling Chicken
Grilling chicken can be simple with a few best practices. First, preheat your grill to medium-high heat. This helps the chicken cook evenly. Avoid flipping the chicken too often. Let it sit for about 6-7 minutes on one side. This gives nice grill marks and locks in flavor. Use a meat thermometer to check the chicken’s internal temperature. It should reach 165°F (75°C) for safe eating.
How to Ensure Juicy Chicken
Juicy chicken starts with a good marinade. For this Lemon Herb Grilled Chicken, use fresh lemon juice and olive oil. These ingredients not only add flavor but also keep the chicken moist. Marinate the chicken for at least one hour. If you have more time, marinate it overnight for richer taste. After grilling, let the chicken rest for five minutes. This step allows the juices to redistribute, keeping the meat tender.
Seasoning Suggestions
While the recipe calls for lemon, garlic, and herbs, you can try different seasonings. For a spicy twist, add crushed red pepper flakes. If you prefer a sweet touch, mix in honey with the marinade. Fresh herbs like basil or rosemary can add unique flavors too. Experimenting with seasonings keeps the dish exciting and fun!
Pro Tips
- Marination Time: For the best flavor, marinate the chicken for at least 1 hour, but ideally overnight. This allows the flavors to penetrate the meat more deeply.
- Grill Temperature: Ensure your grill is preheated to medium-high heat. This helps achieve a nice sear on the chicken, locking in juices and flavor.
- Resting Period: Allow the chicken to rest for 5 minutes after grilling. This helps the juices redistribute, making for a juicier and more flavorful bite.
- Herb Variations: Feel free to experiment with different herbs in the marinade, such as rosemary or basil, to customize the flavor profile of your grilled chicken.
Variations
Herb Alternatives
You can change the herbs to suit your taste. If you want a different flavor, try using:
– Basil for a sweet touch.
– Rosemary for a strong scent.
– Cilantro for a fresh kick.
– Dill for a bright taste.
Mix and match these herbs to create your own special blend. Each choice adds a new twist to your dish.
Cooking Methods (Oven/Broiler)
You don’t need a grill to enjoy this chicken. You can cook it in your oven or under a broiler.
Oven Method:
1. Preheat your oven to 400°F (200°C).
2. Place the marinated chicken on a baking sheet.
3. Bake for 25-30 minutes or until the chicken reaches 165°F (75°C).
Broiler Method:
1. Preheat the broiler.
2. Place the chicken on a broiler pan.
3. Broil for about 6-7 minutes on each side or until cooked.
Both methods keep the chicken juicy and full of flavor.
Serving Suggestions and Pairings
Lemon Herb Grilled Chicken pairs well with many sides. Here are some ideas:
– Serve it with a fresh green salad.
– Pair it with roasted vegetables for a healthy meal.
– Add some rice or quinoa for a filling option.
– Squeeze more lemon on top for extra zest.
These sides enhance the meal and make it even better. Enjoy your culinary adventure!
Storage Info
Storing Leftovers
You can keep leftover Lemon Herb Grilled Chicken in the fridge. Place the chicken in an airtight container. It stays fresh for about 3 to 4 days. Make sure it cools down before sealing. This will help avoid extra moisture inside.
Freezing Instructions
If you want to store it longer, freezing is a great choice. Wrap each chicken breast in plastic wrap. Then, place them in a freezer bag. Remove as much air as you can. This helps prevent freezer burn. You can freeze the chicken for up to 3 months. Label the bag with the date for easy tracking.
Reheating Tips
When you are ready to eat, reheating is easy. You can use the microwave or oven. For the microwave, heat on medium for 1 to 2 minutes. Check that the chicken is hot all the way through. If you use the oven, preheat it to 350°F (175°C). Place the chicken in a baking dish, cover it, and bake for about 15 minutes. This keeps the meat moist and tasty. Enjoy your delicious Lemon Herb Grilled Chicken!
FAQs
How long should I marinate the chicken?
You should marinate the chicken for at least 1 hour. This time lets the flavors soak in. For the best taste, try marinating overnight. It makes the chicken juicy and packed with flavor.
Can I use bone-in chicken for this recipe?
Yes, you can use bone-in chicken. Just adjust the cooking time. Bone-in pieces take longer to cook. Make sure the internal temperature reaches 165°F (75°C) for safety. The marinade will still work well with bone-in chicken.
What sides pair well with Lemon Herb Grilled Chicken?
Great sides for this dish include:
– Grilled vegetables
– Rice pilaf
– Fresh salad
– Garlic bread
These sides add color and flavor to your meal. They balance the lemony taste of the chicken. Enjoy your meal with a refreshing drink, like iced tea or lemonade!
You learned how to make Lemon Herb Grilled Chicken through clear steps and useful tips. I shared my favorite ingredients for a great dish and how to grill chicken that stays juicy. Explore different herbs, cooking methods, and tips to serve it well. Don’t forget about storing leftovers or reheating them right. Now you have all you need to impress at your next meal. Enjoy your cooking journey and the flavors you creat

Lemon Herb Grilled Chicken
Ingredients
- 4 pieces chicken breasts (boneless and skinless)
- 0.25 cup fresh lemon juice
- 2 tablespoons olive oil
- 1 piece Zest of 1 lemon
- 3 cloves garlic, minced
- 2 teaspoons dried oregano
- 2 teaspoons fresh thyme (or 1 teaspoon dried thyme)
- to taste Salt and pepper
- for garnish Fresh parsley, chopped
Instructions
- In a mixing bowl, whisk together the lemon juice, olive oil, lemon zest, minced garlic, oregano, thyme, salt, and pepper to create the marinade.
- Place the chicken breasts in a resealable plastic bag or shallow dish, then pour the marinade over the top, ensuring each piece is well-coated. Seal the bag or cover the dish, and refrigerate for at least 1 hour (or up to overnight for best flavor).
- Preheat your grill to medium-high heat.
- Remove the chicken from the marinade, discarding the leftover marinade.
- Place the chicken breasts on the grill and cook for about 6-7 minutes on one side. Flip and grill for an additional 6-7 minutes, or until the internal temperature reaches 165°F (75°C).
- Once cooked, remove the chicken from the grill and let it rest for 5 minutes before slicing.
- Serve the grilled chicken garnished with fresh parsley and slices of lemon, if desired.
![To make this vibrant salad, you need fresh and colorful ingredients. Here’s what you will need: - 8 oz rice noodles (or your favorite noodle) - 1 cup red cabbage, shredded - 1 cup carrots, julienned - 1 cup bell peppers (mixed colors), sliced - 1 cup sugar snap peas, trimmed - 1 cucumber, julienned - 1 cup edamame, shelled - ¼ cup fresh cilantro, chopped - ¼ cup green onions, sliced - ¼ cup peanuts, crushed (optional for garnish) These ingredients bring crispness and bright colors to the dish. They also add a mix of textures that make every bite fun. The dressing ties all the flavors together. You will need these simple ingredients: - 3 tablespoons soy sauce (or tamari for gluten-free) - 2 tablespoons sesame oil - 1 tablespoon rice vinegar - 1 tablespoon honey (or maple syrup for vegan) - 1 teaspoon ginger, grated - 1 clove garlic, minced - 1 teaspoon chili paste (adjust to taste) Mixing these ingredients creates a tasty dressing that adds depth to the salad. The balance of salty, sweet, and a little spice is what makes this dish stand out. Want to make your salad even better? Here are some fun add-ins: - Sliced avocado for creaminess - Grilled chicken or tofu for protein - Sesame seeds for extra crunch - Fresh herbs like mint or basil for a fresh twist These additions can take your Rainbow Asian Noodle Salad to the next level. Feel free to mix and match based on your taste! For the complete recipe, check the [Full Recipe]. Start by boiling a pot of water. Use enough water to cover the noodles. Once the water boils, add 8 oz of rice noodles. Cook them according to the package instructions. I usually check for an al dente texture. This means they should be firm, not mushy. After cooking, drain the noodles in a colander. Rinse them under cold water. This step cools them and stops the cooking process. Set them aside for later. Grab a large mixing bowl. Add 1 cup of shredded red cabbage. Next, add 1 cup of julienned carrots. Then, toss in 1 cup of sliced bell peppers in mixed colors. Don't forget 1 cup of trimmed sugar snap peas. They add a nice crunch! Now, add 1 julienned cucumber and 1 cup of shelled edamame. Finally, mix in ¼ cup of chopped cilantro and ¼ cup of sliced green onions. These fresh veggies make your salad colorful and tasty. In a small bowl, combine the dressing ingredients. Start with 3 tablespoons of soy sauce. If you are gluten-free, use tamari instead. Next, add 2 tablespoons of sesame oil and 1 tablespoon of rice vinegar. Then, mix in 1 tablespoon of honey or maple syrup for a vegan option. Add 1 teaspoon of grated ginger and 1 clove of minced garlic. Finally, add 1 teaspoon of chili paste, adjusting to your spice level. Whisk all the ingredients together until well combined. Now, it’s time to bring everything together. Add the cooked noodles to your bowl of fresh vegetables. Pour the dressing over the top. Toss everything gently to mix. Make sure each noodle and veggie is coated well. This mixing helps all the flavors blend together for a delicious bite. After mixing, taste your salad. If you want it sweeter, add a little more honey. For extra spice, add more chili paste. Adjust the flavors to suit your liking. This salad should be a reflection of your taste. Feel free to experiment until it’s perfect for you. To make your Rainbow Asian Noodle Salad pop, use a large, shallow platter. This helps showcase the bright colors. Layer the noodles first, then pile on the veggies. Drizzle dressing on top, and finish with a sprinkle of cilantro and crushed peanuts. This creates a stunning look that draws everyone in. To keep your salad fresh, store it in an airtight container. Keep the dressing separate until you’re ready to eat. This prevents the noodles and veggies from getting soggy. You can also add a little lemon juice to the salad. This helps maintain color and crunch. Leftover salad is great for lunch! Consider adding protein like grilled chicken or tofu for a filling meal. You can also use the salad as a filling for lettuce wraps. Just scoop some salad into large lettuce leaves. This adds a fun twist and keeps it fresh. If you want to make it spicy, add more chili paste to the leftovers. {{image_2}} You can easily make this salad gluten-free. Just swap regular noodles for rice noodles. Use tamari instead of soy sauce. This keeps the flavor while avoiding gluten. If you want a vegan version, replace honey with maple syrup in the dressing. This simple swap keeps your salad sweet while staying plant-based. You can also add tofu for extra texture and protein. For those who want more protein, consider adding cooked chicken or shrimp. Both work well with the flavors in this salad. You can also use chickpeas or lentils for a hearty twist. Each option adds nutrition and keeps the dish filling. If you want the full recipe, you can find it above. To keep your Rainbow Asian Noodle Salad fresh, store it in the fridge. Place the salad in an airtight container. If you have leftover dressing, store it separately to prevent sogginess. This way, the noodles and veggies stay crisp. Use glass containers or high-quality plastic ones with tight lids. Glass is great because it does not stain or retain odors. Make sure the container is large enough to hold all the ingredients without squishing them together. Your salad can last for about 3 to 5 days in the fridge. The veggies will stay fresh, but the noodles may soften over time. To enjoy the best taste, eat it within the first few days. Always check for any changes in smell or texture before eating. For the full recipe, refer to the earlier sections. I love using rice noodles for their light texture. They soak up the flavors well. You can also use soba noodles or any thin pasta. Just cook them until they are al dente. Rinse under cold water to stop the cooking. This keeps them from getting mushy. Absolutely! You can prep the salad a day in advance. Just keep the dressing separate until you are ready to serve. This helps keep the veggies crisp. If you mix everything too early, the noodles may soak up the dressing. Yes, this salad is packed with veggies. Each ingredient adds nutrients. The colorful mix provides vitamins and minerals. You get fiber from the noodles and veggies too. This salad is a great option for a light meal or side dish. You can easily change the dressing to suit your taste. Add more honey for sweetness or extra chili paste for heat. You might try lime juice instead of rice vinegar for a zingy twist. Fresh herbs like mint or basil can add a bright flavor. Yes! Grilled chicken, shrimp, or tofu are great options. Just make sure to cook them first. Slice the meat thin before adding it to the salad. This adds protein and makes the dish more filling. You can check the Full Recipe for ideas on how to include them. You learned how to make a tasty Rainbow Asian Noodle Salad. We covered the key ingredients, from the noodles to the fresh veggies and zesty dressing. I shared easy steps to prepare and combine everything for the best flavor. You also found tips for presentation and storage to keep your salad fresh. Experiment with variations like gluten-free or vegan options. Remember, this dish is flexible and fun! Enjoy your colorful salad and make it your way.](https://dailydishly.com/wp-content/uploads/2025/06/34dc854e-6038-45bb-afdc-1af709707800-768x768.webp)

![To make this easy chicken tortilla soup, gather these simple items: - 2 cups cooked chicken, shredded - 1 medium onion, chopped - 2 cloves garlic, minced - 1 can (14 oz) diced tomatoes with green chilies - 4 cups chicken broth - 1 can (15 oz) black beans, rinsed and drained - 1 cup corn (frozen or canned) - 1 teaspoon ground cumin - 1 teaspoon chili powder - Salt and pepper to taste - 1 tablespoon olive oil - Tortilla strips (for garnish) - Fresh cilantro, chopped (for garnish) - Sliced avocado (for serving) - Lime wedges (for serving) Choose fresh ingredients for the best flavor. Here are my tips: - Chicken: Look for plump and juicy chicken. Cooked rotisserie chicken works well too. - Onion: Select firm onions with dry skin. Avoid any soft spots or sprouting. - Garlic: Pick garlic bulbs that feel heavy and firm. The cloves should be tight. - Corn: If using fresh corn, choose bright yellow ears with no brown patches. - Tomatoes: For canned tomatoes, check the can for dents or rust. Always opt for quality brands. If you lack an ingredient, here are some easy swaps: - Chicken: Use turkey or even canned chicken if needed. - Black beans: Swap with pinto beans or kidney beans. - Corn: Try using bell peppers or zucchini for a different texture. - Chicken broth: Vegetable broth can replace chicken broth for a lighter soup. - Spices: If you don’t have cumin, use paprika or a taco seasoning mix. This soup is flexible, so feel free to adjust based on what you have at home. For the full recipe, check out the link. Making Easy Chicken Tortilla Soup is simple. You start by cooking the onion and garlic. Then, you add the other ingredients and let them simmer. This lets all the flavors mix well. Finally, you serve it hot with tasty toppings. 1. Heat olive oil (5 minutes): In a large pot, heat 1 tablespoon of olive oil over medium heat. Add 1 chopped onion. Cook until the onion is soft and clear. This takes about 5 minutes. 2. Add garlic (1 minute): Stir in 2 minced garlic cloves. Cook for 1 minute until your kitchen smells great. 3. Combine ingredients (5 minutes): Add 1 can of diced tomatoes, 4 cups of chicken broth, 1 can of black beans, and 1 cup of corn. Mix well. 4. Season the soup (20 minutes): Bring the mix to a simmer. Add 2 cups of shredded chicken, 1 teaspoon of ground cumin, and 1 teaspoon of chili powder. Season with salt and pepper. Let it simmer for 15-20 minutes. 5. Prepare tortilla strips (12 minutes): While the soup simmers, cut tortillas into thin strips. Bake them at 375°F for 10-12 minutes until they are crispy. 6. Taste and adjust (3 minutes): After 20 minutes, taste the soup. Adjust the seasoning if needed. 7. Serve (5 minutes): Serve the soup hot. Top with crispy tortilla strips, chopped cilantro, and avocado slices. Don’t forget a lime wedge for extra flavor! - Sautéing: Sautéing the onion and garlic first brings out their flavors. This step is key for a rich taste. - Simmering: Allow the soup to simmer for enough time. This helps the flavors blend perfectly. - Baking tortilla strips: Baking instead of frying gives you a crunchy topping without added oil. This makes your soup lighter and healthier. For the full recipe, check the [Full Recipe]. To make your chicken tortilla soup pop, focus on layers of flavor. Start with fresh herbs like cilantro and lime. These add brightness. You can also add a pinch of smoked paprika for depth. If you like heat, toss in some diced jalapeños or a few dashes of hot sauce. Finally, finish each bowl with crispy tortilla strips. They add crunch and texture. One common mistake is overcooking the soup. If you simmer too long, the chicken can become dry. Another mistake is skipping the seasoning. Make sure to taste as you go. Adjust salt and pepper to bring out the flavors. Lastly, don’t forget the toppings! They make the soup fun and flavorful. Missing them can dull the dish. Use a large pot or Dutch oven for even cooking. A wooden spoon is great for stirring. Make sure you have a sharp knife for chopping. You’ll also need a cutting board and measuring spoons. If you want crispy tortilla strips, a baking sheet is a must. With these tools, you'll make the whole process easier and more enjoyable. For more details on the recipe, check out the [Full Recipe]. {{image_2}} When making chicken tortilla soup, you can mix things up. Here are some fun options. To make a vegetarian version, skip the chicken. Use more beans instead. Black beans work great. Chickpeas add a nice twist too. You can add more veggies like bell peppers, zucchini, or carrots. Use vegetable broth instead of chicken broth. This keeps all the flavors without meat. If you love spicy food, add jalapeños or serrano peppers. Chop them finely and cook with the onion. You can also add a dash of hot sauce. For more heat, sprinkle in cayenne pepper or chipotle powder. This gives the soup a smoky taste. Just remember to taste as you go! For a creamy twist, stir in some cream or sour cream. You can use half-and-half for a lighter version. Add it in right before serving. This makes the soup rich and smooth. You can also blend some soup to make it thicker. This way, you still have some chunky bits. For the full recipe, check out the Zesty Chicken Tortilla Soup! Storing your chicken tortilla soup is easy. First, let it cool down. Then, put the soup in an airtight container. Make sure to leave some space at the top. This helps the soup expand when frozen. Store it in the fridge if you plan to eat it in a few days. It can last about 3 to 4 days. If you want to keep it longer, freezing is best. When you are ready to enjoy your soup, reheating is simple. Pour the soup into a pot. Heat it on medium until it bubbles. Stir it often to avoid sticking. You can also use a microwave. Put the soup in a microwave-safe bowl. Heat it in short bursts, stirring in between. This keeps the soup from getting too hot in some spots. Always check the temperature before serving. To freeze your soup, use a freezer-safe container. Leave some space at the top, just like before. You can also use freezer bags. Lay them flat in the freezer to save space. This way, they stack nicely. When you want to eat it, thaw the soup overnight in the fridge. You can also use the microwave to defrost it quickly. Make sure to reheat it well before serving. For the best taste, use frozen soup within 2 to 3 months. For the full recipe, check out the detailed steps above. To make chicken tortilla soup gluten-free, skip the tortilla strips or use gluten-free tortillas. You can find corn tortillas that are safe for gluten-free diets. Check labels to be sure. Use gluten-free chicken broth too. This keeps your soup tasty and safe to eat. Yes, you can use shredded rotisserie chicken. It saves time and adds great flavor. Just shred it and add it to the pot when the soup simmers. This makes weeknight cooking easy and quick. Your soup will still taste fresh and delicious! Chicken tortilla soup has many health benefits. It is high in protein from the chicken. The beans and corn add fiber, which is good for digestion. Plus, the tomatoes give vitamins that help your body. This soup is also low in fat, making it a smart choice for dinner. Yes, you can prepare this soup in a slow cooker. Start by adding all the ingredients, except the tortilla strips, to the slow cooker. Set it on low for 6-7 hours or high for 3-4 hours. When it’s done, stir in the shredded chicken and let it heat through. This method is great for busy days! For the full recipe, check the link above. This blog post covered everything you need for delicious chicken tortilla soup. We discussed the best ingredients, tips for selection, and substitutes. I shared step-by-step instructions and key techniques for cooking. You learned how to enhance flavors and avoid common mistakes. We explored variations for different tastes and shared storage tips. Embrace your cooking journey and enjoy the soup! With these insights, you're ready to impress everyone.](https://dailydishly.com/wp-content/uploads/2025/06/4c837e08-7a40-4cb5-8eb2-23b66dcc18ae-768x768.webp)

![To make these tasty tacos, you need some simple yet bold ingredients. Here’s what you’ll need: - 2 cans black beans, rinsed and drained - 1 medium onion, diced - 3 garlic cloves, minced - 2 tablespoons chipotle in adobo sauce, chopped These ingredients give your tacos a distinct smoky flavor. The black beans provide protein and creaminess. The onions and garlic add depth, while the chipotle brings heat and smokiness. Next, we need some seasonings and garnishes to elevate the dish: - 1 teaspoon smoked paprika - 1 teaspoon cumin - Salt and pepper to taste - Fresh cilantro, for garnish Smoked paprika and cumin enhance the earthy flavor of the beans. A pinch of salt and pepper balances everything out. Fresh cilantro adds brightness and color, making your tacos visually appealing. Lastly, let’s prepare the tortillas and toppings: - 8 small corn tortillas - 1 avocado, sliced - Lime wedges, for serving Corn tortillas are perfect for this dish. They have a lovely flavor and hold up well. Sliced avocado adds creaminess, while lime wedges give a zesty kick. For the full recipe, check out the details for cooking and assembling! First, I heat olive oil in a large skillet over medium heat. I add the diced onion and sauté it until it turns translucent, which takes about five minutes. Next, I stir in the minced garlic and cook it for one minute until it becomes fragrant. Then, I combine the rinsed black beans, chopped chipotle in adobo, smoked paprika, cumin, salt, and pepper. Mixing these ingredients well creates a rich base full of flavor. After combining the filling, I grab a potato masher. I mash some of the black beans to create a creamy texture while leaving others whole for extra bite. This step adds depth to the dish. I then reduce the heat to low, cover the skillet, and let it simmer for about ten minutes. This allows all the flavors to meld beautifully. I stir occasionally to ensure even cooking. While the filling simmers, I warm the small corn tortillas in a separate skillet. I heat them over medium heat for about thirty seconds on each side. This makes the tortillas pliable and ready for filling. Now comes the fun part! I spoon the smoky black bean mixture onto each warm tortilla. Then, I top them with sliced avocado and sprinkle fresh cilantro on top. For an extra burst of flavor, I serve the tacos with lime wedges on the side. This adds a zesty touch that brightens the whole dish. You can find the full recipe for Smoky Chipotle Black Bean Tacos in the previous section. Enjoy! To make your Smoky Chipotle Black Bean Tacos even better, try adding more spices. A dash of cayenne can kick up the heat. You can also mix in a pinch of oregano for a fresh herb taste. If you enjoy a bit of sweetness, drizzle some honey over the top before serving. Toppings can really change the game too! Try adding pickled onions, crumbled feta, or diced tomatoes. Each will give your tacos a unique twist. Don't be afraid to get creative! Presentation matters. When serving, arrange your tacos on a large platter. Add lime wedges and fresh cilantro around them for color. You can even use a small bowl for salsa on the side. This makes your meal look vibrant and inviting. Consider adding colorful accompaniments like sliced radishes or a side of corn salad. These not only look great but also enhance the meal’s flavor. Sautéing and simmering are key for perfect tacos. When you sauté the onion, aim for a golden color. This adds a sweet flavor to the dish. Stir often to avoid burning. To prevent soggy tortillas, warm them before filling. Heat them in a skillet for about 30 seconds on each side. This keeps them soft and easy to fold. If you want extra crispiness, consider lightly frying them in oil. This simple step can elevate your tacos to the next level. For the complete recipe, check out the [Full Recipe]. {{image_2}} Want to add more protein to your tacos? You can easily incorporate chicken or shrimp. Simply cook them in the skillet before adding the beans. For a vegetarian option, try using tofu or tempeh. Cube the tofu and sauté it until golden. For tempeh, steam it first to soften, then sauté for a nice texture. These additions will keep your tacos satisfying and packed with flavor. If you're looking for plant-based protein, consider lentils or chickpeas. They both work well and add a hearty touch. For cheese lovers, look for dairy-free cheese substitutes. Many brands offer tasty options that melt well. This way, you can enjoy creamy toppings without dairy. These alternatives keep your meal both delicious and inclusive for all diets. Tacos don’t have to be served in the traditional way. You can create taco bowls instead. Just layer the black bean mixture over rice or quinoa. Then add your favorite toppings. Another fun option is using lettuce wraps instead of tortillas. This makes for a low-carb alternative while keeping the fresh crunch. Each style offers a unique twist to your smoky chipotle black bean tacos. For the full recipe, check out the Smoky Chipotle Black Bean Tacos section. To store any leftover tacos, place them in an airtight container. Make sure to cool them first. These tacos will stay fresh in the fridge for about three to four days. If you want to freeze the taco filling, let it cool completely. Then, place it in a freezer-safe bag. Squeeze out the air before sealing. The filling can last in the freezer for up to three months. To enjoy, take it out of the freezer and put it in the fridge overnight to thaw. When you reheat the filling, you have two good options: the oven or the microwave. If you use the oven, preheat it to 350°F. Spread the filling in a baking dish and cover it with foil. Heat for about 15 minutes. For the microwave, put the filling in a bowl and cover it. Heat for about 1 to 2 minutes, stirring halfway. Both methods work, but the oven keeps the texture nice. Enjoy your delicious Smoky Chipotle Black Bean Tacos even as leftovers! To make your tacos crispy, you can fry the tortillas. Heat oil in a pan. Add each tortilla and fry for about 30 seconds on each side. This method gives them a nice crunch. You can also use the oven. Preheat it to 400°F (200°C). Brush tortillas with a little oil and place them on a baking sheet. Bake for 5-7 minutes until they are crispy around the edges. Yes, you can use dried beans! However, they need more time. Soak them overnight in water. Then, cook them until soft. This process can take 1-2 hours. Canned beans are quicker and easier, but dried beans can add great flavor and texture. If you don’t have chipotle in adobo, try using smoked paprika or cayenne pepper. Both can add heat and depth. You can also use liquid smoke for that smoky flavor. Adjust the amount to match your heat preference. Start small and taste as you go. In this guide, I covered how to make smoky chipotle black bean tacos. We talked about the key ingredients, cooking steps, and tips for perfect tacos. You can add your favorite proteins or toppings to make it your own. Don’t forget to store leftovers properly to enjoy later. These tacos are flexible and sure to impress. Dive in and enjoy the flavors! You've got this.](https://dailydishly.com/wp-content/uploads/2025/07/3dafe893-e4f9-4e41-b9c9-258fb494a309-768x768.webp)