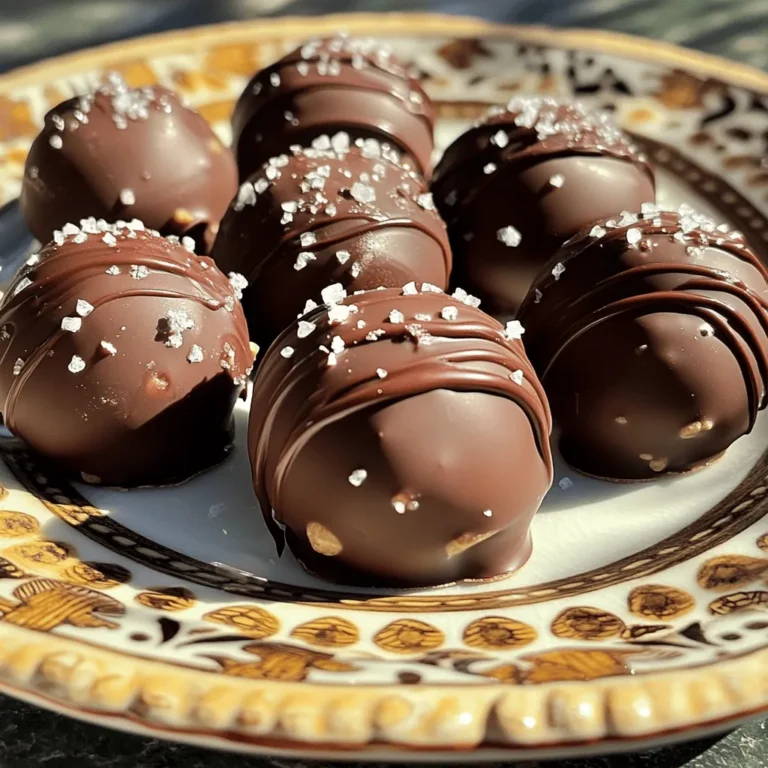
Oreo Cheesecake Truffles No Bake Easy Dessert Recipe


Craving a sweet treat that’s easy and fun to make? Look no further! These No-Bake Oreo Cheesecake Truffles are a delightful dessert that combines creamy, rich flavors with crunchy cookie bits. I’m excited to share this simple recipe that will wow your taste buds and impress your friends. With just a few ingredients and no oven required, you can whip these up in no time. Let’s get started on this delicious adventure!
Ingredients
Main Ingredients for Oreo Cheesecake Truffles
To make these delicious truffles, you need a few simple ingredients:
– 1 package (14.3 oz) Oreo cookies, finely crushed
– 8 oz cream cheese, softened
– 1 teaspoon vanilla extract
– 1 cup white chocolate chips
– 1 tablespoon coconut oil
– Extra crushed Oreo cookies for coating
These ingredients come together to create a rich and creamy treat. The crushed Oreos add a nice crunch and flavor.
Optional Toppings and Add-Ins
You can customize your truffles with some fun toppings:
– Mini chocolate chips for extra texture
– A sprinkle of sea salt for a sweet-salty balance
– Shredded coconut for a tropical twist
These add-ins can make your truffles even more special. Feel free to mix and match!
Equipment Needed
To make these truffles, you’ll need some basic kitchen tools:
– A large mixing bowl
– A hand mixer or spatula
– A parchment-lined baking sheet
– A microwave-safe bowl for melting chocolate
Having these tools ready will streamline the process. Enjoy making your Oreo Cheesecake Truffles!
Step-by-Step Instructions
Preparation of the Mixture
Start by taking a large mixing bowl. Add 1 package of finely crushed Oreo cookies. Then, mix in 8 ounces of softened cream cheese. Use a hand mixer or a spatula to blend well. You want it to be smooth and creamy. Next, stir in 1 teaspoon of vanilla extract. Make sure it is fully mixed in. This mixture will be sweet and tasty.
Shaping the Truffles
Now it’s time to shape the truffles. Take a small amount of the mixture. Roll it into a ball, about 1 inch wide. Place each ball on a parchment-lined baking sheet. Continue this process until all the mixture is rolled into balls. Once done, put the baking sheet in the fridge. Let the truffles chill for at least 30 minutes. This will help them firm up nicely.
Melting and Coating the Truffles
While the truffles chill, prepare to coat them. Take a microwave-safe bowl. Add 1 cup of white chocolate chips and 1 tablespoon of coconut oil. Microwave this in 30-second bursts. Stir between each burst until the chocolate is smooth. Once melted, take the chilled truffles out of the fridge. Dip each truffle into the melted white chocolate. Allow any extra chocolate to drip off. Then, roll the truffles in extra crushed Oreo cookies. Place them back on the baking sheet. Finally, return them to the fridge for 15 more minutes to set.
Tips & Tricks
Best Practices for Mixing
To get a smooth mix, use softened cream cheese. This makes it easy to blend. Crush the Oreo cookies into fine crumbs. A food processor works great for this. If you don’t have one, place the cookies in a bag and crush them with a rolling pin. Mix the cookies and cream cheese well. A hand mixer helps, but a spatula is fine too. Make sure there are no lumps for the best texture.
How to Achieve the Perfect Coating
When melting white chocolate, use short bursts in the microwave. Stir between each burst to avoid burning. Add coconut oil to make the chocolate smooth and shiny. Dip each truffle in the melted chocolate fully. Let any extra chocolate drip off. After the coating, roll the truffles in crushed Oreos for a great look. This adds flavor and gives a nice crunch.
Serving Suggestions for Presentation
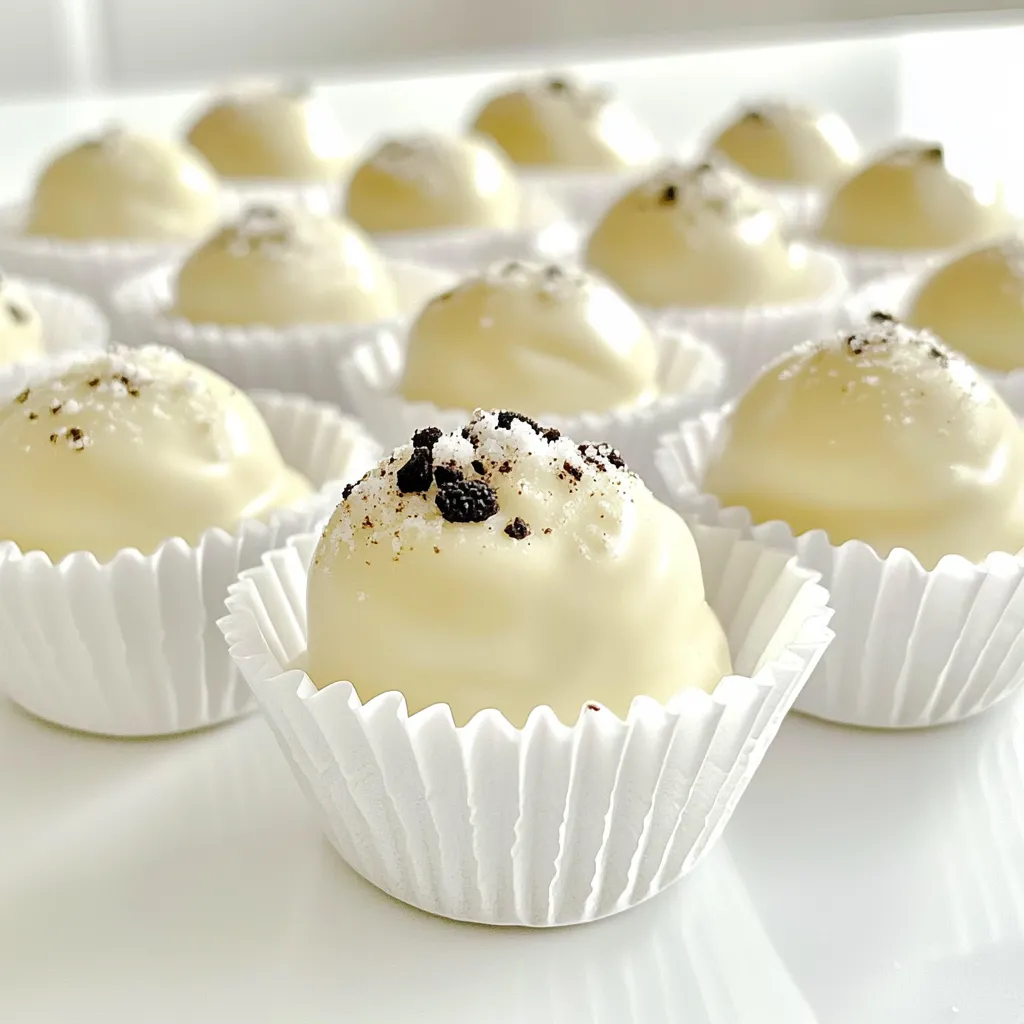
For a fun presentation, use mini cupcake liners. Place each truffle in a liner on a nice plate. You can also use a tiered tray for height. Drizzle extra melted white chocolate on top for flair. Adding some whole Oreos around the truffles makes it look more inviting. These small touches make your truffles stand out at any gathering.
Variations
Flavor Variations
You can play with flavors to make these truffles even more fun. Try adding mint extract for a fresh twist. Just one teaspoon will do. If you love peanut butter, mix in two tablespoons of creamy peanut butter with the cream cheese. You can also use chocolate sandwich cookies instead of Oreos for a chocolate overload. Experiment with different flavors to find your favorite!
Dietary Modifications
If you need a vegan option, swap the cream cheese for a plant-based cream cheese. And for the chocolate, choose vegan chocolate chips. You can also make these truffles gluten-free by using gluten-free Oreo cookies. This way, everyone can enjoy this tasty treat without worry!
Different Coating Options
The coating can change the whole vibe of these truffles. Instead of white chocolate, try dark chocolate for a rich flavor. You can also use colorful candy melts for a fun look. Sprinkle some sea salt on top for a sweet and salty combo. Get creative with toppings like crushed nuts or sprinkles to add more crunch and color!
Storage Info
How to Store No-Bake Oreo Cheesecake Truffles
Store your truffles in an airtight container. This keeps them fresh and tasty. Place a piece of parchment paper between layers if you stack them. This way, they won’t stick together.
Shelf Life and Refrigeration Tips
These truffles last about one week in the fridge. Keep them cold to maintain their texture. Always check for any signs of spoilage before eating. If they look or smell off, throw them away.
Freezing Instructions
You can freeze these truffles for up to three months. First, place them on a baking sheet. Freeze until firm, then transfer to an airtight container. When ready to eat, thaw them in the fridge overnight. Enjoy them chilled for a delightful treat!
FAQs
Can I use other cookies instead of Oreos?
Yes, you can use other cookies. Chocolate sandwich cookies work well too. You can try vanilla wafers for a different taste. Just make sure the cookies are finely crushed to mix well with the cream cheese.
How long do these truffles need to set?
These truffles need to set for about 45 minutes. First, chill them for 30 minutes to firm up. After coating in chocolate, chill them again for 15 minutes. This helps them hold their shape and flavor.
What can I substitute for cream cheese?
For cream cheese, you can use Greek yogurt or a dairy-free option. Mascarpone cheese is another great choice. These substitutes keep the truffles creamy and tasty, just like the original recipe.
Oreo cheesecake truffles are fun and easy to make. We covered the key ingredients, like cream cheese and Oreos, along with tasty toppings. You learned step-by-step how to prepare and shape the truffles. I shared helpful tips for mixing and coating, plus ideas for flavors and dietary swaps. Finally, we discussed storage and answered common questions. Enjoy making these treats for yourself or friends; they’re a hit with everyone!