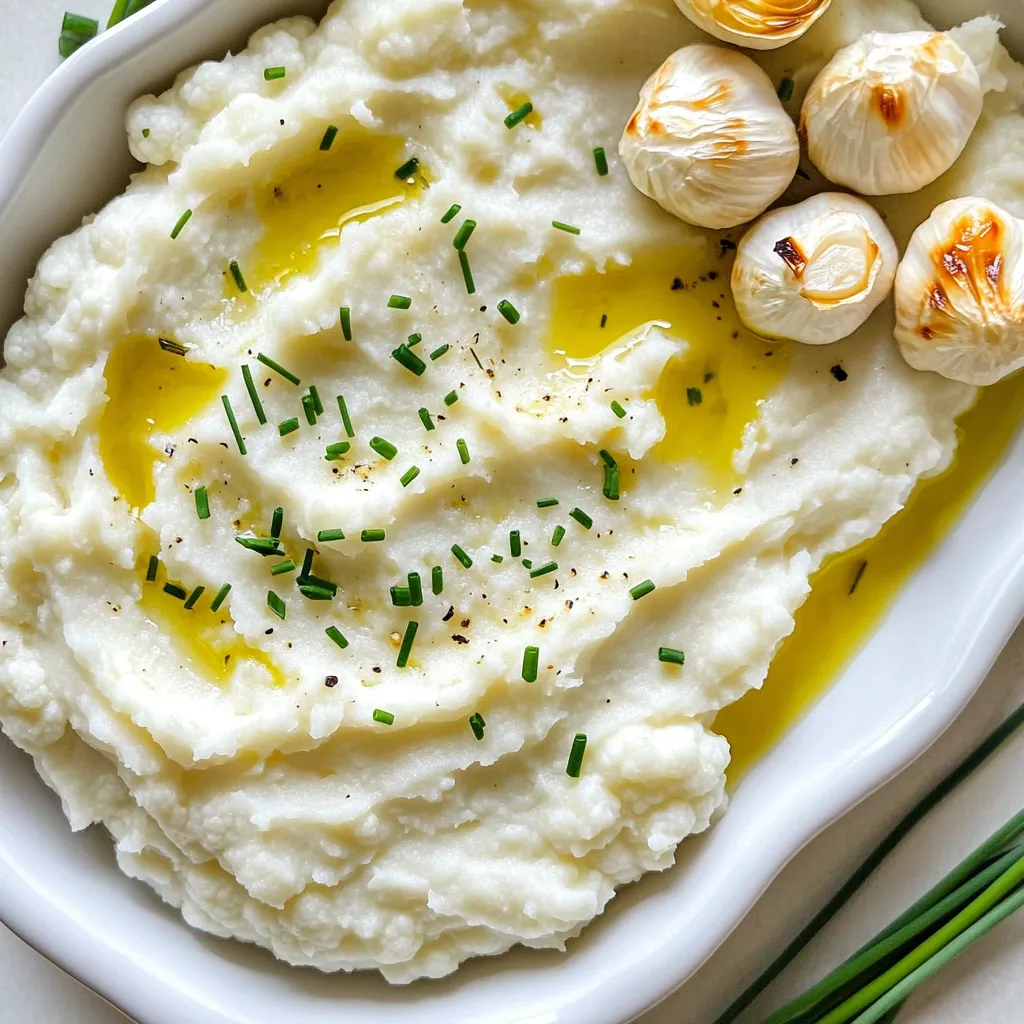
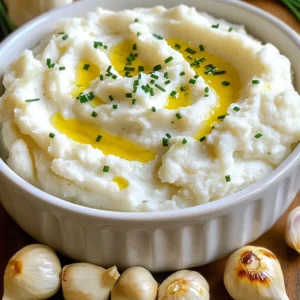
Roasted Garlic Cauliflower Mash Creamy and Flavorful Dish


Are you ready to elevate your dinner game with a creamy and flavorful twist? Roasted Garlic Cauliflower Mash is the perfect dish that combines taste and health. With just a few simple ingredients like cauliflower and garlic, this mash gives you the comfort of traditional potatoes without the extra carbs. Whether you’re vegan, gluten-free, or just looking to impress at your next meal, this guide will help you achieve the best garlic mash ever!
Ingredients
Main Ingredients
– 1 large head cauliflower, chopped into florets
– 5 cloves garlic, unpeeled
– 2 tablespoons olive oil
Optional Ingredients
– 2 tablespoons nutritional yeast for a cheesy flavor
– 1/4 cup unsweetened almond milk or any milk of your choice
– 1 tablespoon fresh thyme leaves or 1 teaspoon dried thyme
Seasoning and Garnish
– Salt and freshly ground black pepper to taste
– 1 tablespoon butter, vegan or regular
– Chopped chives for garnish (optional)
Gather these ingredients to make your roasted garlic cauliflower mash. The main ingredients bring a great base. Cauliflower is the star here, and it gives a nice, creamy texture. Garlic adds rich flavor. Olive oil helps with roasting and adds a bit of a nice taste.
You can choose optional ingredients to add more depth. Nutritional yeast gives a cheesy flavor without dairy. Almond milk makes the mash creamy. Fresh herbs like thyme add a touch of brightness.
For seasoning, salt and pepper make the flavors pop. A bit of butter adds richness. Chives are perfect for a fresh garnish at the end. With these ingredients, you will create a mash that is creamy and full of flavor.
Step-by-Step Instructions
Preparation
– Preheat your oven to 400°F (200°C).
– Take your large head of cauliflower and chop it into florets.
– Grab 5 cloves of garlic, keeping them unpeeled.
– Place the florets and whole garlic cloves on a baking sheet.
– Drizzle the mixture with 2 tablespoons of olive oil.
– Sprinkle salt and pepper to taste.
– Toss everything to coat well.
Roasting Process
– Roast in the oven for about 25-30 minutes.
– Check that the cauliflower is tender and slightly golden.
– Stir the mixture halfway through cooking to ensure even roasting.
Blending and Serving
– Once roasted, take the baking sheet out of the oven.
– Let it cool a bit, then squeeze the garlic from their skins.
– In a large mixing bowl, combine the roasted cauliflower and garlic.
– Add in 1/4 cup of unsweetened almond milk, 2 tablespoons of nutritional yeast, and thyme.
– Toss in 1 tablespoon of butter for extra creaminess.
– Using an immersion blender or potato masher, blend until smooth or chunky.
– Taste it and adjust the seasoning with more salt and pepper if needed.
– Serve warm, and top with chopped chives for a fresh touch.
Tips & Tricks
Perfecting the Roasting
To get even cooking, cut the cauliflower into similar-sized florets. This way, they all cook at the same rate. Spread them out on a baking sheet. Make sure they are not crowded. Stir the florets halfway through roasting. This helps them brown nicely.
For the best garlic flavor, roast the garlic whole and unpeeled. Roasting brings out its sweet taste. When you squeeze the roasted garlic from its skin, it will be soft and flavorful. This adds depth to your mash.
Achieving Optimal Consistency
Do you prefer smooth or chunky mash? Use an immersion blender for a smooth texture. If you want a chunkier mash, a potato masher works great. You can mix it until it is just right for you.
If the mash is too thick, add more milk. Start with a little at a time. Stir well and check the texture. This helps you find the perfect creaminess.
Flavor Enhancements
Don’t be afraid to experiment! Try adding herbs like rosemary or parsley. Spices like paprika can give it a kick. You can mix and match to find your favorite flavors.
For garnishes, chopped chives add a nice touch. They give a fresh taste and look great on top. You can also sprinkle some extra thyme for a pop of color and flavor.
Variations
Different Flavor Profiles
You can easily change the flavor of your roasted garlic cauliflower mash. Adding spices brings new life to the dish. Try mixing in paprika for a smoky taste or cumin for warmth. Both spices enhance the mash without overpowering it. You can also add greens. Incorporating vegetables like spinach or kale adds color and nutrients. Just mix them in when blending the mash.
Dietary Modifications
If you need dairy-free options, use almond milk or any plant-based milk. This keeps it creamy without dairy. For a cheesy flavor, add nutritional yeast. It adds richness without any dairy. Also, this dish is gluten-free. All the main ingredients are safe for those with gluten issues.
Serving Suggestions
This mash pairs well with proteins like chicken or fish. It also complements roasted veggies or salads. If you have leftovers, get creative. Use the mash as a base for veggie bowls or a topping for baked potatoes. It can easily spice up your meals for the week.
Storage Info
Storing Leftovers
After enjoying your roasted garlic cauliflower mash, store any leftovers in an airtight container. Keep it in the fridge. This helps keep your mash fresh and tasty. It lasts about 3 to 5 days in the fridge. If you see any signs of spoilage, throw it away.
Freezing Cauliflower Mash
To freeze your mash, let it cool first. Then, scoop it into freezer bags. Remove as much air as you can before sealing. This helps prevent freezer burn. It keeps well for about 2 to 3 months. When you want to use it, thaw it in the fridge overnight.
To maintain texture, avoid using a microwave for thawing. Let it sit in the fridge instead. This slow thaw helps keep it creamy.
Reheating Tips
You can reheat your cauliflower mash in a few ways. The microwave is fast. Pour the mash into a bowl and cover it. Heat in short bursts, stirring in between. This helps heat it evenly.
You can also use the stovetop. Place the mash in a pot over low heat. Stir often to prevent sticking. Add a splash of almond milk or water if it seems dry. This keeps it smooth and creamy.
FAQs
Can I use frozen cauliflower instead of fresh?
Yes, you can use frozen cauliflower. Frozen cauliflower saves time. It’s already washed and cut. This can cut your prep time in half. However, it may have more water. This extra water can make your mash watery. To avoid this, drain it well after cooking. Fresh cauliflower gives a better texture and flavor.
How do I make Roasted Garlic Cauliflower Mash vegan?
To make it vegan, swap out the butter and milk. Use vegan butter instead of regular butter. For milk, unsweetened almond milk works great. You could also try oat or soy milk. These substitutes keep the creamy texture. They still let the garlic shine through.
What’s the difference between this mash and traditional mashed potatoes?
Roasted garlic cauliflower mash is lower in carbs. Cauliflower has fewer calories than potatoes. It’s also high in fiber and vitamins. Flavor-wise, the garlic adds a rich taste. Cauliflower has a unique, nutty flavor too. This mash is lighter and can be a great side dish.
This blog post shared a simple way to make roasted garlic cauliflower mash. We explored its key ingredients, like cauliflower, garlic, and olive oil. You learned step-by-step instructions to prepare, roast, and blend your mash. Useful tips helped improve your cooking technique and flavor. We even explored variations and storage methods.
This dish is not only tasty but also flexible for any dietary needs. Enjoy this nutritious alternative to traditional mashed potatoes. Your culinary skills will impress anyone at the table.
![To make Greek Lemon Chicken Soup, you need fresh and simple ingredients. These give the soup its bright flavor and comforting feel. Here’s the list of what you’ll need: - 1 lb boneless, skinless chicken breasts - 6 cups chicken broth - 1 medium onion, chopped - 2 cloves garlic, minced - 1 cup carrots, diced - 1 cup celery, diced - 1 cup orzo pasta or rice - 3 large eggs - 1/3 cup fresh lemon juice (about 2-3 lemons) - 1 teaspoon dried oregano - Salt and pepper to taste - Fresh dill, for garnish These ingredients come together to create a soup that warms the soul. The chicken offers protein, while the vegetables add nutrients and texture. The lemon juice gives it a zesty kick. I always stress the importance of fresh ingredients. They make the soup vibrant and full of flavor. Using orzo or rice helps to make the soup hearty. You can choose according to your preference. Eggs add creaminess without heavy cream, keeping the dish light. Don’t skip the fresh dill; it adds a wonderful aroma and flavor. For the full recipe and step-by-step instructions, check out the section labeled "Full Recipe." - Boil chicken in broth. Place 1 lb of boneless, skinless chicken breasts in 6 cups of chicken broth. Bring it to a boil over medium-high heat. Let the chicken simmer for 15 to 20 minutes, until it’s cooked through. - Remove and shred. Once done, take the chicken out and let it cool a bit. Use two forks to shred it into bite-sized pieces. Set this chicken aside for later. - Add onion, garlic, carrots, and celery. In the same pot with the broth, add 1 medium chopped onion, 2 minced garlic cloves, 1 cup diced carrots, and 1 cup diced celery. - Cook until tender. Stir and let the veggies cook for about 10 minutes, until they become tender and fragrant. - Stir in orzo or rice. After the veggies soften, add 1 cup of orzo pasta or rice. Cook it according to the package instructions, usually around 8 to 10 minutes. - Whisk eggs and lemon juice. In a bowl, whisk together 3 large eggs and 1/3 cup of fresh lemon juice until well mixed. - Temper eggs with hot broth. Once the orzo is ready, reduce the heat to low. Gradually add a ladle of the hot broth to the egg mixture while whisking constantly. This step helps prevent the eggs from scrambling. - Add to the pot, return chicken. Slowly pour the tempered egg mixture back into the pot while stirring. Add the shredded chicken back in, along with 1 teaspoon of dried oregano, salt, and pepper to taste. Let the soup warm through for 3 to 5 minutes. This method brings every flavor together in a cozy bowl of Greek Lemon Chicken Soup. You can find the complete recipe [Full Recipe]. How to prevent eggs from scrambling To keep the eggs from scrambling, you must temper them first. Start by whisking together the eggs and lemon juice in a bowl. Slowly add a ladle of hot broth from the pot into this bowl. Whisk continuously while pouring. This warms the eggs without cooking them. Once the mixture is warm, pour it back into the pot while stirring. This method helps create a smooth texture. Achieving the right consistency The soup should be creamy but still light. If it feels too thick, add more broth until it reaches your desired consistency. If you prefer a thicker soup, let it simmer a bit longer to reduce. Just remember to stir often to prevent sticking. The orzo or rice will also absorb some broth, so adjust as needed. Best accompaniments for Greek Lemon Chicken Soup This soup pairs well with a simple side salad or crusty bread. A fresh Greek salad with tomatoes, cucumbers, and feta adds a nice crunch. You can also serve it with warm pita or toasted baguette slices. These sides enhance the meal and round out the flavors. Presentation tips with dill and lemon zest For a beautiful presentation, ladle the soup into bowls. Garnish each bowl with a sprig of fresh dill. Add a twist of lemon zest on top for color and flavor. A slice of lemon on the side brightens up the dish. This not only looks great but also adds a burst of fresh taste. {{image_2}} To make Greek Lemon Chicken Soup vegan or vegetarian, you can switch out the chicken. Use tofu, tempeh, or chickpeas instead. For broth, swap chicken broth with vegetable broth. This keeps the same warm flavor while being plant-based. Instead of orzo, you can use quinoa or rice noodles. These options add a nice texture and soak up the soup’s flavor well. They are also gluten-free, which is great for many diets. If you don’t have orzo, any small pasta works. You can try ditalini, small shells, or even farro. Each gives a unique twist to the dish. For vegetables, consider adding sweet corn, peas, or bell peppers. These add color and a hint of sweetness. You can also try kale or spinach for a nutritious boost. Mixing different veggies keeps the soup exciting and tasty. For the full recipe, check out the detailed cooking steps. To keep your Greek Lemon Chicken Soup fresh, follow these steps: - Refrigeration tips: Let the soup cool to room temperature. Transfer it to an airtight container. It’s best to store it in the fridge for up to 3 days. - Freezing instructions: For longer storage, freeze the soup. Use a freezer-safe container, leaving some space at the top for expansion. It can stay frozen for up to 3 months. When you want to enjoy your soup again, reheating is key. Here’s how to do it right: - Best methods for reheating soup: Use the stovetop for even heating. Place the soup in a pot over medium heat, stirring often. You can also use the microwave, but do it in short bursts to prevent hot spots. - Tips for maintaining flavor and texture: Add a splash of chicken broth or water while reheating. This keeps the soup from getting too thick and helps refresh the flavors. How can I make Greek Lemon Chicken Soup gluten-free? To make this soup gluten-free, simply replace orzo with gluten-free pasta or rice. This swap keeps the soup tasty and light. What is the origin of Greek Lemon Chicken Soup? This comforting dish, known as Avgolemono, comes from Greece. It blends chicken, lemon, and eggs, creating a rich flavor. Can I use leftover chicken for this recipe? Absolutely! Leftover chicken adds great flavor. Just shred it and add it to the soup when you combine ingredients. How long does this soup last in the refrigerator? Greek Lemon Chicken Soup lasts about three to four days in the fridge. Store it in an airtight container for best results. What are the nutritional benefits of this soup? This soup is rich in protein from chicken and eggs. It also offers vitamins from vegetables and lemon's vitamin C. Can I make this soup in a slow cooker or instant pot? Yes, you can! For a slow cooker, cook on low for 6-8 hours. For an instant pot, use the soup setting for about 20 minutes. Be sure to follow the Full Recipe for best results. This blog post walked you through making Greek Lemon Chicken Soup. We covered the key ingredients, from chicken and broth to fresh lemon juice. You learned how to prepare the chicken and cook the veggies. I shared tips to perfect the soup and ideas for serving it. Variations and proper storage techniques were also highlighted. This soup is not only tasty but also easy to make. Whether you stick to the classic recipe or try a twist, enjoy every warm bowl!](https://dailydishly.com/wp-content/uploads/2025/06/65f566a6-d6b5-4832-8417-ad5d991989df-768x768.webp)