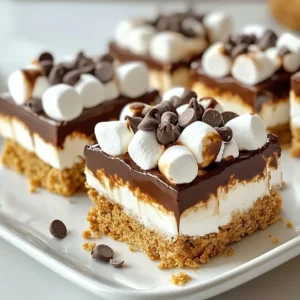
S’mores No-Bake Bars
Delicious no-bake bars that combine the classic flavors of s'mores in a convenient bar form.
Ingredients
- 2 cups graham cracker crumbs
- 1 cup mini marshmallows
- 1 cup semi-sweet chocolate chips
- 0.5 cup unsweetened cocoa powder
- 0.5 cup coconut oil, melted
- 0.25 cup honey or maple syrup
- 0.5 teaspoon vanilla extract
- 1 pinch salt
- 1 cup chopped nuts (optional, for crunch)
Instructions
- Prepare the Base: In a large mixing bowl, combine the graham cracker crumbs, unsweetened cocoa powder, and a pinch of salt. Mix until well combined.
- Melt the Chocolate: In a small saucepan over low heat, melt the semi-sweet chocolate chips and coconut oil together, stirring continuously until smooth. Remove from heat and allow to cool slightly.
- Combine Ingredients: In the bowl with the graham cracker mixture, add the melted chocolate mixture, honey or maple syrup, and vanilla extract. Stir until everything is evenly coated and forms a thick mixture.
- Add Marshmallows & Nuts: Gently fold in the mini marshmallows and chopped nuts (if using) into the mixture, ensuring they’re evenly distributed.
- Press Mixture Into Pan: Line a square baking pan (8x8 inches) with parchment paper, leaving some overhang. Pour the mixture into the pan and use a spatula to press it down firmly into an even layer.
- Chill & Set: Cover the pan with plastic wrap and place it in the refrigerator for at least 2-3 hours or until the bars are set and firm.
- Slice & Serve: Once set, lift the bars out of the pan using the parchment paper overhang. Carefully slice into squares or rectangles and serve immediately. Store leftovers in an airtight container in the refrigerator.
Notes
Arrange the no-bake bars on a rustic wooden platter and sprinkle extra mini marshmallows and chocolate chips on top for a fun and inviting display. Add a drizzle of melted chocolate for extra flair!