31. Stuffed Bell Peppers with Quinoa Simple Delight

Looking for a healthy and delicious meal that’s also easy to make? Try these Stuffed Bell Peppers with Quinoa! They’re colorful, packed with nutrients, and bursting with flavor. I’ll guide you step-by-step through the process, from gathering simple ingredients to baking them to perfection. Whether you’re a busy parent or just want a quick dish, this recipe is a win for any table. Let’s get started!
Ingredients
List of Ingredients
– 4 large bell peppers (any color)
– 1 cup quinoa, rinsed
– 2 cups vegetable broth
– 1 can (15 oz) black beans, drained and rinsed
– 1 cup corn kernels (fresh or frozen)
Additional Ingredients
– 1 medium onion, finely chopped
– 2 cloves garlic, minced
– 1 teaspoon cumin
– 1 teaspoon chili powder
– ½ teaspoon smoked paprika
Toppings and Garnishes
– Salt and pepper to taste
– 1 cup diced tomatoes (canned or fresh)
– 1 cup shredded cheese (cheddar or Mexican blend)
– Fresh cilantro for garnish (optional)
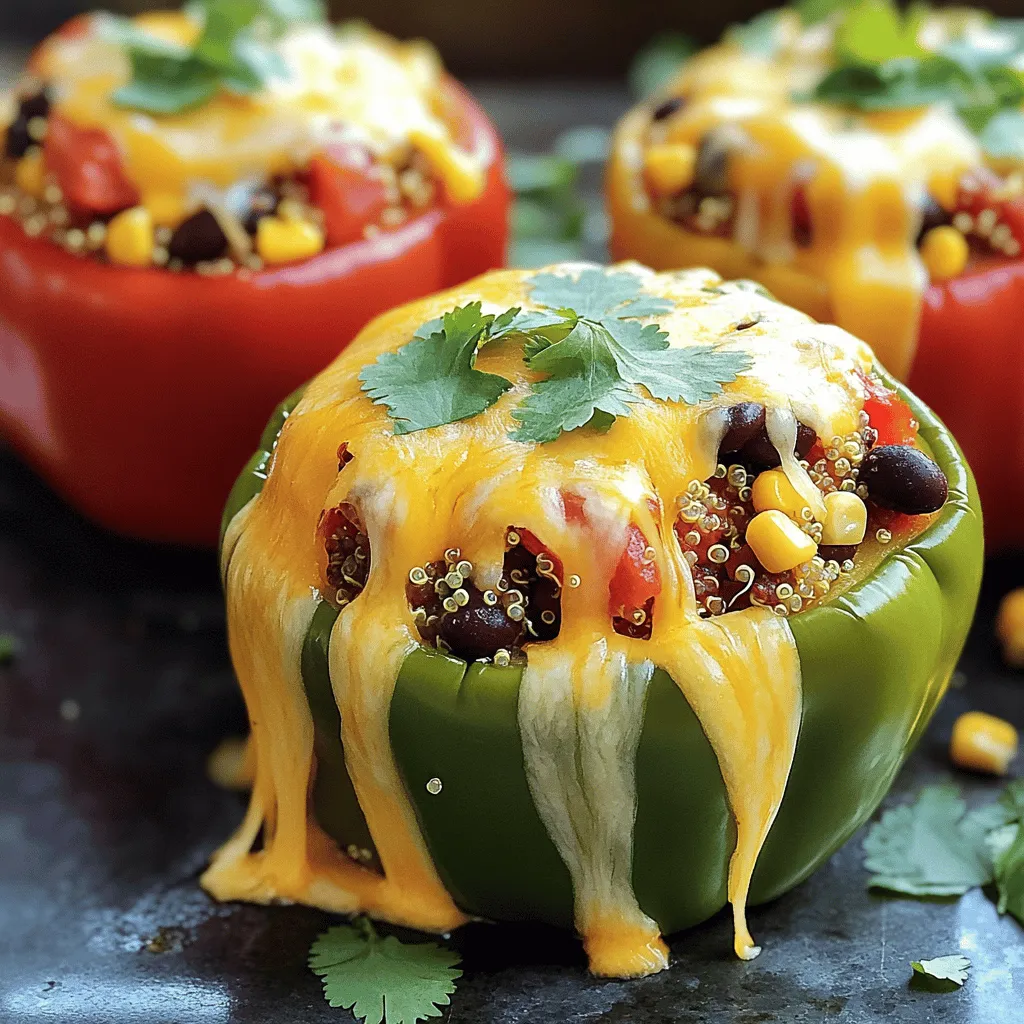
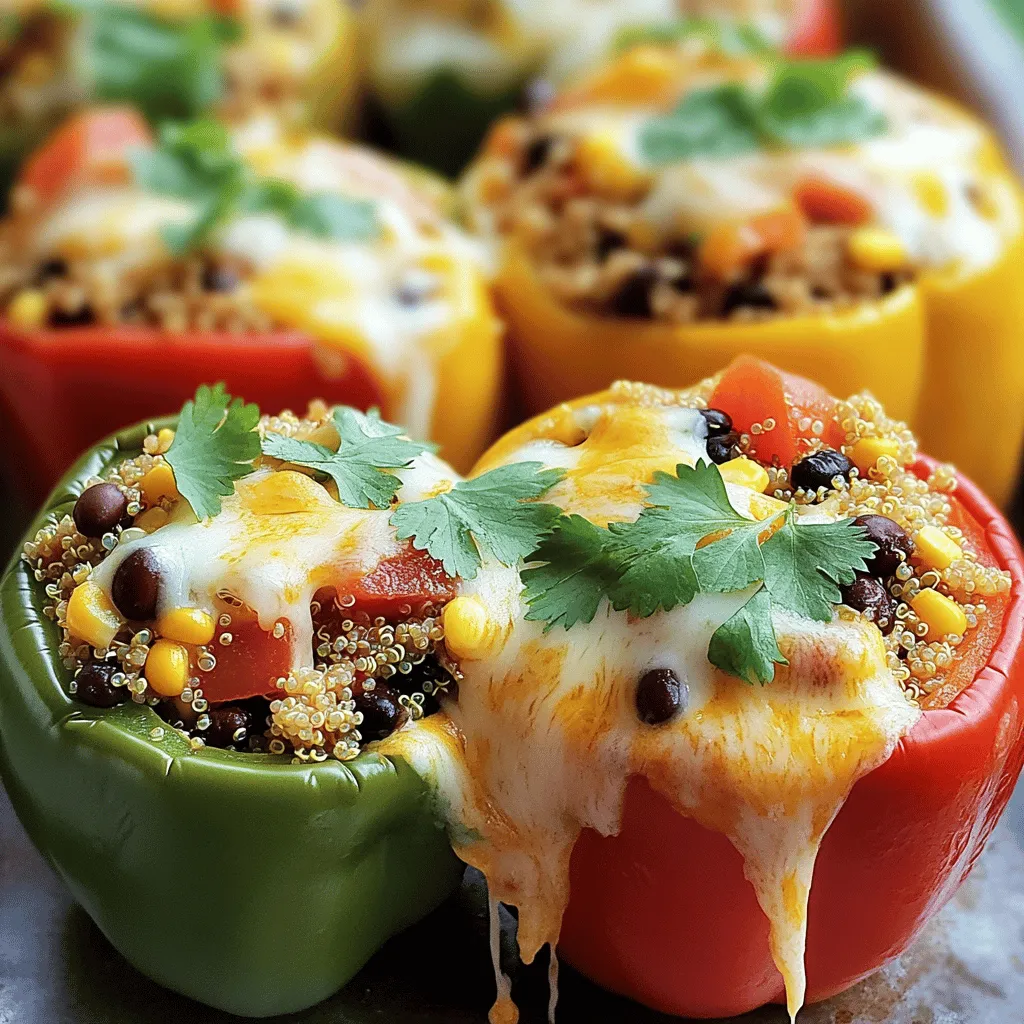
These ingredients make stuffed bell peppers a simple delight. Each bell pepper holds a tasty mix. The quinoa provides a nutty base. You’ll love how the black beans add protein and fiber. Corn gives a sweet crunch, making each bite fun.
Onions and garlic bring a rich flavor. Cumin and chili powder add warmth. Smoked paprika gives a hint of smokiness. Together, these flavors create a dish you’ll enjoy over and over.
Toppings make this dish even better. Diced tomatoes add freshness. Cheese melts on top, creating a gooey layer. Fresh cilantro adds a pop of color and flavor.
You can use this list to gather your ingredients.
Step-by-Step Instructions
Preparing the Quinoa
– Preheat the oven to 375°F (190°C).
– In a medium saucepan, combine the rinsed quinoa and 2 cups of vegetable broth. Bring to a boil, then reduce heat to low. Cover and simmer for about 15 minutes, until the quinoa absorbs all the liquid. Fluff it with a fork and set aside.
Sautéing the Vegetables
– In a non-stick skillet over medium heat, sauté the chopped onion and minced garlic until the onion becomes translucent, about 3-5 minutes.
– Add 1 can of black beans, 1 cup of corn, and 1 cup of diced tomatoes. Then, sprinkle in 1 teaspoon of cumin, 1 teaspoon of chili powder, and ½ teaspoon of smoked paprika. Stir the mixture well and cook for another 5 minutes.
Assembling the Bell Peppers
– Cut the tops off the 4 large bell peppers and remove all seeds and membranes. Place the peppers upright in a baking dish.
– Stuff each bell pepper with the quinoa and vegetable mixture. Make sure to pack it in slightly for a hearty filling.
Baking Instructions
– Sprinkle 1 cup of shredded cheese over the top of each stuffed pepper. Cover the baking dish with aluminum foil.
– Bake for 25 minutes, then remove the foil and bake for an additional 10-15 minutes. You want the peppers to be tender and the cheese to be bubbly and golden.
This recipe is a simple delight and perfect for any meal.
Tips & Tricks
Cooking Tips
– Always rinse your quinoa to remove any bitterness.
– Taste your filling and adjust seasoning as needed.
Perfecting Your Stuffed Peppers
– Be careful not to overcook the peppers; they should stay crisp.
– Use a meat thermometer to check if they are done. Aim for 165°F.
Serving Suggestions
– Pair your stuffed peppers with a fresh side salad or creamy avocado slices.
– Top with sour cream or Greek yogurt for an extra layer of flavor.
Creating stuffed bell peppers with quinoa is easy and fun. Following these tips can help you achieve the best results.Enjoy your cooking!

Variations
Alternative Ingredients
You can swap quinoa for rice or couscous. Both options change the texture and flavor. Ground turkey or beef can also boost the protein. These changes make the dish heartier, perfect for meat lovers.
Flavor Enhancements
Fresh herbs add a vibrant touch. Try basil or parsley for a fresh taste. Different cheeses can also enhance flavor. Feta or goat cheese offer unique twists. Each cheese brings its own character to the dish.
Dietary Versions
To make it vegan, skip the cheese or use dairy-free cheese. This keeps the dish plant-based while still tasty. For gluten-free options, choose ingredients that fit your needs. This way, everyone can enjoy stuffed peppers.
Storage Info
Storing Leftovers
To keep your stuffed peppers fresh, let them cool completely. Place them in an airtight container. You can store them in the fridge for up to 4 days. This way, you can enjoy your meal later without losing flavor.
Freezing Instructions
If you want to keep your stuffed peppers for a longer time, you can freeze them. First, wrap each pepper in plastic wrap. Then, wrap them in foil. They can stay in the freezer for up to 3 months. When you are ready to eat, just thaw and reheat.
Reheating Tips
To reheat your stuffed peppers, the oven works best. Preheat it to 350°F. Bake until they are heated through. If you prefer the microwave, set it on medium heat. Cover the pepper to keep moisture. This helps avoid dryness and keeps the flavors intact. For the best results, always check if they are hot all the way through.
FAQs
Can I make stuffed peppers ahead of time?
Yes, you can prep and assemble stuffed peppers a day in advance. Just keep them in the fridge. This makes dinner easy on busy days. You can cook them right when you need to eat. This way, you save time and enjoy the meal fresh.
How do I know when the peppers are done?
You’ll know the peppers are ready when they are tender. Check if the cheese is bubbly and golden on top. This shows they are cooked well. A fork can easily pierce the pepper skin. This means you can enjoy the flavors inside.
What can I serve with stuffed peppers?
You can serve stuffed peppers with a side salad, garlic bread, or steamed vegetables. These sides add freshness and flavor to your meal. A simple salad brings a nice crunch. Garlic bread adds warmth. Steamed veggies are healthy and colorful on your plate. Try these pairings to complete your meal.
Stuffed bell peppers are an easy and tasty dish. We covered the key ingredients, from quinoa to spices. I shared clear steps to prepare, assemble, and bake your peppers. You now have tips for perfect texture and storage for leftovers. Feel free to customize your recipe with different herbs and ingredients. This dish is both healthy and satisfying. Get creative and enjoy your stuffed peppers as a hearty meal!


![- 1 lb chicken breast, cut into 1-inch cubes - 2 ripe mangoes, pureed - Zest and juice of 2 limes For the Mango Lime Chicken Skewers, the main ingredients bring the dish to life. Chicken breasts provide a lean protein base. Ripe mangoes lend sweetness and a tropical touch. Lime zest and juice add a bright, tangy flavor that balances the sweetness of the mango. - 2 tablespoons honey - 2 tablespoons olive oil - 1 teaspoon garlic powder - 1 teaspoon ground cumin - Salt and pepper to taste The marinade is key to creating depth in the flavor. Honey adds a hint of sweetness that complements the mango. Olive oil keeps the chicken moist while adding richness. Garlic powder brings a savory note, while ground cumin offers warmth and earthiness. Salt and pepper enhance all the flavors. - Fresh cilantro, for garnish - Wooden or metal skewers Garnishing with fresh cilantro adds a pop of color and fresh taste. It brightens the dish and elevates the presentation. You can use wooden or metal skewers for holding the chicken. Just remember to soak wooden skewers in water for 30 minutes before grilling to prevent burning. By using these ingredients, you set the stage for a flavorful and vibrant meal. For the full recipe, check the link provided. First, gather your ingredients. In a large bowl, combine 2 ripe mangoes pureed, zest and juice of 2 limes, and 2 tablespoons honey. Add 2 tablespoons olive oil, 1 teaspoon garlic powder, 1 teaspoon ground cumin, along with salt and pepper to taste. Mix well until everything blends smoothly. This marinade gives the chicken a sweet and tangy flavor, making it truly special. Next, take 1 pound of chicken breast cut into 1-inch cubes. Coat these chicken cubes with the marinade you just made. Make sure each piece is fully covered. This step is key for the flavor to soak in. Cover your bowl with plastic wrap and place it in the fridge. Let the chicken marinate for at least 1 hour. If you have time, refrigerate overnight for an even better taste. Now, it’s time to grill! Preheat your grill or grill pan to medium-high heat. While it heats up, thread the marinated chicken cubes onto wooden or metal skewers. Leave a little space between each piece for even cooking. Once your grill is ready, place the skewers on it. Cook for about 10 to 12 minutes, turning occasionally. Check the chicken to make sure it’s fully cooked and has nice grill marks. After grilling, let the skewers rest for a few minutes. Garnish with chopped fresh cilantro. Enjoy your Mango Lime Chicken Skewers! For more details, check the Full Recipe. For the best flavor, marinate your chicken for at least one hour. If you have time, let it sit overnight. This longer time allows the flavors to soak in deeply. When you coat the chicken, make sure every piece gets the marinade. Use your hands or a spoon to mix it well. This helps every bite to be bursting with mango and lime. Grill your skewers at medium-high heat. This temperature creates a nice char without burning the chicken. Cook the skewers for about 10 to 12 minutes. Turn them a few times to ensure even cooking. Check the chicken for doneness by cutting a piece open. It should be white inside with no pink. Serve your skewers with fresh sides like a salad or rice. A mango salsa or a zesty yogurt dip also pairs well. For a colorful plate, arrange the skewers neatly and drizzle some extra mango puree on top. Add lime wedges for garnish to give a bright look and extra flavor. You can also sprinkle fresh cilantro for a pop of color. {{image_2}} You can switch out the chicken for shrimp or firm tofu. Shrimp cooks fast and takes on flavors well. Just marinate them the same way as chicken. Firm tofu absorbs all the good taste. Cut it into cubes and let it soak in the marinade for at least 30 minutes. Both options create a tasty dish that fits different diets. To make the dish even more exciting, add spices like chili powder or ginger. Chili powder gives a warm kick, while ginger adds a fresh touch. You can also try different fruits. Pineapple, for example, brings a sweet and tangy flavor. Just chop the fruit and mix it into your marinade. Experimenting with these flavors can lead to fun new tastes. You don’t have to stick to just chicken or shrimp. Try using veggies or other fruits on your skewers. Bell peppers, zucchini, and onions work great and add color. Fruits like pineapple or peaches can also be skewered. They caramelize beautifully on the grill. This not only makes your meal more colorful but also adds more nutrients. To store leftover mango lime chicken skewers, place them in an airtight container. This keeps them fresh. Make sure to cool them to room temperature first. Store them in the fridge for up to three days. For reheating, you can use your grill or a skillet. Heat them on medium until warm. This helps keep the chicken juicy and tasty. Avoid using a microwave, as it can make the chicken dry. Yes, you can freeze mango lime chicken skewers! This is great for meal prep. To freeze, wrap each skewer in plastic wrap. Then, place them in a freezer-safe bag. This keeps them safe from freezer burn. They can last up to three months in the freezer. When ready to eat, thaw them in the fridge overnight. This helps them defrost evenly. Then, grill or reheat as you like. In the fridge, mango lime chicken skewers last for about three days. If you freeze them, they can last for about three months. Always check for any off smell or color before eating! Proper storage ensures your meal stays safe and delicious. To marinate chicken well, use a mix of acid and fat. The acid helps to tenderize the meat. For Mango Lime Chicken Skewers, marinate for at least 1 hour. If you have time, letting it sit overnight gives better flavor. Keep the chicken in the fridge while it marinates. Yes, you can cook these skewers in the oven. Preheat your oven to 400°F. Place the skewers on a baking sheet lined with foil. Bake for about 20-25 minutes. Flip the skewers halfway through cooking for even results. This method works well if you can't grill. To check chicken doneness, look for clear juices. If the juices run clear when you cut into the chicken, it’s done. The meat should not be pink inside. You can also cut a piece in half to check. Always ensure it reaches a safe internal temperature. These skewers are great with a side of rice or a fresh salad. You can also serve them with grilled veggies. Try adding a light dipping sauce, like yogurt or a mango salsa. This adds flavor and balance to your meal. For the complete Mango Lime Chicken Skewers recipe with all details, check out the [Full Recipe]. This blog post covered making delicious Mango Lime Chicken Skewers. You learned about the key ingredients, like chicken and mangoes, and how to prepare a tasty marinade. We went through grilling tips and serving ideas to make your meal shine. You can even try different proteins or spices to mix things up. Remember to store leftovers correctly for later enjoyment. Now, you have all the tools needed to create a flavorful dish that your friends and family will love. Enjoy your cooking adventure with these tasty skewers!](https://dailydishly.com/wp-content/uploads/2025/05/700a395d-140d-49bc-8652-e5807e5ab179-768x768.webp)


![- 1 zucchini, sliced into thick rounds - 1 yellow bell pepper, sliced into strips - 1 red bell pepper, sliced into strips - 1 red onion, cut into wedges - 1 cup cherry tomatoes - 3 tablespoons olive oil - Zest and juice of 1 lemon - 2 teaspoons dried oregano - 2 teaspoons dried thyme - 2 cloves garlic, minced - Salt and pepper to taste - Fresh parsley, chopped (for garnish) When I create Lemon Herb Grilled Vegetables, I focus on using fresh, high-quality vegetables. Zucchini brings a nice crunch, while yellow and red bell peppers add sweetness and color. The red onion gives a mild bite, and cherry tomatoes burst with flavor. Next, I make the marinade. I combine olive oil, lemon zest, and lemon juice to give a citrusy kick. Dried oregano and thyme add earthy notes, while minced garlic brings depth. Salt and pepper enhance all the flavors. This marinade coats the veggies, making them vibrant and flavorful. Finally, I garnish with fresh parsley. This simple touch adds brightness and a pop of color. For the full recipe, check the complete cooking instructions and enjoy this fresh dish! To start, gather your ingredients. In a large bowl, combine these items: - 3 tablespoons olive oil - Zest of 1 lemon - Juice of 1 lemon - 2 teaspoons dried oregano - 2 teaspoons dried thyme - 2 cloves garlic, minced - Salt and pepper to taste Whisk these together until smooth. This marinade packs in bright flavors. It will make your veggies sing! Next, it's time to add the fresh veggies. Use: - 1 zucchini, sliced into thick rounds - 1 yellow bell pepper, sliced into strips - 1 red bell pepper, sliced into strips - 1 red onion, cut into wedges - 1 cup cherry tomatoes Toss the veggies in the marinade. Make sure every piece gets coated well. Cover your bowl with plastic wrap. Place it in the fridge. Let the vegetables sit for at least 30 minutes. This step is key for flavor. After marinating, it’s grilling time! First, preheat your grill or grill pan on medium-high heat. When hot, place the marinated vegetables directly on the grill. Spread them out in a single layer. Grill for about 6-8 minutes. Turn them occasionally. You want those lovely grill marks! The veggies should be tender but still crisp. Once done, remove the vegetables from the grill. Transfer them to a serving platter. For a nice touch, garnish with fresh chopped parsley before serving. For the full recipe, check out the details above! For Lemon Herb Grilled Vegetables, choose fresh and seasonal options. Look for bright colors and firm textures. Zucchini, bell peppers, red onion, and cherry tomatoes are great choices. They all grill well and taste amazing. Select vegetables in peak season for the best flavor. Visit local farmers' markets to find the freshest picks. To get those perfect grill marks, preheat your grill to medium-high heat. Spread the vegetables in a single layer on the grill. This helps them cook evenly. Turn them occasionally for even char and tenderness. Aim for 6-8 minutes of grilling. You want them tender but still crisp. Use tongs to flip them gently. Enhance the taste of your grilled veggies with extra herbs or spices. Fresh herbs like basil or cilantro work well. You can also try adding a pinch of red pepper flakes for heat. A drizzle of balsamic glaze after grilling adds a sweet touch. Customize the flavors to match your meal or mood. For the full recipe, check out Lemon Herb Grilled Vegetables. {{image_2}} You can swap in many vegetables for this dish. Asparagus works great on the grill. It adds a nice crunch and fresh taste. Eggplant is another tasty choice. It absorbs flavors well and becomes creamy when grilled. Other options include mushrooms, carrots, or even sweet potatoes. Each choice brings something unique to your plate. If you want to change up the taste, try different citrus fruits. Lime or orange juice can add a new twist. You can also mix in fresh herbs like basil or cilantro. These herbs give a fresh and vibrant flavor. A splash of balsamic vinegar can also work wonders. Experimenting with marinades keeps the meal exciting. Pair your grilled vegetables with grains for a full meal. Quinoa, rice, or couscous work well. You can also add grilled chicken or fish for protein. A fresh salad on the side brightens up the dish. For a little kick, drizzle some chili oil over the top. This dish can be a main event or a perfect side for any meal. For the full recipe, check out the complete guide. Grilled vegetables can last in the fridge for about 3 to 5 days. Make sure to store them in an airtight container. This keeps them fresh and tasty. When you want to eat them again, just take a look and see if they still smell good. If they look or smell off, it's best to discard them. If you want to save grilled vegetables for later, freezing is a great option. Here’s how to do it: 1. Cool the Vegetables: Let them cool to room temperature first. 2. Prepare the Freezer Bags: Use freezer-safe bags or containers. 3. Pack the Vegetables: Place the veggies in the bags, leaving some space for air. 4. Seal and Label: Seal the bags tightly. Label them with the date. 5. Freeze: Lay the bags flat in the freezer to save space. These steps help keep your vegetables safe and tasty for up to 3 months. When it’s time to enjoy your grilled vegetables again, reheating them the right way is key. Here are some great methods: - Stovetop: Heat a skillet over medium heat. Add a splash of olive oil. Toss the veggies for about 5 minutes, until warmed through. - Oven: Preheat your oven to 350°F (175°C). Spread the vegetables on a baking sheet. Bake for about 10 minutes, or until hot. - Microwave: Place the vegetables in a microwave-safe dish. Heat for 1-2 minutes, stirring halfway. These methods keep the flavor and texture close to fresh, so you can enjoy them just like the first time. For the full recipe, check out the instructions above. Yes, you can prepare these grilled vegetables ahead of time. I recommend marinating them first. Mix the marinade and coat the veggies. Then, cover the bowl and place it in the fridge. You can marinate for at least 30 minutes or up to 24 hours. The longer they sit, the more flavor they absorb. Grill them right before serving for the best taste and texture. Lemon Herb Grilled Vegetables pair well with many dishes. Serve them alongside grilled chicken or fish for a balanced meal. They also go great with quinoa or couscous. Add a fresh salad for extra crunch. You can even toss them into pasta dishes for added flavor. Yes, this recipe is perfect for both vegetarians and vegans. All the ingredients are plant-based. If you want extra protein, consider adding chickpeas or tofu. These additions make the dish even heartier while maintaining its vibrant flavor. Enjoy this healthy and colorful meal! For the complete recipe, check out the [Full Recipe]. This blog post showed you how to make Lemon Herb Grilled Vegetables. We covered fresh veggies, flavorful marinades, and tips for grilling. Choosing fresh ingredients boosts taste. Also, various veggie combos can spice up your meals. Storing and reheating are easy too. You can enjoy this dish any time. Whether you’re cooking for yourself or feeding a crowd, you have all the tools needed to impress. Dive into the joy of grilling, and experiment with your favorite flavors. Enjoy your delicious creations!](https://dailydishly.com/wp-content/uploads/2025/06/2c532b5c-078c-48cf-b109-f94e84489936-768x768.webp)