
Chocolate Peppermint Bark Irresistible Holiday Treat
A festive treat combining dark and white chocolate with a refreshing peppermint flavor, perfect for...
Delicious recipes
Sweet treats and desserts
A festive treat combining dark and white chocolate with a refreshing peppermint flavor, perfect for...

A healthy and delicious snack packed with oats, blueberries, and lemon flavor.
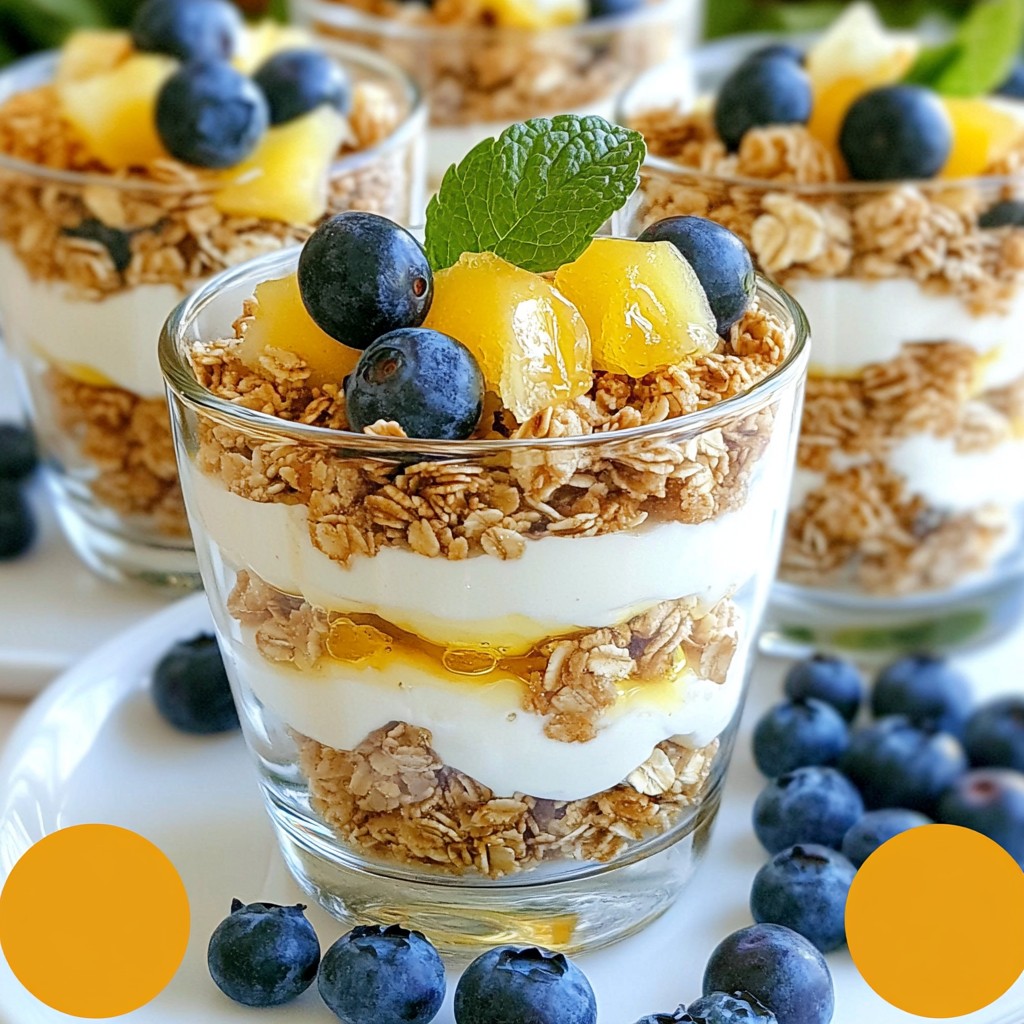
Looking for a refreshing treat that dazzles your taste buds? You’ve found it! My Lemon Blueberry Yog...
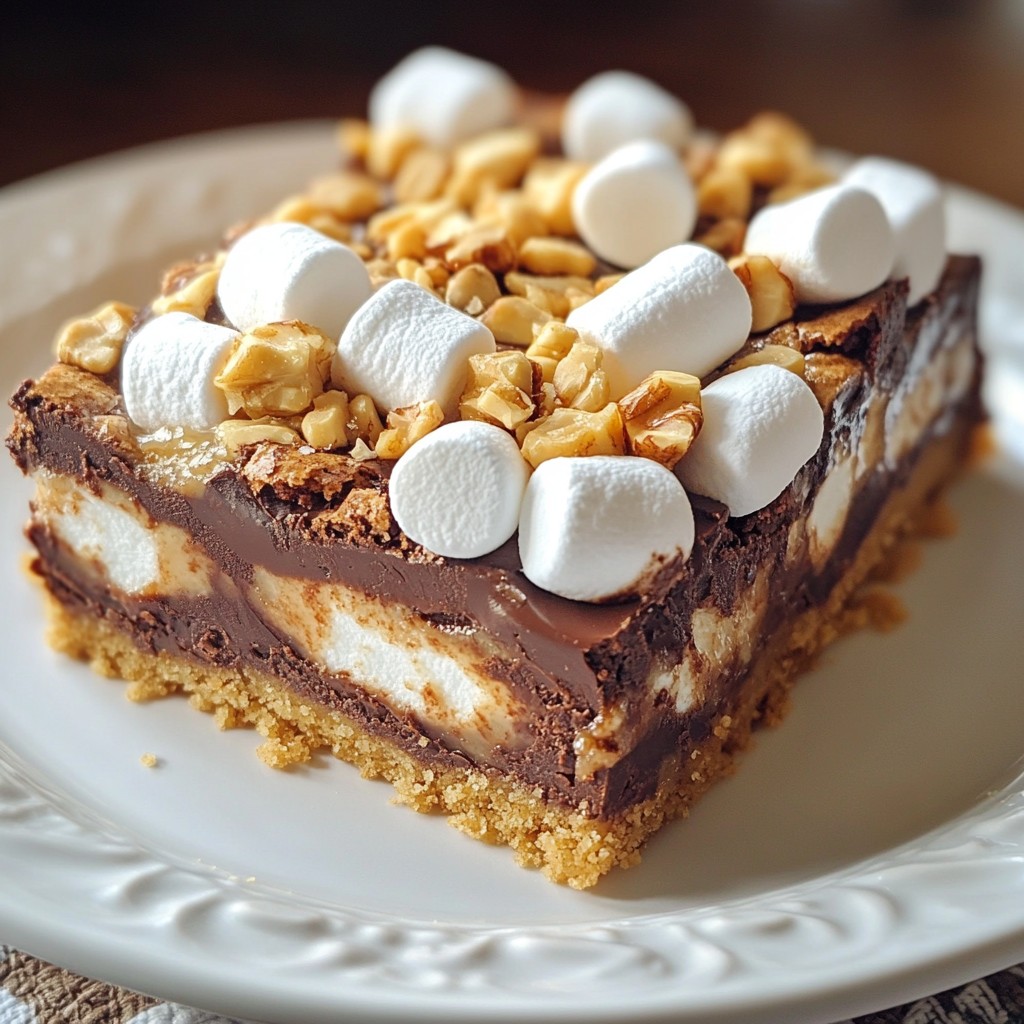
Craving a sweet treat that blends gooey goodness with crunchy delight? You’re in the right place! Th...

Are you ready to bake some mouthwatering Blueberry Streusel Muffins? This easy recipe is perfect for...
Craving a dessert that’s both tasty and simple? You’re in the right place! Today, I’ll show you how...
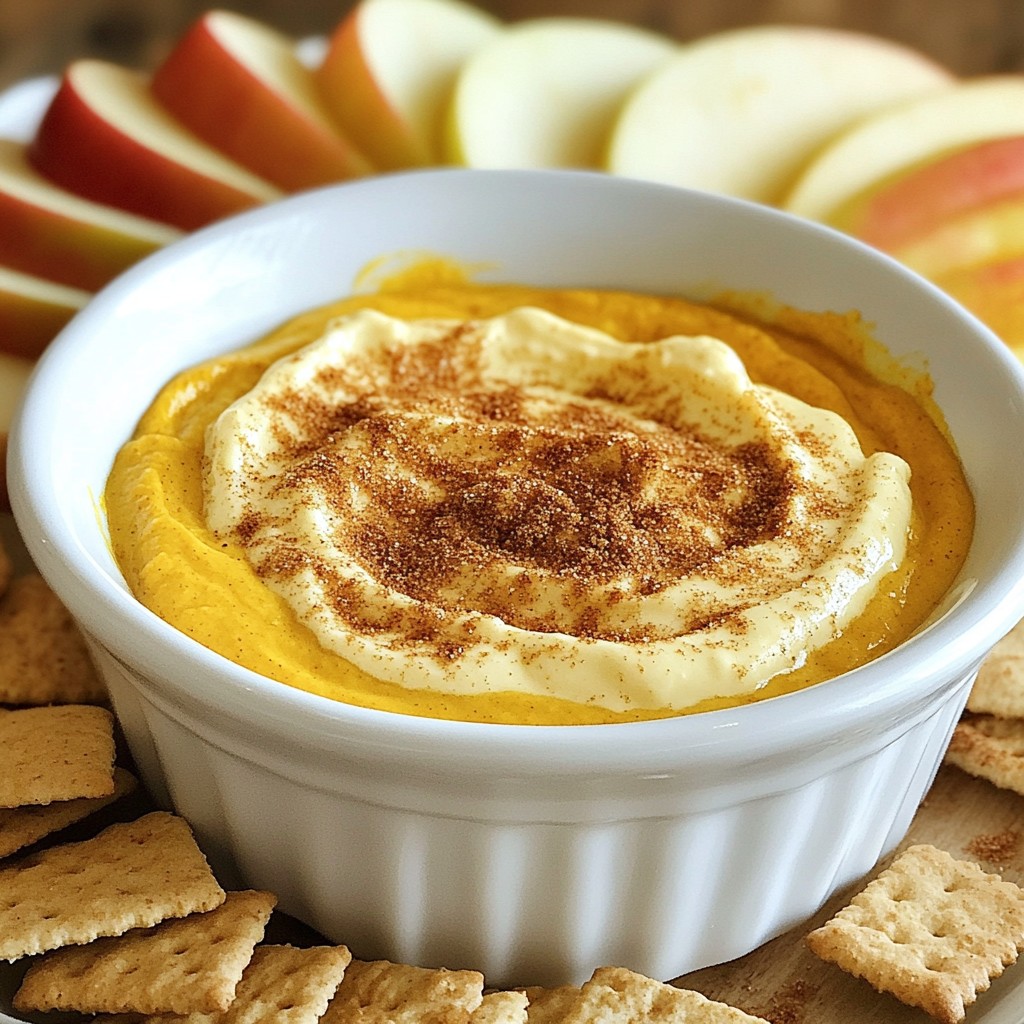
A creamy and delicious dip perfect for fall gatherings, combining pumpkin and cheesecake flavors.

Rich and indulgent chocolate truffles infused with raspberry puree, coated in cocoa powder or powder...
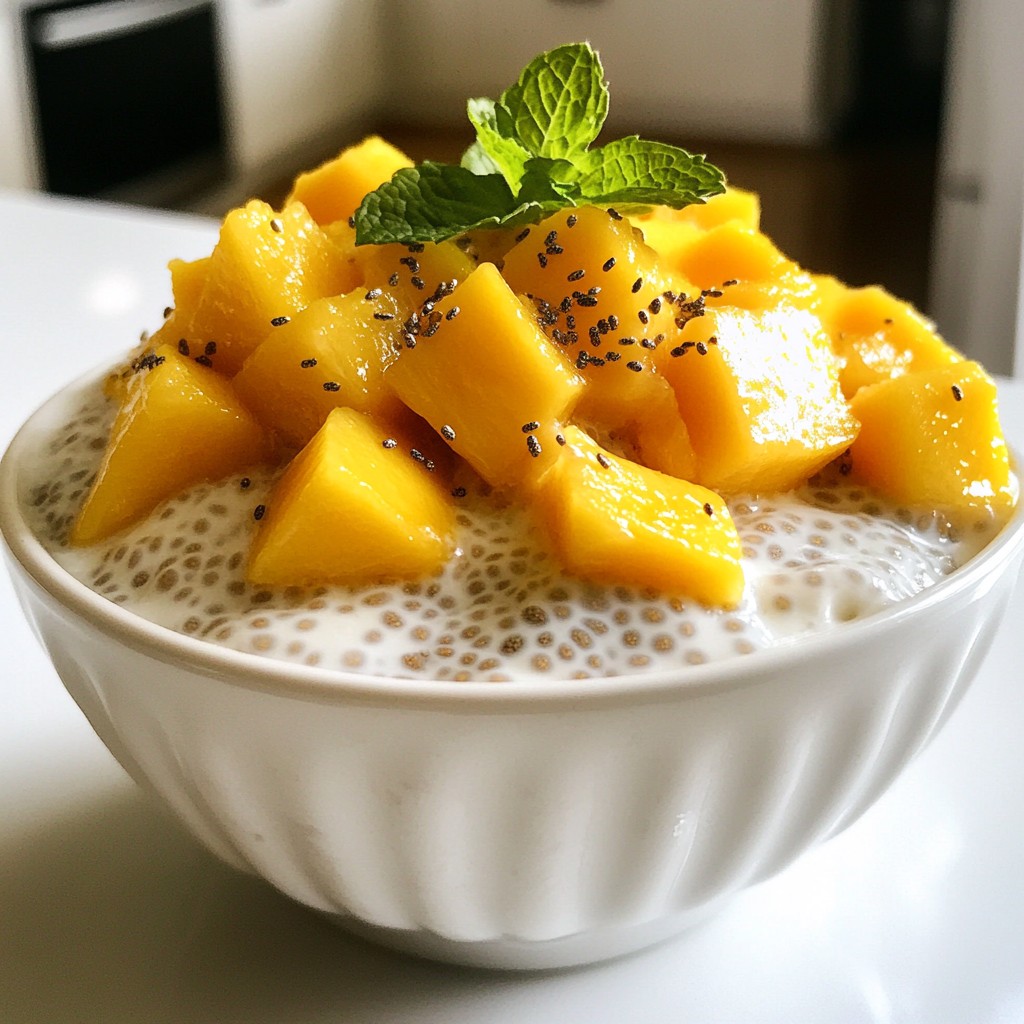
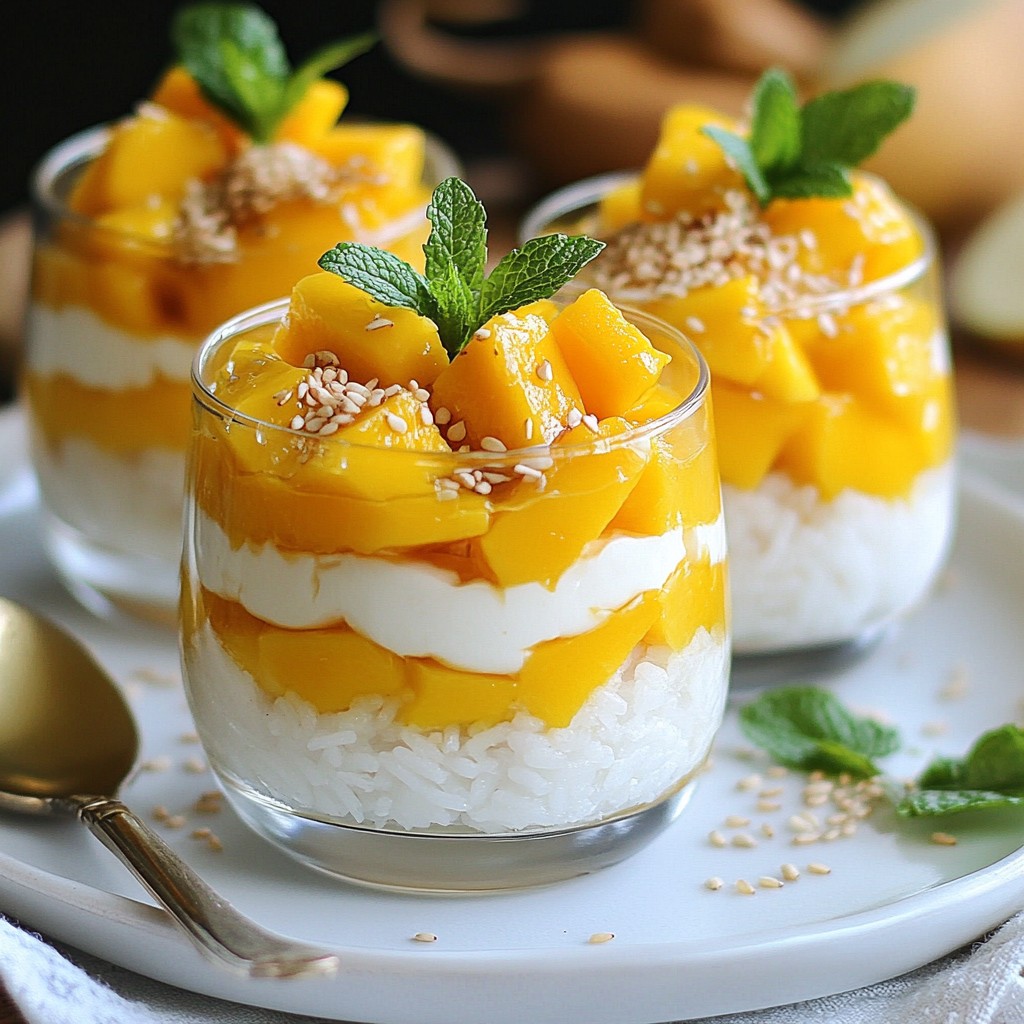
A refreshing and healthy dessert made with coconut milk, chia seeds, and ripe mango.
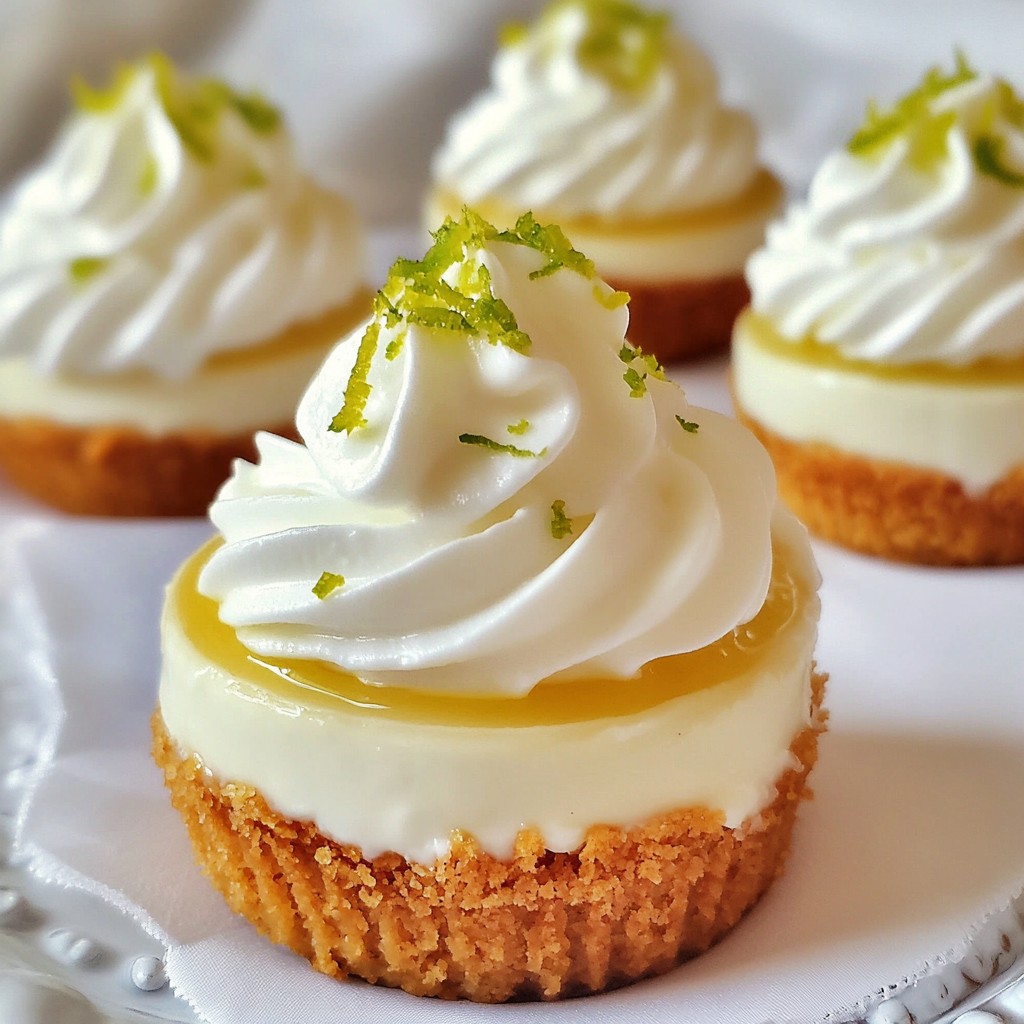
Delicious individual cheesecake cups with a zesty key lime flavor.
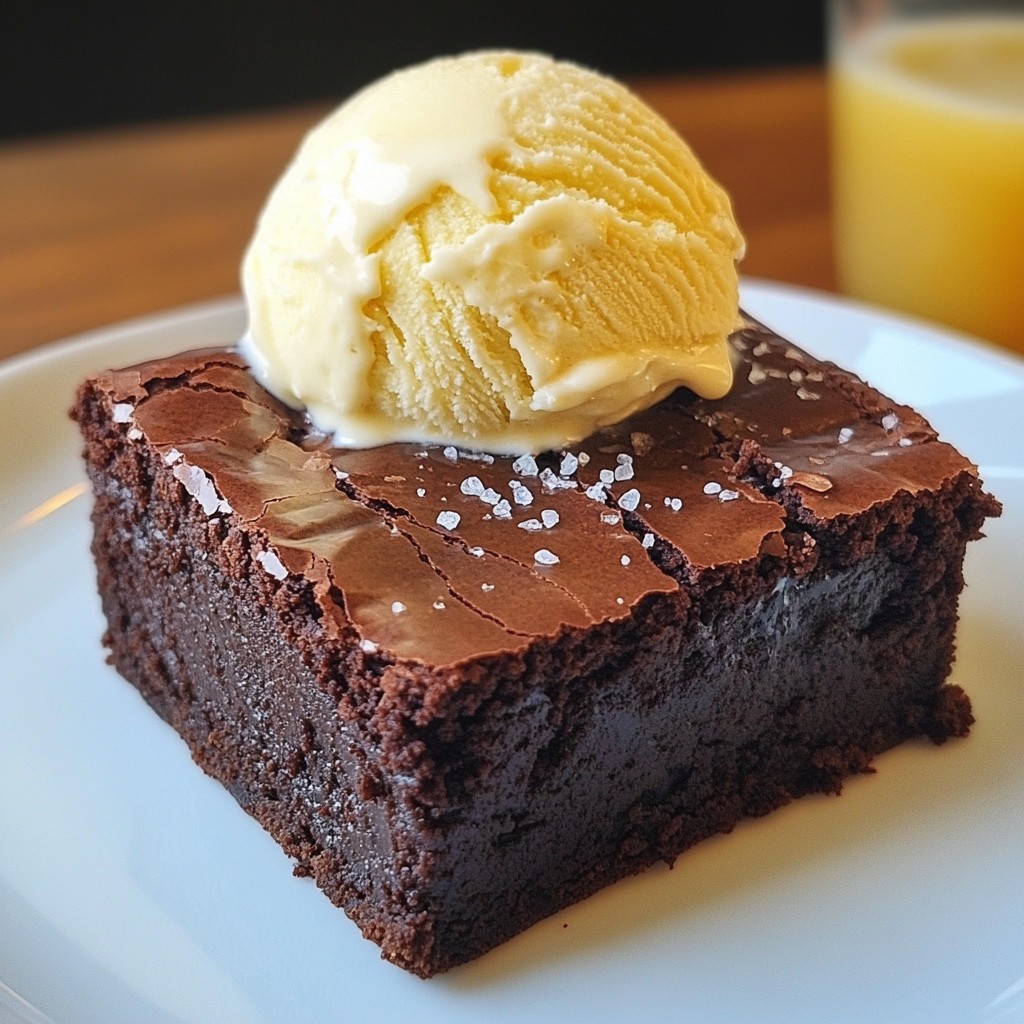
Decadent brownies made with brown butter and chocolate chips for a rich flavor.

A classic French dish, these thin crêpes are perfect for sweet or savory fillings.