Skip to content
  • About
  • Contact
  • Cookie Policy
  • Copyright Policy
  • Disclaimer
dailydishly
  • Home
  • Dinner
  • Appetizer
  • Desserts
  • Drinks
  • About
  • Contact
  • Privacy Policy
dailydishly
Home / Drinks

Drinks

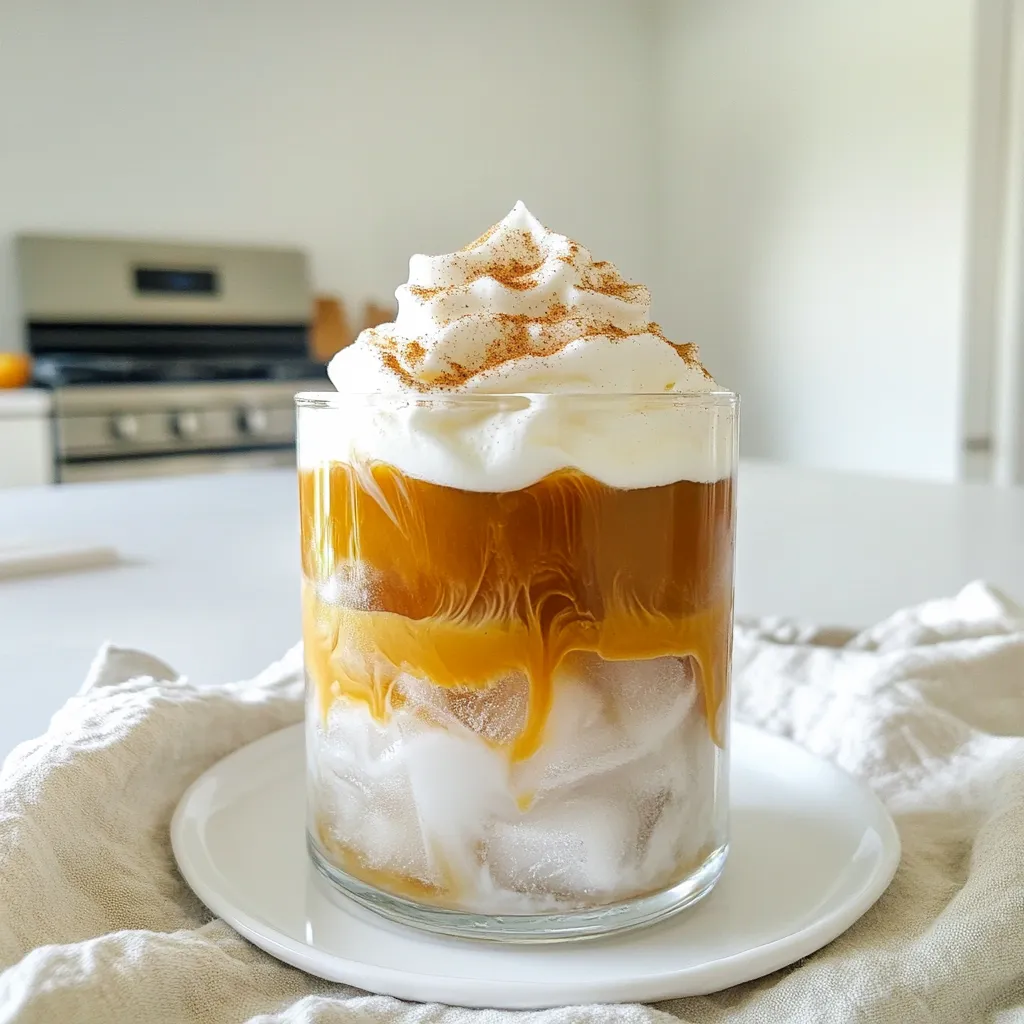
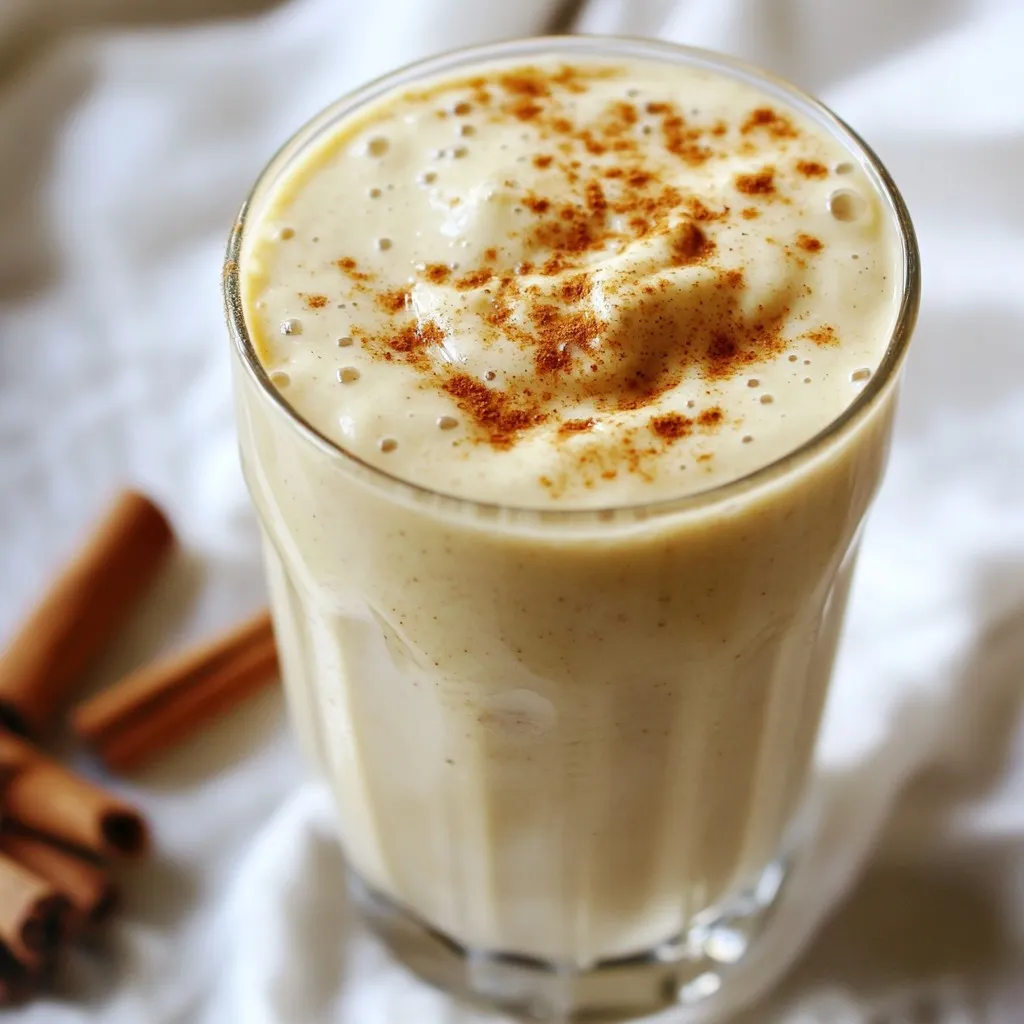
To make a Caramel Pumpkin Spice Latte in a slow cooker, gather these key ingredients: - 4 cups milk (any variety) - 1 cup brewed coffee (strong) - 1 cup pumpkin puree - 1/4 cup caramel sauce (plus extra for drizzling) - 2 tablespoons sugar (adjust to taste) - 1 teaspoon vanilla extract - 1 teaspoon pumpkin pie spice - 1/2 teaspoon cinnamon - Whipped cream for topping These ingredients create a creamy and rich drink, perfect for fall. You can make this recipe your own with some simple changes. - Milk: Use almond, oat, or coconut milk to make it dairy-free. - Coffee: Try using espresso for a stronger flavor. - Pumpkin Puree: If you don’t have pumpkin puree, use sweet potato puree. - Caramel Sauce: You can swap caramel for chocolate sauce for a different twist. - Sugar: Use maple syrup or honey instead of sugar for natural sweetness. These swaps help you cater to your taste or dietary needs. Add some fun to your latte with delicious toppings. - Whipped cream: This is a must for creaminess. - Extra caramel drizzle: It adds sweetness and looks great. - Pumpkin pie spice: A sprinkle on top boosts the fall flavor. - Cinnamon: For a warm, cozy touch. These optional toppings turn your latte into a festive treat everyone will love. Start by gathering your ingredients. You need: - 4 cups milk (any variety) - 1 cup brewed coffee (strong) - 1 cup pumpkin puree - 1/4 cup caramel sauce (plus extra for drizzling) - 2 tablespoons sugar (adjust to taste) - 1 teaspoon vanilla extract - 1 teaspoon pumpkin pie spice - 1/2 teaspoon cinnamon - Whipped cream for topping Next, grab your slow cooker. Pour in the milk, brewed coffee, pumpkin puree, and caramel sauce. Mix these well until they blend smoothly. Then, add the sugar, vanilla extract, pumpkin pie spice, and cinnamon. Stir again to combine everything nicely. Cover the slow cooker and set it to low heat. Cook for 2 hours. Make sure to stir the mixture every now and then. This helps prevent the ingredients from separating. After 2 hours, give it a good stir again. This ensures all the flavors mix well together. Now, it's time to serve! Use a ladle to pour the latte into mugs. Fill them about three-quarters full. Top each latte with whipped cream. Then, drizzle some extra caramel sauce on top. For a festive look, sprinkle a little pumpkin pie spice or cinnamon on the whipped cream. Enjoy your warm and cozy drink! To get the best taste from your caramel pumpkin spice latte, use strong brewed coffee. I suggest a dark roast. It balances well with the sweet caramel and pumpkin. Always use fresh pumpkin puree for a rich flavor. Canned pumpkin works too, but fresh adds a nice touch. The spices play a big role, so don’t skip the pumpkin pie spice and cinnamon. They bring warmth to the drink. Mix well to combine all flavors. One common mistake is overcooking the latte. Two hours on low is just right. Stir the mixture occasionally. This helps prevent any separation. If the latte is too sweet, lower the sugar. You can always add more later. For a creamier texture, use whole milk or a milk alternative, like oat milk. Avoid low-fat milk, as it won’t give the same richness. You can customize this latte in many ways. Want a chocolate twist? Add a scoop of cocoa powder. If you love nuts, sprinkle some crushed hazelnuts on top. For an extra kick, try adding a shot of espresso. This makes it stronger and gives a nice boost. You can also change the toppings. Try adding nutmeg or even a drizzle of chocolate syrup. Mix and match to find your perfect latte! {{image_2}} You can easily make a dairy-free version of this caramel pumpkin spice latte. Use almond milk, coconut milk, or oat milk instead of regular milk. These options keep the drink creamy and rich. I prefer coconut milk for its sweet flavor. It pairs well with pumpkin and caramel. Just remember to check the labels for added sugars or flavors. To boost the flavor, consider adding a pinch of nutmeg or cloves. These spices add warmth and depth to the latte. You can also mix in a splash of maple syrup for a new twist. If you love chocolate, try adding cocoa powder for a mocha version. Each of these options enhances the taste while keeping it cozy and comforting. If you want to cut down on sugar, use natural sweeteners. Honey or agave syrup works great. They add sweetness without refined sugar. You can also try stevia or monk fruit for a low-calorie option. Adjust the amount to your taste. It’s all about finding the right balance for your perfect cup! After you make your Caramel Pumpkin Spice Latte, let it cool down first. Pour any leftovers into an airtight container. Store it in the fridge for up to three days. When you want to enjoy it again, reheat it on the stove over low heat. Stir it often to warm it up evenly. You can also use the microwave. Heat it in 30-second bursts, stirring after each one until it’s warm. You can freeze your latte if you want to save it longer. Pour the cooled latte into freezer-safe containers. Leave some space at the top for expansion. It can last up to three months in the freezer. To enjoy, let it thaw in the fridge overnight. Then, reheat it as mentioned above. Each ingredient in this latte has its own shelf life. Milk lasts about a week after opening, depending on the type. Brewed coffee is best used fresh but can last up to four days in the fridge. Pumpkin puree can stay good for about a week after opening, too. Caramel sauce lasts for about a month in the fridge after opening. Always check for any off smells or changes before using. Yes, you can use flavored coffee. It adds a fun twist to the latte. Try vanilla, hazelnut, or caramel coffee. These flavors blend well with pumpkin and spices. Just remember to choose a strong brew. This helps the taste shine through. You can make this latte on the stove. Start by heating the milk, coffee, and pumpkin puree in a pot. Stir in the caramel, sugar, and spices. Keep the heat low to avoid boiling. Stir often for about 10 minutes. Once it's hot, pour it into mugs and add whipped cream. Store leftovers in an airtight container. Place it in the fridge for up to three days. To reheat, pour it into a pot and warm it gently. Stir often to keep it smooth. You can also use a microwave, but stir it halfway through. Enjoy your latte again! This blog post showed you how to make a delicious Caramel Pumpkin Spice Latte. You learned the key ingredients and some tasty substitutions. The step-by-step guide helped you with preparation and slow cooking. I shared tips for great flavor and avoiding mistakes. You also discovered fun variations and storage tips. Now, you can enjoy a cozy cup anytime. With these ideas, your latte will impress. You're ready to experiment and make it your own!

Caramel Pumpkin Spice Latte Slow Cooker Delight

Read More Caramel Pumpkin Spice Latte Slow Cooker DelightContinue

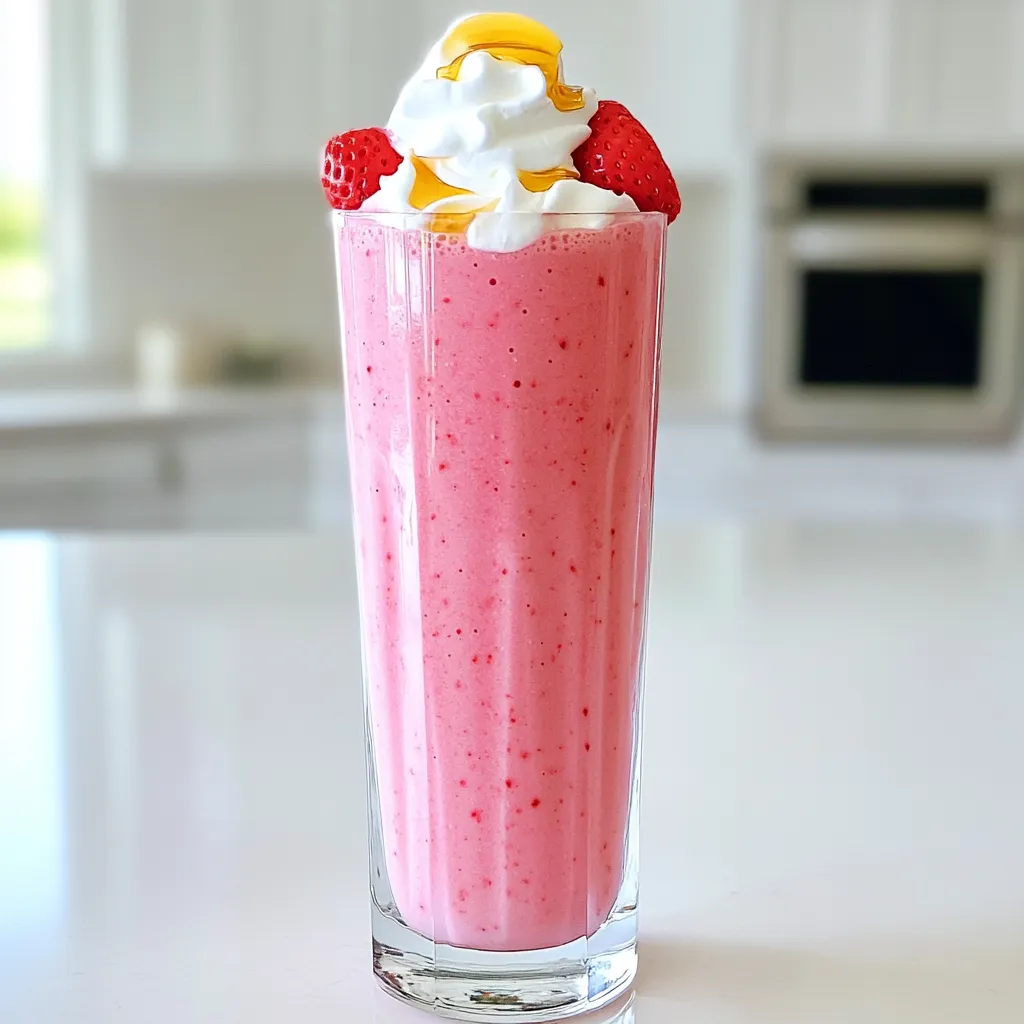
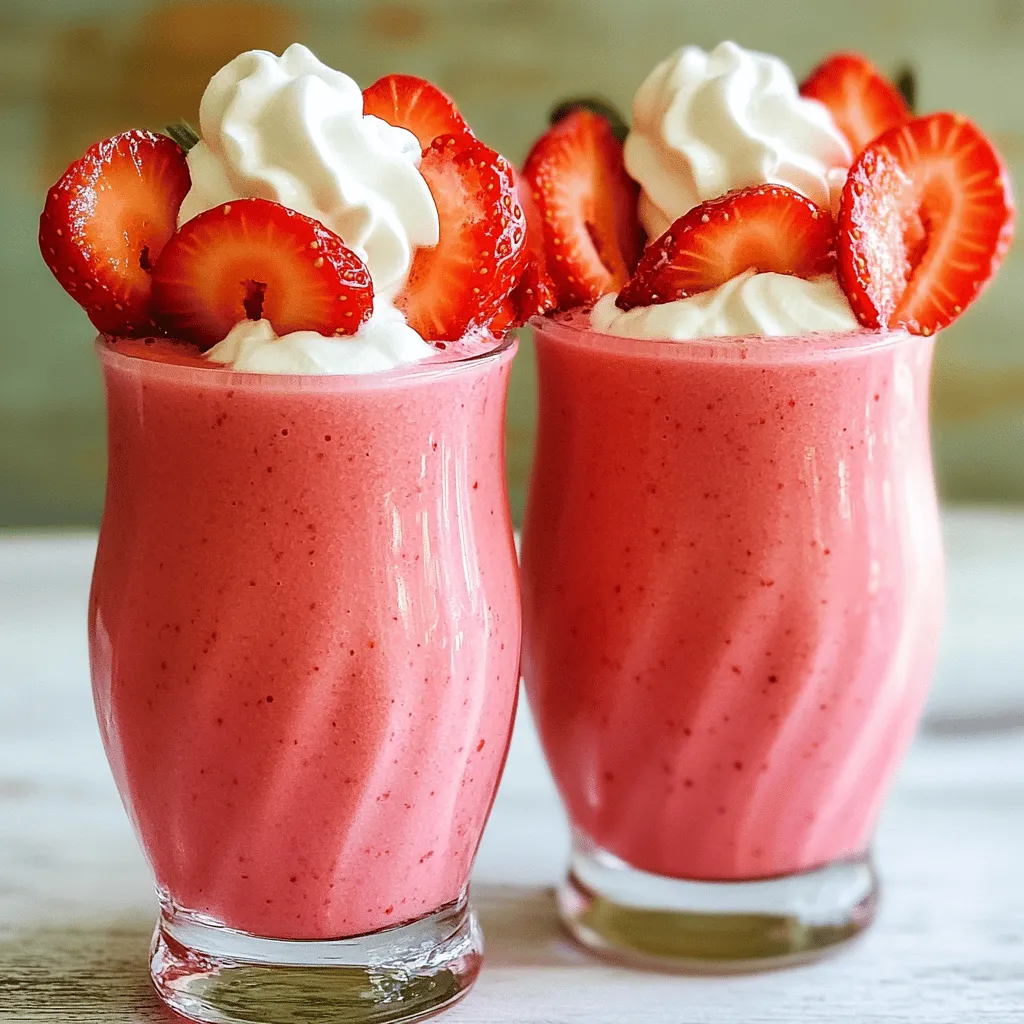
- 1 cup frozen strawberries - 1 ripe banana - 1 cup almond milk (or any milk of your choice) - 2 tablespoons cocoa powder - 1 tablespoon honey or maple syrup (adjust to taste) - 1 tablespoon almond butter (or your favorite nut butter) - 1/2 teaspoon vanilla extract - A pinch of sea salt - 1 tablespoon chia seeds (for added nutrition) This smoothie is rich in vitamins and minerals. It provides fiber from fruits, healthy fats from nut butter, and antioxidants from cocoa. A serving has about 300 calories. It also offers protein and carbs to fuel your day. The almond milk keeps it light and dairy-free. If you add chia seeds, you boost the fiber and omega-3 content. You can adjust sweetness by changing the honey or maple syrup. This recipe is perfect for breakfast or a snack. To make the best Chocolate Covered Strawberry Smoothie, gather your ingredients first. You will need: - 1 cup frozen strawberries - 1 ripe banana - 1 cup almond milk (or any milk of your choice) - 2 tablespoons cocoa powder - 1 tablespoon honey or maple syrup (adjust to taste) - 1 tablespoon almond butter (or your favorite nut butter) - 1/2 teaspoon vanilla extract - A pinch of sea salt - Optional: 1 tablespoon chia seeds (for added nutrition) Start by measuring out the frozen strawberries. Their chill gives the smoothie a nice, thick texture. Then, peel the banana and break it into chunks. This helps the blender work better. Now it’s time to blend! In a blender, add your frozen strawberries, banana, almond milk, and cocoa powder. Then, add honey or maple syrup for sweetness. Next, spoon in the almond butter, vanilla extract, and a pinch of sea salt. If you want extra nutrition, toss in the chia seeds too. They add good fiber and omega-3s! Blend all the ingredients on high speed until smooth. You want a creamy texture, so make sure everything mixes well. After blending, taste your smoothie. If you like it sweeter, add more honey or maple syrup. Blend again to mix it in. Pour your delicious smoothie into a tall glass. You can top it with extra sliced strawberries or a sprinkle of cocoa powder to make it look nice. For a fun touch, add a straw and place a whole strawberry on the rim of your glass. This makes your drink look fancy and inviting! Enjoy your tasty creation! To get a smooth and creamy texture, use frozen strawberries. They add a nice chill. A ripe banana also helps. It brings natural sweetness and creaminess. Blend all the ingredients well. Start on low speed, then increase to high. This helps mix everything evenly. If it’s too thick, add more almond milk. A splash at a time works best. Taste your smoothie before serving. If it needs more sweetness, add honey or maple syrup. Start with a small amount, then blend again. Remember, you can always add more, but you can’t take it out! Keep your sweetener handy for quick adjustments. To make your smoothie look great, use a tall glass. Pour the smoothie slowly to keep it layered. Add a few sliced strawberries on top. You can also sprinkle cocoa powder for a fun touch. For an extra special look, place a whole strawberry on the rim of the glass. Serve it with a straw for easy sipping. Enjoy your beautiful creation! {{image_2}} You can easily make this smoothie dairy-free. Simply swap regular milk for almond milk. You can also use oat or coconut milk. These options keep the smoothie creamy and delicious. They add their own unique flavors too. Try adding a dash of cinnamon for warmth. You can also blend in a tablespoon of peanut butter for a nutty twist. If you love mint, add a few fresh mint leaves. This adds a refreshing zing to your drink. You can mix and match flavors based on what you like. Want to boost the nutrition? Add a scoop of protein powder. It helps you feel full and supports muscle health. Look for plant-based options if you're vegan. You can also toss in some chia seeds. They pack a punch of fiber and omega-3s. These options make your smoothie both tasty and healthy. If you have leftover smoothie, store it in the fridge. Use an airtight container. This keeps it fresh for about 24 hours. Shake or stir before drinking. The smoothie may separate, but that's normal. To freeze your smoothie, pour it into ice cube trays. Once frozen, transfer the cubes to a bag. This way, you can blend them later. Just add a splash of milk when ready to enjoy. You can keep frozen smoothie cubes for up to three months. Store your strawberries in the fridge for freshness. Keep bananas on the counter away from sunlight. Almond milk should stay sealed and refrigerated after opening. Cocoa powder lasts long in a cool, dry place. For almond butter, store it in a cupboard or fridge after opening. Yes, you can use fresh strawberries. They will make your smoothie less thick. If you want a colder drink, you might add a few ice cubes. Fresh strawberries provide a bright flavor and a nice color. Absolutely! This smoothie is great for breakfast. It has fruit, healthy fat, and a bit of sweetness. The banana and almond butter give you energy. Plus, it’s quick to make. You can enjoy it on busy mornings. Making it vegan is simple. Just use maple syrup instead of honey. Also, choose almond milk or any plant-based milk. This way, the smoothie stays tasty and fits a vegan diet. This smoothie has many health benefits: - Strawberries: Packed with vitamin C and antioxidants. - Banana: Offers potassium and fiber for heart health. - Almond milk: Low in calories and dairy-free. - Cocoa powder: Contains flavonoids that help heart health. - Almond butter: Provides healthy fats and protein. - Chia seeds: Full of omega-3s and fiber (if you add them). These ingredients work together to make a nutritious drink that tastes great! In this post, we explored the key ingredients for a great smoothie, including options to customize and boost nutrition. We detailed step-by-step instructions for preparing, blending, and serving your creation. Plus, we offered helpful tips to achieve a creamy texture and enhance sweetness. You can try various delightful variations, store leftovers properly, and find answers to common questions. Smoothies can be simple, tasty, and healthy. You can enjoy them as part of your daily routine.

Chocolate Covered Strawberry Smoothie Tasty Recipe

Read More Chocolate Covered Strawberry Smoothie Tasty RecipeContinue

To make a delicious Pumpkin Spice Latte Smoothie, you need the right ingredients. Here’s the list: - 1 cup canned pumpkin puree - 1 banana, frozen - 1 cup unsweetened almond milk (or any milk of your choice) - 2 tablespoons maple syrup (adjust to taste) - 1 teaspoon vanilla extract - 1 teaspoon pumpkin pie spice - 1/2 teaspoon ground cinnamon - 1 cup ice cubes - Whipped coconut cream for topping (optional) Each ingredient plays a key role. The pumpkin puree gives it that rich, fall flavor. The frozen banana adds creaminess and natural sweetness. Almond milk makes it smooth and light, but you can use any milk you like. Maple syrup adds a touch of sweetness. The vanilla extract enhances the flavors, while the pumpkin pie spice and ground cinnamon bring warmth and depth. Finally, the ice cubes help create a frosty texture. If you want to make it even more special, whipped coconut cream on top is a fun option. It looks pretty and tastes amazing! 1. Blend the base ingredients until smooth. Start by adding the canned pumpkin puree, frozen banana, almond milk, maple syrup, vanilla extract, pumpkin pie spice, and ground cinnamon into your blender. Blend on high speed until it is smooth and creamy. You may need to scrape down the sides to get everything mixed well. 2. Incorporate ice for a frosty texture. Next, add in the ice cubes. Blend again until the smoothie becomes thick and frosty. This step is crucial for that refreshing feel. 3. Adjust sweetness to taste. After blending, taste your smoothie. If you want it sweeter, add more maple syrup. Blend again briefly to mix in the syrup. 1. Pour into glasses or bowls. Once your smoothie is ready, pour it into two glasses or bowls. This dish looks great served cold. 2. Add toppings for decoration. For an extra special touch, top your smoothie with whipped coconut cream. You can also sprinkle a bit of cinnamon or pumpkin pie spice on top. This will add flavor and make it look beautiful! The texture of your smoothie matters. A frozen banana is key for creaminess. It makes the blend thick and smooth. When you freeze the banana, it adds a nice chill. This helps create that rich feel in your drink. You can choose different types of milk for creaminess. Almond milk is light and nutty. Coconut milk offers a rich and creamy texture. If you like something thicker, try oat milk. Each milk gives a unique flavor. Pick one that you love! You can make your smoothie sweeter with natural sweeteners. Honey is a good choice. It adds flavor and sweetness at the same time. Agave syrup is another option. It is less thick than honey but still sweet. Flavored syrups can add a fun twist. A splash of caramel syrup can enhance the taste. You can also use vanilla syrup for extra flavor. Just remember to start with a little. You can always add more! By using these tips, you will create a smooth and tasty treat that feels just right for you. {{image_2}} You can switch up the smoothie with different ingredients. One great option is using coconut milk instead of almond milk. Coconut milk adds a rich flavor and creaminess. It gives the smoothie a tropical twist. You can also boost the protein in your smoothie. Try adding protein powder or nut butters, like almond or peanut butter. This change makes the smoothie more filling. It is a great choice for breakfast or a post-workout snack. Incorporating seasonal spices can elevate your smoothie. Try adding nutmeg or ginger for a warm kick. These spices blend well with pumpkin and enhance the fall flavor. You can also experiment with chocolate or caramel flavors. A tablespoon of cocoa powder can add a rich chocolate taste. Alternatively, a drizzle of caramel sauce gives a sweet touch. Both options play nicely with the pumpkin spice theme. Store any leftover smoothie in a sealed container. It stays fresh for up to two days in the fridge. To keep the taste great, put it in an airtight jar. Before you drink it, give it a good shake. The ingredients may separate a bit, but that’s normal. If the smoothie seems too thick, add a splash of almond milk to thin it out. You can freeze portions of your smoothie for later. Pour it into ice cube trays for easy use. Once frozen, pop the cubes into a freezer bag. This method helps save space and makes blending easy. When you want to enjoy it, take out the cubes and thaw them in the fridge overnight. You can also blend the frozen cubes directly with a bit of almond milk for a quick treat. A Pumpkin Spice Latte Smoothie is a creamy drink that blends pumpkin, banana, and spices. This smoothie captures the warm flavors of fall in a convenient form. You get the taste of a latte without brewing coffee. By mixing pumpkin puree and spices, you create a rich and satisfying drink. The banana adds sweetness and smoothness, while almond milk gives it a creamy texture. This smoothie is perfect for breakfast or a snack. Yes, you can easily make this smoothie vegan. Use almond milk or any plant-based milk instead of cow's milk. Instead of maple syrup, you can try agave nectar for sweetness. Just make sure all your ingredients are plant-based. This way, you keep the creamy texture and delicious taste without using any animal products. To make this smoothie healthier, you can add some greens. Spinach or kale blends well without changing the flavor much. You can also swap out maple syrup for a smaller amount of honey or a natural sweetener. Adding a scoop of protein powder can boost the nutrition. This way, you get more protein and fiber, making the smoothie more filling. Yes, you can make this smoothie less sweet. Start with less maple syrup, and taste as you mix. You can also use unsweetened almond milk for a less sugary base. If you want a bit of sweetness, try adding mashed dates or a touch of stevia. These options let you control the sweetness while keeping the flavor. To make this smoothie dairy-free, simply choose a non-dairy milk. Almond milk is a great choice, but you can also use soy or oat milk. These options provide a creamy base without dairy. If you want to add creaminess, consider using coconut milk. This gives a rich flavor and works well with pumpkin spice. This blog covered how to make a delicious Pumpkin Spice Latte Smoothie. We explored key ingredients, preparation steps, and tips for perfect texture. You learned about variations and how to store leftovers for later joy. In the end, you can create a tasty treat that fits your diet. Enjoy experimenting and making it your own!

Pumpkin Spice Latte Smoothie Rich and Creamy Blend

Read More Pumpkin Spice Latte Smoothie Rich and Creamy BlendContinue

- 2 cups unsweetened almond milk (or any milk of your choice) - 1 tablespoon turmeric powder - 1 tablespoon fresh ginger, grated (or 1 teaspoon ginger powder) - 1-2 tablespoons maple syrup or honey (to taste) - 1/2 teaspoon cinnamon powder - A pinch of black pepper (enhances turmeric absorption) - 1/2 teaspoon vanilla extract (optional) - A sprinkle of gold dust or ground nutmeg for garnish (optional) The ingredients for the Turmeric Ginger Golden Milk Latte are simple but powerful. Each one brings its own flavor and health benefits. I love using almond milk, but you can choose any milk you like. The creaminess of the milk makes it a cozy drink. Turmeric powder gives the latte its bright color and health benefits. Fresh ginger adds a spicy kick. Honey or maple syrup balances the spices with sweetness. Cinnamon brings warmth and a hint of sweetness, too. Black pepper is a key ingredient. It helps your body absorb turmeric. The vanilla extract gives a lovely aroma. If you want to impress, a sprinkle of gold dust or nutmeg makes it look fancy. - Turmeric: This spice is known for its anti-inflammatory and antioxidant properties. It fights free radicals and helps your body heal. - Ginger: Ginger supports digestion and may reduce nausea. It can ease stomach issues and boost your immune system. - Cinnamon: This spice may help regulate blood sugar levels. It adds a sweet flavor while keeping your body balanced. These ingredients not only make this drink tasty, but they also promote wellness. Enjoying a cup of this latte can be a great way to support your health. For the full recipe, check the details above. - Combine 2 cups of unsweetened almond milk, 1 tablespoon of turmeric, 1 tablespoon of grated ginger, and a pinch of black pepper in a saucepan. - Use medium heat and whisk constantly to prevent lumps. This step is key for a smooth drink. - Incorporate 1 to 2 tablespoons of maple syrup or honey, 1/2 teaspoon of cinnamon, and 1/2 teaspoon of vanilla extract if you like. - Whisk continuously for about 2-3 minutes. This helps blend all the flavors well. - Strain the latte into mugs to remove any ginger bits. This makes your drink silky and pleasant. - Serve hot and add optional garnishes like a sprinkle of gold dust or ground nutmeg for a special touch. For the full recipe, check the section above. Enjoy your energizing comfort drink! - Use fresh ingredients for the best flavor. Fresh ginger and turmeric give the drink a vibrant taste. - Adjust sweetness according to your taste preference. You can add more or less maple syrup or honey. - Black pepper is key for turmeric absorption. It helps your body use turmeric better. - Try alternative spices for flavor variations. Cardamom, nutmeg, or even cayenne can add a twist. - Pair with healthy snacks. This latte goes well with nuts or whole-grain toast. - Enjoy as a morning energizer. It’s also perfect for cozy evenings or as a comforting drink. {{image_2}} You can make your turmeric ginger golden milk latte dairy-free easily. Instead of almond milk, try these options: - Coconut milk - Oat milk - Soy milk Each milk brings its own flavor. Coconut milk adds a creamy sweetness. Oat milk gives a nutty taste. Soy milk offers a rich texture. Adjust your spices to match the milk you choose. If you use coconut milk, you might want less sweetener. This helps keep the balance. Want a kick? Add cayenne pepper to your latte! Just a pinch can wake up your taste buds. It adds warmth and spice. You can also mix in chai spices for a fun twist. Think about cardamom, cloves, and black pepper. These spices work well with turmeric and ginger. They make your drink even more exciting. If you want a low-calorie option, use stevia or agave instead of sugar. Both sweeteners blend nicely. You can also try flavored syrups, like vanilla or caramel. These add a fun twist to the drink. If you like it sweet, taste as you go. Adjust until it’s just right for you. For the full recipe, check out the complete list of ingredients and instructions. After making your delicious Turmeric Ginger Golden Milk Latte, store any leftovers in an airtight container. This keeps it fresh for up to 3 days. When you’re ready to enjoy it again, reheat it gently. You can use the stove or the microwave. Just make sure not to let it boil. You can freeze this latte if you want to keep it longer. Pour the cooled latte into ice cube trays or freezer-safe containers. Make sure to leave some space for expansion. When you’re ready to drink it, thaw it overnight in the fridge. To heat, warm it gently on the stove. You can also blend it with a little fresh milk for a smooth texture. I love using unsweetened almond milk for its light flavor and creaminess. It blends well with spices. Coconut milk adds a rich taste, while oat milk gives a smooth texture. You may also try soy milk if you prefer a protein boost. Each type of milk changes the drink’s flavor. Experiment to find your favorite! Yes, this latte is easy to make vegan! Use almond milk, coconut milk, or any plant-based milk. Substitute honey with maple syrup for sweetness. This keeps your drink vegan-friendly while still tasting great. You won't miss the dairy at all! Turmeric is known for its anti-inflammatory properties. It helps reduce pain and improves your immune system. Ginger aids digestion and can soothe nausea. The combination of these two spices can boost your overall wellness. Regularly enjoying this latte may help keep you healthy and feeling good. You can easily tailor the latte to match your taste! For sweetness, add more or less maple syrup or honey. If you like spice, increase the ginger or add a pinch of cayenne pepper. Want it creamier? Use full-fat coconut milk. Don't hesitate to play with the recipe until it’s perfect for you. For the full recipe, check the earlier section. Making a Turmeric Ginger Golden Milk Latte is simple and rewarding. You learned about the key ingredients and their health benefits, how to prepare it step-by-step, and ways to tweak the recipe. You can even store or freeze your leftovers for later. This drink not only warms you up but also brings health benefits to your day. Enjoying this latte can boost your wellness routine. Remember, feel free to experiment and make it your own!

Turmeric Ginger Golden Milk Latte Energizing Comfort Drink

Read More Turmeric Ginger Golden Milk Latte Energizing Comfort DrinkContinue

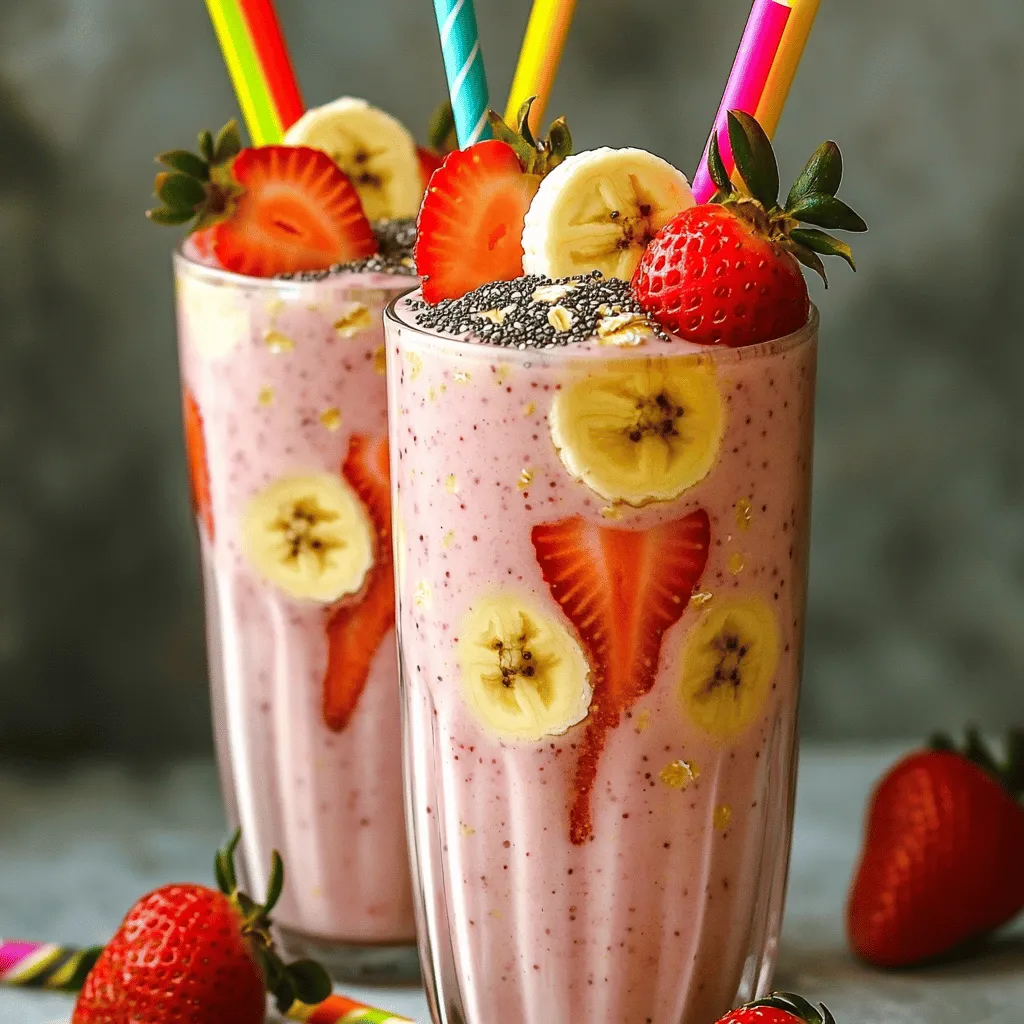
This strawberry banana protein smoothie packs a punch. It is quick to make and full of flavor. You can enjoy it as a snack or a meal. The recipe serves two, so it’s perfect to share or save for later. Here’s what you’ll need for the smoothie: - 1 ripe banana, sliced - 1 cup fresh or frozen strawberries - 1 cup almond milk (or any milk of choice) - 1 scoop vanilla protein powder - 1 tablespoon chia seeds - 1 tablespoon honey or maple syrup (optional) - A pinch of cinnamon (optional) - Ice cubes (if using fresh strawberries) - Banana: This fruit gives you energy and helps with digestion. It’s rich in potassium, which is good for your heart. - Strawberries: These berries are high in vitamin C. They boost your immune system and are low in calories. - Almond Milk: This milk is dairy-free and low in calories. It has healthy fats that keep you full. - Protein Powder: It helps build muscles and keeps you satisfied. It’s great for after a workout. - Chia Seeds: These tiny seeds are full of fiber and omega-3s. They help with digestion and heart health. With these ingredients, you get a tasty drink that fuels your day. Enjoy the full recipe for more details! To make a strawberry banana protein smoothie, start by gathering your ingredients. You will need: - 1 ripe banana, sliced - 1 cup fresh or frozen strawberries - 1 cup almond milk (or any milk of choice) - 1 scoop vanilla protein powder - 1 tablespoon chia seeds - 1 tablespoon honey or maple syrup (optional) - A pinch of cinnamon (optional) - Ice cubes (if using fresh strawberries) This smoothie is simple and quick to prepare. It takes only about 5 minutes from start to finish. Begin by placing the sliced banana and strawberries into your blender. If you're using fresh strawberries, toss in a handful of ice cubes. This helps keep your smoothie nice and cold. Next, pour in the almond milk. Then, add the scoop of vanilla protein powder and the chia seeds. If you want a touch of sweetness, add honey or maple syrup now. For those who enjoy a hint of spice, sprinkle in a pinch of cinnamon. Blend on high for about 30 to 60 seconds. You want everything to mix well and become smooth. After blending, taste your smoothie. If you want it sweeter, add more honey or syrup and blend again. Once your smoothie is ready, pour it into a tall glass or two smaller glasses. This recipe serves two, so share it with a friend or keep one for later. Enjoy your smoothie right away for the best taste and texture. You can also add toppings like sliced strawberries or a sprinkle of chia seeds for a nice touch. For the full recipe, refer to the earlier section. Choose ripe strawberries for the best flavor. Look for bright red berries with no white spots. They should feel firm but not hard. For bananas, pick ones that are slightly speckled. This means they are sweet and ready to eat. If you can, buy organic fruits. They taste better and are better for you. To get a creamier texture, use frozen strawberries. They help thicken the smoothie and keep it cold. You can also add half an avocado. This adds creaminess without changing the flavor much. If you want even more creaminess, consider adding Greek yogurt. It’s rich and full of protein. Taste your smoothie before serving. If it’s not sweet enough, add honey or maple syrup. Start with a small amount and blend again. You can also use dates for natural sweetness. If you want a spice kick, add a pinch of cinnamon. This gives the smoothie a warm flavor. For a fresh twist, try adding a splash of vanilla extract. For the complete recipe, check out the Full Recipe section. {{image_2}} You can add greens to your smoothie for more nutrients. Spinach is a great choice. It has a mild taste and blends well. Kale is another option, but it has a stronger flavor. Start with a small handful and blend it in. You won't taste the greens, but you'll get the benefits! If you want to swap protein powder, there are good options. Greek yogurt adds creaminess and protein. Cottage cheese gives a nice texture and protein boost too. You can also use nut butter like almond or peanut butter. They add flavor and healthy fats. Mixing in flavors can make your smoothie exciting. Try adding a scoop of cocoa powder for a chocolate twist. Vanilla extract offers a warm flavor that pairs well. You can also add some fresh mint or ginger for a kick. These small changes can take your smoothie to the next level! For the complete recipe, check out the Strawberry Banana Protein Smoothie. To keep your strawberry banana protein smoothie fresh, store it in a sealed container. Glass jars work well. Use an airtight lid to keep out air. This helps prevent oxidation. Smoothies are best enjoyed fresh, but you can store them in the fridge for up to 24 hours. Shake or stir before drinking if you see separation. Freezing smoothies is a great way to save them for later. Pour the smoothie into freezer-safe bags or containers. Make sure to leave some space at the top. This allows for expansion. When you're ready to enjoy it, thaw it in the fridge overnight. You can also blend it directly from frozen. Just add a splash of milk to help it blend smoothly. If your smoothie has been stored, it may separate. This is normal. Simply pour it back into the blender. Add a bit of milk to help with consistency. Blend until smooth again. This will bring back its creamy texture and flavor. For the best results, always enjoy your smoothie fresh, but these tips help you save it for later! Yes, you can make the smoothie without protein powder. You can still enjoy a tasty drink. If you skip the protein powder, try adding Greek yogurt or nut butter. Both add creaminess and protein. Greek yogurt gives a nice tang, while nut butter adds flavor and richness. You might need to adjust the liquid amount to keep the right texture. To make this smoothie vegan, use plant-based milk. Almond milk or oat milk works well. Skip the honey and use maple syrup instead for sweetness. You can also add more chia seeds to boost nutrition. This keeps your smoothie tasty while meeting vegan needs. You get a creamy texture without any animal products. Protein smoothies offer many health benefits. They can aid in muscle repair after workouts. Protein helps you feel full longer, which can help with weight control. Strawberries and bananas provide vitamins and minerals. Strawberries are high in vitamin C, and bananas offer potassium. Chia seeds add fiber and omega-3 fats. Overall, this smoothie supports energy and recovery while tasting great. This blog post shared a simple and fun way to make a smoothie. We covered key ingredients, step-by-step instructions, and tips for the best results. Remember, choosing ripe strawberries and bananas key to great taste. You can also add greens or flavor boosts for variety. Store extras properly for later enjoyment. Smoothies can fit any diet, from vegan to protein-packed. Enjoy experimenting with your own creations, and savor the blend of flavors and health benefits!

Strawberry Banana Protein Smoothie Energizing Drink

Read More Strawberry Banana Protein Smoothie Energizing DrinkContinue

- 1 cup fresh spinach leaves - 1/2 cup mixed berries (strawberries, blueberries, raspberries) - 1 ripe banana - 1/2 cup Greek yogurt (or dairy-free alternative) - 1 cup almond milk (or any milk of your choice) - 1 tablespoon honey or maple syrup - 1 tablespoon chia seeds - Ice cubes I love using fresh ingredients in this smoothie. Spinach gives it a healthy boost. You want to wash the spinach well to remove any dirt. The mixed berries add sweetness and color. You can use any berries you like! A ripe banana makes it creamy and rich. For the base, I choose Greek yogurt. It’s thick and adds protein. If you want a dairy-free option, use coconut yogurt. Almond milk is my go-to, but you can pick any milk you enjoy. Optional add-ins can take your smoothie to the next level. Honey or maple syrup sweetens it up more. Chia seeds add fiber and omega-3s. Ice cubes make the smoothie cold and refreshing. For the full recipe, check the section above. It’s simple to make and so tasty! - Rinse the spinach leaves thoroughly. This step removes dirt and makes them clean. - Add the spinach, mixed berries, banana, Greek yogurt, and almond milk to the blender. This mix creates a tasty base. - Blend everything until smooth and creamy. You want a silky texture with no lumps. - Taste your smoothie. If it needs more sweetness, add honey or maple syrup. Blend again quickly to mix. - Pour the smoothie into a glass or bowl. This makes it easy to drink or eat. - For a beautiful look, serve in clear glasses. Top with whole berries, chia seeds, or mint. This adds color and fun. For the complete recipe, check out the Full Recipe section. Enjoy the vibrant mix of flavors! To get the perfect smoothie consistency, start with fresh spinach and berries. Use a high-speed blender for a smooth finish. Begin by blending the spinach and almond milk first. This helps break down the spinach well. After that, add the berries, banana, and yogurt. Blend until it’s creamy and there are no lumps. If the smoothie is too thick, add more milk slowly. Spinach and berries pack a punch of nutrients. Spinach is rich in iron and vitamins. It helps keep your bones strong and your skin healthy. Berries are loaded with antioxidants. They can boost your immune system and improve heart health. This smoothie is not just tasty; it’s a nutrition powerhouse. The Greek yogurt adds protein and probiotics, great for gut health. If you want more sweetness, add honey or maple syrup. Start with a small amount and taste as you go. For a twist, try adding a pinch of cinnamon or vanilla extract. You can also mix in nutmeg for a warm flavor. These changes make your smoothie even more delicious and fun to drink. For the complete recipe, check out the [Full Recipe]. {{image_2}} You can switch up the berries in your smoothie. Try using blackberries, cherries, or even mango. Each fruit adds a unique flavor and some extra nutrients. If you want a berry-free option, use peaches or pineapple for a tropical twist. If you follow a vegan diet, substitute Greek yogurt with coconut yogurt or almond yogurt. These options keep your smoothie creamy without dairy. For milk, try oat milk or soy milk. Both work well and have a great taste. To make this smoothie even better, add protein powder or a spoonful of nut butter. Both options add creaminess and keep you full longer. You can also mix in superfoods like kale or flaxseeds for extra health benefits. They boost your nutrient intake without changing the taste much. You can pre-make your berry spinach smoothie for busy days. Blend all the ingredients and pour it into a jar. Seal the jar tightly and store it in the fridge. It is best to drink it within 24 hours for the freshest taste. If you use yogurt, it helps keep the smoothie creamy longer. Always give it a good shake before drinking. Freezing is another great option. To freeze, pour the smoothie into freezer-safe containers or ice cube trays. Leave a little space at the top for expansion. When you are ready to drink it, just take it out and let it thaw in the fridge overnight. You can also blend the frozen smoothie to get a frosty texture. This method keeps the flavor intact while making it easy to store. In the fridge, your berry spinach smoothie lasts about 1 to 2 days. After that, it may start to lose its taste and texture. If you see any changes in color or smell, it’s best to toss it out. Freshness is key for enjoying this tasty drink! A berry spinach smoothie is packed with nutrients. Spinach gives you iron, vitamins A and C. Berries add antioxidants that help your body fight free radicals. The Greek yogurt provides protein and probiotics for gut health. This smoothie supports your immune system and boosts energy too. Yes, you can make this smoothie ahead of time. Simply blend the ingredients and store it in the fridge. It stays fresh for about 24 hours. Just give it a quick stir before drinking. For best taste, drink it soon after making. If you don’t want to use banana, try avocado for creaminess. You can also use apple sauce or frozen mango. These options keep the smoothie smooth while adding natural sweetness. Each choice will change the flavor a bit, but they will still taste great. To make the smoothie more filling, add oats or nut butter. Rolled oats blend well and provide fiber. Nut butter adds healthy fats and protein. Chia seeds can also help. They expand in your stomach and keep you full longer. Yes, you can easily add protein without changing the taste. Try protein powder in vanilla or unflavored. Greek yogurt already has protein, but you can add more. Silken tofu is another great option. It blends smoothly and has a mild taste. Feel free to try the Full Recipe for a delicious and healthy treat. I love making the Berry Spinach Smoothie because it tastes great and is super healthy. This smoothie is packed with vitamins and flavors. Let’s dive into the ingredients you need for this tasty treat. - 1 cup fresh spinach leaves - 1/2 cup mixed berries (strawberries, blueberries, raspberries) - 1 ripe banana - 1/2 cup Greek yogurt (or dairy-free alternative) - 1 cup almond milk (or any milk of your choice) - 1 tablespoon honey or maple syrup (optional) - 1 tablespoon chia seeds (optional) - Ice cubes (optional, for a frostier texture) Start by rinsing the fresh spinach leaves well under cold water. This removes dirt and makes it clean. Then, place the spinach in your blender. Next, add the mixed berries, banana, Greek yogurt, and almond milk. If you want your smoothie sweet, drizzle in honey or maple syrup. Adding chia seeds can boost the health benefits too! You might like your smoothie chilled. If so, toss in some ice cubes. Blend everything on high until it’s smooth and creamy. You may need to scrape down the sides to mix well. Taste it to see if you want more sweetness. If so, blend again briefly to combine. Once it's ready, pour the smoothie into a glass or bowl. It looks great in clear glasses! You can top it with whole berries, chia seeds, or mint for a fancy touch. Enjoy your Berry Spinach Smoothie right away! This blog post shows you how to make a delicious berry spinach smoothie. You learned about fresh ingredients, dairy options, and fun add-ins. I shared tips for perfect blending and enhancing flavors. You can customize this recipe with various fruits and dairy substitutes. Remember, you can make this smoothie ahead and store it for later. This way, you can enjoy a healthy drink anytime. Now it’s time to blend your own tasty smoothie and enjoy the benefits!

Berry Spinach Smoothie Simple and Nutritious Blend

Read More Berry Spinach Smoothie Simple and Nutritious BlendContinue

- 4 ripe peaches, pitted and diced - 1 cup freshly squeezed lemon juice (about 4-6 lemons) - 1/2 cup honey or agave syrup (adjust to taste) - 4 cups cold water - Fresh mint leaves for garnish - Lemon slices for garnish - Ice cubes To make fresh peach lemonade, you need ripe peaches. Look for peaches that smell sweet and feel soft but not mushy. The right peaches make your drink sweet and fruity. Next, you'll need fresh lemons. You can squeeze about 4 to 6 lemons to get one cup of juice. Fresh juice gives the best tartness to balance the sweetness from the peaches. For sweetener, honey or agave syrup works great. You can adjust the amount based on how sweet you want your lemonade. Some people like it sweeter, while others prefer a tangy flavor. Lastly, consider garnishes. Fresh mint leaves add a nice touch and flavor. Lemon slices look pretty and add extra citrus notes. Don’t forget the ice cubes to keep your drink cold! - Calories per serving: About 100 calories - Sugar content: Around 20 grams - Vitamins and minerals: Rich in Vitamin C and A Each serving of fresh peach lemonade has about 100 calories. The sugar content is around 20 grams, mostly from the peaches and sweetener. Peaches offer Vitamin C, which is good for your immune system. Lemons also provide Vitamin C, and they add potassium. These vitamins and minerals help keep you healthy and refreshed during hot days. To start, gather your ripe peaches. Ripe peaches give the best flavor. Cut them in half, remove the pits, and dice the flesh. Next, add the diced peaches to a blender. Pour in a cup of cold water. Blend them until smooth. This step creates a lovely peach puree. Now, you need to strain the puree. Use a fine mesh sieve over a large pitcher. Pour the blended mixture through the sieve. Use a spatula to press down. This helps push more peach juice through. Discard any leftover pulp. With your peach juice ready, it’s time to mix. Add the freshly squeezed lemon juice to the pitcher. This adds a bright, zesty flavor. Now, sweeten the mix. Add half a cup of honey or agave syrup. Stir until fully dissolved. Taste your lemonade. If you want it sweeter, add more honey or agave. Finally, add the remaining three cups of cold water. Stir gently to combine all the flavors. For the best taste, chill your lemonade. Place it in the refrigerator for at least 30 minutes. This allows the flavors to blend together well. When you’re ready to serve, fill glasses with ice cubes. Pour the chilled peach lemonade over the ice. Garnish each glass with a slice of lemon and a few fresh mint leaves. This adds a nice touch and makes it look pretty. Enjoy your refreshing summer drink! To make your fresh peach lemonade even better, adjust the sweetness to your taste. You can use honey or agave syrup. Start with half a cup and add more if you like it sweeter. Taste it after mixing. The more you taste, the better it gets! For a stronger peach flavor, use ripe peaches. The riper, the sweeter! If you want a bolder taste, add a bit of peach juice to the mix. This will give you a more intense peach experience. Garnishing makes your drink look great! Add a slice of lemon on the rim of the glass. Fresh mint leaves also add a nice touch. They give a pop of color and smell amazing! You can use fun glassware too. Tall glasses highlight the colors, while mason jars give a rustic feel. Choose what fits your style best! Prep time is key. You can make the peach puree a day ahead. Just store it in an airtight container in the fridge. This makes the final steps quicker. For storage, keep leftovers in a sealed pitcher. It stays fresh for up to three days. If you notice separation, just stir it before serving again. Enjoy your refreshing peach lemonade anytime! {{image_2}} You can change the flavor of your peach lemonade easily. Adding herbs like basil or mint gives it a fresh twist. Just toss a few leaves into the blender with the peaches. You will love how these herbs lift the flavors. Mixing other fruits is also fun. Try adding strawberries or raspberries for a fruity blend. Each fruit adds its own taste. This way, you can make different versions each time! If you want a healthier option, try stevia or monk fruit. These sweeteners are great for cutting sugar. You can use them in the same amounts as honey or agave. Another idea is to use flavored syrups. They can add a unique taste to your lemonade. Look for peach or lemon-flavored syrups at the store. This gives you a new way to enjoy the drink. For a fun twist, make fizzy peach lemonade. You can use sparkling water or soda instead of still water. This adds bubbles and a lively feeling to your drink. If you use soda, choose a lemon-lime flavor for a zesty kick. Just remember to adjust the sweetness, as soda can be very sweet. You might not need as much honey or agave. Enjoy the refreshing fizz on a hot summer day! After making your fresh peach lemonade, store it in the fridge. Pour it into a clean pitcher or jar. Keep it sealed to prevent any odors from mixing in. Fresh peach lemonade stays good for about 3 to 5 days. Always give it a quick stir before serving. This helps mix any settled peach puree. If you want to make lemonade ahead of time, freezing is a great option. Pour the lemonade into ice cube trays or freezer-safe containers. Leave some space in the container for expansion. The lemonade will last for up to 3 months in the freezer. To use frozen lemonade, take it out of the freezer and let it thaw in the fridge overnight. You can also place it in a bowl of cold water for a quicker thaw. Once thawed, stir well and serve over ice. Enjoy the refreshing taste all summer long! To make your fresh peach lemonade, follow these steps: 1. Start by dicing 4 ripe peaches and pitting them. 2. In a blender, add the diced peaches and 1 cup of cold water. Blend until smooth. 3. Strain the peach puree through a fine mesh sieve into a large pitcher. Use a spatula to help push the liquid through. 4. Stir in 1 cup of freshly squeezed lemon juice and 1/2 cup of honey or agave syrup. Mix until the sweetener dissolves. 5. Add 3 more cups of cold water to the pitcher and stir well. Taste and adjust sweetness if needed. 6. Chill the lemonade in the fridge for at least 30 minutes. 7. Serve over ice, garnished with lemon slices and fresh mint. For the full recipe, check out the detailed steps. Yes, you can use canned peaches. Here are some pros and cons: - Pros: - Canned peaches are ready to use and save time. - They can be sweeter, so you may need less sweetener. - Cons: - Canned peaches may have added sugars or syrups. - The flavor might not be as fresh as ripe peaches. If you need a substitute for lemon juice, consider these options: - Lime juice: It gives a similar tangy flavor. - Vinegar: White or apple cider vinegar can work, but use less since it’s stronger. - Citric acid: Mix a small amount with water for a tart flavor. Each substitute can change the taste, so adjust to your liking. Homemade peach lemonade can last about 5 to 7 days in the fridge. To store it: - Use an airtight container to keep it fresh. - Check for any off smells or flavors before serving. Yes, you can make peach lemonade ahead of time. Here are some tips: - Prepare the lemonade and store it in the fridge. - If you plan to serve later, add ice just before serving to keep it cold. - Garnish with lemon slices and mint right before serving to keep it fresh. This blog post explored how to make fresh peach lemonade. We detailed the key ingredients, including ripe peaches and sweeteners. The step-by-step guide showed you how to prepare peach puree, mix the lemonade, and serve it chilled. We also shared tips to enhance flavor and present your drink beautifully. Finally, we discussed storage options and variations like fizzy lemonade. Making peach lemonade is simple and fun. Enjoy your refreshing drink and experiment with different flavors. Your perfect summer beverage awaits!

Fresh Peach Lemonade Refreshing Summer Delight

Read More Fresh Peach Lemonade Refreshing Summer DelightContinue

- 1 ripe mango, peeled and diced - 1 cup fresh pineapple, diced - 1 banana, sliced - 1 cup coconut milk (or almond milk) - 1 tablespoon honey or agave syrup - 1 tablespoon chia seeds - Ice cubes (as desired) - A handful of fresh mint leaves When making a Tropical Mango Pineapple Smoothie, fresh, ripe fruits are key. Start with a mango that feels soft to the touch. This means it's sweet and ready to eat. Pineapples should also be fresh, with a sweet smell at the base. Bananas add creaminess. You can use coconut milk for a tropical twist or almond milk for a nutty taste. If you want extra sweetness, add honey or agave syrup. Chia seeds can give your smoothie a nice texture and boost nutrition. Ice cubes keep it cool and refreshing. Finally, fresh mint leaves make a lovely garnish. They add a pop of color and flavor. For more details, check out the Full Recipe. Start by preparing your fruits. First, peel and dice the mango into small chunks. Next, take your fresh pineapple and dice it as well. Finally, slice the banana into rounds. In a blender, combine all your fruits. Add the diced mango, pineapple, and sliced banana. Next, pour in the coconut milk. If you want some sweetness, add honey or agave syrup. For added texture, throw in chia seeds. Pulse the blender on low speed a few times to break down the big fruit pieces. After that, blend on high speed until the mix is smooth and creamy. Once your smoothie is ready, pour it into tall glasses. To make it look even better, garnish each glass with a sprig of fresh mint leaves. Enjoy your refreshing Tropical Mango Pineapple Smoothie! To get the right texture in your Tropical Mango Pineapple Smoothie, adjust the thickness with ice or liquid. If you want it thicker, add more ice. If it feels too thick, pour in a bit more coconut milk or water. Start blending with a few ice cubes. Then, add more as needed. This way, you can control the smoothness and chill. Taste your smoothie after blending. If it needs more sweetness, add honey or agave syrup. Blend again until mixed well. This helps you find the perfect balance. You can also use ripe fruits. They add natural sweetness. Always remember, you can adjust as you go. Blend on low speed first to break down the larger pieces. Once the fruit starts to combine, switch to high speed. Blend until smooth and creamy, usually for about 30 seconds. This method ensures all ingredients mix well. Don't rush this step; it makes a big difference in texture. {{image_2}} You can easily make this smoothie dairy-free. Instead of using coconut milk, try almond milk or oat milk. Both options keep the smoothie creamy and delicious. They also add unique flavors. If you want a nutty touch, almond milk is perfect. For a smoother, richer taste, choose oat milk. Either way, your Tropical Mango Pineapple Smoothie will still taste amazing. Want to pack in more nutrition? Add more fruits! You can toss in extra mango or even some spinach. Spinach blends well and boosts vitamins without changing the taste much. Other great choices include berries or kiwi. They add natural sweetness and fun colors. Feel free to mix and match based on what you love or have at home! To make your smoothie even tastier, consider adding spices or extracts. A dash of vanilla can give a warm flavor. If you like a bit of spice, try adding grated ginger. It adds a nice kick and is very healthy. Cinnamon is also a fantastic option. It pairs well with tropical flavors and brings out the sweetness. These small additions can transform your smoothie into something special! You can keep a prepared smoothie in the fridge for about one day. After that, the taste and texture may change. If you plan to enjoy it later, store it in an airtight container. This helps keep the smoothie fresh. When you're ready to drink, give it a good shake or stir. This will mix up any separation that may occur. To freeze portions for future smoothies, pour the smoothie into ice cube trays or small containers. Leave some space at the top, as liquids expand when frozen. Once frozen, pop the cubes into a freezer bag. This way, you can grab a few cubes whenever you want a quick treat. They will hold their flavor well for about three months. When you're ready to enjoy your frozen smoothie, you will need to re-blend it. Start by adding a splash of coconut milk or water to help it blend smoothly. If the smoothie is too thick, add more liquid gradually. Blend until it reaches your desired consistency. This method will make your smoothie creamy and refreshing again. Yes, you can use frozen fruits! They make the smoothie cold and thick. Frozen mango and pineapple work great. Just toss them into the blender as you would with fresh ones. This also helps keep the smoothie fresh longer if you can't use fresh fruit right away. To make your smoothie thicker, add more ice cubes or use less liquid. You can also add a banana or some chia seeds. Both help create a rich, creamy texture. If you want a smoothie bowl, just blend it less so it's chunkier. This smoothie is packed with nutrients! Mango is high in vitamins A and C, great for your skin. Pineapple has bromelain, which helps digestion. Bananas provide potassium, good for your heart. Coconut milk has healthy fats, giving you energy. Overall, this smoothie is sweet and healthy! For the complete recipe, check out the *Tropical Mango Pineapple Bliss* recipe. You learned how to make a delicious Tropical Mango Pineapple Smoothie. We covered the key ingredients, like ripe mango and coconut milk, and optional additions to enhance flavor. I shared easy steps to prepare, blend, and serve your smoothie. You also got tips for texture and sweetness, plus ideas for tasty variations. Lastly, I provided storage methods for your smoothies. Enjoy your drink, and let it bring a burst of tropical joy to your day!

Tropical Mango Pineapple Smoothie Refreshing and Easy

Read More Tropical Mango Pineapple Smoothie Refreshing and EasyContinue

To make the perfect Pistachio Cream Iced Latte, you need just a few key ingredients. Each one adds to the rich and refreshing flavor of this drink. - 1 cup brewed espresso or strong coffee: Start with a good quality coffee for the best taste. - 1 cup milk (dairy or non-dairy, your choice): You can use whole, almond, oat, or soy milk. Each adds a unique flavor. - 2 tablespoons pistachio paste: This is the star of the drink. Look for high-quality paste made from roasted pistachios. - 2 teaspoons vanilla extract: This adds warmth and depth to the drink. - 1-2 tablespoons honey or maple syrup (to taste): Sweeten your latte to your liking. Honey adds a floral note, while maple syrup gives a rich flavor. - Ice cubes: Essential for making this drink cold and refreshing. - Whipped cream (for topping): Adds a creamy, indulgent finish. - Chopped pistachios (for garnish): These add a nice crunch and extra flavor on top. This list ensures you have everything you need for a delicious iced latte. You can find the full recipe to guide you through each step. 1. Brew your espresso or strong coffee. Let it cool for a few minutes. 2. In a small bowl, mix 2 tablespoons of pistachio paste, 2 teaspoons of vanilla extract, and 1-2 tablespoons of honey or maple syrup. Stir until smooth. 3. Fill a glass halfway with ice cubes. 1. Pour the cooled espresso over the ice in the glass. 2. Add 1 cup of milk to the espresso and stir gently. 3. Incorporate the pistachio mixture, mixing well so all flavors blend. 1. Top your iced latte with a generous swirl of whipped cream. 2. Garnish with chopped pistachios for a crunchy finish. 3. For a nice touch, serve in a clear glass to show off the layers. Follow this Full Recipe to create your perfect Pistachio Cream Iced Latte and enjoy every sip! Getting the right ingredient ratios is key for your Pistachio Cream Iced Latte. Use one cup of brewed espresso and one cup of milk. This balance creates the perfect drink. If you want it sweeter, adjust the honey or maple syrup. Start with one tablespoon, then taste and add more if you like. You can prepare this iced latte in advance. Brew your espresso and let it cool. Mix the pistachio paste with vanilla and sweetener. Store this mix in the fridge for up to three days. Keep the milk and whipped cream separate until you are ready to serve. This way, your drink stays fresh and tasty. You can make your latte even better by adding flavors. Try almond or coconut milk for a twist. A pinch of cinnamon or nutmeg can bring warmth to the drink. You can also mix in flavored syrups like caramel or chocolate. Don't be afraid to experiment and find your favorite taste! {{image_2}} If you want a dairy-free iced latte, try using almond milk, oat milk, or coconut milk. Each of these options gives a unique flavor. Almond milk is light and nutty. Oat milk adds creaminess, while coconut milk brings a tropical twist. When using these alternatives, taste your drink. You might need to adjust the flavor balance. Non-dairy milks can be sweeter, so reduce the sweetener if needed. For a healthier option, use natural sweeteners like agave syrup or stevia. Both provide sweetness without added sugars. If you prefer a sugar-free drink, stevia is a great choice. Just remember, it's much sweeter than sugar. Start with a small amount and add more to taste. Adjusting your sweetness helps you enjoy your iced latte without guilt. Want to mix things up? Add chocolate or mocha notes for a richer taste. Simply stir in some cocoa powder or use chocolate syrup. You can also incorporate seasonal ingredients like pumpkin spice in the fall. This spice adds warmth and comfort. Feel free to explore different flavors. Each time you make this drink, you can create a new experience! For the full recipe, check the main article. To store your unused iced latte, pour it into a sealable container. Keep it in the fridge for up to two days. The milk can spoil quickly, so check for freshness before drinking. If you have leftover components like espresso or pistachio paste, store them separately. Brewed espresso lasts about three days in the fridge. Pistachio paste can stay fresh for a week if sealed tightly. If you want to refresh a previously made iced latte, try adding more ice or milk. This helps cool it down and revives its flavor. You can also blend it for a frosty drink. Discard leftovers if they sit in the fridge for more than two days. Always trust your senses; if it smells or tastes off, it's best to throw it away. To keep your pistachio paste fresh, seal it in an airtight container. Store it in a cool, dark place, like your pantry or the fridge. This way, it can last for about two weeks. For brewed coffee, keep it in a closed container in the fridge. It will last up to three days. Always remember, fresh ingredients lead to a better-tasting pistachio cream iced latte. For the full recipe and serving instructions, check out the [Full Recipe]. A Pistachio Cream Iced Latte is a delicious drink. It blends rich espresso, creamy milk, and sweet pistachio paste. This drink is cold and refreshing, perfect for warm days. The flavor is nutty and slightly sweet, with a hint of vanilla. The whipped cream on top adds a nice touch. You can enjoy this treat at home or in cafés. You can find a Pistachio Cream Iced Latte at many local cafes. Major chains may also offer this special drink. To order online, check popular coffee delivery apps. Many cafes list their drinks on their websites. You might discover new places that serve this tasty iced latte! Pistachios are packed with nutrients. They are high in protein and healthy fats. They provide fiber, vitamins, and minerals too. Eating pistachios can help lower cholesterol. They may also support heart health and weight management. Adding pistachios to your diet is a smart choice! This blog post covered everything you need to make a Pistachio Cream Iced Latte. We discussed ingredients, preparation steps, and tasty variations. You can customize this drink to fit your taste. Remember the tips for better storage and measuring. Krafting this coffee treat is easy, fun, and satisfying. Enjoy making your own iced lattes at home, and feel free to experiment. You’ll impress friends and family with your skills and flavor choices.

Pistachio Cream Iced Latte Rich and Refreshing Drink

Read More Pistachio Cream Iced Latte Rich and Refreshing DrinkContinue

- 2 cups sparkling water - 1 cup fresh apple juice - 1 tablespoon grated fresh ginger - 1 tablespoon honey (or maple syrup for a vegan option) - Juice of 1 lemon - Apple slices for garnish - Fresh mint leaves for garnish - Ice cubes To make the Apple Ginger Sparkler, gather these simple and fresh ingredients. You will need bubbly sparkling water to add fizz. Fresh apple juice brings a sweet and crisp flavor. Grated fresh ginger adds a nice zing. Honey or maple syrup sweetens the drink. A splash of lemon juice adds brightness. For garnish, prepare apple slices and fresh mint leaves. Lastly, ice cubes keep your drink super cold. Using fresh ingredients makes all the difference. Fresh apple juice and ginger have the best taste. You can find these at local markets or grocery stores. Choose organic options when possible for better flavor and health. Once you have everything ready, you will create a drink that is not just tasty but also refreshing. This drink is perfect for warm days or festive gatherings. Check out the full recipe for easy steps to mix this delightful drink. To start, grate one tablespoon of fresh ginger. In a small bowl, mix this ginger with one tablespoon of honey or maple syrup. If you want a vegan option, use maple syrup. Next, squeeze the juice of one lemon into the bowl. Stir everything together well. This mix needs a few minutes to let the flavors meld. Set it aside while you prepare the rest. Grab a large pitcher. Pour in one cup of fresh apple juice and two cups of sparkling water. These two will give your drink a nice balance of sweetness and fizz. Carefully add the ginger mixture to the pitcher. Stir gently to combine all the ingredients. You want all the flavors to mix without losing the bubbles. Now it’s time to serve! Fill your glasses with ice cubes. Pour the Apple Ginger Sparkler over the ice until each glass is full. For a nice touch, garnish each glass with apple slices and fresh mint leaves. This not only looks great but adds extra flavor too. Enjoy this refreshing drink right away! For the best taste, I recommend using fresh apple juice. Look for juice made from sweet apples like Fuji or Honeycrisp. These apples give your drink a nice balance of sweet and tart. You can also adjust the sweetness to your liking. If you want a sweeter drink, add honey or maple syrup. Just a tablespoon will do, but feel free to add more if you like it sweet. Garnishes make your drink pop. Slice fresh apples and add them to each glass. You can also add mint leaves for a fresh scent. For a fun twist, try different glassware. Use tall glasses for a fancy look or mason jars for a rustic feel. The right glass can make your drink even more special. If you're hosting a party, prepare the drink in advance. You can mix the apple juice and sparkling water ahead of time. Store the ginger mix in a sealed jar in the fridge. Just combine everything right before serving. This way, you can enjoy time with your guests. If you have leftovers, store the drink in the fridge for a day. Keep the ginger mix separate to keep the fizz. {{image_2}} You can change the taste of your Apple Ginger Sparkler easily. Adding herbs can bring new life to this drink. Try adding basil for a fresh twist or thyme for a rich flavor. These herbs will give your drink a unique touch that surprises your guests. You can also switch up the juices. Instead of apple juice, use pear juice for a sweeter drink. Cranberry juice offers a tart kick that pairs well with ginger. Each choice gives a new flavor profile. So, feel free to experiment! Want to warm things up? Adding cinnamon or nutmeg can add a cozy feel to your drink. A sprinkle of cinnamon can enhance the apple taste. Nutmeg gives a warm spice that balances the sweetness. You can also use other ginger products. Try ginger ale instead of fresh ginger. It adds fizz and a sweeter kick. This option makes the drink simpler but still tasty. If you want a twist, use flavored sparkling water. Lemon, lime, or berry flavors can change the whole drink. This will add a new layer of taste that is fun and refreshing. For those who prefer a non-sparkling drink, you can skip the bubbles. Just mix your apple juice and ginger mixture without the sparkling water. It will still be tasty and enjoyable, perfect for any occasion. Explore these variations to find your favorite way to enjoy the Apple Ginger Sparkler! For the complete recipe, refer to the [Full Recipe]. To keep your Apple Ginger Sparkler fresh, store it in a sealed container. Use a glass jar or a pitcher with a lid. This helps maintain its fizz and flavor. I recommend drinking it within 2 days for the best taste. After that, it may lose its sparkle. For leftover apple juice, pour it into a clean bottle. Seal it tightly and store it in the fridge. Fresh ginger can last longer if you keep it in a cool, dry place. Wrap it in a damp paper towel and place it in a plastic bag in the fridge. This keeps it fresh for about a week. To preserve garnishes, like apple slices and mint, store them in a container with a damp cloth. This helps them stay crisp and vibrant. You can freeze apple juice in ice cube trays. This is great for adding to drinks later. Just pour the juice into the trays and freeze until solid. For ginger, you can grate it and freeze it in small portions. After thawing, the flavor remains strong, but the texture may change slightly. Enjoy your frozen components in future drinks! For the best apple juice, choose sweet and crisp apples. The best varieties include: - Honeycrisp - Fuji - Gala - Granny Smith These apples make your juice tasty and refreshing. They balance sweetness and tartness well. Honeycrisp apples are especially juicy. Fuji apples give a rich flavor, while Granny Smith adds a nice zing. Yes! You can easily make the Apple Ginger Sparkler alcoholic. Here are some ideas: - Add vodka for a light kick. - Use rum for a tropical vibe. - Try gin for a herbal twist. Start with one ounce of spirit. Add it to your glass before pouring the sparkling drink. Stir gently, and enjoy your fun twist! Store your Apple Ginger Sparkler in the fridge for up to three days. After that, it may lose its fizz. To keep it fresh: - Use an airtight container. - Avoid adding ice before storing. This way, you can enjoy your refreshing drink longer! Yes, the Apple Ginger Sparkler can be vegan-friendly. Instead of honey, use maple syrup. Here are some other vegan options: - Agave nectar for sweetness. - Coconut sugar for a different flavor. These alternatives keep the drink tasty and suitable for everyone! This blog post detailed how to make a refreshing Apple Ginger Sparkler. You learned about essential ingredients, step-by-step instructions, and tips to enhance the drink. We explored variations to customize flavors and discussed storage options to keep your drink fresh. Enjoy crafting this tasty beverage for yourself or gatherings. It's easy, fun, and delicious. Make it your own with different flavors or garnishes. You’ll impress everyone with your homemade creation!

Apple Ginger Sparkler Exciting Refreshing Drink Recipe

Read More Apple Ginger Sparkler Exciting Refreshing Drink RecipeContinue

Page navigation

1 2 3 Next PageNext

Our Policys

  • Privacy Policy
  • Cookie Policy
  • Copyright Policy
  • GDPR Policy
  • Disclaimer
  • Terms Of Use

More Information

  • Home
  • About
  • Contact
  • Appetizer
  • Desserts
  • Dinner
  • Drinks

© 2025 dailydishly

  • Home
  • Dinner
  • Appetizer
  • Desserts
  • Drinks
  • About
  • Contact
  • Privacy Policy
Search