Welcome to a culinary delight that will ignite your taste buds! In this post, I’ll share my flavorful recipe for Honey Garlic Chicken Thighs. You’ll bask in the sweet and savory mix of honey and garlic, creating juicy chicken with crispy skin. With simple ingredients and easy steps, dinner becomes pleasure. Get ready to impress your family or guests with this mouthwatering dish. Let’s dive into the ingredients!
Ingredients
Main Ingredients for Honey Garlic Chicken Thighs
– 4 chicken thighs, bone-in and skin-on
– 1/4 cup honey
– 1/4 cup soy sauce (low sodium preferred)
Aromatics and Seasoning
– 4 cloves garlic, minced
– 1 tablespoon fresh ginger, grated
– Salt and pepper to taste
Cooking Oils and Garnishes
– 1 teaspoon sesame oil
– 1 tablespoon olive oil
– 2 green onions, sliced (for garnish)
– Sesame seeds (for garnish)
When making honey garlic chicken thighs, choose fresh, high-quality ingredients. The chicken thighs should be bone-in and skin-on. This keeps the meat juicy and adds flavor. The combination of honey and soy sauce creates a sweet and savory glaze that makes the dish pop.
The garlic and ginger bring warmth and depth to the flavor. Fresh garlic adds a strong taste, while ginger offers a nice zing. Don’t skip the salt and pepper; they help enhance all the flavors.
Using sesame oil adds a nutty aroma, while olive oil helps to sear the chicken. The green onions and sesame seeds are perfect garnishes that elevate the dish’s look and taste.This dish is easy and sure to impress everyone at your table!
Step-by-Step Instructions
Marinade Preparation
Start by whisking together honey, soy sauce, minced garlic, ginger, and sesame oil. This mix is your marinade and glaze. It gives the chicken a sweet and savory flavor. Make sure everything blends well. This step sets the stage for great taste.
Chicken Preparation
Next, season the chicken thighs with salt and pepper. Get both sides nice and seasoned. Then, heat olive oil in a big skillet over medium-high heat. Once the oil is hot, place the chicken thighs in the pan, skin side down. Sear for about 6-8 minutes. The skin should turn golden brown and crispy. This step locks in flavor and texture.
Cooking Process
After searing, flip the chicken thighs over. Pour the honey garlic mix over them. Let the sauce gently simmer. Now, reduce the heat to low and cover the skillet. Cook for 15-20 minutes until the chicken reaches 165°F (75°C). This ensures the chicken is juicy and tender.
Once cooked, remove the cover and turn the heat back to medium-high. Let the sauce reduce for about 5 minutes. Stir occasionally. The glaze should thicken slightly. This step makes the dish even richer.
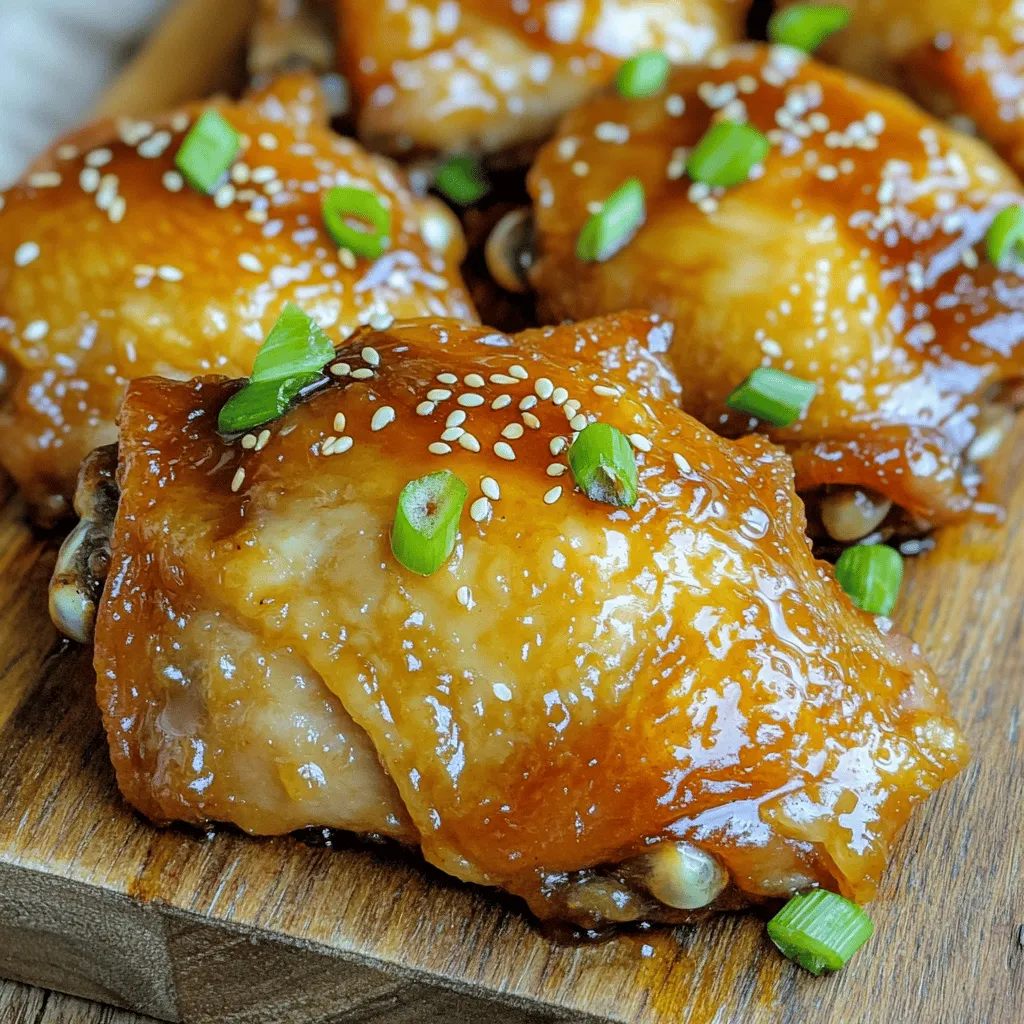
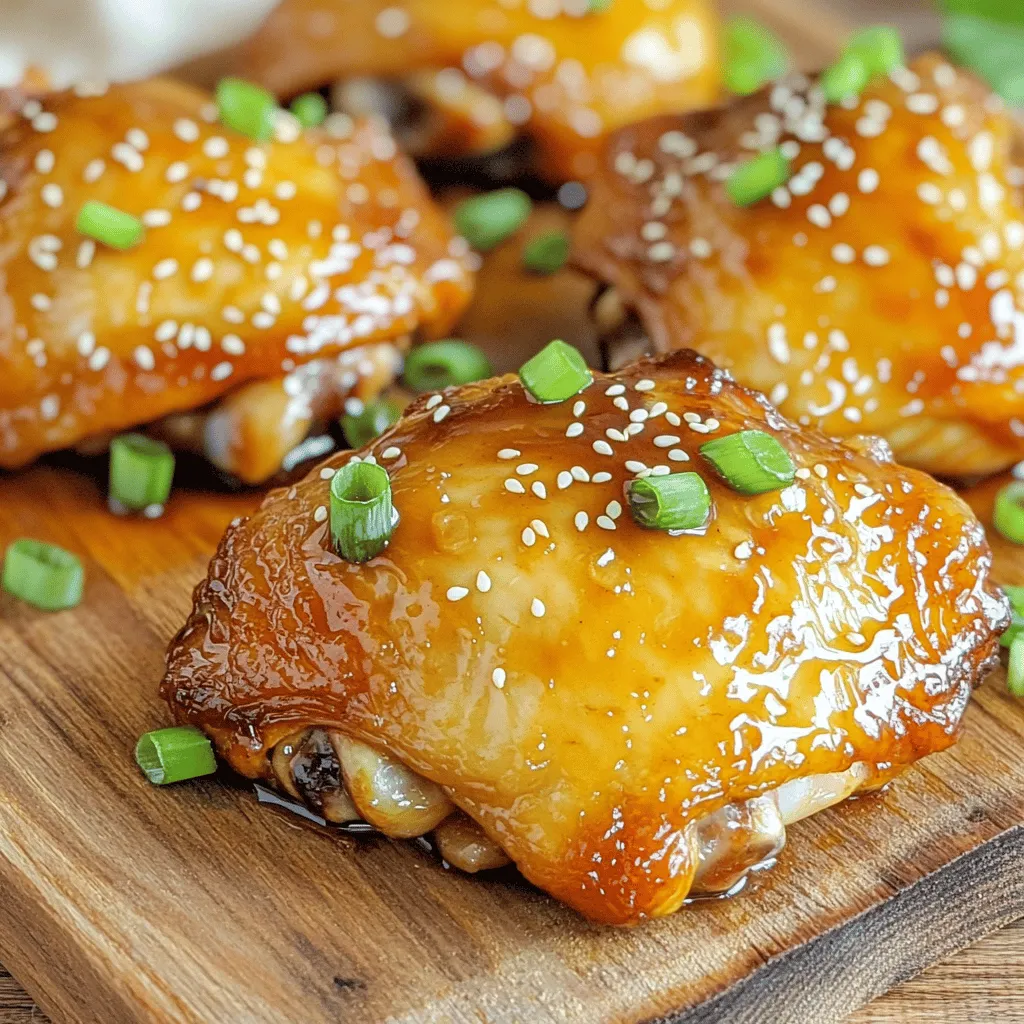
Now, you’re ready to enjoy this honey garlic chicken. Serve it drizzled with the thickened sauce and maybe some green onions and sesame seeds on top. This adds a fresh touch.
Tips & Tricks
Achieving Perfectly Crispy Skin
To get that tasty, crispy skin, start by searing the chicken thighs. Sear them skin side down for 6 to 8 minutes. Make sure your skillet is hot before adding the chicken. This high heat helps crisp the skin. After searing, flip the thighs and continue cooking them with the sauce. This method locks in flavor and keeps the skin crunchy.
Ensuring Juicy Chicken Thighs
Resting is key for juicy chicken. After cooking, let the thighs sit for a few minutes. This step helps the juices spread throughout the meat. To check if the chicken is done, use a meat thermometer. The internal temperature should reach 165°F (75°C). If you don’t have a thermometer, cut into the thickest part. If the juices run clear and the meat is no longer pink, it’s ready.
Personalized Flavor Adjustments
You can easily tweak the sweetness of the sauce. If you like it sweeter, add more honey. If you prefer less sweetness, reduce the honey and add a splash of vinegar. For fun garnishes, try adding toasted nuts or herbs. You can also use lime or orange zest for a fresh twist. Experiment with these flavors to make the dish your own.
Variations
Spicy Honey Garlic Chicken Thighs
You can easily add heat to your honey garlic chicken. Just sprinkle in some chili flakes or mix in sriracha for a spicy twist. This adds a kick without losing the sweet flavor. Start with a pinch and taste. Adjust until it’s just right for you. This spicy version is perfect for those who love bold flavors.
Honey Garlic Chicken Thighs with Vegetables
Adding vegetables makes this dish more colorful and nutritious. Bell peppers and broccoli work great in this recipe. Chop them into bite-sized pieces and toss them in the skillet with the chicken. They soak up the sweet sauce and add a nice crunch. This twist enhances both taste and texture, making your meal more exciting.
Grilled Honey Garlic Chicken Thighs
Grilling gives a smoky flavor to your chicken thighs. Marinate your chicken as usual, then place them on a hot grill. Cook for about 6-8 minutes on each side. Brush some of the honey garlic sauce on during grilling for extra flavor. Make sure to check that they reach an internal temperature of 165°F. This method creates a delicious char and takes your dish to the next level.
Storage Info
Storing Leftovers
To keep your honey garlic chicken thighs fresh, use airtight containers. Glass or plastic containers work well. Make sure to let the chicken cool down before sealing. This helps prevent moisture buildup. Store leftovers in the fridge for up to three days.
Reheating Instructions
To reheat, place your chicken thighs in a skillet over low heat. Add a splash of water or chicken broth to keep them moist. Cover to retain heat and steam. This method helps keep the chicken juicy and flavorful. You can also use a microwave, but be careful not to overcook.
Freezing and Thawing Guidelines
To freeze honey garlic chicken thighs, place them in a freezer-safe bag. Squeeze out as much air as you can. This prevents freezer burn. They can last up to three months in the freezer.
When ready to eat, thaw them in the fridge overnight. You can also use the microwave for quick thawing. Make sure to cook the chicken immediately after thawing for best taste and safety.
FAQs
Can I use boneless chicken thighs?
Yes, you can use boneless chicken thighs. They cook faster than bone-in thighs. This means you will need to reduce the cooking time. Boneless thighs usually take about 10-15 minutes less to cook. The texture will also be different. Bone-in thighs have a richer flavor and remain juicier. Boneless thighs may turn out a bit drier if overcooked. Keep an eye on them to avoid this issue.
What can I substitute for honey?
If you don’t have honey, there are good options. Maple syrup is a great choice. It adds a nice sweetness and flavor. You can also use agave nectar. Brown sugar mixed with a bit of water works too. This mix gives a similar sweetness. Each option will change the taste slightly, but it should still be tasty!
How do I know when the chicken is fully cooked?
To check if the chicken is done, use a meat thermometer. Insert it into the thickest part of the thigh. The chicken should reach 165°F (75°C). This ensures it is safe to eat. If you don’t have a thermometer, cut into the chicken. The juices should run clear, not pink. Always check in the thickest part for the best results.
In this blog post, we explored how to make honey garlic chicken thighs. We discussed key ingredients and their roles, shared step-by-step cooking instructions, and included tips for crispy skin and juicy meat. We also covered variations and storage methods.
Remember, cooking can be fun and flexible. Feel free to adjust flavors and add your own twist. Experimenting with your meal makes it truly yours. Enjoy making this dish and delighting your taste buds!


