62. Roasted Garlic and Tomato Pasta Flavor Boosters
![To make roasted garlic and tomato pasta, you need these simple items: - 1 pound spaghetti or your favorite pasta - 8 cloves garlic, unpeeled - 4 cups cherry tomatoes, halved - 1/4 cup extra-virgin olive oil - 1 teaspoon dried oregano - 1 teaspoon red pepper flakes (adjust for spice preference) - Salt and pepper to taste - 1/4 cup fresh basil, chopped - 1/2 cup freshly grated Parmesan cheese (optional) Fresh ingredients make a big difference in taste. When cooking, I always use ripe cherry tomatoes. They burst with flavor. Fresh garlic gives a sweet, nutty taste after roasting. Fresh basil adds a bright note to the dish. Using these ingredients helps create a dish that feels special. You can adjust this pasta to fit your needs. If you're gluten-free, choose gluten-free pasta. For a vegan option, skip the Parmesan cheese or use a plant-based alternative. You can even swap cherry tomatoes for canned diced tomatoes if fresh ones aren't available. This way, anyone can enjoy this tasty dish. For a heartier meal, add cooked chicken or shrimp. Feel free to mix in veggies like spinach or zucchini for added nutrition. For the full recipe, check out the details above. Start by gathering your ingredients. For this dish, you need: - 1 pound spaghetti or your favorite pasta - 8 cloves garlic, unpeeled - 4 cups cherry tomatoes, halved - 1/4 cup extra-virgin olive oil - 1 teaspoon dried oregano - 1 teaspoon red pepper flakes (adjust for spice preference) - Salt and pepper to taste - 1/4 cup fresh basil, chopped - 1/2 cup freshly grated Parmesan cheese (optional) Preheat your oven to 400°F (200°C). This helps the garlic and tomatoes roast perfectly. On a baking sheet, place the unpeeled garlic cloves and halved cherry tomatoes. Drizzle with half of the olive oil. Sprinkle with oregano, red pepper flakes, salt, and pepper. Toss gently to coat. Roast in the oven for 20-25 minutes. Look for blistered tomatoes and soft garlic. The smell will guide you! Meanwhile, cook your pasta. Use a large pot of salted boiling water and follow the package instructions. Cook until it’s al dente. Don’t forget to save 1 cup of pasta water before draining. Once the tomatoes and garlic are done, let them cool a bit. Squeeze the roasted garlic out of its skin into a bowl. Mash it with a fork to create a creamy base. Mix the mashed garlic with the roasted tomatoes. Add the remaining olive oil and a splash of the reserved pasta water. Stir well to make a sauce. Now, add the drained pasta to the sauce. Toss it all together until the pasta is well coated. If the sauce is too thick, add more reserved pasta water until you like the consistency. Finally, stir in fresh basil. Taste and adjust seasoning with salt and pepper if needed. Serve your roasted garlic and tomato pasta immediately. If you want, sprinkle some grated Parmesan cheese on top. Enjoy this meal! For the full recipe, check the earlier section. Roasting garlic is simple. Start by placing unpeeled garlic cloves on a baking sheet. Cook them at 400°F (200°C) for about 20 to 25 minutes. You want them soft and golden. When done, let them cool a bit. Squeeze the garlic out of the skin with your fingers. It should be creamy and sweet. This garlic adds a rich, deep flavor to your pasta. Cooking pasta seems easy, but timing is key. Follow the package directions for cooking time. Use a large pot with plenty of salted boiling water. This boosts flavor and helps keep pasta from sticking. For the best texture, aim for "al dente," which means it should be firm to the bite. Remember to reserve some pasta water before draining. This starchy water helps thicken your sauce. Want to make your roasted garlic and tomato pasta pop? Here are some ideas: - Herbs: Add fresh basil or parsley for a bright touch. - Cheese: Toss in some feta or goat cheese for creaminess. - Nuts: Pine nuts or walnuts give a nice crunch. - Spices: For heat, add more red pepper flakes or a dash of smoked paprika. - Zest: A sprinkle of lemon zest can brighten the flavors. These enhancements will take your dish to the next level. Check out the Full Recipe for a complete guide to making this tasty meal! {{image_2}} Roasted garlic and tomato pasta is great for everyone. For a vegetarian twist, skip the cheese. You can add nutritional yeast for a cheesy taste. If you want a vegan option, use a plant-based cheese. This makes it creamy without dairy. You can also toss in fresh spinach or kale. These greens add color and nutrients to your dish. You can switch up the pasta for fun! Try whole wheat pasta for more fiber. Gluten-free pasta works well if you need it. You can even use zucchini noodles for a low-carb choice. Each type will change the dish's texture, so experiment to find your favorite. Want to make it heartier? Add protein like grilled chicken or shrimp. Cook these separately and toss them in at the end. For a veggie boost, add bell peppers or mushrooms. They roast well and taste amazing with garlic and tomatoes. Broccoli or asparagus are also great choices. These keep the dish fresh and colorful. For more details, check out the full recipe. To keep your roasted garlic and tomato pasta fresh, store it in an airtight container. Make sure it cools down before sealing. This will help keep the flavors intact. The pasta can last in the fridge for about 3 to 5 days. If you notice any off smells or changes in color, it's best to toss it. When you’re ready to enjoy your leftovers, reheating properly is key. Use a pan over low heat for the best results. Add a splash of water or olive oil to help the pasta regain its moisture. Stir often to prevent sticking. You can also microwave it, but cover the dish to retain moisture. Heat in 30-second intervals, stirring in between. If you want to save some pasta for later, freezing is a great option. Portion the pasta into individual servings and place them in freezer-safe bags. Remove as much air as possible before sealing. It keeps well for about 2 to 3 months in the freezer. When you're ready to eat, thaw it in the fridge overnight, then reheat as mentioned above. For the best taste, enjoy it within a month. Yes, you can use many types of tomatoes. Roma tomatoes add a rich flavor. Beefsteak tomatoes are juicy and sweet. You can also use canned tomatoes if fresh ones are not available. Just be sure to drain them well. This will keep your pasta from getting too watery. Experiment and find what you like best! To make this recipe gluten-free, choose gluten-free pasta. Many brands offer great options that taste good. You can find pasta made from rice, corn, or lentils. These pastas cook a bit differently, so check the package for instructions. Follow the same steps in the recipe, and enjoy your meal worry-free! Roasted garlic and tomato pasta pairs well with many sides. A fresh green salad adds crunch and color. Garlic bread is a classic choice that everyone loves. You can also serve it with grilled vegetables for a healthy twist. A nice glass of red wine makes the meal even better. Enjoy exploring different pairings! For the complete recipe, check out the [Full Recipe]. This blog post covered key ingredients for roasted garlic and tomato pasta. We explored fresh ingredients and alternatives for dietary needs. I shared step-by-step cooking instructions and helpful tips, like roasting garlic perfectly. We also discussed pasta variations and storage tips to keep leftovers fresh. In summary, this dish is simple, versatile, and delicious. You can make it fit your tastes and needs. Enjoy experimenting with flavors and ingredients! Your next meal can be a hit.](https://dailydishly.com/wp-content/uploads/2025/06/d553d96f-6423-4985-8dca-dedfc8f9e127.webp)
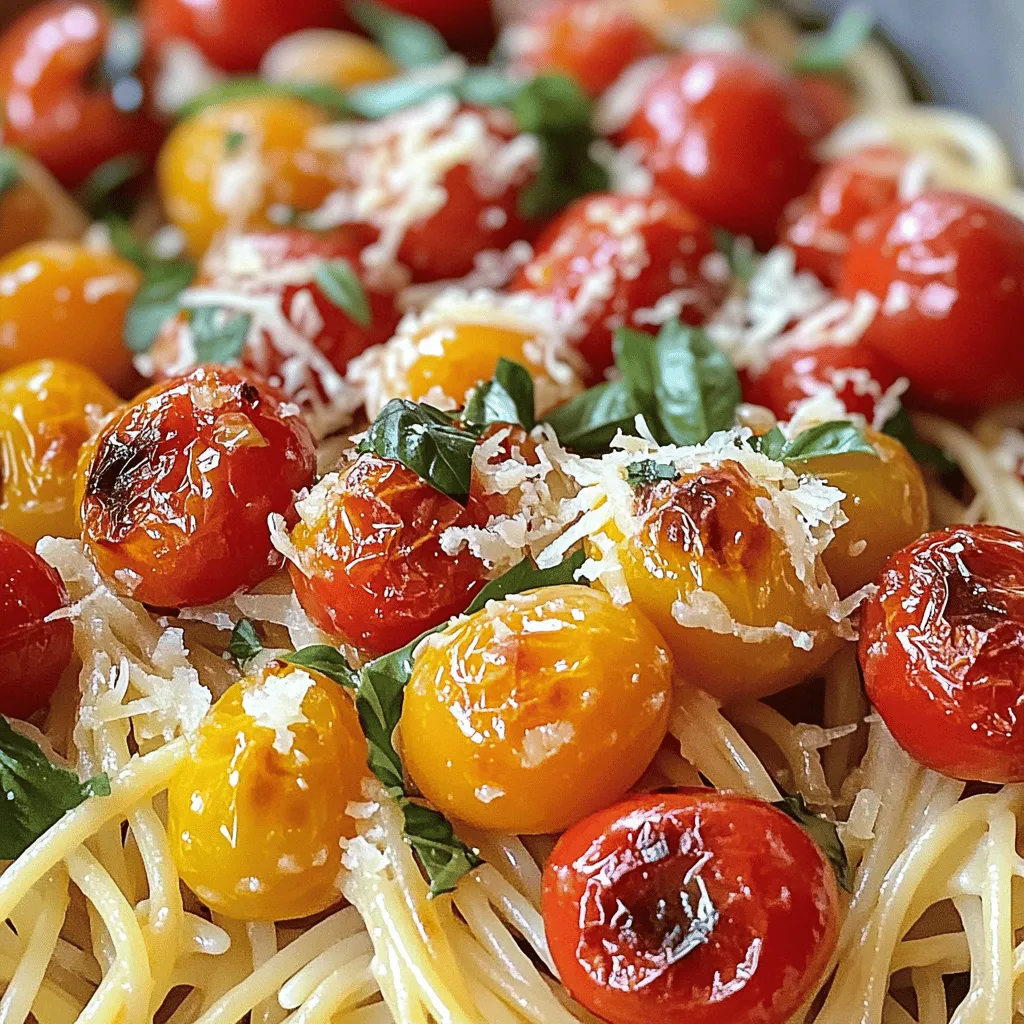
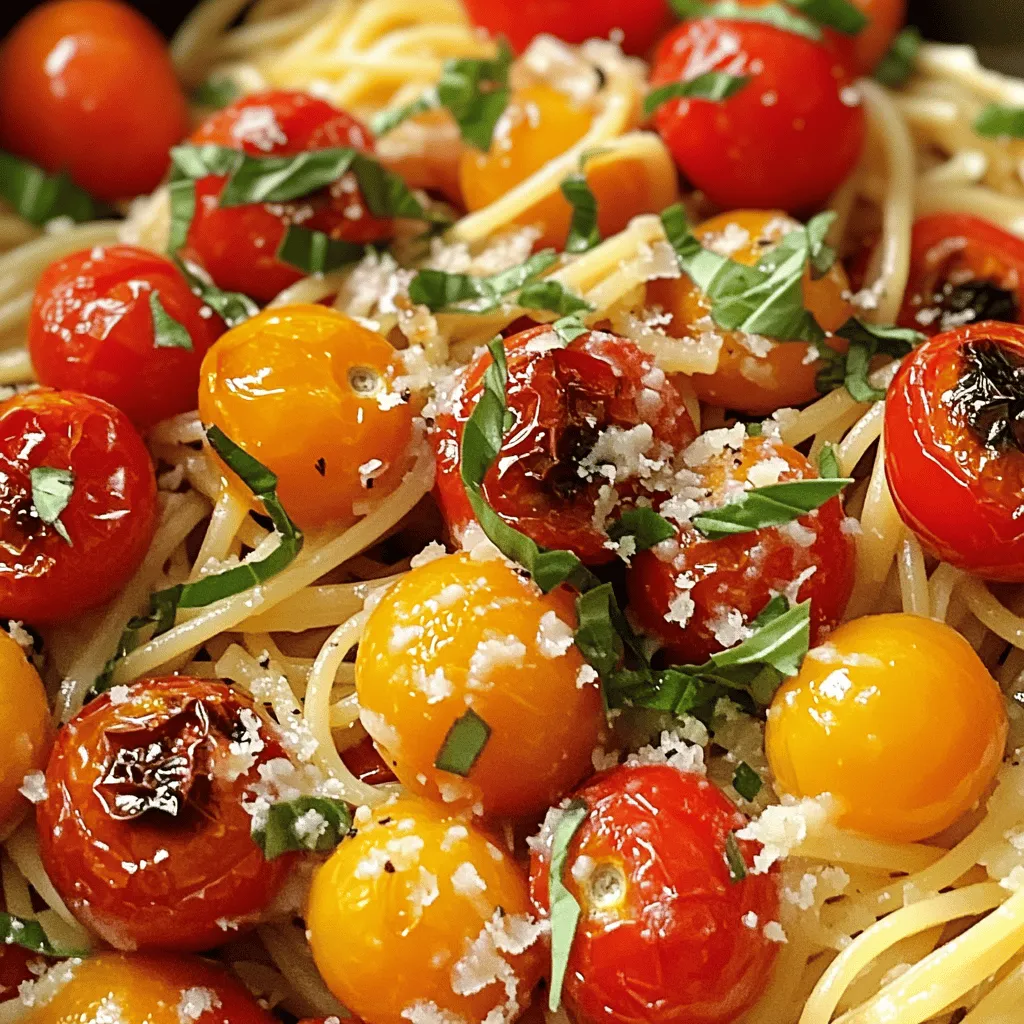
Discover the secret to elevating your Roasted Garlic and Tomato Pasta! In this article, I’ll share simple tips and tasty flavor boosters that make your dish shine. From choosing fresh ingredients to expert cooking techniques, you’ll learn how to create a pasta meal everyone will love. Ready to impress your family and friends? Let’s dive into these delicious enhancements and transform your pasta game!
Ingredients
Detailed Ingredient List
To make roasted garlic and tomato pasta, you need these simple items:
– 1 pound spaghetti or your favorite pasta
– 8 cloves garlic, unpeeled
– 4 cups cherry tomatoes, halved
– 1/4 cup extra-virgin olive oil
– 1 teaspoon dried oregano
– 1 teaspoon red pepper flakes (adjust for spice preference)
– Salt and pepper to taste
– 1/4 cup fresh basil, chopped
– 1/2 cup freshly grated Parmesan cheese (optional)
Importance of Fresh Ingredients
Fresh ingredients make a big difference in taste. When cooking, I always use ripe cherry tomatoes. They burst with flavor. Fresh garlic gives a sweet, nutty taste after roasting. Fresh basil adds a bright note to the dish. Using these ingredients helps create a dish that feels special.
Alternative Ingredients for Dietary Needs
You can adjust this pasta to fit your needs. If you’re gluten-free, choose gluten-free pasta. For a vegan option, skip the Parmesan cheese or use a plant-based alternative. You can even swap cherry tomatoes for canned diced tomatoes if fresh ones aren’t available. This way, anyone can enjoy this tasty dish. For a heartier meal, add cooked chicken or shrimp. Feel free to mix in veggies like spinach or zucchini for added nutrition.
Step-by-Step Instructions
Preparation of Ingredients
Start by gathering your ingredients. For this dish, you need:
– 1 pound spaghetti or your favorite pasta
– 8 cloves garlic, unpeeled
– 4 cups cherry tomatoes, halved
– 1/4 cup extra-virgin olive oil
– 1 teaspoon dried oregano
– 1 teaspoon red pepper flakes (adjust for spice preference)
– Salt and pepper to taste
– 1/4 cup fresh basil, chopped
– 1/2 cup freshly grated Parmesan cheese (optional)
Preheat your oven to 400°F (200°C). This helps the garlic and tomatoes roast perfectly.
Cooking Process for Roasted Garlic and Tomatoes
On a baking sheet, place the unpeeled garlic cloves and halved cherry tomatoes. Drizzle with half of the olive oil. Sprinkle with oregano, red pepper flakes, salt, and pepper. Toss gently to coat.
Roast in the oven for 20-25 minutes. Look for blistered tomatoes and soft garlic. The smell will guide you!
Meanwhile, cook your pasta. Use a large pot of salted boiling water and follow the package instructions. Cook until it’s al dente. Don’t forget to save 1 cup of pasta water before draining.
Once the tomatoes and garlic are done, let them cool a bit. Squeeze the roasted garlic out of its skin into a bowl. Mash it with a fork to create a creamy base.
Combining Pasta with the Sauce
Mix the mashed garlic with the roasted tomatoes. Add the remaining olive oil and a splash of the reserved pasta water. Stir well to make a sauce.
Now, add the drained pasta to the sauce. Toss it all together until the pasta is well coated. If the sauce is too thick, add more reserved pasta water until you like the consistency.
Finally, stir in fresh basil. Taste and adjust seasoning with salt and pepper if needed. Serve your roasted garlic and tomato pasta immediately. If you want, sprinkle some grated Parmesan cheese on top. Enjoy this meal!
Tips & Tricks
How to Roast Garlic Perfectly
Roasting garlic is simple. Start by placing unpeeled garlic cloves on a baking sheet. Cook them at 400°F (200°C) for about 20 to 25 minutes. You want them soft and golden. When done, let them cool a bit. Squeeze the garlic out of the skin with your fingers. It should be creamy and sweet. This garlic adds a rich, deep flavor to your pasta.
Achieving the Best Pasta Texture
Cooking pasta seems easy, but timing is key. Follow the package directions for cooking time. Use a large pot with plenty of salted boiling water. This boosts flavor and helps keep pasta from sticking. For the best texture, aim for “al dente,” which means it should be firm to the bite. Remember to reserve some pasta water before draining. This starchy water helps thicken your sauce.
Suggestions for Flavor Enhancements
Want to make your roasted garlic and tomato pasta pop? Here are some ideas:
– Herbs: Add fresh basil or parsley for a bright touch.
– Cheese: Toss in some feta or goat cheese for creaminess.
– Nuts: Pine nuts or walnuts give a nice crunch.
– Spices: For heat, add more red pepper flakes or a dash of smoked paprika.
– Zest: A sprinkle of lemon zest can brighten the flavors.
These enhancements will take your dish to the next level.

Variations
Vegetarian and Vegan Options
Roasted garlic and tomato pasta is great for everyone. For a vegetarian twist, skip the cheese. You can add nutritional yeast for a cheesy taste. If you want a vegan option, use a plant-based cheese. This makes it creamy without dairy. You can also toss in fresh spinach or kale. These greens add color and nutrients to your dish.
Alternative Pasta Types
You can switch up the pasta for fun! Try whole wheat pasta for more fiber. Gluten-free pasta works well if you need it. You can even use zucchini noodles for a low-carb choice. Each type will change the dish’s texture, so experiment to find your favorite.
Add-In Ideas for Protein or Vegetables
Want to make it heartier? Add protein like grilled chicken or shrimp. Cook these separately and toss them in at the end. For a veggie boost, add bell peppers or mushrooms. They roast well and taste amazing with garlic and tomatoes. Broccoli or asparagus are also great choices. These keep the dish fresh and colorful.
Storage Info
Best Practices for Storing Leftovers
To keep your roasted garlic and tomato pasta fresh, store it in an airtight container. Make sure it cools down before sealing. This will help keep the flavors intact. The pasta can last in the fridge for about 3 to 5 days. If you notice any off smells or changes in color, it’s best to toss it.
Reheating Instructions for Optimal Flavor
When you’re ready to enjoy your leftovers, reheating properly is key. Use a pan over low heat for the best results. Add a splash of water or olive oil to help the pasta regain its moisture. Stir often to prevent sticking. You can also microwave it, but cover the dish to retain moisture. Heat in 30-second intervals, stirring in between.
Freezing Tips for Long-Term Storage
If you want to save some pasta for later, freezing is a great option. Portion the pasta into individual servings and place them in freezer-safe bags. Remove as much air as possible before sealing. It keeps well for about 2 to 3 months in the freezer. When you’re ready to eat, thaw it in the fridge overnight, then reheat as mentioned above. For the best taste, enjoy it within a month.
FAQs
Can I use other types of tomatoes?
Yes, you can use many types of tomatoes. Roma tomatoes add a rich flavor. Beefsteak tomatoes are juicy and sweet. You can also use canned tomatoes if fresh ones are not available. Just be sure to drain them well. This will keep your pasta from getting too watery. Experiment and find what you like best!
How to make this recipe gluten-free?
To make this recipe gluten-free, choose gluten-free pasta. Many brands offer great options that taste good. You can find pasta made from rice, corn, or lentils. These pastas cook a bit differently, so check the package for instructions. Follow the same steps in the recipe, and enjoy your meal worry-free!
What can I serve with Roasted Garlic and Tomato Pasta?
Roasted garlic and tomato pasta pairs well with many sides. A fresh green salad adds crunch and color. Garlic bread is a classic choice that everyone loves. You can also serve it with grilled vegetables for a healthy twist. A nice glass of red wine makes the meal even better. Enjoy exploring different pairings!
This blog post covered key ingredients for roasted garlic and tomato pasta. We explored fresh ingredients and alternatives for dietary needs. I shared step-by-step cooking instructions and helpful tips, like roasting garlic perfectly. We also discussed pasta variations and storage tips to keep leftovers fresh.
In summary, this dish is simple, versatile, and delicious. You can make it fit your tastes and needs. Enjoy experimenting with flavors and ingredients! Your next meal can be a hit.
![To make roasted garlic and tomato pasta, you need these simple items: - 1 pound spaghetti or your favorite pasta - 8 cloves garlic, unpeeled - 4 cups cherry tomatoes, halved - 1/4 cup extra-virgin olive oil - 1 teaspoon dried oregano - 1 teaspoon red pepper flakes (adjust for spice preference) - Salt and pepper to taste - 1/4 cup fresh basil, chopped - 1/2 cup freshly grated Parmesan cheese (optional) Fresh ingredients make a big difference in taste. When cooking, I always use ripe cherry tomatoes. They burst with flavor. Fresh garlic gives a sweet, nutty taste after roasting. Fresh basil adds a bright note to the dish. Using these ingredients helps create a dish that feels special. You can adjust this pasta to fit your needs. If you're gluten-free, choose gluten-free pasta. For a vegan option, skip the Parmesan cheese or use a plant-based alternative. You can even swap cherry tomatoes for canned diced tomatoes if fresh ones aren't available. This way, anyone can enjoy this tasty dish. For a heartier meal, add cooked chicken or shrimp. Feel free to mix in veggies like spinach or zucchini for added nutrition. For the full recipe, check out the details above. Start by gathering your ingredients. For this dish, you need: - 1 pound spaghetti or your favorite pasta - 8 cloves garlic, unpeeled - 4 cups cherry tomatoes, halved - 1/4 cup extra-virgin olive oil - 1 teaspoon dried oregano - 1 teaspoon red pepper flakes (adjust for spice preference) - Salt and pepper to taste - 1/4 cup fresh basil, chopped - 1/2 cup freshly grated Parmesan cheese (optional) Preheat your oven to 400°F (200°C). This helps the garlic and tomatoes roast perfectly. On a baking sheet, place the unpeeled garlic cloves and halved cherry tomatoes. Drizzle with half of the olive oil. Sprinkle with oregano, red pepper flakes, salt, and pepper. Toss gently to coat. Roast in the oven for 20-25 minutes. Look for blistered tomatoes and soft garlic. The smell will guide you! Meanwhile, cook your pasta. Use a large pot of salted boiling water and follow the package instructions. Cook until it’s al dente. Don’t forget to save 1 cup of pasta water before draining. Once the tomatoes and garlic are done, let them cool a bit. Squeeze the roasted garlic out of its skin into a bowl. Mash it with a fork to create a creamy base. Mix the mashed garlic with the roasted tomatoes. Add the remaining olive oil and a splash of the reserved pasta water. Stir well to make a sauce. Now, add the drained pasta to the sauce. Toss it all together until the pasta is well coated. If the sauce is too thick, add more reserved pasta water until you like the consistency. Finally, stir in fresh basil. Taste and adjust seasoning with salt and pepper if needed. Serve your roasted garlic and tomato pasta immediately. If you want, sprinkle some grated Parmesan cheese on top. Enjoy this meal! For the full recipe, check the earlier section. Roasting garlic is simple. Start by placing unpeeled garlic cloves on a baking sheet. Cook them at 400°F (200°C) for about 20 to 25 minutes. You want them soft and golden. When done, let them cool a bit. Squeeze the garlic out of the skin with your fingers. It should be creamy and sweet. This garlic adds a rich, deep flavor to your pasta. Cooking pasta seems easy, but timing is key. Follow the package directions for cooking time. Use a large pot with plenty of salted boiling water. This boosts flavor and helps keep pasta from sticking. For the best texture, aim for "al dente," which means it should be firm to the bite. Remember to reserve some pasta water before draining. This starchy water helps thicken your sauce. Want to make your roasted garlic and tomato pasta pop? Here are some ideas: - Herbs: Add fresh basil or parsley for a bright touch. - Cheese: Toss in some feta or goat cheese for creaminess. - Nuts: Pine nuts or walnuts give a nice crunch. - Spices: For heat, add more red pepper flakes or a dash of smoked paprika. - Zest: A sprinkle of lemon zest can brighten the flavors. These enhancements will take your dish to the next level. Check out the Full Recipe for a complete guide to making this tasty meal! {{image_2}} Roasted garlic and tomato pasta is great for everyone. For a vegetarian twist, skip the cheese. You can add nutritional yeast for a cheesy taste. If you want a vegan option, use a plant-based cheese. This makes it creamy without dairy. You can also toss in fresh spinach or kale. These greens add color and nutrients to your dish. You can switch up the pasta for fun! Try whole wheat pasta for more fiber. Gluten-free pasta works well if you need it. You can even use zucchini noodles for a low-carb choice. Each type will change the dish's texture, so experiment to find your favorite. Want to make it heartier? Add protein like grilled chicken or shrimp. Cook these separately and toss them in at the end. For a veggie boost, add bell peppers or mushrooms. They roast well and taste amazing with garlic and tomatoes. Broccoli or asparagus are also great choices. These keep the dish fresh and colorful. For more details, check out the full recipe. To keep your roasted garlic and tomato pasta fresh, store it in an airtight container. Make sure it cools down before sealing. This will help keep the flavors intact. The pasta can last in the fridge for about 3 to 5 days. If you notice any off smells or changes in color, it's best to toss it. When you’re ready to enjoy your leftovers, reheating properly is key. Use a pan over low heat for the best results. Add a splash of water or olive oil to help the pasta regain its moisture. Stir often to prevent sticking. You can also microwave it, but cover the dish to retain moisture. Heat in 30-second intervals, stirring in between. If you want to save some pasta for later, freezing is a great option. Portion the pasta into individual servings and place them in freezer-safe bags. Remove as much air as possible before sealing. It keeps well for about 2 to 3 months in the freezer. When you're ready to eat, thaw it in the fridge overnight, then reheat as mentioned above. For the best taste, enjoy it within a month. Yes, you can use many types of tomatoes. Roma tomatoes add a rich flavor. Beefsteak tomatoes are juicy and sweet. You can also use canned tomatoes if fresh ones are not available. Just be sure to drain them well. This will keep your pasta from getting too watery. Experiment and find what you like best! To make this recipe gluten-free, choose gluten-free pasta. Many brands offer great options that taste good. You can find pasta made from rice, corn, or lentils. These pastas cook a bit differently, so check the package for instructions. Follow the same steps in the recipe, and enjoy your meal worry-free! Roasted garlic and tomato pasta pairs well with many sides. A fresh green salad adds crunch and color. Garlic bread is a classic choice that everyone loves. You can also serve it with grilled vegetables for a healthy twist. A nice glass of red wine makes the meal even better. Enjoy exploring different pairings! For the complete recipe, check out the [Full Recipe]. This blog post covered key ingredients for roasted garlic and tomato pasta. We explored fresh ingredients and alternatives for dietary needs. I shared step-by-step cooking instructions and helpful tips, like roasting garlic perfectly. We also discussed pasta variations and storage tips to keep leftovers fresh. In summary, this dish is simple, versatile, and delicious. You can make it fit your tastes and needs. Enjoy experimenting with flavors and ingredients! Your next meal can be a hit.](https://dailydishly.com/wp-content/uploads/2025/06/d553d96f-6423-4985-8dca-dedfc8f9e127-300x300.webp)


![To make these tasty tacos, you need some simple yet bold ingredients. Here’s what you’ll need: - 2 cans black beans, rinsed and drained - 1 medium onion, diced - 3 garlic cloves, minced - 2 tablespoons chipotle in adobo sauce, chopped These ingredients give your tacos a distinct smoky flavor. The black beans provide protein and creaminess. The onions and garlic add depth, while the chipotle brings heat and smokiness. Next, we need some seasonings and garnishes to elevate the dish: - 1 teaspoon smoked paprika - 1 teaspoon cumin - Salt and pepper to taste - Fresh cilantro, for garnish Smoked paprika and cumin enhance the earthy flavor of the beans. A pinch of salt and pepper balances everything out. Fresh cilantro adds brightness and color, making your tacos visually appealing. Lastly, let’s prepare the tortillas and toppings: - 8 small corn tortillas - 1 avocado, sliced - Lime wedges, for serving Corn tortillas are perfect for this dish. They have a lovely flavor and hold up well. Sliced avocado adds creaminess, while lime wedges give a zesty kick. For the full recipe, check out the details for cooking and assembling! First, I heat olive oil in a large skillet over medium heat. I add the diced onion and sauté it until it turns translucent, which takes about five minutes. Next, I stir in the minced garlic and cook it for one minute until it becomes fragrant. Then, I combine the rinsed black beans, chopped chipotle in adobo, smoked paprika, cumin, salt, and pepper. Mixing these ingredients well creates a rich base full of flavor. After combining the filling, I grab a potato masher. I mash some of the black beans to create a creamy texture while leaving others whole for extra bite. This step adds depth to the dish. I then reduce the heat to low, cover the skillet, and let it simmer for about ten minutes. This allows all the flavors to meld beautifully. I stir occasionally to ensure even cooking. While the filling simmers, I warm the small corn tortillas in a separate skillet. I heat them over medium heat for about thirty seconds on each side. This makes the tortillas pliable and ready for filling. Now comes the fun part! I spoon the smoky black bean mixture onto each warm tortilla. Then, I top them with sliced avocado and sprinkle fresh cilantro on top. For an extra burst of flavor, I serve the tacos with lime wedges on the side. This adds a zesty touch that brightens the whole dish. You can find the full recipe for Smoky Chipotle Black Bean Tacos in the previous section. Enjoy! To make your Smoky Chipotle Black Bean Tacos even better, try adding more spices. A dash of cayenne can kick up the heat. You can also mix in a pinch of oregano for a fresh herb taste. If you enjoy a bit of sweetness, drizzle some honey over the top before serving. Toppings can really change the game too! Try adding pickled onions, crumbled feta, or diced tomatoes. Each will give your tacos a unique twist. Don't be afraid to get creative! Presentation matters. When serving, arrange your tacos on a large platter. Add lime wedges and fresh cilantro around them for color. You can even use a small bowl for salsa on the side. This makes your meal look vibrant and inviting. Consider adding colorful accompaniments like sliced radishes or a side of corn salad. These not only look great but also enhance the meal’s flavor. Sautéing and simmering are key for perfect tacos. When you sauté the onion, aim for a golden color. This adds a sweet flavor to the dish. Stir often to avoid burning. To prevent soggy tortillas, warm them before filling. Heat them in a skillet for about 30 seconds on each side. This keeps them soft and easy to fold. If you want extra crispiness, consider lightly frying them in oil. This simple step can elevate your tacos to the next level. For the complete recipe, check out the [Full Recipe]. {{image_2}} Want to add more protein to your tacos? You can easily incorporate chicken or shrimp. Simply cook them in the skillet before adding the beans. For a vegetarian option, try using tofu or tempeh. Cube the tofu and sauté it until golden. For tempeh, steam it first to soften, then sauté for a nice texture. These additions will keep your tacos satisfying and packed with flavor. If you're looking for plant-based protein, consider lentils or chickpeas. They both work well and add a hearty touch. For cheese lovers, look for dairy-free cheese substitutes. Many brands offer tasty options that melt well. This way, you can enjoy creamy toppings without dairy. These alternatives keep your meal both delicious and inclusive for all diets. Tacos don’t have to be served in the traditional way. You can create taco bowls instead. Just layer the black bean mixture over rice or quinoa. Then add your favorite toppings. Another fun option is using lettuce wraps instead of tortillas. This makes for a low-carb alternative while keeping the fresh crunch. Each style offers a unique twist to your smoky chipotle black bean tacos. For the full recipe, check out the Smoky Chipotle Black Bean Tacos section. To store any leftover tacos, place them in an airtight container. Make sure to cool them first. These tacos will stay fresh in the fridge for about three to four days. If you want to freeze the taco filling, let it cool completely. Then, place it in a freezer-safe bag. Squeeze out the air before sealing. The filling can last in the freezer for up to three months. To enjoy, take it out of the freezer and put it in the fridge overnight to thaw. When you reheat the filling, you have two good options: the oven or the microwave. If you use the oven, preheat it to 350°F. Spread the filling in a baking dish and cover it with foil. Heat for about 15 minutes. For the microwave, put the filling in a bowl and cover it. Heat for about 1 to 2 minutes, stirring halfway. Both methods work, but the oven keeps the texture nice. Enjoy your delicious Smoky Chipotle Black Bean Tacos even as leftovers! To make your tacos crispy, you can fry the tortillas. Heat oil in a pan. Add each tortilla and fry for about 30 seconds on each side. This method gives them a nice crunch. You can also use the oven. Preheat it to 400°F (200°C). Brush tortillas with a little oil and place them on a baking sheet. Bake for 5-7 minutes until they are crispy around the edges. Yes, you can use dried beans! However, they need more time. Soak them overnight in water. Then, cook them until soft. This process can take 1-2 hours. Canned beans are quicker and easier, but dried beans can add great flavor and texture. If you don’t have chipotle in adobo, try using smoked paprika or cayenne pepper. Both can add heat and depth. You can also use liquid smoke for that smoky flavor. Adjust the amount to match your heat preference. Start small and taste as you go. In this guide, I covered how to make smoky chipotle black bean tacos. We talked about the key ingredients, cooking steps, and tips for perfect tacos. You can add your favorite proteins or toppings to make it your own. Don’t forget to store leftovers properly to enjoy later. These tacos are flexible and sure to impress. Dive in and enjoy the flavors! You've got this.](https://dailydishly.com/wp-content/uploads/2025/07/3dafe893-e4f9-4e41-b9c9-258fb494a309-768x768.webp)