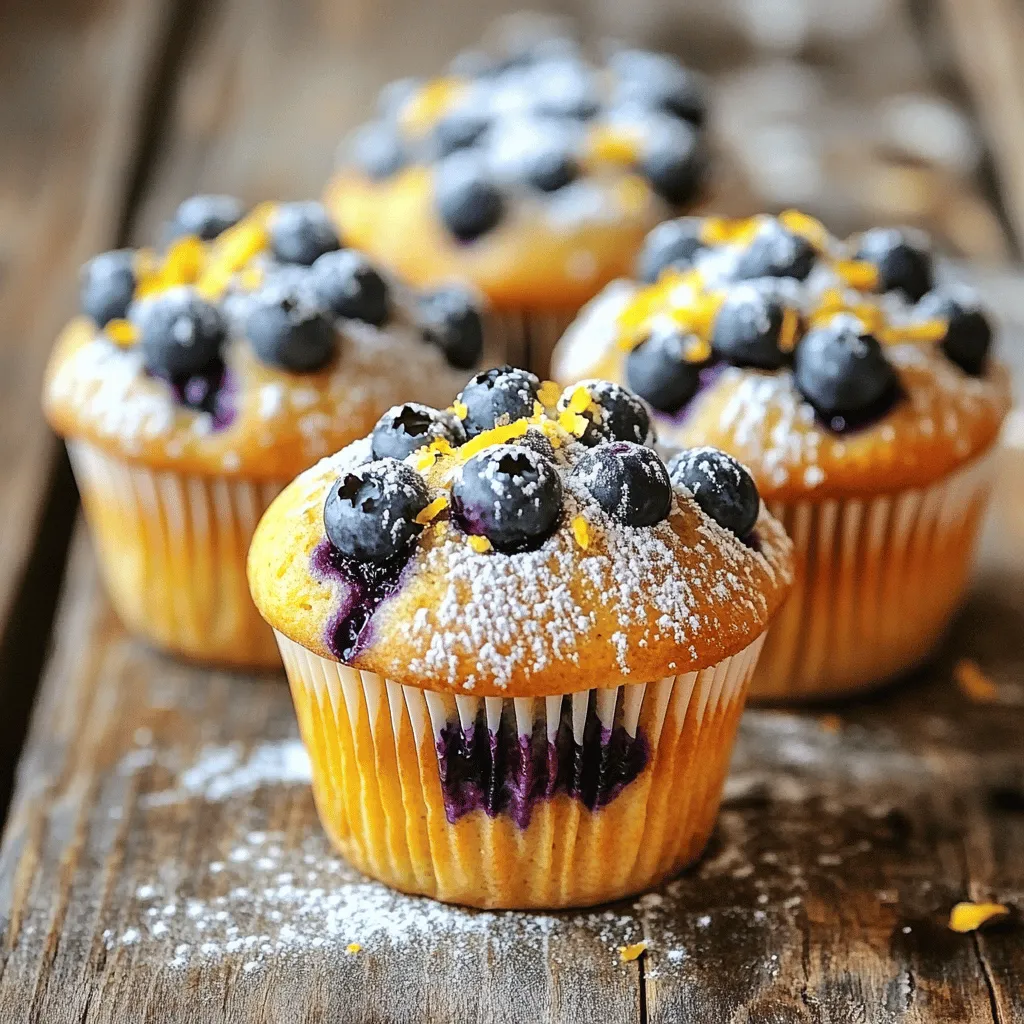
Best Ever Lemon Blueberry Muffins Delightfully Simple

Are you ready to bake the best lemon blueberry muffins? With just a few simple ingredients, you can create a delicious treat that’s bursting with flavor. These muffins are perfect for breakfast or a delightful snack. In this post, I’ll guide you through the easy steps to make these light and fluffy desserts. Get your apron on, and let’s dive into the world of lemon blueberry goodness!
Ingredients
To make the best ever lemon blueberry muffins, you need simple ingredients. Each one adds a special touch to the muffins. Here’s what you will need:
– 2 cups all-purpose flour
– 1 cup granulated sugar
– 1 tablespoon baking powder
– 1/2 teaspoon baking soda
– 1/2 teaspoon salt
– 1 large lemon, zested and juiced
– 1/2 cup unsalted butter, melted
– 1 cup buttermilk (or milk with 1 tablespoon lemon juice added)
– 2 large eggs
– 1 teaspoon vanilla extract
– 1 1/2 cups fresh blueberries (or frozen, if out of season)
– Optional: Extra blueberries and lemon zest for topping
This recipe is quick and easy.Each ingredient plays a role in making these muffins fluffy and flavorful. The lemon zest brightens the taste, while blueberries add bursts of sweetness. The melted butter helps keep the muffins moist. Use fresh blueberries when you can; they make a big difference. If you have frozen ones, they work too. Just remember to gently fold them into the batter to avoid breaking them. Happy baking!
Step-by-Step Instructions
Preheat and Prepare
– Preheat oven to 375°F (190°C)
– Line muffin tin with paper liners or grease
Start by setting your oven to 375°F (190°C). This is the perfect temperature for baking. Next, prepare your muffin tin. You can use paper liners or grease it lightly with oil. This will help the muffins release easily after baking.
Mix Dry Ingredients
– Combine flour, sugar, baking powder, baking soda, and salt in a bowl
In a large bowl, mix together two cups of all-purpose flour, one cup of granulated sugar, one tablespoon of baking powder, half a teaspoon of baking soda, and half a teaspoon of salt. Stir these dry ingredients well. This step is key for even flavor and rising.
Mix Wet Ingredients
– Combine melted butter, buttermilk, eggs, lemon zest, lemon juice, and vanilla extract
In another bowl, combine half a cup of melted butter, one cup of buttermilk, two large eggs, the zest and juice from one lemon, and one teaspoon of vanilla extract. Whisk these ingredients until fully combined. The lemon zest and juice add a bright taste.
Combine & Fold Ingredients
– Add wet mixture to dry mixture; mix gently
– Fold in fresh blueberries
Now, pour the wet mixture into the dry mixture. Stir gently until just mixed. It’s important not to overmix; a few lumps are okay. Next, fold in one and a half cups of fresh blueberries. You can use frozen blueberries if you don’t have fresh ones. Just make sure to keep them whole.
Bake
– Fill muffin cups and bake for 18-20 minutes
– Check doneness with a toothpick
Spoon the batter into the muffin cups, filling each about three-quarters full. Bake for 18 to 20 minutes. To check if they are done, insert a toothpick into the center of a muffin. If it comes out clean, they are ready. Enjoy the aroma as they bake!
Tips & Tricks
Ensuring Perfect Muffins
To make the best ever lemon blueberry muffins, start with room temperature ingredients. This helps them mix well and rise nicely. If your butter is cold, it can cause lumps. So, let it sit out for a bit. Also, avoid overmixing the batter. Mix just until the ingredients blend. This keeps your muffins fluffy and light. A few lumps are fine!
Enhancing Flavor and Texture
Choosing high-quality blueberries makes a big difference. Look for plump, firm berries with a deep color. If you can, buy them fresh. If using frozen, do not thaw; just toss them in the batter. For buttermilk, you can use regular milk with lemon juice. Just add one tablespoon of lemon juice to a cup of milk. Let it sit for five minutes, and it’s ready!
Optional Toppings
Garnishing with lemon zest adds a nice touch. Just sprinkle some on top before serving. It gives a bright flavor and makes the muffins pretty. You can pair these muffins with drinks like tea or coffee. They also taste great with a glass of cold lemonade. Enjoy your muffins and drinks together for a delightful treat!
Variations
Different Flavors
You can switch up the flavors of your lemon blueberry muffins. Here are two fun ideas:
– Lemon Raspberry Muffins: Replace blueberries with fresh raspberries. The tart flavor pairs well with lemon.
– Blueberry Coconut Muffins: Add shredded coconut to the batter. This gives a sweet, tropical twist.
Gluten-Free Option
If you need a gluten-free muffin, it’s easy to adapt. Just swap regular flour for gluten-free flour. This keeps the texture nice while making it safe for gluten-free diets.
Vegan Version
Want a vegan version? You can replace the eggs and butter. Use flax eggs instead of real eggs. For butter, try coconut oil or a vegan butter substitute. This way, everyone can enjoy these tasty muffins!
Storage Info
Best Practices for Muffin Storage
To keep your muffins fresh, store them at room temperature. Place them in an airtight container. This helps keep moisture in and prevents them from getting too dry. If you stack them, use parchment paper between layers. This stops them from sticking together.
You can also store muffins in the fridge. Use a sealed container to keep them fresh. However, this can make the muffins a bit dry. If you prefer them cold, try warming them up before eating. Just pop them in the microwave for a few seconds. This brings back some of their soft texture.
Freezing Muffins
Freezing muffins is a great way to save them for later. Here’s a step-by-step guide:
1. Cool the muffins: Let them cool completely on a wire rack.
2. Wrap each muffin: Use plastic wrap or aluminum foil. Make sure they are tightly wrapped to avoid freezer burn.
3. Place in a bag: Put the wrapped muffins in a freezer-safe bag. Label the bag with the date for easy tracking.
4. Freeze: Store in the freezer for up to three months for the best quality.
When it’s time to enjoy your muffins, thaw them properly. Here are some tips for thawing:
– At room temperature: Leave them out for about an hour. This is great for soft muffins.
– In the microwave: Heat one muffin for about 15 seconds. Check if it’s warm enough, then enjoy!
With these storage tips, your best ever lemon blueberry muffins will stay delicious and ready for you to enjoy!
FAQs
How do I know when the muffins are done?
You can check if the muffins are done by using a toothpick. Insert it into the center of a muffin. If it comes out clean, your muffins are ready. The tops should look golden brown and spring back when touched. This means the muffins are light and fluffy, not dense.
Can I use frozen blueberries?
Yes, you can use frozen blueberries. They work well in this recipe. Just toss them in flour before adding them to the batter. This helps stop them from sinking. If using fresh blueberries, wash and dry them. Fresh blueberries give a nice burst of flavor.
What can I substitute for buttermilk?
If you don’t have buttermilk, don’t worry! You can make a quick substitute. Add one tablespoon of lemon juice to one cup of milk. Let it sit for five minutes. This will create a similar tangy flavor. You can also use yogurt or sour cream mixed with water.
How long will the muffins last?
These muffins last for about three days at room temperature. Store them in an airtight container to keep them fresh. If you want them to last longer, place them in the fridge. They can last up to one week in the fridge.
This blog post showed you how to make delicious blueberry muffins, covering ingredients, steps, and hints. You learned to combine dry and wet ingredients, bake, and ensure perfect results. Don’t forget the optional flavors and storage tips to enjoy these treats longer. Whether fresh or frozen, blueberries add a delightful touch. Experiment with variations to find your favorite. Now, you can impress friends and family with easy, tasty muffins. Enjoy baking and sharing!


![To make a tasty no-bake strawberry cheesecake, you need a few key ingredients: - 200g digestive biscuits, crushed - 100g unsalted butter, melted - 400g cream cheese, softened - 100g powdered sugar - 1 teaspoon vanilla extract - 250ml heavy cream - 300g fresh strawberries, hulled and sliced - 100g strawberry jam These ingredients work together to create a rich and creamy dessert. The digestive biscuits form a crunchy base, while the cream cheese and heavy cream give it a smooth texture. You can customize your cheesecake with a few optional ingredients: - Fresh mint leaves for garnish - Additional fruit toppings like blueberries or raspberries - A splash of lemon juice for a tangy flavor - Chocolate shavings for a sweet touch These extras allow you to add your personal flair to the cheesecake. If you need substitutions, here are some ideas: - Use graham crackers instead of digestive biscuits for the base. - Swap cream cheese with Greek yogurt for a lighter option. - Try coconut cream instead of heavy cream for a dairy-free version. - Use honey instead of powdered sugar for a natural sweetener. These alternatives can make the recipe fit your needs while still tasting great. For the full recipe, check the detailed steps to create this delightful dessert. To start, gather your ingredients. You need crushed digestive biscuits and melted butter. In a mixing bowl, combine these two. Mix until you see a texture that looks like wet sand. Next, take a 9-inch springform pan. Press the biscuit mixture firmly into the bottom. Make sure it is even. This will be the base of your cheesecake. After that, refrigerate the pan for about 10 minutes. This helps the base to set nicely. Now, let’s make that creamy filling. In a new bowl, add softened cream cheese, powdered sugar, and vanilla extract. Beat these together until they become smooth and creamy. In another bowl, whip the heavy cream. Keep whipping until stiff peaks form. This means it will hold its shape well. Now, gently fold the whipped cream into the cream cheese mixture. Do this carefully so the filling stays light and airy. Once your filling is ready, pour it over the chilled biscuit base. Spread it evenly with a spatula. Now, let’s add some color. Arrange the sliced strawberries on top of the cheesecake. You can be creative with this step! In a small saucepan, melt the strawberry jam over low heat. Once it is runny, let it cool a little. Drizzle the jam over the strawberries for a shiny finish. Finally, cover your cheesecake with plastic wrap. Refrigerate it for at least 4 hours, or even overnight. This waiting time helps it set perfectly. For the full recipe, check the earlier section. When making a no-bake strawberry cheesecake, a few common mistakes can spoil your treat. First, don’t skip chilling the biscuit base. It needs to set before adding the filling. Second, make sure your cream cheese is fully softened. Cold cream cheese can create lumps in your mixture. Lastly, don’t rush the whipping of the heavy cream. Whip it until stiff peaks form for the best texture. To get a creamy and smooth texture, follow these steps. Mix the cream cheese, powdered sugar, and vanilla extract until it’s really smooth. Then, whip the heavy cream separately until it’s nice and fluffy. When you fold the whipped cream into the cream cheese mix, do it gently. This keeps air in the mixture, making it light and fluffy. Serving your cheesecake can be fun and creative. Cut slices and place them on pretty dessert plates. You can add fresh mint leaves on top for a pop of color. For extra sweetness, drizzle more strawberry jam over the slices. You can also serve it with a side of fresh strawberries. This adds a nice touch and makes the dessert look even better. For the full recipe, refer to the earlier sections. {{image_2}} You can change up the fruity flavor of your cheesecake. Swap strawberries for other berries like blueberries or raspberries. You can also use peaches, mangoes, or even kiwi. Just chop the fruit and layer it on top or mix it into the filling. This makes your dessert colorful and fun. Want a richer taste? Try adding chocolate or caramel. For chocolate, mix in cocoa powder or melted chocolate into the cream cheese. Drizzle caramel sauce on top for a sweet touch. Both options give your cheesecake a new twist that chocolate lovers will adore. If you need a gluten-free option, use gluten-free cookies for the base. Many brands offer tasty gluten-free biscuits. Check the label to be sure. This way, everyone can enjoy this delicious treat without worry. Make sure to use gluten-free cream cheese and whipped cream too. For the full recipe, check out the [Full Recipe]. To keep your No-Bake Strawberry Cheesecake fresh, store it in the fridge. Use an airtight container to prevent any odors from mixing in. If you don’t have one, cover the cheesecake tightly with plastic wrap. This keeps it safe and tasty. Your cheesecake stays fresh in the fridge for about 3 to 5 days. After that, the texture may change, and the flavor might fade. Keep an eye on any signs of spoilage, like a sour smell or discoloration. Yes, you can freeze No-Bake Strawberry Cheesecake. Wrap it well in plastic wrap and then foil. This keeps out air and prevents freezer burn. It can last up to 3 months in the freezer. When ready to eat, thaw it in the fridge for a few hours. Enjoy the creamy goodness! For the full recipe, check out the details above. Baked cheesecakes use heat to set the filling. This process gives a dense, rich texture. No-bake cheesecakes rely on cold temperatures to firm up. They often taste lighter and creamier. Baked cheesecakes need time in the oven, while no-bake ones chill in the fridge. This makes no-bake cheesecakes quicker to prepare. To make your cheesecake firmer, try these tips: - Use full-fat cream cheese. This adds richness and firmness. - Add gelatin to the filling. Dissolve it in water and mix it in. - Chill the cheesecake longer. Let it set overnight for the best results. - Avoid overmixing the cream cheese. This keeps air out and helps it firm up. Yes, you can use frozen strawberries. Just thaw them first and drain excess liquid. The flavor will still be great, but the texture may change slightly. Fresh strawberries give a firmer bite and vibrant look. For best results, try to use fresh strawberries in the recipe. For the full recipe, check the main article. No-bake strawberry cheesecake is easy and fun to make. We explored key ingredients, like strawberries and cream cheese, and even how to customize them. I shared step-by-step instructions to help you prepare the base, filling, and assembly. Tips on avoiding common mistakes will guide you to the perfect texture. With various topping options, you can get creative. Finally, proper storage keeps your cheesecake fresh longer. Remember, this dessert is versatile, so don't hesitate to experiment. Enjoy every bite of your delicious creation!](https://dailydishly.com/wp-content/uploads/2025/06/5274bd3f-8d96-4968-97f1-1841490db53b-768x768.webp)