No Bake Raspberry Chocolate Tart Rich and Decadent Treat
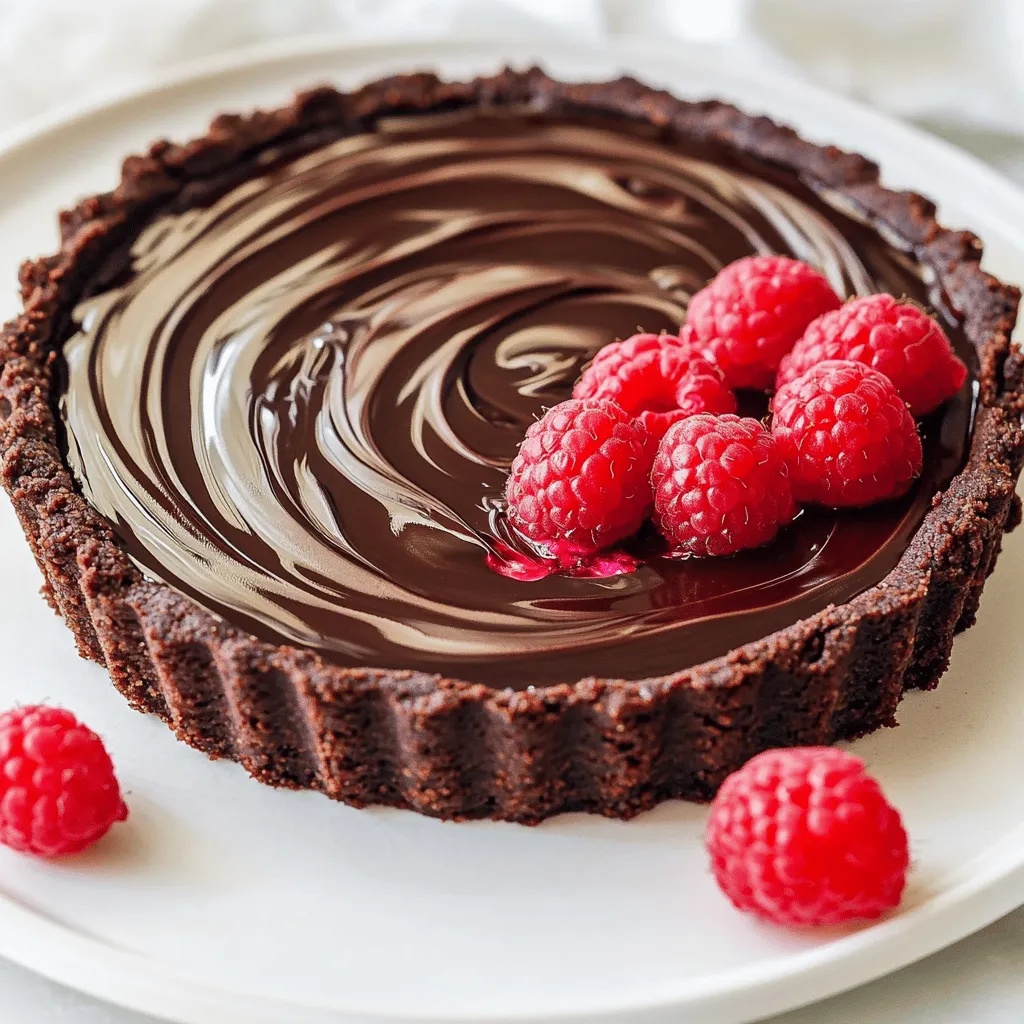
Indulge in the rich and creamy goodness of a No Bake Raspberry Chocolate Tart. With just a handful of simple ingredients, you can create a truly decadent dessert that’s perfect for any occasion. This tart features a crunchy cookie crust, smooth chocolate filling, and bursts of fresh raspberry flavor. Whether you’re hosting a dinner party or just treating yourself, this easy recipe will impress your taste buds. Let’s dive into the steps to make this delightful treat!
Ingredients
List of Ingredients
– 1 ½ cups chocolate cookie crumbs
– ½ cup unsalted butter, melted
– 1 cup dark chocolate chips
– 1 cup heavy cream
– 1 cup fresh raspberries, plus extra for garnish
– 2 tablespoons powdered sugar
– 1 teaspoon vanilla extract
– Pinch of salt
This tart is rich and creamy, perfect for any occasion. The base is made from chocolate cookie crumbs, which give a great taste and crunch. You need to melt unsalted butter to hold the crumbs together. This keeps the crust firm and tasty.
For the filling, we use dark chocolate chips. They are rich and give a deep flavor. Heavy cream is heated to help melt the chocolate. This mix creates a smooth and thick filling.
Fresh raspberries add a burst of flavor. They balance the sweet chocolate. Mashing them with powdered sugar makes a nice, chunky puree. The vanilla extract adds a warm note, and a pinch of salt enhances all the flavors.
Gather these ingredients to start your tart. Each one plays a key role in making this dessert a hit. Enjoy the mix of sweet and tart in every bite!
Step-by-Step Instructions
Preparing the Tart Crust
1. In a medium bowl, combine 1 ½ cups of chocolate cookie crumbs and ½ cup of melted unsalted butter. Mix them well until they blend together.
2. Next, press the cookie mixture into the bottom and up the sides of a tart pan. Make sure to press evenly to avoid gaps.
3. Chill the crust in the refrigerator for 10-15 minutes. This helps it set and hold its shape.
Making the Chocolate Filling
1. In a small saucepan, heat 1 cup of heavy cream over medium heat. Watch it closely until it starts to simmer.
2. Remove the saucepan from heat and add 1 cup of dark chocolate chips. Let them sit for 2-3 minutes so the chocolate melts.
3. Stir the chocolate mixture until it becomes smooth. Then add 1 teaspoon of vanilla extract and a pinch of salt for flavor.
Incorporating Raspberry Puree
1. In a separate bowl, gently mash 1 cup of fresh raspberries with 2 tablespoons of powdered sugar. You want a chunky puree, not a smooth one.
2. Carefully fold the raspberry puree into the chocolate mixture. Mix them until they are fully combined, creating a beautiful swirl.
Assembling and Chilling the Tart
1. Pour the raspberry chocolate filling into the prepared tart crust. Smooth the top using a spatula for an even finish.
2. Refrigerate the tart for at least 4 hours. This allows it to firm up properly and makes slicing easier.
3. Once set, garnish the tart with extra fresh raspberries before serving. It adds a lovely touch and looks great on the plate.
Tips & Tricks
Perfecting the Tart Crust
To make a great tart crust, you need to avoid gaps. When you mix the chocolate cookie crumbs with melted butter, make sure it is wet enough. Press this mixture firmly into the tart pan. Use your fingers or a flat-bottomed glass to pack it tight. This helps create a smooth base. Chill the crust for 10-15 minutes in the fridge. This step helps it set and hold its shape.
You also want the right consistency for your crust. The mixture should be moist but not soggy. If it feels too dry, add a bit more melted butter. If it’s too wet, add more cookie crumbs. This balance is key for a sturdy crust.
Enhancing the Chocolate Filling
To make your filling extra rich, try using different types of chocolate. Dark chocolate gives a deep flavor, but you can mix in milk chocolate for a sweeter taste. You can also use semi-sweet chocolate if you want a balance.
Adjust the sweetness levels by adding more or less powdered sugar. If you prefer a less sweet filling, reduce the sugar. Taste the mixture as you go to find your perfect balance.
Serving Suggestions
When serving the tart, presentation matters. Serve slices on chilled plates to keep them fresh. Add a dollop of whipped cream on top to make it look fancy. You can also drizzle chocolate sauce over the tart. This adds flair and makes it even more delicious.
For a pop of color, garnish with fresh raspberries. They add brightness and a fresh taste. This is a simple way to impress your guests and make each slice look special.

Variations
Alternative Ingredients
You can make this tart more inclusive by swapping some ingredients. For a gluten-free crust, use gluten-free cookies. Brands like gluten-free Oreos work well. Just crush them like regular cookies and mix with melted butter.
If you need a dairy-free option, choose dairy-free chocolate chips. Many brands offer rich, dark chocolate that tastes great. You can also use coconut cream instead of heavy cream. It gives a nice flavor and keeps the tart creamy.
Flavor Additions
Want to mix things up? Add a burst of flavor with orange zest. Just a teaspoon will brighten the chocolate. You can also add other fruits like sliced strawberries or blueberries. These fruits can replace raspberries for a different taste.
Different Tart Shapes
Get creative with shapes! You can make mini tarts using a muffin tin. This way, each guest gets their own serving. Another idea is to use different tart pans. Heart-shaped or square pans can add fun to your dessert. Just make sure to adjust the chilling time if you change sizes.
Storage Info
How to Store the Tart
To keep your no bake raspberry chocolate tart fresh, store it in the refrigerator. You should place it in an airtight container. This method helps protect the tart from absorbing odors and maintains its creamy texture. If you do not have an airtight container, you can cover the tart with plastic wrap. Make sure it touches the surface to prevent air from getting in.
Freezing Instructions
You can freeze the tart if you want to save some for later. It is best to freeze the tart after it has set. Wrap it well in plastic wrap and then foil. This extra layer helps prevent freezer burn. When you are ready to eat it, thaw the tart in the fridge overnight. This method keeps the texture smooth and creamy. Avoid thawing at room temperature to maintain its quality.
FAQs
How long does it take for the tart to set?
The tart needs to chill in the fridge for at least 4 hours. This time helps the filling to firm up. I recommend making it the night before serving. This way, you ensure it is fully set and ready to enjoy.
Can I use frozen raspberries instead?
Yes, you can use frozen raspberries. Just remember to thaw them first. Drain any extra juice to avoid a watery mixture. This will keep your tart filling thick and tasty.
What can I serve with the tart?
This tart pairs well with a few tasty options. A dollop of whipped cream adds creaminess. You can also drizzle chocolate sauce for extra sweetness. A scoop of vanilla ice cream brings a nice chill and contrast.
Is this recipe easy to scale?
Yes, this recipe is easy to adjust. If you want more slices, simply double the ingredients. For fewer servings, cut the recipe in half. Just keep an eye on the chilling time.
This blog post outlined a delicious chocolate tart with raspberries. We covered ingredients, step-by-step instructions, and tips for a perfect treat. You can adjust flavors, use alternative ingredients, and even change the tart’s shape. Make sure to store it properly for the best taste. Enjoy creating this dessert, and don’t hesitate to try your own unique twists. You now have all the tools to make an amazing tart that impresses everyone! Happy baking!




![- Apples: You need 3 medium-sized apples. I like using Fuji or Honeycrisp for their sweet flavor and crisp texture. These apples dry well and taste great as chips. - Coconut Sugar: This sugar adds a mild caramel flavor. You can swap it for brown sugar if you prefer. Both options work well in this recipe. - Lemon Juice: This ingredient helps keep the apples from turning brown. It also adds a nice zing that brightens the flavor. - Sea Salt: Just a pinch of sea salt enhances the sweetness of the apples. It balances the flavors perfectly. Using these simple ingredients, you can make a tasty snack. You can find the full recipe mentioned earlier for more details. First, preheat your oven to 200°F (95°C). Line two baking sheets with parchment paper. This step helps your apple chips bake evenly and prevents sticking. Next, wash and dry your apples. I like to use Fuji or Honeycrisp for their sweetness. After that, core the apples and slice them into thin rings, about 1/8 inch thick. A mandoline works wonders here. It makes your slices uniform, which is key for even baking. Now it's time to mix some flavors! In a large mixing bowl, toss the apple slices with 1 teaspoon of lemon juice. This step stops the apples from browning. It adds a nice flavor too. In another bowl, combine 2 teaspoons of ground cinnamon, 1 tablespoon of coconut sugar, and a pinch of sea salt. This cinnamon-sugar mix gives your apple chips that sweet, spicy kick. Arrange the apple slices in a single layer on your baking sheets. Make sure they don’t overlap. This helps them become crispy. Bake your apple slices for about 2 hours. Flip them halfway through to ensure even crispness. Keep a close eye on them so they don’t burn. Once they look dried and crispy, take them out of the oven. Let them cool on the baking sheets for a few minutes. After cooling, store your apple chips in an airtight container at room temperature. They should stay fresh for up to a week. Follow the [Full Recipe] for exact measurements and more details! To get those perfect, crunchy apple chips, watch your baking time closely. Bake at 200°F for about two hours. Flip the slices halfway to promote even drying. Start checking them after 90 minutes. They should look dry and crisp. To achieve even drying, slice your apples uniformly. A mandoline works best for this. Ensure the slices are about 1/8 inch thick. This thickness helps them cook evenly. Also, spread the apple slices in a single layer on your baking sheets. Avoid overlapping. This will help air circulate around each slice. Want to jazz up your apple chips? Try adding other spices! Nutmeg and cardamom can bring warm flavors. You can mix in these spices with your cinnamon-sugar blend. If you want a different sweetness, think about using maple syrup. Just drizzle a little on the apple slices before baking. This adds a nice touch and a unique flavor. Get creative with how you serve your apple chips! You can present them in a lovely bowl or on a snack platter. Pair them with nut butter or yogurt for dipping. This adds a fun twist to your snack. For a special touch, sprinkle some extra cinnamon on top before serving. It not only looks nice but also boosts the flavor. Enjoy your crispy, homemade snack! For the full recipe, check out the [Full Recipe]. {{image_2}} You can change the taste of your apple chips with just a few tweaks. One fun idea is to add pumpkin spice for fall. This spice blend gives your chips a warm, cozy flavor. Just mix in a teaspoon of pumpkin spice with your cinnamon-sugar mix. You can also try infusing your apple chips with vanilla or almond extracts. This adds a lovely aroma and taste. Just a few drops in the lemon juice mixture can transform your chips into a delightful treat. Using a dehydrator is a great way to make apple chips. First, slice your apples as you would for baking. Then, place the slices in a single layer on the dehydrator trays. Set the temperature to 135°F (57°C) for about six to eight hours. Dehydrating has some big advantages over baking. It helps preserve more nutrients and can give you a crunchier texture. Plus, you don’t need to monitor them as closely as in the oven. Different apples can change the taste of your chips. I recommend using Fuji or Honeycrisp apples. They have the right balance of sweet and tart. But feel free to try Granny Smith or Gala apples for a different flavor. You can also adjust the sweetness or spice levels to fit your taste. If you like it sweeter, add more coconut sugar. For a spicier kick, increase the cinnamon or add some nutmeg. Personalize your apple chips to make them just right for you! To keep your apple chips crispy, store them in an airtight container. This prevents moisture from getting in and ruining their crunch. Glass jars or plastic containers work well. Make sure the chips are completely cool before sealing the container. If you stack them, add parchment paper between layers to avoid sticking. At room temperature, your apple chips can stay fresh for about a week. If you want to keep them longer, consider freezing them. Place the cooled chips in a freezer-safe bag. They can last for up to three months in the freezer. Just remember to let them thaw at room temperature before enjoying. You can tell if your apple chips are no longer good by checking for a few signs. If they feel soft or chewy, they have absorbed moisture. If you see any mold or unusual spots, it’s best to toss them out. Lastly, if they smell off or stale, don’t eat them. Always trust your senses when it comes to food freshness. I suggest using Fuji or Honeycrisp apples for the best flavor. These apples are sweet and crisp. They hold their shape well during baking. Other good options are Granny Smith or Gala apples. Granny Smith adds a nice tartness, while Gala is sweet and tender. Always choose fresh apples for the best results. Yes, you can! A dehydrator is a great choice for making apple chips. It allows for low, even heat. This method keeps the apples crispy without baking. An air fryer works too; it can make them crisp in less time. Just set it to a low temperature and check them often. Lemon juice is a common method, but there are others. Soaking apple slices in a saltwater solution also helps. Rinse the slices after soaking to remove excess salt. You can also use a mixture of vinegar and water. This adds flavor and keeps the color bright. Lastly, try adding cinnamon right after slicing; it works wonders! In this blog post, we explored how to make delicious homemade apple chips. We covered the key ingredients, including the best types of apples and sweeteners. I shared step-by-step instructions for preparing and baking the apples to crisp perfection. We also looked at tips for enhancing flavors and creative serving ideas. Finally, I discussed variations and the best ways to store your chips. Making these apple chips is simple and fun, and they offer a tasty, healthy snack option. Enjoy your crispy creations with family and friends!](https://dailydishly.com/wp-content/uploads/2025/06/97958b33-10d0-4297-bc13-9eb6a092a9d8-768x768.webp)
. Yes, you can use butternut squash or regular potatoes, but the flavor will change. Sweet potatoes add a nice sweetness and texture that other potatoes may lack. Use a flax egg or applesauce as a vegan alternative. A flax egg is made by mixing one tablespoon of ground flaxseed with two and a half tablespoons of water. Let it sit until it thickens. Swap half the flour for whole wheat flour or reduce sugar for a lighter option. You can also add mashed bananas or applesauce to cut down on sugar and add moisture. You can use a muffin tin; adjust the baking time accordingly. Muffins will take a little longer to bake than donuts, so check them after 15 minutes. Ensure donuts are completely cool before coating to avoid melting the sugar. Brush them with melted butter first. This helps the sugar stick well and gives a nice finish. For the full recipe, check the complete list of ingredients and steps to make these delightful treats! These sweet potato donuts are easy and fun to make. You need simple ingredients and a few steps. Start with mixing dry and wet ingredients, then bake your treats. Remember to experiment with flavors and toppings to find your favorite combo. Store any extras to enjoy later. Whether for breakfast or a snack, these donuts are a tasty choice. Have fun baking and sharing them!](https://dailydishly.com/wp-content/uploads/2025/07/04b40064-aac7-4876-84c8-c93335adf97c-768x768.webp)