
Air Fryer Teriyaki Chicken Strips Delicious and Simple
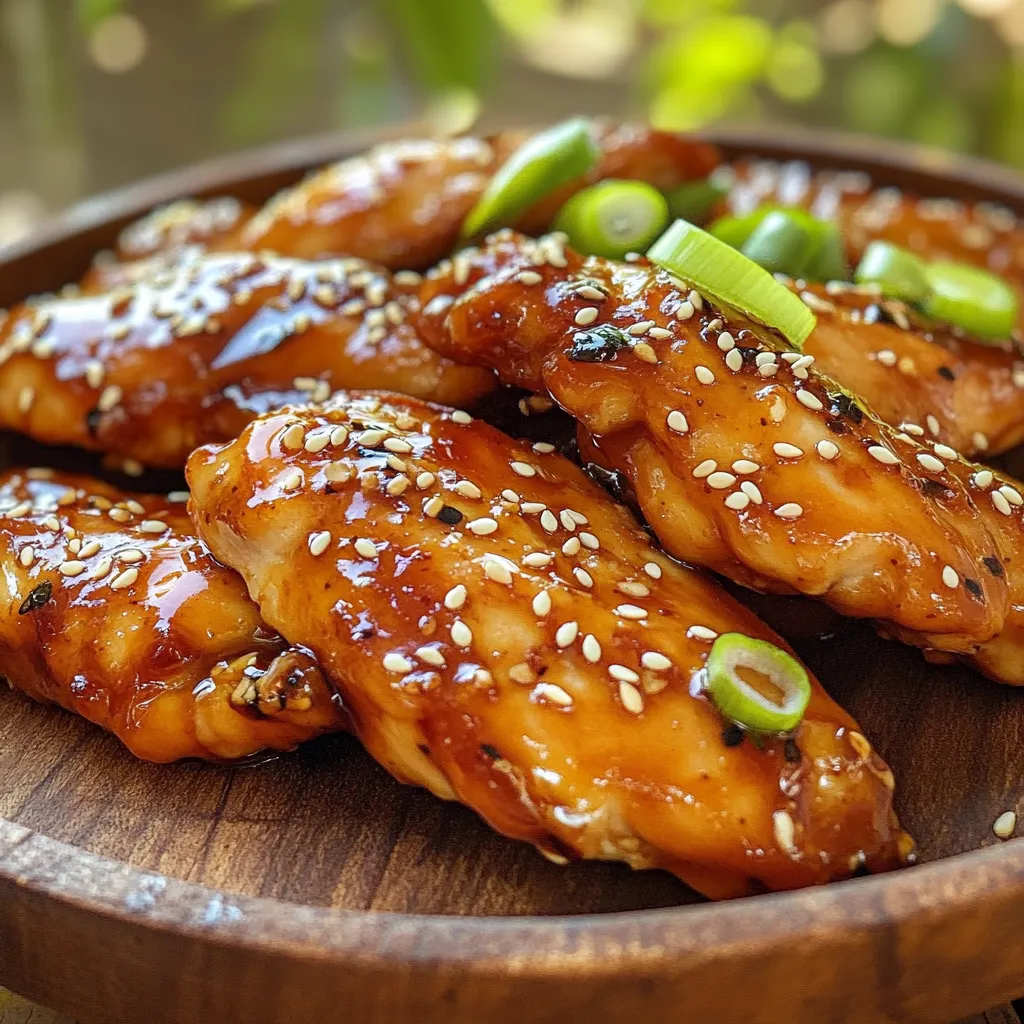
Are you ready to enjoy Air Fryer Teriyaki Chicken Strips that are both tasty and easy to make? This recipe combines sweet and savory flavors for a meal you’ll love. In just a few steps, you can create crispy chicken strips with homemade teriyaki sauce, all without the fuss. Let’s dive into the ingredients and start your delicious journey today!
Ingredients
Main Ingredients for Air Fryer Teriyaki Chicken Strips
– 1 pound chicken breast, cut into strips
– 1/4 cup soy sauce (low sodium if preferred)
– 2 tablespoons honey
– 1 tablespoon rice vinegar
– 1 tablespoon sesame oil
– 2 cloves garlic, minced
– 1 teaspoon grated ginger
– 1 tablespoon cornstarch
– 1 tablespoon water
– 1 teaspoon sesame seeds (for garnish)
– 2 green onions, sliced (for garnish)
These ingredients form the heart of the dish. The chicken gives you a nice protein base. The soy sauce adds saltiness and depth. Honey brings sweetness, while rice vinegar adds a tangy kick. Sesame oil introduces a warm, nutty flavor. Garlic and ginger add aroma and spice. Cornstarch and water help thicken the sauce, making it rich and sticky.
Optional Ingredients for Customization
– Red pepper flakes for heat
– Pineapple chunks for sweetness
– Bell peppers for added crunch
– Broccoli florets for extra veggies
You can easily customize your dish with these options. If you like heat, add red pepper flakes. Pineapple adds a tropical twist. Bell peppers give a nice crunch. Broccoli can boost the dish’s nutrition.
Important Tips for Selection
– Choose fresh, high-quality chicken breast. Look for a bright color and firm texture.
– Use low-sodium soy sauce if you want a lighter dish.
– Fresh ginger and garlic are best for flavor. Avoid pre-minced options.
– Use pure honey for the best taste.
Selecting the right ingredients is key. Fresh chicken makes a big difference in taste. Low-sodium soy sauce helps control the salt. Fresh garlic and ginger deliver a stronger flavor than processed ones. High-quality honey will give you the best sweetness.
Step-by-Step Instructions
Preparing the Marinade
To start, grab a bowl. Add 1/4 cup of soy sauce, 2 tablespoons of honey, and 1 tablespoon of rice vinegar. Then, pour in 1 tablespoon of sesame oil. Next, add 2 minced cloves of garlic and 1 teaspoon of grated ginger. Whisk these ingredients well until they blend together. This marinade packs a punch of flavor.
Marinating the Chicken Strips
Now, take 1 pound of chicken breast and cut it into strips. Place the chicken strips into the marinade bowl. Toss the chicken to coat it evenly. This step is key for flavor. Let the chicken marinate for at least 30 minutes. For deeper flavor, you can marinate it up to 2 hours.
Cooking the Chicken in the Air Fryer
When the chicken has marinated, remove it from the bowl. Keep the marinade for later. Preheat your air fryer to 400°F (200°C) for about 5 minutes. Place the chicken strips in a single layer in the air fryer basket. Cook them for 10 to 12 minutes. Don’t forget to flip them halfway through. They should turn golden brown and be fully cooked.
Thickening the Teriyaki Sauce
While the chicken cooks, take the reserved marinade. In a small bowl, mix 1 tablespoon of cornstarch with 1 tablespoon of water to make a slurry. Add this slurry to the marinade and stir well. Pour the marinade into a small saucepan. Bring it to a boil and then reduce the heat. Let it simmer for 2 to 3 minutes. This thickens the sauce nicely.
Once the chicken is ready, drizzle the thickened teriyaki sauce over it. Toss gently to coat the chicken strips. Now, they are ready to serve!
Tips & Tricks
Best Practices for Air Frying Chicken
Air frying chicken gives it a nice crunch. Keep these tips in mind:
– Preheat your air fryer: This helps cook the chicken evenly.
– Don’t overcrowd the basket: Leave space for air to flow.
– Flip halfway: This ensures both sides brown well.
– Check the temperature: Chicken should reach 165°F (75°C).
– Use a light coat of oil: This helps with browning without adding too much fat.
How to Achieve Perfectly Cooked Chicken Strips
To get juicy and tender chicken strips, follow these steps:
– Marinate well: Let the chicken soak in the sauce for at least 30 minutes.
– Dry the chicken: Pat it dry before cooking to ensure crispiness.
– Use cornstarch: This makes the outside crispier when air frying.
– Cook in batches: If you have a lot of strips, cook them in small groups.
Serving Suggestions and Pairing Ideas
Serve your teriyaki chicken strips with these ideas:
– Rice or quinoa: These grains soak up the sauce well.
– Steamed veggies: Broccoli or snap peas add color and nutrition.
– Salad: A fresh green salad adds crunch and balance.
– Dipping sauces: Try spicy mayo or additional teriyaki sauce.
– Garnish: Use sesame seeds and green onions for a nice look.

Variations
Alternative Proteins to Use
You can switch out chicken for other meats. Try turkey or pork strips for a twist. Both options work well with the teriyaki flavors. If you choose beef, use thin cuts like flank or sirloin. These meats will soak up the marinade nicely. Just make sure to adjust cooking times.
Vegetarian Options for Teriyaki Flavor
For a plant-based dish, use tofu or tempeh. Both soak up the marinade and taste great. Press the tofu to remove excess water. Then, cut it into strips like chicken. You can also use seitan for a meatier texture. Cook them in the air fryer just like the chicken.
Different Teriyaki Sauce Recipes
You can make your own teriyaki sauce at home. Combine soy sauce, honey, and ginger for a quick mix. Add some garlic and sesame oil for depth. Want a spicy kick? Include some sriracha or chili flakes. You can also try a pineapple teriyaki sauce for a fruity twist. Just blend pineapple juice with soy sauce and honey for a sweet sauce.
Storage Info
How to Store Leftover Chicken Strips
To keep your leftover chicken strips fresh, place them in an airtight container. You can store them in the fridge for up to 3 days. Make sure they cool down before sealing. This helps prevent sogginess. If you want to keep them longer, consider freezing them.
Reheating Instructions
To reheat, use your air fryer or oven. Preheat the air fryer to 375°F (190°C). Place the chicken strips in a single layer. Heat for about 5-7 minutes or until warm. For the oven, set it to 350°F (175°C) and bake for 10-15 minutes. Both methods will help keep them crispy.
Freezing Tips for Long-Term Storage
For long-term storage, freeze the chicken strips. First, let them cool completely. Then, wrap each strip in plastic wrap. After that, place them in a freezer bag. Squeeze out the air before sealing. They can last in the freezer for up to 3 months. When ready to eat, thaw in the fridge overnight before reheating.
FAQs
Can I use frozen chicken for this recipe?
Yes, you can use frozen chicken. However, it is best to thaw it first. This helps the chicken absorb the marinade better. Place the frozen chicken in the fridge overnight to defrost. If you are in a hurry, you can also use the microwave. Just make sure it is fully thawed before marinating.
What can I substitute for soy sauce?
If you need a soy sauce substitute, try tamari or coconut aminos. Both provide a similar flavor. You can also use liquid aminos, which are a good choice for a soy-free option. If you want a sweeter taste, mix some balsamic vinegar with water and a pinch of salt.
How do I know when the chicken is fully cooked?
To check if the chicken is cooked, use a meat thermometer. The internal temperature should reach 165°F (74°C). If you don’t have a thermometer, cut a piece open. The meat should be white and the juices should run clear. No pink should be visible.
Can I make this recipe without an air fryer?
Yes, you can make this recipe in a regular oven. Preheat your oven to 400°F (200°C). Place the marinated chicken on a baking sheet. Bake for about 20-25 minutes. Flip the chicken halfway through for even cooking. Keep an eye on it to make sure it doesn’t dry out.
This blog post shared how to make tasty air fryer teriyaki chicken strips. We covered the main and optional ingredients, along with tips for selection. I walked you through the step-by-step process from marinating to cooking. We also explored variations and storage tips for leftover strips.
In closing, air frying offers a quick way to enjoy this dish. With the tips and tricks shared, you can easily customize your meal. Enjoy the flavorful journey of cooking!


![To make Indian-spiced chickpea stew, you need a few key ingredients: - 2 cups canned chickpeas, drained and rinsed - 1 onion, finely chopped - 2 cloves garlic, minced - 1 tablespoon ginger, grated - 1 can (14 oz) diced tomatoes - 1 can (14 oz) coconut milk - 2 cups vegetable broth - 1 tablespoon curry powder - 1 teaspoon ground cumin - 1 teaspoon turmeric powder - 1/2 teaspoon red chili powder (adjust to taste) - 1 tablespoon olive oil - Salt and pepper to taste These ingredients blend together to create a hearty and flavorful stew. The chickpeas add protein, while the spices give it warmth and depth. For added flavor and color, consider these garnishes: - Fresh cilantro, chopped - A squeeze of lime juice - Sliced green chilies These garnishes not only enhance the stew's look but also add fresh notes to each bite. To prepare this stew, you will need: - A large pot or Dutch oven - A wooden spoon for stirring - A cutting board and knife for chopping Having the right tools makes cooking easier. You can focus on enjoying the process and the final dish. For the complete list of ingredients and detailed instructions, refer to the Full Recipe. Start by heating olive oil in a large pot over medium heat. When the oil is warm, add the chopped onion. Cook the onion for about five minutes until it becomes soft and clear. This step builds the base of flavor. Next, stir in the minced garlic and grated ginger. Cook for one more minute until it smells great. Now, it’s time to add the spices. Toss in the curry powder, ground cumin, turmeric powder, and red chili powder. Stir them into the onions, garlic, and ginger. Cook the spices for two minutes. This helps them release their rich flavors. After that, pour in the diced tomatoes with their juice and the can of coconut milk. Mix it all together, then add the vegetable broth. Add in the rinsed chickpeas next. They will add protein and texture to the stew. Season with salt and pepper to taste. Bring the stew to a gentle simmer. Once it simmers, reduce the heat to low. Cover the pot and let it cook for 20 to 25 minutes. Stir occasionally to blend the flavors. If you want a thicker stew, mash some chickpeas with the back of a spoon. This complete cooking process creates a dish that is flavorful and satisfying. For the full recipe, refer to the section above. Serve the stew hot, topped with fresh cilantro for a nice touch. To boost the taste of your Indian-spiced chickpea stew, try these tips: - Use fresh spices: Always check your spice shelf. Old spices lose flavor. - Add acidity: A splash of lemon juice can brighten the dish. - Experiment with herbs: Fresh cilantro adds a nice touch at the end. - Toast spices: Briefly cook your spices in oil to bring out their flavor. These steps help layers of flavor shine through. You will taste the difference in every bite. Here are some common errors to steer clear of: - Skipping the sauté: Don’t rush the onion and garlic stage. This builds a solid base. - Overcooking chickpeas: If you use dried chickpeas, soak and cook them properly. They should be tender but not mushy. - Ignoring seasoning: Taste as you go. Adjust salt and pepper to your liking. - Not letting it simmer: Allowing the stew to simmer helps meld all the flavors. By avoiding these mistakes, your stew will be more delicious and satisfying. When it's time to serve, consider these ideas: - Serve with rice: White or brown rice pairs well and soaks up the stew. - Add bread: Naan or crusty bread makes a great side. - Top with yogurt: A dollop of plain yogurt can add creaminess and balance spice. - Garnish: Fresh cilantro is a must for color and taste. Feel free to explore and create your own serving style. Enjoy your meal! For the full recipe, check out the details above. {{image_2}} You can easily boost this stew’s protein. Try adding cooked chicken, beef, or tofu. Each option brings a different taste. For chicken, use shredded pieces. For beef, try ground or diced. Tofu works well when cubed and pan-fried. This adds texture and flavor. You can mix and match to your liking. This Indian-spiced chickpea stew is already vegan. It’s packed with plant-based goodness. If you want to switch it up, add more veggies. Spinach, kale, or sweet potatoes work great. These veggies add nutrients and color. You can also serve it over rice or quinoa for a complete meal. You can swap ingredients based on what you have. For instance, use lentils if you don’t have chickpeas. They cook faster and soak up flavors well. If you lack coconut milk, try almond or soy milk. Just remember, this will change the taste slightly. You can also use any vegetable broth you like. The stew remains flexible and tasty no matter the changes. For the full recipe, check out the [Full Recipe]. I love saving leftovers from my Indian-spiced chickpea stew. To store them, let the stew cool first. Use an airtight container for best results. You can keep it in the fridge for up to three days. If you want to save it longer, freezing is a good option. Reheating is simple. Pour the stew into a pot. Heat it over medium heat on the stove. Stir occasionally to avoid burning. You can also use a microwave. Place the stew in a microwave-safe bowl. Heat it for one to two minutes, stirring halfway through. Make sure it’s hot all the way through before you eat. To freeze the stew, use a freezer-safe container. Leave some space at the top for expansion. This stew can last up to three months in the freezer. When you’re ready to eat, thaw it in the fridge overnight. Then, reheat it using the steps above. Enjoy your delicious meal again! For the full recipe, check out the link provided. To make your Indian-Spiced Chickpea Stew spicier, add more red chili powder. Start with an extra 1/2 teaspoon. If you want more heat, add some chopped green chilies. You can also use fresh ginger or a dash of cayenne pepper. Keep tasting as you go. Adjust the spice level to your liking. Remember, you can always add more, but you can't take it out! Yes, you can use dried chickpeas! Just soak them overnight in water. After soaking, cook them until soft before adding to your stew. This may take about 1 to 2 hours. Be sure to adjust the cooking time in the recipe. Dried chickpeas have a great texture and flavor that can enhance your dish. This stew pairs well with many sides. Serve it with rice or warm naan bread. You can also enjoy it with a fresh salad for a light touch. Consider adding yogurt or raita for creaminess. This balance will elevate your meal. For more ideas, check the Full Recipe for suggestions! This article covered how to make Indian-Spiced Chickpea Stew, from main ingredients to cooking steps. We explored tips for enhancing flavors, avoiding common mistakes, and serving suggestions. You learned about variations, storage, and answering common questions. Enjoying this stew is a delightful experience. Remember, feel free to adjust the spices and toppings to make it your own. Cooking should be fun and creative!](https://dailydishly.com/wp-content/uploads/2025/06/561fcdd4-13bb-4dd2-b7b4-b44f6a9d9028-768x768.webp)