Looking for a quick and tasty dinner idea? I’ve got you covered with my Honey Garlic Meatball Skillet. This dish combines juicy meatballs with a sweet and savory sauce that’s easy to whip up. In just a few steps, you’ll have a meal that delights the entire family. Ready to learn how to make this simple and scrumptious dish? Let’s dive into the ingredients and steps that will make your dinner a hit!
Ingredients
Main Ingredients
– 1 pound ground beef or turkey
– 1/2 cup breadcrumbs
– 1/4 cup grated Parmesan cheese
– 1 egg
– 2 cloves garlic, minced
For this dish, I love using ground beef or turkey. Both options make tender meatballs. Breadcrumbs add the right texture. Grated Parmesan gives a nice flavor boost. The egg helps bind everything together. Minced garlic adds a wonderful aroma and taste.
Seasonings & Sauce Components
– 1 teaspoon onion powder
– 1 teaspoon salt
– 1/2 teaspoon black pepper
– 1/4 teaspoon red pepper flakes (optional)
– 1/3 cup honey
– 1/4 cup soy sauce or tamari
The seasonings can change the taste of your meatballs. Use onion powder for depth. Salt and black pepper enhance all flavors. If you like heat, add red pepper flakes. Honey makes the sauce sweet, while soy sauce or tamari gives it umami.
Garnishes
– 1 tablespoon apple cider vinegar
– 1 tablespoon cornstarch
– 1 tablespoon sesame oil
– 2 green onions, chopped
– Sesame seeds
Garnishes are key to finishing this dish. Apple cider vinegar adds brightness. Cornstarch thickens the sauce, making it stick to the meatballs. Sesame oil brings a nutty flavor. Green onions and sesame seeds not only look great but also add crunch.
Step-by-Step Instructions
Preparing the Meatball Mixture
Start by mixing the meatball ingredients. In a large bowl, add:
– 1 pound ground beef (or turkey)
– 1/2 cup breadcrumbs
– 1/4 cup grated Parmesan cheese
– 1 egg
– 2 cloves garlic, minced
– 1 teaspoon onion powder
– 1 teaspoon salt
– 1/2 teaspoon black pepper
– 1/4 teaspoon red pepper flakes (optional)
Use your hands to combine everything until it’s just mixed. Do not overwork the mixture; this keeps the meatballs tender.
Next, shape the mixture into small meatballs, about 1 inch in diameter. This size helps them cook evenly. Place the meatballs on a plate and set them aside while you heat the skillet.
Cooking the Meatballs
In a large skillet, heat 1 tablespoon of sesame oil over medium heat. Once the oil is hot, add the meatballs in a single layer. It’s best not to crowd them. Cook for about 6-8 minutes. Turn the meatballs occasionally to brown them on all sides. You want them to be cooked through, reaching an internal temperature of 165°F (74°C).
Creating the Honey Garlic Sauce
While the meatballs cook, make the honey garlic sauce. In a small bowl, whisk together:
– 1/3 cup honey
– 1/4 cup soy sauce (or tamari for gluten-free)
– 1 tablespoon apple cider vinegar
– 1 tablespoon cornstarch
This mix will add a sweet and savory flavor. Once the meatballs are browned and cooked, pour the sauce over them in the skillet. Stir gently to coat each meatball in the sauce. Let it simmer for 2-3 minutes. This allows the sauce to thicken slightly and cling to the meatballs.
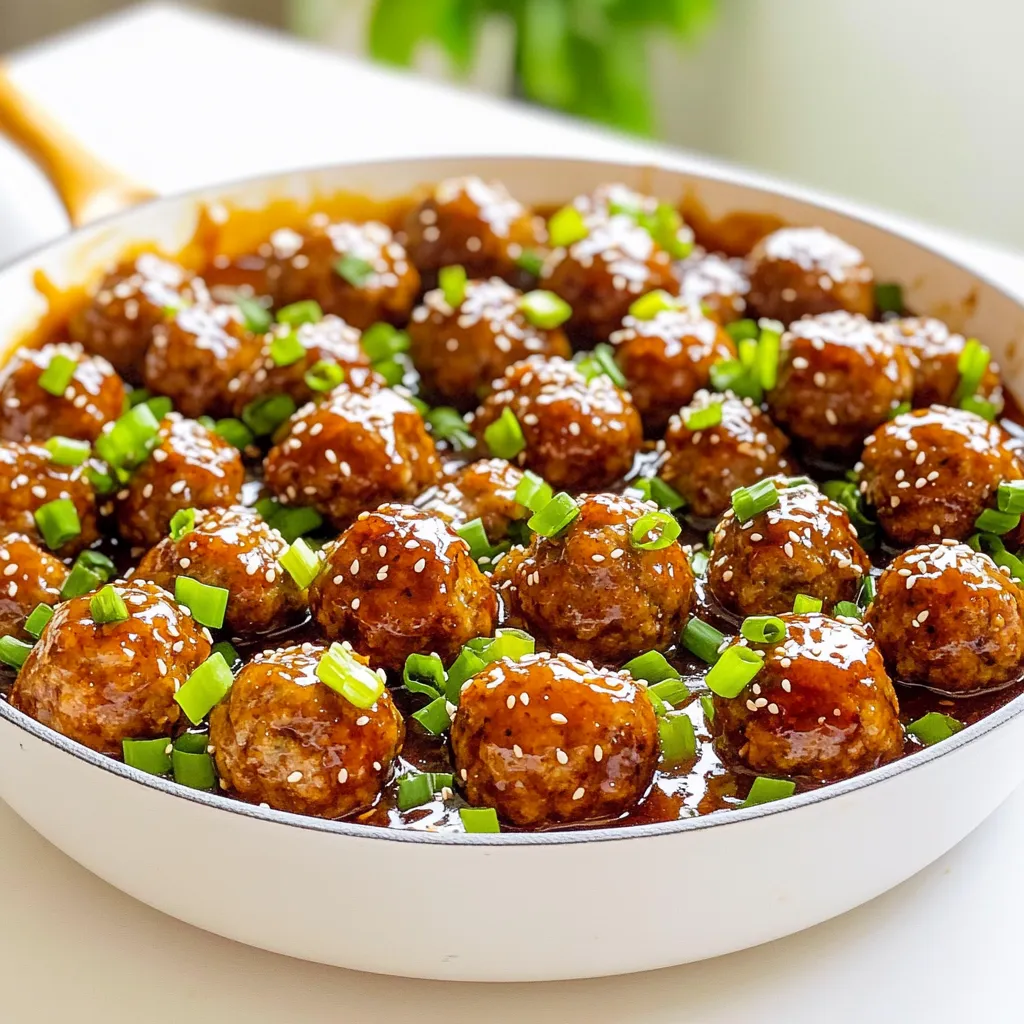
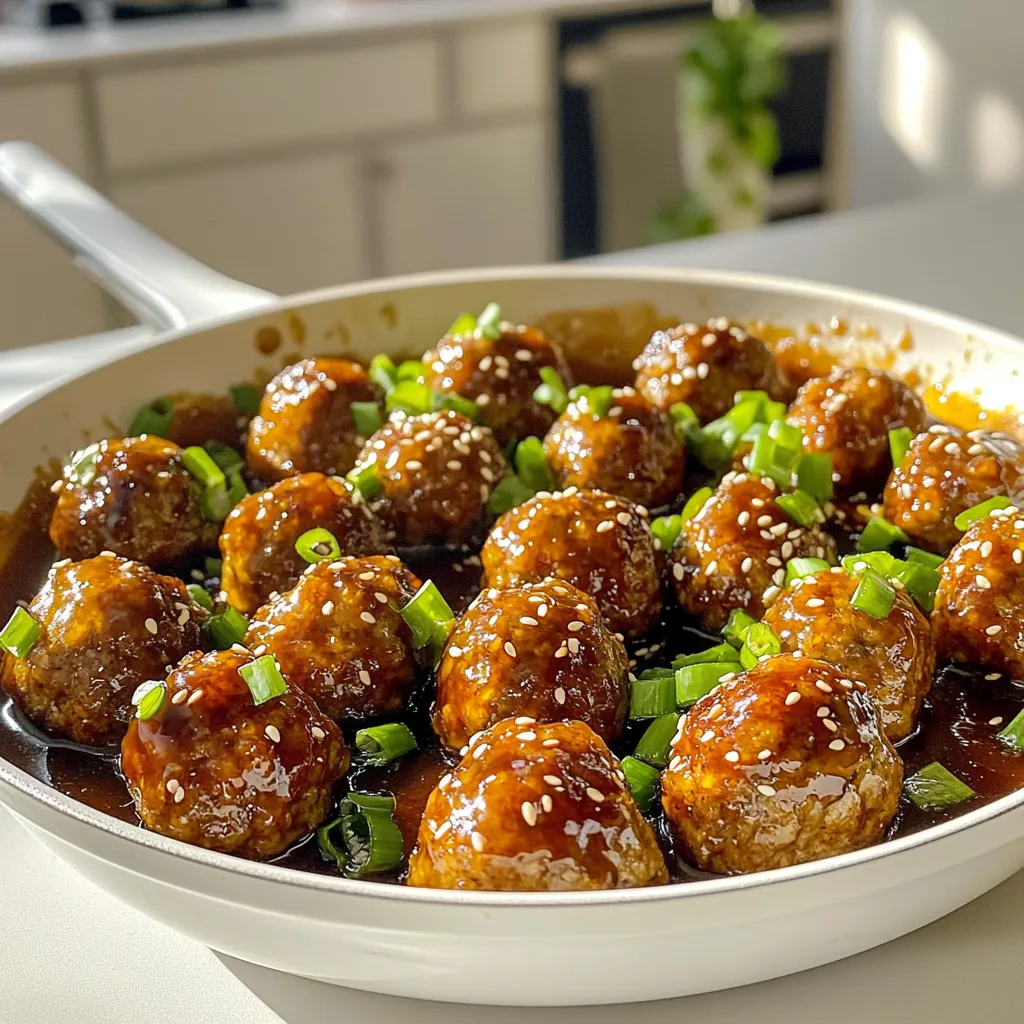
Garnish your dish with chopped green onions and sesame seeds. Serve hot and enjoy!
Tips & Tricks
Achieving the Perfect Meatball
To make great meatballs, avoid overworking the mixture. Mix just until combined. If you overmix, your meatballs can become tough.
For even cooking, shape your meatballs into uniform sizes. Aim for about one inch in diameter. This helps them cook at the same rate.
Sauce Consistency
If you want a thicker sauce, add more cornstarch. Mix it well with a little water first. This will help it blend into the sauce smoothly.
Balancing flavors is key. Taste your sauce as you cook. If it’s too sweet, add a bit more soy sauce. If it’s too salty, add extra honey to balance it out.
Presentation Ideas
Serve your meatballs over steamed rice or quinoa. This adds a nice base and makes it a full meal.
For a rustic look, keep the meatballs in the skillet. Garnish them with chopped green onions and sesame seeds. This adds color and makes the dish more appealing.
Variations
Meat Alternatives
You can swap ground beef for ground turkey or chicken. These meats are leaner and still tasty. Ground turkey brings a mild flavor that blends well with the sauce. You can also use plant-based meat for a vegetarian option. Many brands make great alternatives. They still give you that hearty texture with fewer calories.
Gluten-Free Adaptations
If you need gluten-free options, replace regular breadcrumbs with gluten-free ones. You can find these in most grocery stores. They work just as well for binding the meatballs. For the sauce, use tamari instead of soy sauce. Tamari has a similar taste but is gluten-free. This way, everyone can enjoy the dish without worry.
Flavor Enhancements
To boost the flavor, add fresh herbs like ginger or cilantro. Ginger gives a warm spice, while cilantro adds a fresh taste. You can also mix in finely chopped vegetables. Carrots or bell peppers are great choices. They add texture and nutrition without changing the meatball’s flavor too much. These little changes can make your dish exciting and unique.
Storage Info
Storing Leftovers
To keep your honey garlic meatballs fresh, store them in the fridge. Place them in a container with a tight seal. They will stay good for about 3 to 4 days. Make sure the meatballs are cool before you put them away. This helps prevent moisture buildup. I recommend using glass containers. They help you see what’s inside and are safe for reheating.
Freezing Meatballs
If you want to keep meatballs longer, freezing is a great option. First, let them cool completely. Then, lay them out on a baking sheet. Freeze them for about 1 hour. Once frozen, put them in a freezer bag. Squeeze out extra air to avoid freezer burn. They can last up to 3 months in the freezer. When you’re ready to eat, thaw them in the fridge overnight for best results.
Reheating Instructions
Reheating meatballs is easy, and you have several options. You can use the microwave, oven, or stovetop. For the microwave, place meatballs in a bowl and cover them. Heat in 30-second intervals until hot. If you prefer the oven, place meatballs on a baking sheet at 350°F for about 10-15 minutes. For stovetop, add them to a skillet with a splash of water or sauce. Heat on low, stirring gently. This method keeps the sauce flavorful and prevents it from drying out.
FAQs
How long do honey garlic meatballs last in the fridge?
Honey garlic meatballs last about 3 to 4 days in the fridge. To keep them fresh, store them in an airtight container. Signs of spoilage include a bad smell, mold, or a change in color. If you see any of these, it’s best to toss them.
Can I make meatballs ahead of time?
Yes, you can make meatballs ahead of time! You can mix the meatball ingredients and shape them into balls. Store them in the fridge for up to a day before cooking. This saves time on busy nights. If you want to, you can also cook them and store them for later. Just reheat them before serving.
What can I serve with honey garlic meatballs?
You have many options for side dishes. Steamed rice or quinoa pairs nicely. You can also serve them with a fresh salad or stir-fried veggies for a balanced meal. For a fun twist, try serving them in lettuce wraps. They make a great appetizer or snack too!
You’ve learned how to make delicious honey garlic meatballs, from choosing your ingredients to cooking them perfectly. We covered variations for different diets and tips for storing leftovers. Remember, the magic is in balancing flavors and enjoying every bite. Experimenting with herbs or veggies can make your dish unique. Whether it’s for dinner or meal prep, these meatballs will be a hit. Enjoy this simple recipe, and get creative in your kitchen!


