
Parmesan Herb Turkey Cutlets Crispy and Flavorful Meal
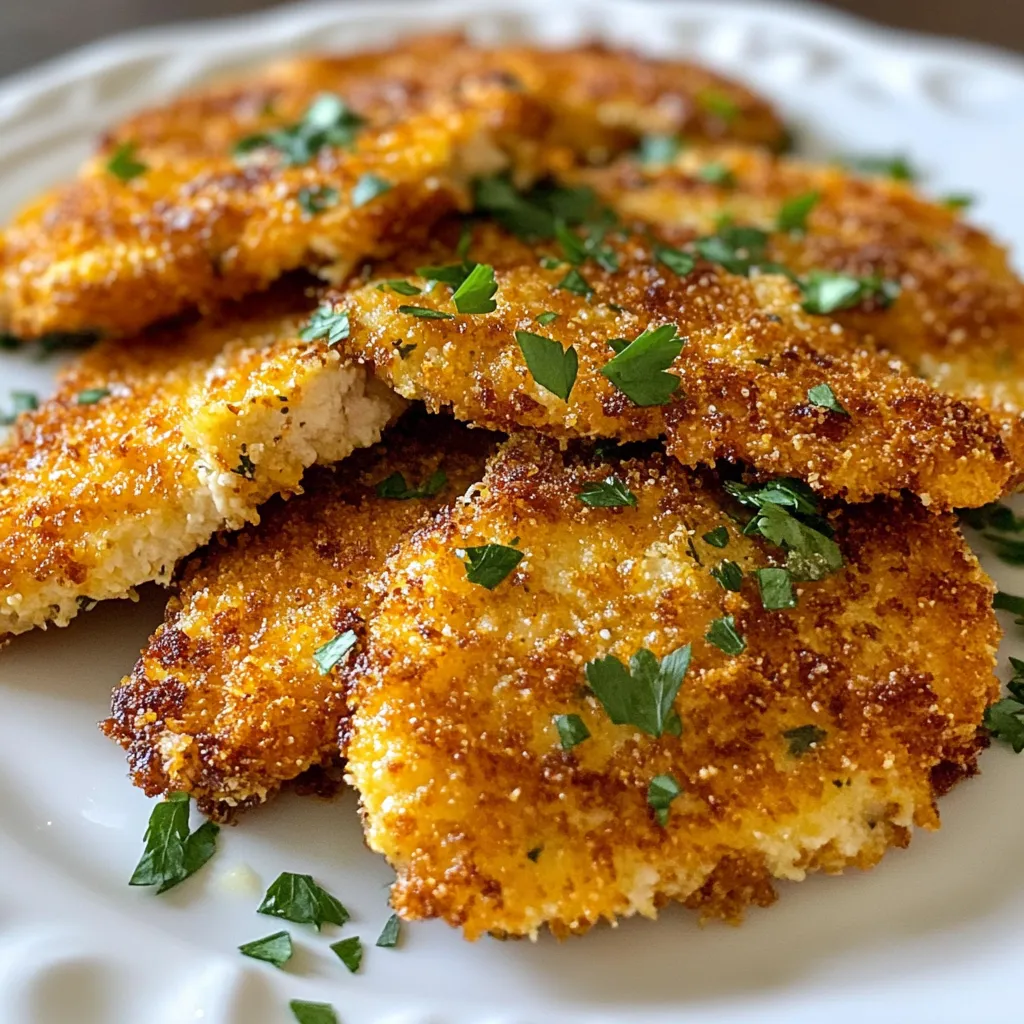

Looking for a tasty meal that’s quick and easy? Try my Parmesan Herb Turkey Cutlets! They’re crispy, flavorful, and perfect for any night. With just a few simple ingredients and steps, you can whip up a dish that delights everyone. Whether you’re a novice cook or a seasoned chef, you’ll find tips and tricks to make this meal shine. Let’s dive into how to create this delicious dinner!
Why I Love This Recipe
- Delicious Flavor: The combination of Parmesan cheese and Italian herbs infuses the turkey cutlets with a rich, savory flavor that is hard to resist.
- Quick and Easy: This recipe is perfect for busy weeknights, taking only about 30 minutes from start to finish.
- Healthy Option: Turkey is a lean meat, making these cutlets a healthier choice compared to traditional fried options.
- Versatile Dish: These cutlets can be served with a variety of sides, from salads to pasta, making them a great addition to any meal.
Ingredients
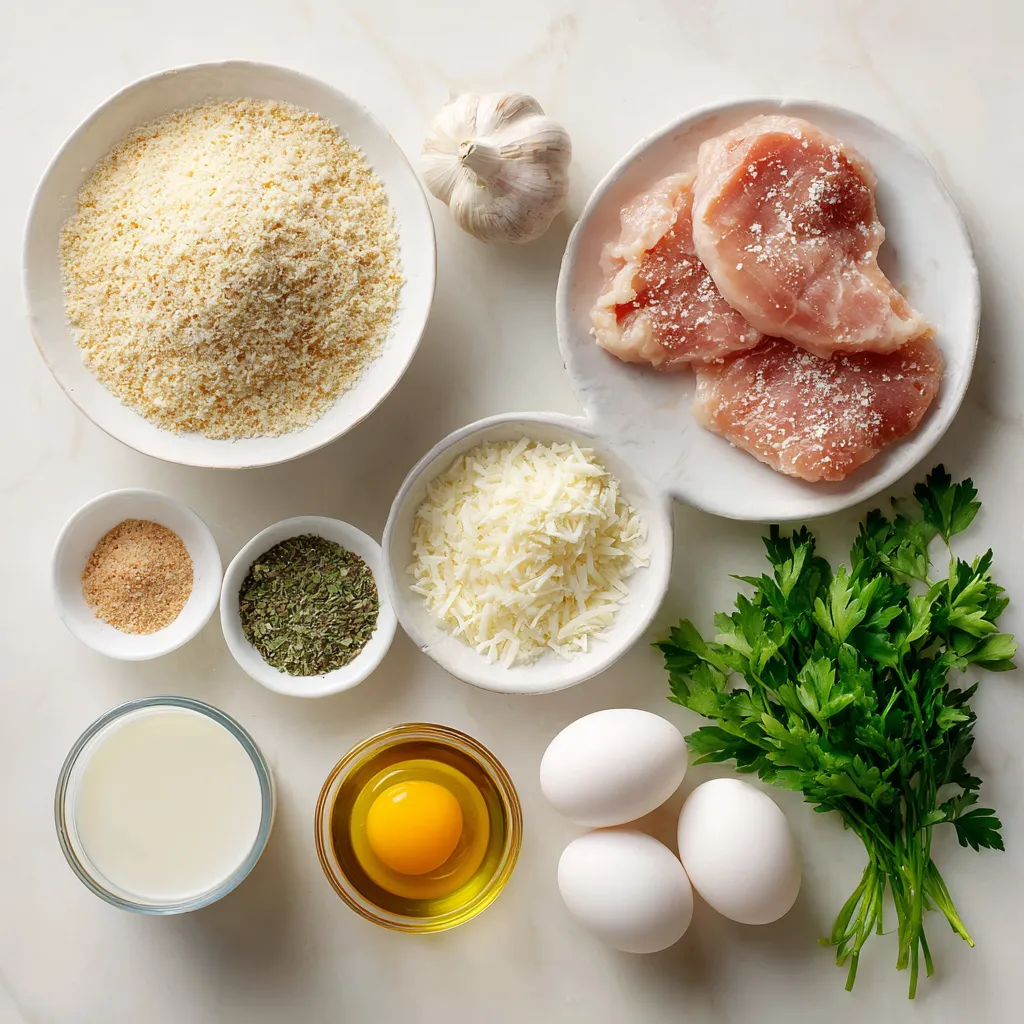
To make Parmesan Herb Turkey Cutlets, you will need a few simple ingredients. Here’s the list:
– 1 lb turkey cutlets
– 1 cup breadcrumbs (preferably panko)
– 1/2 cup grated Parmesan cheese
– 1 tablespoon dried Italian herbs (oregano, basil, thyme)
– 2 cloves garlic, minced
– 1/2 teaspoon salt
– 1/4 teaspoon black pepper
– 2 large eggs
– 2 tablespoons milk
– 3 tablespoons olive oil
– Fresh parsley, chopped (for garnish)
These ingredients create a tasty and crispy meal. The turkey cutlets are the main star. They are lean, healthy, and easy to cook. Panko breadcrumbs give a nice crunch. Parmesan cheese adds rich flavor.
Dried herbs bring a fresh taste to the dish. Garlic adds depth. Salt and pepper enhance all the flavors. Eggs and milk help the breadcrumbs stick. Olive oil is great for cooking. Finally, fresh parsley makes a lovely garnish.
Using these ingredients, you can prepare a delicious meal that everyone will enjoy.
Step-by-Step Instructions
Preparation Steps
1. Preheat your oven to 400°F (200°C). This step helps the cutlets cook evenly.
2. Line a baking sheet with parchment paper. This keeps the cutlets from sticking.
3. In a shallow bowl, mix together the breadcrumbs, Parmesan cheese, dried herbs, garlic, salt, and pepper. This mix adds flavor and texture.
Cooking Process
1. In another bowl, whisk together the eggs and milk. This will create a nice coating.
2. Dip each turkey cutlet into the egg mixture. Let the extra drip off to avoid sogginess.
3. Next, coat the turkey cutlets in the breadcrumb mixture. Press gently to make sure it sticks well.
4. Heat olive oil in a large skillet over medium heat.
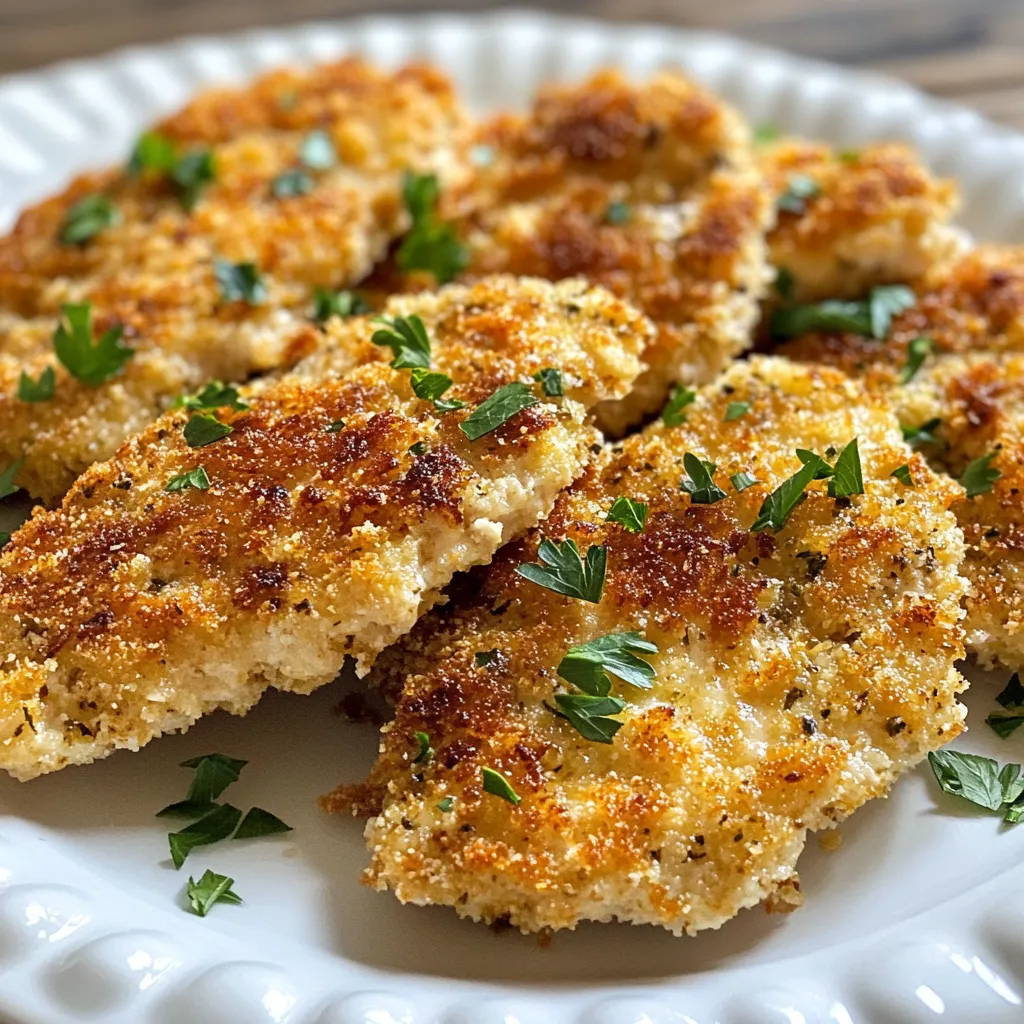
5. Add the cutlets in batches. Cook for about 3-4 minutes on each side until they turn golden brown.
Baking Instructions
1. Once browned, transfer the cutlets to the prepared baking sheet. This helps finish cooking them.
2. Bake the turkey cutlets in the oven for 10-12 minutes. They should reach an internal temperature of 165°F (74°C).
3. Remove from the oven and let them rest for a couple of minutes before serving. This keeps them juicy.
Tips & Tricks
Best Practices for Cooking
To get the best coating on your turkey cutlets, follow these steps:
– Use panko breadcrumbs: They create a light and crispy layer.
– Press down gently: After coating the cutlets, press them into the breadcrumbs. This helps the coating stick better.
For even cooking, here are some tips:
– Don’t crowd the pan: Cook the cutlets in batches if needed. This allows heat to circulate.
– Check the temperature: Use a meat thermometer. The turkey should reach 165°F (74°C) for safety.
Serving Suggestions
Pair your turkey cutlets with these delicious sides:
– Roasted vegetables: Carrots, broccoli, or zucchini work great.
– Mashed potatoes: They add creaminess and balance the meal.
For garnishing, consider:
– Fresh parsley: Sprinkle it on top for color.
– Lemon wedges: They add a zesty kick when squeezed over the cutlets.
Storing Leftovers
To cool and store your leftovers:
– Let them cool: Allow the cutlets to sit at room temperature for about 30 minutes.
– Use an airtight container: This keeps them fresh in the fridge.
For reheating, follow these steps:
– Oven method: Preheat the oven to 350°F (175°C). Heat for 10-15 minutes until warm.
– Microwave method: Place on a microwave-safe plate. Heat in short bursts of 30 seconds.
Pro Tips
- Use Fresh Herbs: Fresh herbs enhance the flavor of your turkey cutlets significantly. If available, substitute dried herbs with fresh ones for a more vibrant taste.
- Let the Cutlets Rest: After baking, allow the turkey cutlets to rest for a few minutes. This helps retain moisture and results in juicier meat.
- Experiment with Cheese: While Parmesan is delicious, feel free to mix in other cheeses like Pecorino Romano or aged Gouda for a unique flavor twist.
- Make it a Meal: Serve the turkey cutlets with a side of roasted vegetables or a fresh salad for a complete and healthy meal.
Variations
Flavor Adjustments
You can change the flavor of the turkey cutlets easily. Try using different herbs, like rosemary or dill, for a fresh taste. You can also add spices like paprika or cumin for a bit of kick. If you want to swap the cheese, use Pecorino Romano or a dairy-free cheese. Each option brings a new twist to the dish.
Cooking Methods
Air frying turkey cutlets is a great option. It gives you a nice crunch without too much oil. Preheat your air fryer to 375°F (190°C). Cook the cutlets for about 12-15 minutes, flipping halfway through. They will come out crispy and delicious. You can also grill the turkey cutlets for a smoky flavor. Preheat the grill and cook for about 5-7 minutes on each side.
Dietary Modifications
You can make this recipe gluten-free by using gluten-free breadcrumbs. Many brands offer tasty options that work well. For dairy-free, choose a milk substitute like almond or oat milk. You can also skip the cheese or find a dairy-free alternative. These adjustments keep the dish tasty while fitting your diet.
Nutritional Information
Nutritional Breakdown
– Calories per serving: Each serving has about 300 calories. This makes it a filling yet light meal.
– Macronutrient profile: Each serving contains approximately 20 grams of protein, 15 grams of fat, and 25 grams of carbs. This balance helps fuel your day.
Health Benefits
– Nutritional benefits of turkey: Turkey is a great source of lean protein. It supports muscle growth and repair. Turkey also contains B vitamins for energy and selenium for a strong immune system.
– Advantages of using herbs and spices: Using herbs and spices adds flavor without extra calories. Dried Italian herbs like oregano and basil are rich in antioxidants. Garlic boosts heart health and adds taste. Fresh parsley not only looks nice but also provides vitamins K and C.
FAQs
Common Questions
How do I know when the turkey cutlets are done?
To check if the turkey cutlets are done, use a meat thermometer. The internal temperature should be 165°F (74°C). If you don’t have a thermometer, cut into a cutlet. The meat should be white and juices should run clear.
Can I make this recipe in advance?
Yes, you can prepare the turkey cutlets in advance. You can coat them in the breadcrumb mix and store them in the fridge for a few hours. This helps the flavors blend. Just cook them when you’re ready.
What can I substitute for Parmesan cheese?
If you need a substitute for Parmesan cheese, try using Pecorino Romano. It has a strong flavor like Parmesan. You can also use nutritional yeast for a dairy-free option.
Cooking Troubleshooting
What to do if cutlets are soggy?
If your cutlets are soggy, they may have too much moisture. Make sure to dry the turkey cutlets with a paper towel before coating. Also, try frying them longer to get a crispier texture.
How to prevent burning during frying?
To prevent burning, keep the heat at medium. Don’t overcrowd the pan; this can lower the heat and cause uneven cooking. Fry in batches if needed.
Storage and Shelf Life
How long do leftovers last?
Leftovers last about 3-4 days in the fridge. Store them in an airtight container to keep them fresh.
Can you freeze cooked turkey cutlets?
Yes, you can freeze cooked turkey cutlets. Let them cool completely, then wrap them tightly in plastic wrap. Place them in a freezer bag for up to 3 months.
This blog post covered the essentials for making delicious turkey cutlets. You learned about the ingredients, step-by-step instructions, and helpful tips. I shared ways to vary flavors and adapt recipes to fit your needs. Proper cooking methods and storage tips ensure your cutlets stay tasty. Remember, the secret to success is in the details. Follow the steps, get creative, and enjoy your meal! With a little practice, these cutlets will become a favorite in your hous

Parmesan Herb Turkey Cutlets
Ingredients
- 1 lb turkey cutlets
- 1 cup breadcrumbs (preferably panko)
- 0.5 cup grated Parmesan cheese
- 1 tablespoon dried Italian herbs (oregano, basil, thyme)
- 2 cloves garlic, minced
- 0.5 teaspoon salt
- 0.25 teaspoon black pepper
- 2 large eggs
- 2 tablespoons milk
- 3 tablespoons olive oil
- to taste Fresh parsley, chopped (for garnish)
Instructions
- Preheat your oven to 400°F (200°C) and line a baking sheet with parchment paper.
- In a shallow bowl, mix together the breadcrumbs, grated Parmesan cheese, dried Italian herbs, minced garlic, salt, and black pepper.
- In another bowl, whisk together the eggs and milk until well combined.
- Dip each turkey cutlet into the egg mixture, allowing any excess to drip off.
- Next, coat the turkey cutlets in the breadcrumb mixture, pressing gently to ensure they adhere well.
- Heat olive oil in a large skillet over medium heat. Add the coated turkey cutlets in batches, cooking for about 3-4 minutes on each side or until golden brown.
- Transfer the browned cutlets to the prepared baking sheet and bake in the oven for an additional 10-12 minutes, or until the turkey is cooked through and reaches an internal temperature of 165°F (74°C).
- Remove from the oven and let rest for a couple of minutes before serving.
- Garnish with fresh chopped parsley.
![To make this vibrant salad, you need fresh and colorful ingredients. Here’s what you will need: - 8 oz rice noodles (or your favorite noodle) - 1 cup red cabbage, shredded - 1 cup carrots, julienned - 1 cup bell peppers (mixed colors), sliced - 1 cup sugar snap peas, trimmed - 1 cucumber, julienned - 1 cup edamame, shelled - ¼ cup fresh cilantro, chopped - ¼ cup green onions, sliced - ¼ cup peanuts, crushed (optional for garnish) These ingredients bring crispness and bright colors to the dish. They also add a mix of textures that make every bite fun. The dressing ties all the flavors together. You will need these simple ingredients: - 3 tablespoons soy sauce (or tamari for gluten-free) - 2 tablespoons sesame oil - 1 tablespoon rice vinegar - 1 tablespoon honey (or maple syrup for vegan) - 1 teaspoon ginger, grated - 1 clove garlic, minced - 1 teaspoon chili paste (adjust to taste) Mixing these ingredients creates a tasty dressing that adds depth to the salad. The balance of salty, sweet, and a little spice is what makes this dish stand out. Want to make your salad even better? Here are some fun add-ins: - Sliced avocado for creaminess - Grilled chicken or tofu for protein - Sesame seeds for extra crunch - Fresh herbs like mint or basil for a fresh twist These additions can take your Rainbow Asian Noodle Salad to the next level. Feel free to mix and match based on your taste! For the complete recipe, check the [Full Recipe]. Start by boiling a pot of water. Use enough water to cover the noodles. Once the water boils, add 8 oz of rice noodles. Cook them according to the package instructions. I usually check for an al dente texture. This means they should be firm, not mushy. After cooking, drain the noodles in a colander. Rinse them under cold water. This step cools them and stops the cooking process. Set them aside for later. Grab a large mixing bowl. Add 1 cup of shredded red cabbage. Next, add 1 cup of julienned carrots. Then, toss in 1 cup of sliced bell peppers in mixed colors. Don't forget 1 cup of trimmed sugar snap peas. They add a nice crunch! Now, add 1 julienned cucumber and 1 cup of shelled edamame. Finally, mix in ¼ cup of chopped cilantro and ¼ cup of sliced green onions. These fresh veggies make your salad colorful and tasty. In a small bowl, combine the dressing ingredients. Start with 3 tablespoons of soy sauce. If you are gluten-free, use tamari instead. Next, add 2 tablespoons of sesame oil and 1 tablespoon of rice vinegar. Then, mix in 1 tablespoon of honey or maple syrup for a vegan option. Add 1 teaspoon of grated ginger and 1 clove of minced garlic. Finally, add 1 teaspoon of chili paste, adjusting to your spice level. Whisk all the ingredients together until well combined. Now, it’s time to bring everything together. Add the cooked noodles to your bowl of fresh vegetables. Pour the dressing over the top. Toss everything gently to mix. Make sure each noodle and veggie is coated well. This mixing helps all the flavors blend together for a delicious bite. After mixing, taste your salad. If you want it sweeter, add a little more honey. For extra spice, add more chili paste. Adjust the flavors to suit your liking. This salad should be a reflection of your taste. Feel free to experiment until it’s perfect for you. To make your Rainbow Asian Noodle Salad pop, use a large, shallow platter. This helps showcase the bright colors. Layer the noodles first, then pile on the veggies. Drizzle dressing on top, and finish with a sprinkle of cilantro and crushed peanuts. This creates a stunning look that draws everyone in. To keep your salad fresh, store it in an airtight container. Keep the dressing separate until you’re ready to eat. This prevents the noodles and veggies from getting soggy. You can also add a little lemon juice to the salad. This helps maintain color and crunch. Leftover salad is great for lunch! Consider adding protein like grilled chicken or tofu for a filling meal. You can also use the salad as a filling for lettuce wraps. Just scoop some salad into large lettuce leaves. This adds a fun twist and keeps it fresh. If you want to make it spicy, add more chili paste to the leftovers. {{image_2}} You can easily make this salad gluten-free. Just swap regular noodles for rice noodles. Use tamari instead of soy sauce. This keeps the flavor while avoiding gluten. If you want a vegan version, replace honey with maple syrup in the dressing. This simple swap keeps your salad sweet while staying plant-based. You can also add tofu for extra texture and protein. For those who want more protein, consider adding cooked chicken or shrimp. Both work well with the flavors in this salad. You can also use chickpeas or lentils for a hearty twist. Each option adds nutrition and keeps the dish filling. If you want the full recipe, you can find it above. To keep your Rainbow Asian Noodle Salad fresh, store it in the fridge. Place the salad in an airtight container. If you have leftover dressing, store it separately to prevent sogginess. This way, the noodles and veggies stay crisp. Use glass containers or high-quality plastic ones with tight lids. Glass is great because it does not stain or retain odors. Make sure the container is large enough to hold all the ingredients without squishing them together. Your salad can last for about 3 to 5 days in the fridge. The veggies will stay fresh, but the noodles may soften over time. To enjoy the best taste, eat it within the first few days. Always check for any changes in smell or texture before eating. For the full recipe, refer to the earlier sections. I love using rice noodles for their light texture. They soak up the flavors well. You can also use soba noodles or any thin pasta. Just cook them until they are al dente. Rinse under cold water to stop the cooking. This keeps them from getting mushy. Absolutely! You can prep the salad a day in advance. Just keep the dressing separate until you are ready to serve. This helps keep the veggies crisp. If you mix everything too early, the noodles may soak up the dressing. Yes, this salad is packed with veggies. Each ingredient adds nutrients. The colorful mix provides vitamins and minerals. You get fiber from the noodles and veggies too. This salad is a great option for a light meal or side dish. You can easily change the dressing to suit your taste. Add more honey for sweetness or extra chili paste for heat. You might try lime juice instead of rice vinegar for a zingy twist. Fresh herbs like mint or basil can add a bright flavor. Yes! Grilled chicken, shrimp, or tofu are great options. Just make sure to cook them first. Slice the meat thin before adding it to the salad. This adds protein and makes the dish more filling. You can check the Full Recipe for ideas on how to include them. You learned how to make a tasty Rainbow Asian Noodle Salad. We covered the key ingredients, from the noodles to the fresh veggies and zesty dressing. I shared easy steps to prepare and combine everything for the best flavor. You also found tips for presentation and storage to keep your salad fresh. Experiment with variations like gluten-free or vegan options. Remember, this dish is flexible and fun! Enjoy your colorful salad and make it your way.](https://dailydishly.com/wp-content/uploads/2025/06/34dc854e-6038-45bb-afdc-1af709707800-768x768.webp)

![To make zucchini noodles with pesto, gather these main ingredients: - 3 medium zucchinis, spiralized into noodles - 1 cup fresh basil leaves - 1/4 cup pine nuts (toasted) - 1/4 cup grated Parmesan cheese (or nutritional yeast for a vegan option) - 2 garlic cloves, minced - 1/3 cup extra-virgin olive oil - Salt and pepper to taste These ingredients create a fresh and bright dish that is full of flavor. The zucchini noodles serve as a light base, while the pesto adds richness. You can enhance the dish with these optional ingredients: - 1/2 cup sun-dried tomatoes, chopped (in oil for extra flavor) - 1/4 teaspoon crushed red pepper flakes (optional) Adding sun-dried tomatoes gives a nice tang and sweetness. The red pepper flakes can add a bit of heat if you like spice. This dish is not just tasty; it also packs a healthy punch. Here’s a quick look at the nutritional benefits: - Zucchini: Low in calories, high in fiber, and rich in vitamins A and C. - Basil: Contains antioxidants and supports heart health. - Pine Nuts: Offer healthy fats and protein. - Parmesan Cheese: Adds calcium and flavor. - Olive Oil: A good source of healthy fats and antioxidants. Each serving is light yet filling, making it a great choice for lunch or dinner. You can find the full recipe [here]. To make fresh pesto, gather your ingredients. You will need basil leaves, toasted pine nuts, Parmesan cheese, minced garlic, and olive oil. Place these in a food processor. First, pulse the basil, pine nuts, cheese, and garlic together. Add a pinch of salt and pepper. While the processor runs, slowly pour in the olive oil. This helps achieve a smooth and creamy texture. After blending, taste your pesto. Adjust the seasoning to your liking. Set it aside for now. Next, grab your zucchinis. Spiralize them into noodle shapes. In a large skillet, heat a tablespoon of olive oil over medium heat. Add the zucchini noodles once the oil is hot. Sauté for about 2-3 minutes. Keep them slightly crunchy, or al dente. This step is key, as overcooking can make them mushy. Once cooked, remove the skillet from heat. Now, it’s time to mix everything together. Add the pesto to the skillet with the zucchini noodles. Stir well to coat the noodles evenly. This is where the magic happens! Next, add chopped sun-dried tomatoes for extra flavor. If you like spice, sprinkle in crushed red pepper flakes. Toss all the ingredients together until well mixed. Serve your dish right away. Presentation matters, so use a large bowl. Create a nest of zucchini noodles and drizzle extra pesto on top. Garnish with toasted pine nuts for a beautiful finish. Enjoy your flavorful and fresh Zucchini Noodles with Pesto! For the full recipe, check [Full Recipe]. When picking zucchini, look for firm ones that are bright in color. Avoid any with soft spots or wrinkles. Smaller zucchinis taste better and are less watery. Aim for ones about six to eight inches long. This ensures a nice, crisp bite in your dish. You can also check the stem; it should be fresh and green. To make your pesto extra creamy, use a good blender or food processor. Start by blending the basil, pine nuts, and garlic first. Then, slowly add the olive oil while blending. This helps to emulsify the oil, making it smooth. You can add a bit more cheese or even a splash of lemon juice. This brightens the flavor and keeps it fresh. One common mistake is cooking zucchini for too long. Zucchini cooks quickly, so aim for just 2-3 minutes. This keeps it al dente and tasty. Also, avoid adding too much salt at the start. Salt pulls out moisture, making your noodles soggy. Instead, season them lightly before adding your pesto. Finally, don’t overcrowd the pan; cook in batches if needed. For the full recipe, check out the [Full Recipe]. {{image_2}} You can easily make this dish vegan. Instead of Parmesan cheese, use nutritional yeast. This swap gives a cheesy flavor without dairy. You still get a creamy pesto. Blend the rest of the ingredients as usual. This keeps the dish rich and tasty. If you have other dietary needs, don't worry. You can switch out ingredients. For gluten-free options, use gluten-free pasta or spiralized veggies. If you need a nut-free recipe, skip the pine nuts. Use sunflower seeds instead. These simple swaps keep the dish enjoyable for everyone. Zucchini is great, but you can change things up. Try adding fresh herbs like parsley or mint. They give a new twist to the flavor. You can also mix in seasonal veggies. In summer, add cherry tomatoes for sweetness. In fall, try roasted butternut squash for warmth. Each season brings fresh options. Enjoy the tasty variety! Store any leftover zucchini noodles with pesto in an airtight container. You want to keep them fresh and tasty. Place the container in the fridge. They will stay good for about two days. Add a few drops of olive oil to prevent sticking. This keeps the noodles from clumping together. If you used sun-dried tomatoes, they can add extra moisture. So, check for sogginess before storing. To reheat your zucchini noodles, use a skillet. Heat it on low to medium heat. Add a little olive oil to the pan, then toss in the noodles. Stir for about two to three minutes. This warms them up without making them mushy. You can also use a microwave. Put the noodles in a bowl and cover it. Heat on medium for about a minute or two. Check and stir halfway through to ensure even heating. Freezing zucchini noodles is not ideal. They can become watery when thawed. However, you can freeze pesto easily. Put it in ice cube trays for easy use later. Once frozen, pop the cubes into a bag. You can use frozen pesto straight from the freezer. Just add it to hot noodles, and it will melt right in. This way, you can enjoy homemade flavor anytime! For the full recipe, check out the details above. Yes, you can use other veggies. Carrots, bell peppers, or squash work well. Spiralize them just like zucchini. They add nice colors and flavors too. Each will give a new twist to your dish. Just remember to cook them until tender, but not mushy. To make nut-free pesto, skip the pine nuts. Use sunflower seeds instead. They blend nicely and add a good texture. You can also use hemp seeds for a different taste. The rest of the pesto stays the same. Use fresh basil and garlic for that classic flavor. Zucchini noodles with pesto pair well with many sides. A fresh salad adds crunch and brightness. Garlic bread is a great choice for dipping. You could also serve grilled chicken or shrimp on top for protein. Enjoy this dish with a light white wine for a special touch. For more ideas, check the Full Recipe for inspiration. Zucchini noodles with pesto offer a tasty and healthy meal. We covered the key ingredients and how to make them. I shared steps for cooking, tips for selecting fresh zucchini, and variations to suit diets. Proper storage and reheating tips will keep leftovers tasty. Remember, experimenting with flavors makes cooking fun. Enjoy your meal, and don’t hesitate to try new things in the kitchen.](https://dailydishly.com/wp-content/uploads/2025/06/e06d07df-0eee-433f-a13f-76c167ac26ec-768x768.webp)