Easy Vegan Pumpkin Mac and Cheese Simple and Quick

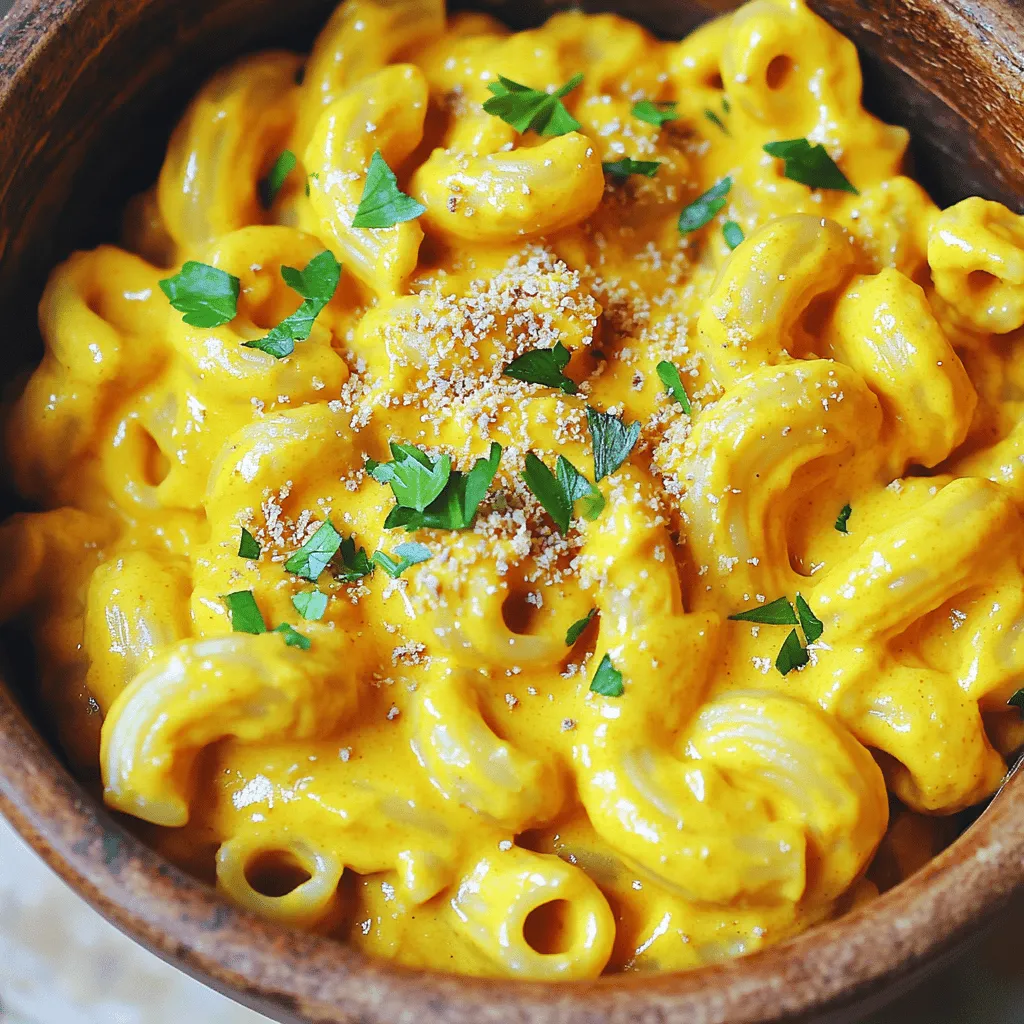
Craving a creamy, delicious meal? You can whip up Easy Vegan Pumpkin Mac and Cheese in no time! This dish is not just quick; it’s packed with flavor and healthy ingredients. Whether you’re vegan, lactose-free, or just looking for a tasty twist, this recipe satisfies everyone. Get ready to impress your family and friends with a comforting bowl of goodness that’s simple to make and even better to eat!
Ingredients
Complete list of ingredients
To make Easy Vegan Pumpkin Mac and Cheese, gather these ingredients:
– 8 ounces elbow macaroni (or any pasta of choice)
– 1 cup canned pumpkin puree
– 1 cup cashews (soaked in water for 2-4 hours and drained)
– 1 cup nutritional yeast
– 1 cup almond milk (or any non-dairy milk)
– 2 tablespoons olive oil
– 2 tablespoons lemon juice
– 1 teaspoon garlic powder
– 1 teaspoon onion powder
– 1 teaspoon smoked paprika
– Salt and pepper to taste
– Optional: fresh parsley, chopped (for garnish)
Recommended brands for key ingredients
I recommend these brands for the best results:
– Cashews: Choose raw, unsalted cashews from brands like Now Foods or Blue Diamond.
– Nutritional Yeast: Look for Bragg or Bob’s Red Mill for a great cheesy flavor.
– Almond Milk: Almond Breeze or Silk are both tasty and creamy options.
Nutritional information per serving
Each serving of this vegan mac and cheese is packed with nutrients:
– Calories: Approximately 350
– Protein: 12g
– Carbohydrates: 45g
– Dietary Fiber: 5g
– Fat: 16g
– Saturated Fat: 2g
– Sugar: 2g
– Sodium: 400mg
This dish is not only comforting but also provides a good source of plant protein and healthy fats. Enjoy this creamy delight while knowing it fuels your body well!
Step-by-Step Instructions
Cooking the pasta
First, fill a large pot with water. Add a pinch of salt to it. Next, bring the water to a boil. Once boiling, add 8 ounces of elbow macaroni. Cook the pasta until it is al dente, which usually takes about 8-10 minutes. After cooking, drain the pasta in a colander. Set it aside while you make the sauce.
Preparing the creamy pumpkin sauce
In a high-speed blender, gather your sauce ingredients. You need 1 cup of canned pumpkin puree, 1 cup of soaked cashews, and 1 cup of nutritional yeast. Also, add 1 cup of almond milk, 2 tablespoons of olive oil, and 2 tablespoons of lemon juice. Don’t forget 1 teaspoon of garlic powder, 1 teaspoon of onion powder, and 1 teaspoon of smoked paprika. Season with salt and pepper to taste. Blend these until the mixture is smooth and creamy. If it seems too thick, add a bit more almond milk.
Combining the pasta and sauce
In the pot you used for the pasta, pour the creamy pumpkin sauce over the macaroni. Stir the pasta and sauce together well. Make sure every piece of pasta gets coated. Place the pot on low heat. Stir continuously for about 2-3 minutes. Heat until everything is warm but do not let it boil. Once heated, taste the dish. Adjust the seasoning if needed. For the best look, serve this mac and cheese in bowls. Garnish with fresh parsley for a nice touch. Enjoy this dish that is both creamy and tasty!
Tips & Tricks
How to achieve the perfect creamy consistency
To get that creamy feel in vegan pumpkin mac and cheese, use soaked cashews. Soak them for 2-4 hours. This step helps blend them into a smooth mixture. If your sauce is too thick, add more almond milk. Blend well until it is silky. You want it to coat the pasta nicely. If you blend too little, your sauce may end up grainy.
Seasoning adjustments for flavor enhancement
Seasoning makes a big difference. Start with the basics like salt and pepper. Then, add garlic powder and onion powder for depth. Smoked paprika gives it a nice kick. If you want more flavor, try adding a pinch of cayenne pepper. Taste as you go. Adjust the seasonings based on your preference. A squeeze of lemon juice adds brightness too.
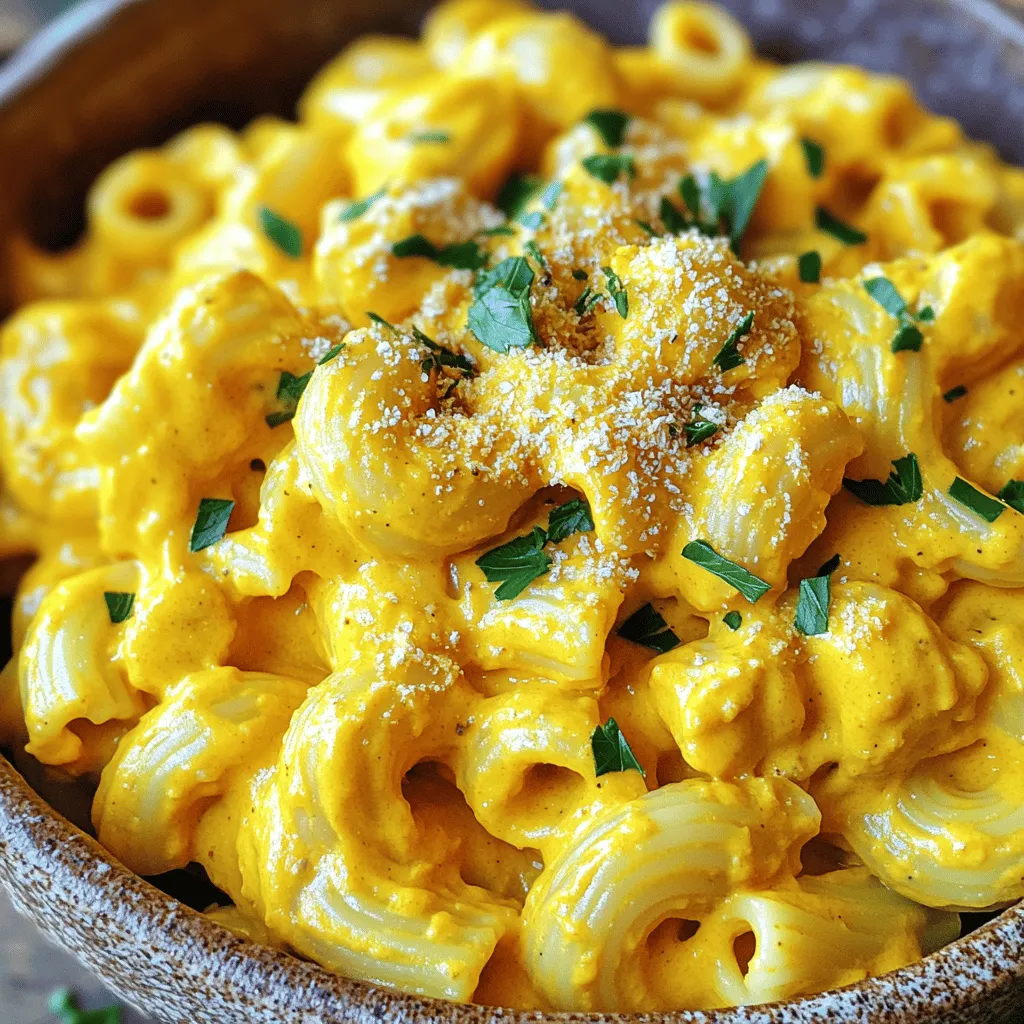
Best practices for serving and presentation
Presentation can make your dish pop. Serve the mac and cheese in colorful bowls. A sprinkle of fresh parsley adds a nice green touch. You can also add more nutritional yeast on top. This gives it a cheesy look and taste. For a fun twist, consider serving with a side of roasted veggies. This adds color and nutrition to your plate.

Variations
Adding vegetables for extra nutrition
You can boost the health of your vegan pumpkin mac and cheese by adding veggies. Spinach, kale, or broccoli work well. Just chop them into small pieces. Cook the vegetables in the pot while boiling the pasta. This way, they get tender but still keep their color. This adds fiber, vitamins, and minerals to your meal.
Alternative pasta choices
Elbow macaroni is classic, but other pasta types work great too. Try whole wheat, gluten-free, or chickpea pasta. These options change the taste and texture a bit. Whole wheat adds a nutty flavor. Gluten-free pasta is perfect for those with allergies. Chickpea pasta gives extra protein. Choose what you like best for your dish.
Spicy version with added ingredients
If you enjoy heat, make your mac and cheese spicy! Add jalapeños or red pepper flakes to the sauce. You can also stir in some hot sauce right before serving. This gives a nice kick without overpowering the pumpkin flavor. Adjust the spice level to match your taste. You can even top with crushed red pepper for extra heat!
Storage Info
Best methods for storing leftovers
To store leftover vegan pumpkin mac and cheese, let it cool first. Then, place it in an airtight container. This helps keep the flavors fresh. You can store it in the fridge for up to 4 days. Make sure to label the container with the date. This way, you know when to use it.
Reheating tips
When you are ready to eat your leftovers, reheat them gently. Use a pan on low heat for even warming. Add a splash of almond milk to help loosen the sauce. Stir often to avoid burning. You can also microwave it in a bowl. Heat it in short bursts, stirring in between. This keeps the creamy texture nice.
Freezing options and duration
You can freeze vegan pumpkin mac and cheese too! Just make sure it cools completely before freezing. Use a freezer-safe container or bag. It will stay good for about 2-3 months. When ready to eat, thaw it in the fridge overnight. Reheat it on the stove or in the microwave. For the best taste, use it sooner rather than later.
FAQs
Can I use other types of cheese?
No, this recipe uses no dairy cheese. However, you can try different vegan cheese brands. Some people like to mix in a bit of vegan cream cheese for extra creaminess.
Is this recipe gluten-free?
Yes, it can be gluten-free! Just choose gluten-free pasta. There are many great options on the market today. Look for brands that offer elbow macaroni made from rice or chickpeas.
How long does it take to make Easy Vegan Pumpkin Mac and Cheese?
Making this dish is quick! It takes about 30 minutes from start to finish. You can prep the ingredients while the pasta cooks.
What can I serve with vegan pumpkin mac and cheese?
You can serve this dish with a fresh salad or steamed veggies. Roasted broccoli or green beans pair nicely. For a hearty meal, add some grilled tofu or tempeh on the side.
This blog post covered how to make Easy Vegan Pumpkin Mac and Cheese. We looked at all the ingredients, brands to trust, and their nutrition. You learned simple steps for cooking pasta and making a creamy pumpkin sauce. I shared tips for the best flavor and looks. Plus, we explored tasty variations and how to store leftovers.
Making this dish is fun and easy. With these steps and tips, you can impress anyone at your next meal. Enjoy your cooking!


![Fresh spinach is the star of this soup. You will need 2 cups of roughly chopped spinach. This leafy green adds color and nutrients. Spinach is rich in vitamins A and C, making your soup healthy and vibrant. When you cook it, the spinach wilts and blends well with the other flavors. Tortellini brings heartiness to the soup. You can use fresh or frozen cheese tortellini, about 2 cups. Fresh tortellini cooks quickly, usually in 3-5 minutes. Frozen tortellini takes a bit longer. Whichever you choose, the soft pasta adds texture and a delightful bite to the creamy broth. Aromatics build the flavor base. You will need a medium onion, diced, and 3 minced garlic cloves. These add savory depth to the soup. A grated carrot, about one medium-sized, gives a touch of sweetness. Together, they create a warm, inviting aroma that fills your kitchen. Don't forget the olive oil! You will need 2 tablespoons to sauté the aromatics to perfection. For the full recipe, see the details above. To start, grab a large pot. Heat 2 tablespoons of olive oil over medium heat. Add 1 diced onion and sauté it until it softens, about 4-5 minutes. Next, stir in 3 minced garlic cloves and 1 grated carrot. Cook this mix for another 2-3 minutes. The garlic should smell great at this point. This base gives the soup a rich flavor. Now, pour in 4 cups of vegetable broth. Bring it to a gentle boil. Once boiling, add 2 cups of cheese tortellini. Follow the package instructions to cook them. Fresh tortellini usually takes about 3-5 minutes. You know they are ready when they float to the top. Reduce the heat to low. Stir in 2 cups of roughly chopped spinach, 1 cup of heavy cream, 1 teaspoon of dried basil, 1 teaspoon of salt, and 1/2 teaspoon of black pepper. Let the soup simmer for 5-7 minutes. This allows the spinach to wilt and the flavors to meld. Taste the soup and adjust the seasoning if needed. Serve it hot, topped with grated Parmesan cheese and fresh basil leaves if you wish. For the complete recipe, see the [Full Recipe]. To boost flavor, don't skip the onions and garlic. Sauté them well; it adds depth. A touch of dried basil brings warmth, while salt and pepper brighten all the tastes. If you want more zing, consider red pepper flakes. They give a lovely kick without overpowering the soup. Fresh herbs are also a great choice. Toss in some fresh basil or parsley right before serving for a fresh burst. If you like a thicker soup, add less broth or more cream. You can also use less tortellini. If the soup feels too thick, just stir in a bit more broth or water. This lets you control how creamy or brothy you want your soup. Using a hand blender can also help. Blend just a little bit to create a smoother base while keeping some chunks for texture. Cook the tortellini according to the package instructions. Fresh tortellini usually takes about 3-5 minutes. If you use frozen, check for the right cooking time. Adding them to boiling broth helps them cook quickly and evenly. They are done when they float to the top. Don’t forget to add them at the right time. If they overcook, they'll become mushy and lose their shape. Follow these tips to enjoy the perfect tortellini in your creamy soup. For more details, check the Full Recipe. {{image_2}} You can easily add protein to your creamy spinach tortellini soup. Chicken, turkey, or sausage work well. If you like shrimp, toss some in during the last few minutes of cooking. For a meatless option, try cooked lentils or chickpeas. These additions make your soup heartier and more filling. To make this soup vegan, swap out the heavy cream for coconut milk or cashew cream. Use vegetable broth instead of chicken broth for a rich base. Look for vegan tortellini in stores, or make your own with flour and water. Nutritional yeast can give a cheesy flavor without dairy. Feel free to mix in other veggies. Carrots and peas add sweetness and color. Zucchini or bell peppers can bring in fresh flavors. You can use frozen vegetables for convenience. Just add them during the cooking process so they heat through and blend well with the soup. For the full recipe, see the section above. After making the creamy spinach tortellini soup, let it cool to room temperature. Then, transfer it to an airtight container. Store it in the fridge for up to three days. If you want to enjoy it later, make sure you seal it well. This keeps the flavors fresh and tasty. You can freeze this soup for longer storage. First, let the soup cool completely. Then, pour it into freezer-safe containers. Leave some space at the top for expansion. The soup can freeze for up to three months. When you’re ready to eat it, just thaw it in the fridge overnight. To reheat, pour the soup into a pot over medium heat. Stir often to avoid sticking. Heat until it’s warm all the way through. If the soup is too thick, add a little broth or water. This will help restore its creamy texture. Enjoy this comforting meal again, just like the first time. For the full recipe, check out the earlier sections. Yes, you can use frozen spinach. Just thaw it first and drain excess water. Frozen spinach is often picked at peak freshness, so it can taste great. However, fresh spinach offers a brighter taste and texture. If you like a more vibrant green, go for fresh. You can thicken the soup in a few ways. One method is to add a cornstarch slurry. Mix one tablespoon of cornstarch with two tablespoons of cold water. Stir this into the soup and heat until it thickens. Another option is to blend part of the soup using an immersion blender. This keeps it creamy and rich. Parmesan cheese is a fantastic choice for adding flavor. It melts well and gives a nice salty kick. You can also try adding cream cheese for extra creaminess. If you want a stronger flavor, consider using sharp cheddar. Just sprinkle it in while the soup simmers for a delicious twist. For the complete recipe, check out the Full Recipe section. In this post, I covered the essentials for a delicious tortellini soup. We discussed key ingredients like fresh spinach, various tortellini, and aromatics. I provided step-by-step instructions for preparing and cooking your dish. I shared tips for enhancing flavors and adjusting texture. You also learned about tasty variations and proper storage methods. Remember, small swaps can greatly change your soup. Enjoy trying new flavors and make it your own! Your perfect tortellini soup awaits.](https://dailydishly.com/wp-content/uploads/2025/06/4c17d0e8-c88c-41b6-a4f3-bfc90cf6bf08-768x768.webp)


![- 2 cans (15 oz each) black beans, rinsed and drained - 1 tablespoon olive oil - 1 medium onion, finely chopped - 3 cloves garlic, minced - 1 chipotle pepper in adobo sauce, minced (or more for extra spiciness) - 1 teaspoon ground cumin - 1 teaspoon smoked paprika - Salt and black pepper to taste - 8 small corn or flour tortillas - 1 avocado, sliced - 1 cup cherry tomatoes, halved - Fresh cilantro, chopped for garnish - Lime wedges, for serving Using high-quality ingredients makes a big difference. I prefer fresh, whole foods. Canned beans are great too, but rinse them well. They taste better and are healthier. If you want a vegan dish, this recipe is perfect. Just use corn tortillas. They are usually gluten-free. If you need a gluten-free option, corn tortillas are a good choice. They add a nice crunch. You can also use whole wheat tortillas for a different flavor. - Sour cream - Shredded cheese - Sliced jalapeños Toppings can really enhance your tacos. I love adding sour cream for creaminess. Shredded cheese adds flavor. For heat, try sliced jalapeños. Making toppings at home is often better than store-bought. You control the taste and freshness. Plus, it's fun to experiment. Try making your own salsa or guacamole for a tasty twist. Start by heating the olive oil in a large skillet over medium heat. Once hot, add the finely chopped onion. Sauté it for about five minutes. When the onion softens, add the minced garlic and chipotle pepper. Stir for one to two minutes, until you smell the garlic. Next, add the black beans, ground cumin, smoked paprika, salt, and pepper. Cook this mixture for five to seven minutes. Stir occasionally and mash some beans with a fork. This will make the mixture creamy. If you taste it and think it needs more flavor, add more salt or spices. Now, let's warm the tortillas. You can use a dry skillet or a microwave. For the skillet, place the tortillas over medium heat. Heat each side for about 30 seconds or until they feel soft. If you use a microwave, wrap them in a damp paper towel and heat for 15 to 20 seconds. Corn tortillas can break easily, so handle them gently. Flour tortillas are more flexible, but both taste great! It's time to put everything together! Start by placing a warm tortilla on a plate. Spoon some of the spicy black bean mixture onto the center. Then, add sliced avocado and halved cherry tomatoes on top. Finish with a sprinkle of fresh cilantro for color and flavor. For a pretty presentation, arrange the tacos on a large platter. Add lime wedges next to them for squeezing. You can even serve them with a side of salsa for extra fun! For the full recipe, check out the details above. Temperature control is key when cooking beans. Start with medium heat. This helps the beans warm evenly without burning. Stir often to avoid sticking. The perfect texture for the bean mixture is creamy but not mushy. Lightly mash some beans as you cook. This gives a nice blend of smooth and chunky. To boost flavor, consider adding spices like chili powder or cayenne pepper. Fresh herbs like cilantro or parsley also add brightness. Marinating the bean mixture can deepen the flavor. Let it sit for at least 30 minutes to absorb the spices. This step is easy and makes a big difference. Meal prepping your ingredients is a smart way to save time. Chop onions and garlic a day ahead. You can also mash the beans in advance. Store each ingredient in separate containers. When you're ready, assembly is quick! For faster assembly, warm all tortillas at once. Use a large skillet to heat them. This way, you can serve warm tacos to everyone. For the full recipe, check out the details above. {{image_2}} You can change up your Spicy Black Bean Tacos by adding different proteins. If you want meat, try diced chicken or ground beef. For a plant-based option, use lentils or quinoa. Both options add new flavors and textures. You can spice up those chicken tacos with smoky seasonings. Add chipotle or cayenne for even more heat. Tacos vary by region, so you can get creative! For a twist, make black bean burritos by wrapping the filling in a larger tortilla. You could also create taco bowls by layering the ingredients in a bowl instead of a tortilla. Each method brings its own fun to the table and allows for more customization. Using seasonal produce makes your tacos fresh and vibrant. In summer, add grilled zucchini or corn for a sweet crunch. In the fall, try roasted butternut squash for a warm flavor. You can also use leftover veggies from your fridge. Toss them in with the black beans for a tasty, resourceful meal. To store your taco filling, first let it cool to room temperature. Place it in an airtight container. This keeps it fresh for up to four days in the fridge. If you want to freeze the bean mixture, use a freezer-safe container. Label it with the date. The filling can last up to three months in the freezer. To reheat, simply thaw it overnight in the fridge and warm it on the stove. Stir occasionally until heated through. Store leftover tortillas in a zip-top bag. This helps prevent them from drying out. Keep the bag in the fridge for best results. If your tortillas get stale, don’t worry! You can revive them. Just wrap them in a damp paper towel and microwave for 10-15 seconds. This will make them soft and pliable again. The black bean mixture will last in the fridge for about four days. Tortillas can last one to two weeks if stored well. To stay safe, always check for any odd smells or mold before eating. When in doubt, throw it out! Enjoy your Spicy Black Bean Tacos knowing you stored them safely. For the complete recipe, visit the [Full Recipe] link. To make your tacos less spicy, skip the chipotle pepper. You can also use bell peppers for flavor. Adding a dollop of sour cream or yogurt cools the heat too. If you want a milder taste, use less cumin and smoked paprika. Try adding sweet corn or diced tomatoes for a fresh twist. Yes, you can use canned black beans. They are safe and save you time. Just rinse and drain them to remove extra salt. Canned beans are cooked, so you only need to heat them in your taco mix. This makes cooking easier and faster. Pair your tacos with some tasty sides. Try serving them with Mexican rice or a fresh salad. Guacamole is a great dip too. If you want a drink, serve with limeade or iced tea. These sides balance the flavors and make your meal complete. For more ideas, check out the Full Recipe. In this post, I covered how to make Spicy Black Bean Tacos from start to finish. We explored key ingredients, cooking steps, and tips to enhance flavor and texture. I also shared ideas for variations, storage, and how to handle leftovers. Tacos are fun and easy to make. You can customize them any way you want. Enjoy your cooking adventure!](https://dailydishly.com/wp-content/uploads/2025/06/e30d655b-3f29-4259-b589-8a39593520a7-768x768.webp)
