Garlic Parmesan Roasted Cauliflower Soup Delight
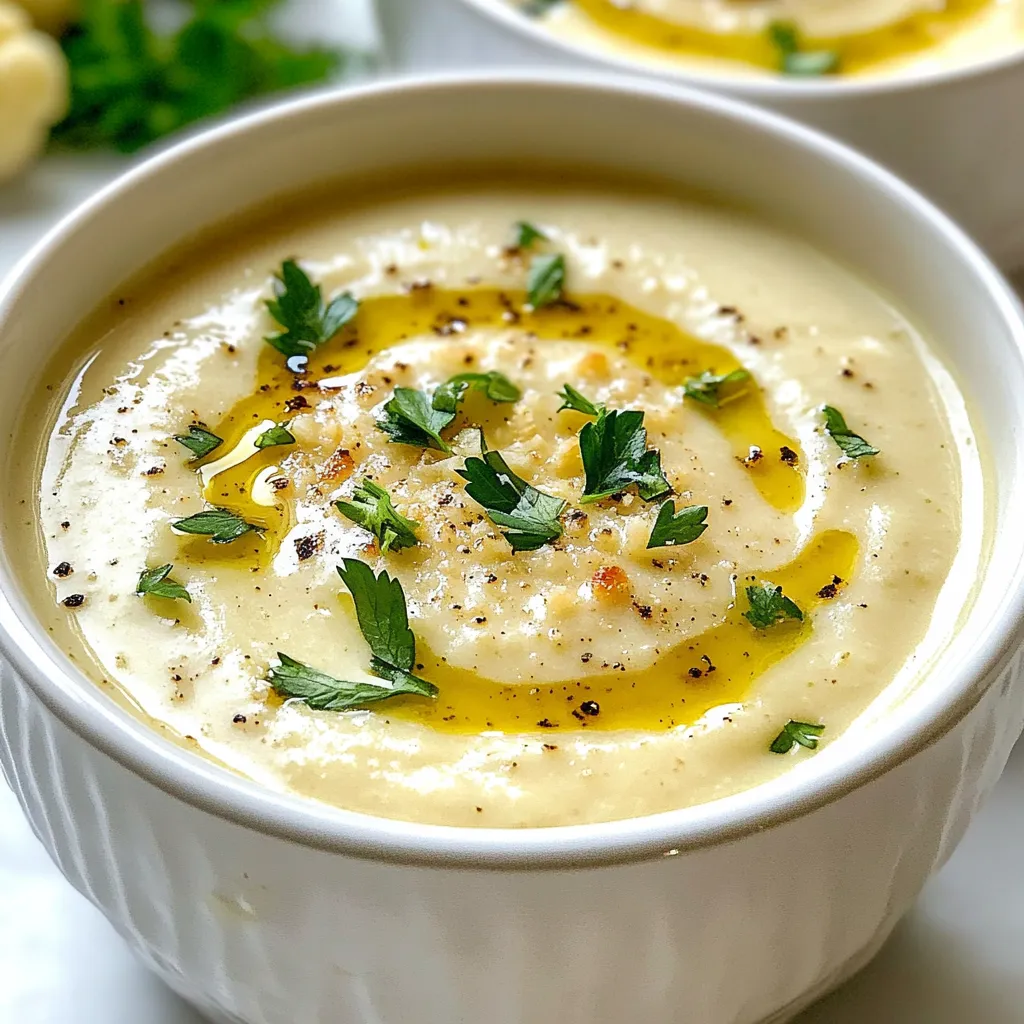
Looking for a warm, creamy delight? My Garlic Parmesan Roasted Cauliflower Soup is just what you need! This soup bursts with flavor and comforts you with each spoonful. With simple ingredients and easy steps, you can create a dish that impresses everyone. Let’s dive into the world of flavors, nutrition, and tips to make this soup your new favorite! You’ll love how quick and satisfying it is to make!
Why I Love This Recipe
- Delicious Flavor: This soup combines the rich taste of roasted cauliflower with garlic and Parmesan, creating a comforting and flavorful dish.
- Easy to Make: With simple ingredients and straightforward steps, this recipe is perfect for both novice and experienced cooks.
- Customizable: You can easily adapt this recipe to be vegan by substituting heavy cream with coconut cream and Parmesan with nutritional yeast.
- Healthy Option: Packed with vegetables and made from scratch, this soup is a nourishing choice for any meal.
Ingredients
List of Ingredients
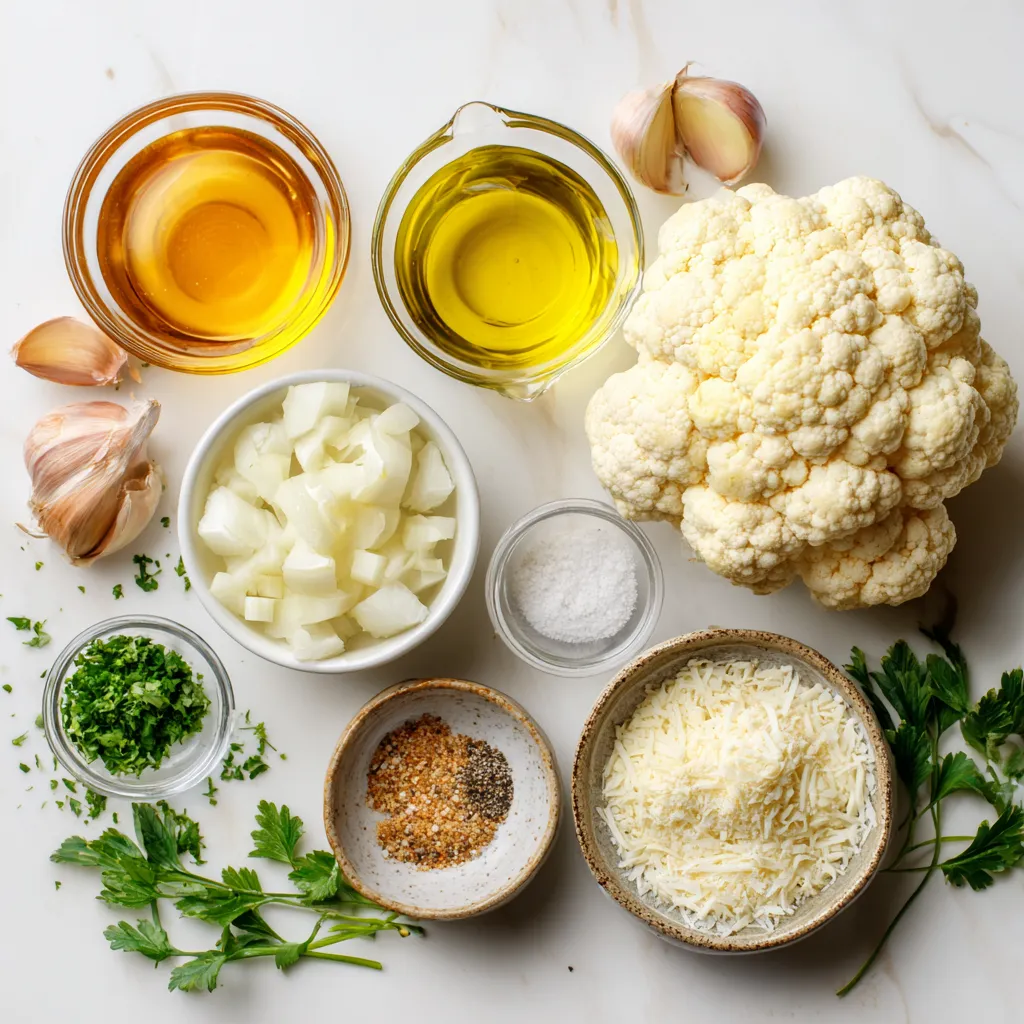
To make Garlic Parmesan Roasted Cauliflower Soup, you will need:
– 1 large head of cauliflower, cut into florets
– 4 tablespoons olive oil, divided
– 1 large onion, diced
– 5 cloves garlic, minced
– 4 cups vegetable broth
– 1 cup heavy cream or coconut cream for a vegan option
– 1 cup grated Parmesan cheese (use nutritional yeast for vegan)
– Salt and black pepper to taste
– Fresh parsley, chopped (for garnish)
Ingredient Substitutions
You can swap ingredients based on your needs. For a dairy-free version, use coconut cream and nutritional yeast instead of cheese. If you want a richer taste, add butter instead of olive oil. You can also change the broth to chicken broth if you prefer. If you don’t have fresh parsley, try using dried herbs like thyme or rosemary for some extra flavor.
Nutritional Information per Serving
Each serving of this soup offers a comforting mix of nutrients:
– Calories: 350
– Protein: 9g
– Total Fat: 28g
– Saturated Fat: 15g
– Carbs: 22g
– Fiber: 4g
– Sugars: 3g
This soup is great for a warm meal. It fills you up while also being healthy. Adjust the cream and cheese to lower the calories if needed. Enjoy this rich soup that is packed with flavor and nutrition!
Step-by-Step Instructions
Preparing the Cauliflower
Start by preheating your oven to 425°F (220°C). Take your large head of cauliflower and cut it into small florets. This helps them roast evenly. In a big bowl, toss the florets with 2 tablespoons of olive oil, salt, and black pepper. Make sure every piece is coated. Spread the florets on a baking sheet in a single layer. Roast them in the oven for 25-30 minutes. You want them golden and tender. Remember to stir them halfway through for even cooking.
Sautéing Aromatics
While the cauliflower roasts, grab a large pot and heat the remaining 2 tablespoons of olive oil over medium heat. Add the diced onion and sauté until it turns translucent, about 5-7 minutes. This step builds a nice base for your soup. Then, add the minced garlic and cook for 2 more minutes. The garlic should smell amazing at this point.
Blending for Smoothness
Once your cauliflower is roasted, add it to the pot with the onions and garlic. Pour in 4 cups of vegetable broth and stir well. Bring this mixture to a gentle simmer and cook for about 10 minutes. After that, remove the pot from heat. Now, use an immersion blender to puree the soup until it’s smooth and creamy. If you don’t have an immersion blender, you can carefully transfer it to a blender in batches. Just be cautious with hot liquids. Return the pot to low heat, and stir in 1 cup of heavy cream (or coconut cream for a vegan option) and 1 cup of grated Parmesan cheese. Mix until fully melted. Add more salt and pepper to taste. Your soup is ready to serve!
Tips & Tricks
Perfect Roasting Techniques
Roasting the cauliflower right makes a big difference. First, cut the cauliflower into small florets. This helps them cook evenly. Toss the florets in olive oil, salt, and pepper. I use two tablespoons of oil for a rich taste. Spread the florets on a baking sheet. Make sure they are in a single layer. This allows them to roast well. Bake at 425°F (220°C) for 25 to 30 minutes. Stir the cauliflower halfway through to ensure even browning. When it turns golden brown, you know it’s ready!
Achieving Creaminess
To make the soup creamy, I use heavy cream. If you want a vegan option, coconut cream works great too. After blending the roasted cauliflower with broth, add the cream. Return the pot to low heat and stir. This step brings the soup together. It ensures the flavors meld well. Always taste and adjust seasoning with salt and pepper.
Flavor Enhancements
For more flavor, I love adding garlic. Sauté it with the onions until fragrant. Using fresh parsley as a garnish adds a nice touch. You can also sprinkle extra Parmesan cheese on top. If you want a kick, try a pinch of red pepper flakes. This simple addition can elevate your soup’s flavor.
Pro Tips
- Roasting Technique: Ensure the cauliflower is spread out in a single layer on the baking sheet to promote even roasting and achieve that perfect golden color.
- Vegan Option: Substitute heavy cream with coconut cream and use nutritional yeast instead of Parmesan cheese for a creamy, dairy-free alternative.
- Immersion Blender Tip: If using an immersion blender, let the soup cool slightly before blending to avoid splatters, or blend in small batches if transferring to a regular blender.
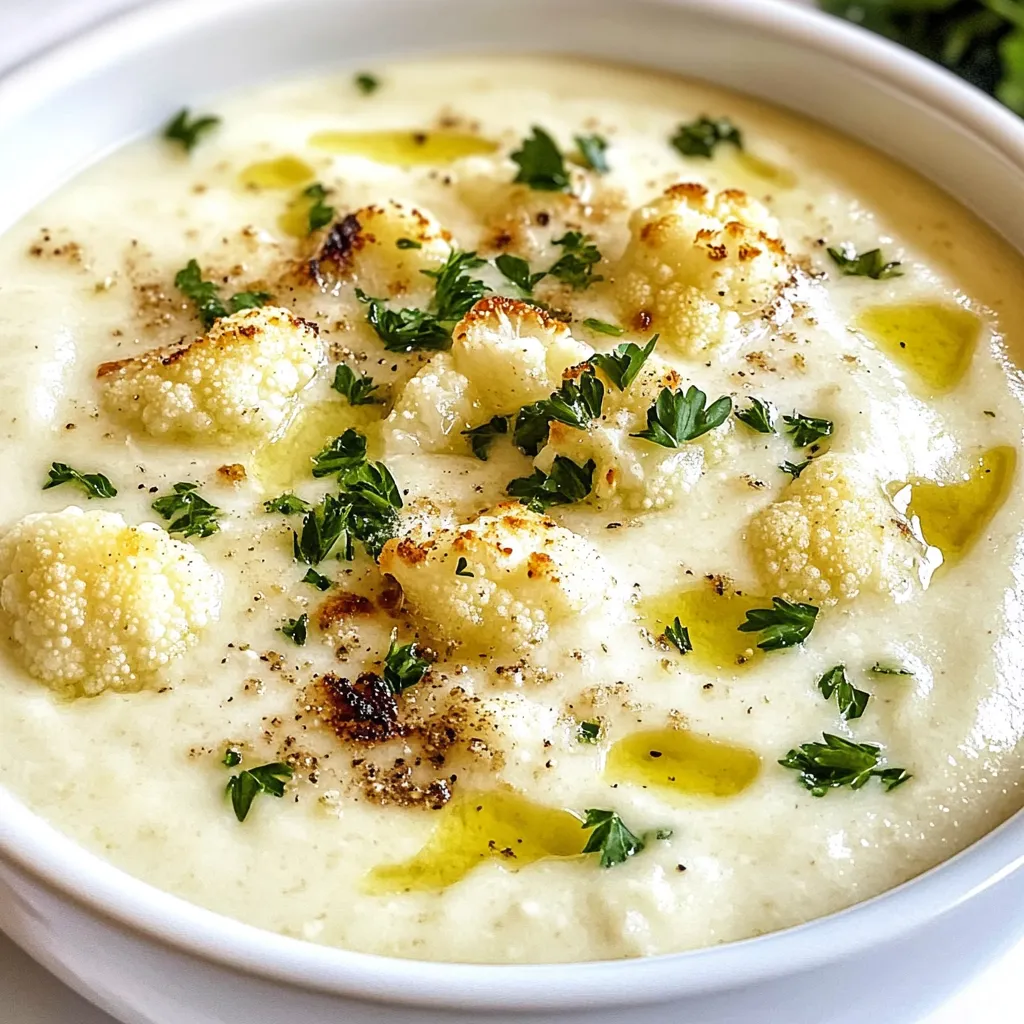
- Garnishing Ideas: Consider adding toasted croutons or a drizzle of olive oil on top of the soup for added texture and flavor.
Variations
Vegan Options
To make this soup vegan, swap heavy cream for coconut cream. It adds a nice richness. Instead of Parmesan cheese, use nutritional yeast. This keeps the cheesy flavor without dairy. You can still enjoy the same creamy texture and taste.
Add-ins for Extra Flavor
Want to boost flavor? Add a squeeze of lemon juice. It brightens the soup and adds depth. You can also mix in some roasted garlic for a sweeter taste. A handful of spinach or kale will add nutrition and color. They will wilt nicely into the hot soup.
Spice Level Adjustments
If you like heat, add some red pepper flakes. Start with a pinch and adjust to your taste. For a milder soup, skip the spice altogether. You can also try adding smoked paprika for a smoky flavor without heat. Each option brings a new twist to the dish.
Storage Info
Refrigerating Leftovers
You can store leftover soup in the fridge. Place it in an airtight container. It will stay fresh for about 3 to 4 days. Make sure to let it cool before sealing the lid. This helps keep the soup creamy and tasty.
Freezing Instructions
You can freeze this soup for later use. Allow it to cool completely first. Pour the soup into freezer-safe containers. Leave some space at the top, as it will expand when frozen. It can last for up to 3 months in the freezer. When you’re ready to eat, just thaw it overnight in the fridge.
Reheating Tips
Reheating this soup is easy. For the best taste, use a pot on the stove. Heat on low and stir often until warm. If it seems thick, add a bit of broth or water. You can also microwave it in a safe bowl. Cover it loosely and heat in short bursts. Stir between each burst to warm evenly. Enjoy your delicious soup again!
FAQs
How to Make Garlic Parmesan Roasted Cauliflower Soup Vegan?
To make this soup vegan, swap the heavy cream for coconut cream. You can also use nutritional yeast instead of Parmesan cheese. These changes keep the soup creamy and rich without dairy.
When you cook the soup, follow the same steps as in the recipe. The flavor will still be amazing! Coconut cream adds a slight sweetness, while nutritional yeast gives it a cheesy taste.
Can I Use Different Broths or Creams?
Yes, you can! Feel free to use any broth you like. Chicken broth or mushroom broth can add depth. Just remember, using vegetable broth keeps it vegan.
For cream, coconut cream is a great choice. You can also try cashew cream or almond milk for a lighter soup. Each option brings a unique flavor to the dish.
How Long Does This Soup Last?
This soup lasts about 4 to 5 days in the fridge. Store it in an airtight container to keep it fresh.
You can also freeze the soup for up to 3 months. Just make sure to let it cool first. When you’re ready to eat, thaw it overnight in the fridge. Reheat it on the stove or in the microwave until hot.
This blog post walked you through making a delicious garlic Parmesan roasted cauliflower soup. We covered the key ingredients, healthy swaps, and detailed preparation steps. You learned tips for perfect roasting, achieving creaminess, and enhancing flavors. Variations allow you to customize the soup, and we discussed proper storage for leftovers.
In my experience, this soup is easy and rewarding to make. Enjoy the cooking process and share it with friends. Happy cookin
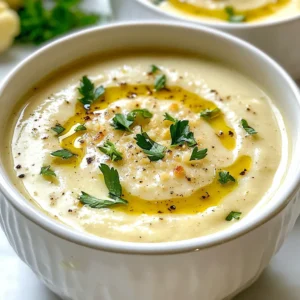
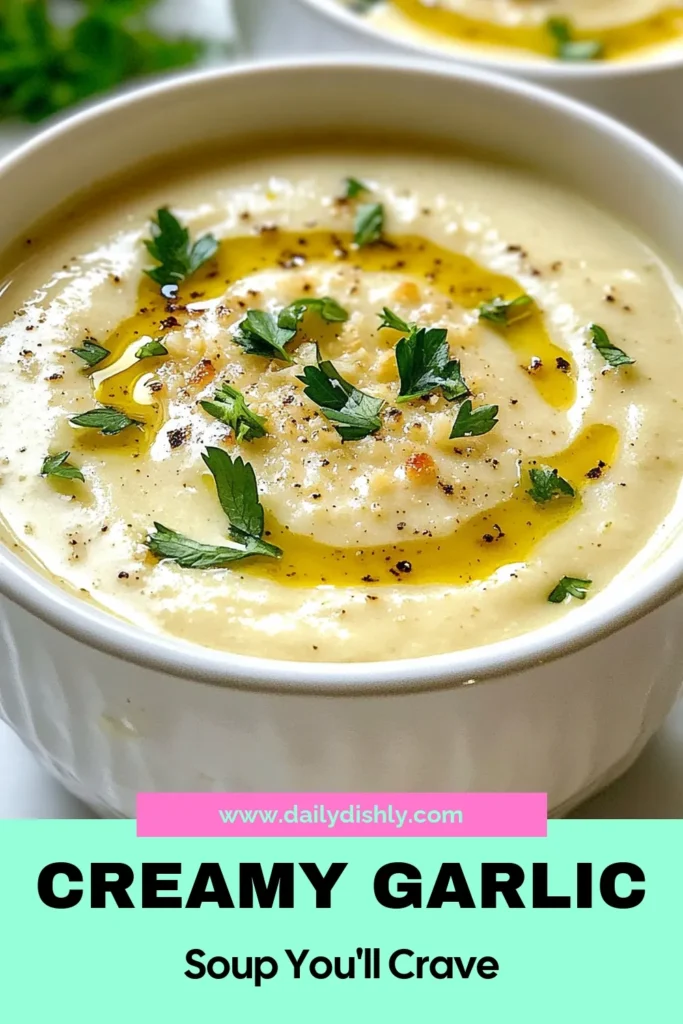
Creamy Garlic Parmesan Roasted Cauliflower Soup
Ingredients
- 1 large head cauliflower, cut into florets
- 4 tablespoons olive oil, divided
- 1 large onion, diced
- 5 cloves garlic, minced
- 4 cups vegetable broth
- 1 cup heavy cream or coconut cream for a vegan option
- 1 cup grated Parmesan cheese (use nutritional yeast for vegan)
- to taste Salt and black pepper
- to taste Fresh parsley, chopped (for garnish)
Instructions
- Preheat your oven to 425°F (220°C).
- In a large bowl, toss the cauliflower florets with 2 tablespoons of olive oil, salt, and pepper. Spread the cauliflower on a baking sheet in a single layer.
- Roast the cauliflower in the preheated oven for about 25-30 minutes, or until golden and tender. Stir halfway through for even cooking.
- While the cauliflower is roasting, heat the remaining 2 tablespoons of olive oil in a large pot over medium heat. Add the diced onion and sauté until translucent, about 5-7 minutes. Add the minced garlic and cook for an additional 2 minutes until fragrant.
- Once the cauliflower is roasted, add it to the pot with the onions and garlic. Pour in the vegetable broth, stirring to combine. Bring the mixture to a simmer and cook for about 10 minutes.
- Remove the pot from heat and use an immersion blender to puree the soup until smooth and creamy. You can also transfer the soup in batches to a blender if you don’t have an immersion blender—just be cautious with hot liquids.
- Return the pot to low heat, and stir in the heavy cream and grated Parmesan cheese until fully melted and incorporated. Season with additional salt and pepper to taste.
- Serve hot, garnished with fresh parsley for a pop of color.




![- 400g spaghetti - 6 cloves garlic, thinly sliced - ½ cup extra virgin olive oil - 1 teaspoon red pepper flakes - Grated Parmesan cheese for serving - Freshly cracked black pepper - 1 cup fresh parsley, chopped - 1 lemon (zest and juice) - Salt to taste When making Spaghetti Aglio e Olio, you want to keep it simple. The main ingredients shine through. Start with quality spaghetti, as it forms the base of your dish. I always use 400g for four servings. For that distinct flavor, thinly slice 6 cloves of garlic. The garlic adds a rich aroma and taste as it cooks. Don't forget the olive oil! Use ½ cup of extra virgin olive oil to sauté the garlic. To kick it up a notch, consider some optional ingredients. A teaspoon of red pepper flakes adds heat. Adjust it to fit your spice level. If you love cheese, grated Parmesan is a nice touch for serving. Freshly cracked black pepper adds a lovely finish. For freshness, I like to add a cup of chopped parsley. It brings color and taste to the dish. The zest and juice from one lemon brighten the flavors. Salt is essential for enhancing every ingredient. Feel free to adjust the salt to your preference. This recipe is all about balance and freshness. Gather these ingredients for a quick and delicious meal. For the complete recipe, check out the [Full Recipe]. 1. Boil water and salt: Start by filling a large pot with water. Add a generous amount of salt to make it flavorful. Bring it to a rolling boil. 2. Cook until al dente: Add the spaghetti to the boiling water. Stir occasionally. Cook according to package instructions until it is al dente, which means firm to the bite. 3. Reserve pasta water before draining: Before you drain the pasta, remember to save about one cup of that starchy pasta water. It helps to make the sauce creamy later. 1. Heat olive oil in a skillet: In a large skillet, pour in the olive oil. Turn the heat to medium. Let the oil warm up but not smoke. 2. Sauté garlic until golden: Add the thinly sliced garlic to the warm oil. Cook it gently for about 2-3 minutes. Watch it closely until it turns golden and fragrant. Be careful not to let it burn. 3. Mix in red pepper flakes: Stir in the red pepper flakes. Let them cook for an extra minute. This step adds a nice kick to the oil. 1. Toss spaghetti with garlic oil: Add the drained spaghetti to the skillet with the garlic oil. Toss it well to coat every strand. 2. Add reserved pasta water: Pour in a bit of the reserved pasta water. This helps to keep the spaghetti moist and binds the flavors. 3. Incorporate parsley, lemon, and seasoning: Off the heat, mix in the chopped parsley, lemon zest, and juice. Taste it and adjust the salt if needed. This easy recipe gives you a simple yet flavorful dish. For the full recipe, check out the details above. Enjoy every bite of your savory spaghetti aglio e olio! - Avoid overcooking pasta: Cook spaghetti until it's al dente. This means it should be firm when you bite into it. This texture helps the pasta hold up better when you mix it with the sauce. - Importance of seasoning the boiling water: Always add salt to your boiling water. This helps flavor the pasta from the inside. Use about 1-2 tablespoons for every 4 quarts of water. - Timing for sautéing garlic: Add sliced garlic to the oil once it’s hot. Cook it for about 2-3 minutes. This timing helps unlock its rich flavor without going too far. - How to avoid burning garlic: Keep an eye on the garlic as it cooks. If it starts to turn brown too quickly, lower the heat. Burnt garlic can taste bitter and ruin your dish. - Presentation tips for a restaurant-style dish: Serve your spaghetti on warmed plates. This keeps the pasta hot longer. Add a sprinkle of fresh parsley on top for color. A lemon wedge on the side adds a nice touch. - Pairing options for sides or drinks: A simple green salad pairs well with spaghetti. You can also serve it with garlic bread for a full meal. For drinks, a glass of white wine complements the flavors nicely. For more details on how to make this dish, check out the Full Recipe. {{image_2}} You can change some ingredients to fit your needs. If you want gluten-free spaghetti, you can find many great options in stores. These work well in this recipe. If you prefer garlic-infused oil, use it instead of plain olive oil. This option adds even more garlic flavor to your dish. Adding vegetables makes this dish even better. Try mixing in fresh spinach or sweet cherry tomatoes. These add color and nutrients. You can also mix in proteins like shrimp or grilled chicken. Both options create a heartier meal and offer more flavors. Fresh herbs can brighten up this dish. Basil or oregano are great choices. Just chop them finely and mix them in at the end. If you like heat, adjust the spice level. Use different types of peppers, like jalapeños or serranos, to switch things up. Each pepper brings its own unique flavor to your spaghetti. For the Full Recipe, check out the complete details! To keep your Spaghetti Aglio e Olio fresh, store it in the fridge. Place the leftover pasta in an airtight container. This helps to keep moisture in and prevents the pasta from drying out. You can also cover the container tightly with plastic wrap. The best containers for storage are glass or BPA-free plastic. Glass containers allow you to see the food inside. They also do not absorb odors. Plastic containers are lightweight and easy to stack. Just make sure they seal well. When it's time to eat your leftovers, you have two options: the microwave or the stove. The microwave is quick. Place the pasta in a microwave-safe dish. Cover it with a lid or damp paper towel to keep moisture in. Heat for 1-2 minutes, stirring halfway through. Using the stove gives you better results. Add a splash of olive oil or water to a skillet. Heat over low to medium heat. Stir gently until warm. This method helps keep the pasta moist. Yes, you can freeze Spaghetti Aglio e Olio! Freezing is great for making meals ahead of time. First, let the pasta cool completely. Then, place it in a freezer-safe container. Make sure to leave some space at the top for expansion. To freeze, follow these steps: 1. Portion the pasta into single servings. 2. Seal each portion tightly in a plastic bag or container. 3. Label the bags with the date for easy tracking. When you want to eat it, thaw it in the fridge overnight. Reheat as described above. Enjoy your easy dinner later! For the full recipe, check the Full Recipe section above. Spaghetti Aglio e Olio can last in the fridge for up to three days. Store it in an airtight container to keep it fresh. It’s best to eat it within this time for the best flavor. Yes, you can make Spaghetti Aglio e Olio ahead of time. Cook the pasta and sauce, then cool them down. You can store them separately in the fridge. When ready to serve, just reheat and combine. This dish is quick to prepare, so making it fresh is great too. You can serve Spaghetti Aglio e Olio with many tasty options. Consider garlic bread for a crunchy side. A simple salad with fresh greens works well too. You might also enjoy antipasto or bruschetta to start your meal. To reheat Spaghetti Aglio e Olio, follow these steps: 1. Place the pasta in a skillet over low heat. 2. Add a splash of reserved pasta water or olive oil to prevent sticking. 3. Stir gently until heated through, about 5 minutes. 4. Serve hot to enjoy the full flavor of the dish. For the full recipe, check out the detailed instructions for a perfect dish every time! Spaghetti Aglio e Olio is simple yet flavorful. We covered the main and optional ingredients, how to cook and combine them, plus tips for the best results. Variations allow for personal twists, making this dish your own. Proper storage and reheating ensure you enjoy it later. Whether you stick to tradition or experiment, this dish will impress. Enjoy cooking and sharing this tasty meal!](https://dailydishly.com/wp-content/uploads/2025/05/5a127dfa-b261-495f-ad6e-6f110f891143-768x768.webp)
