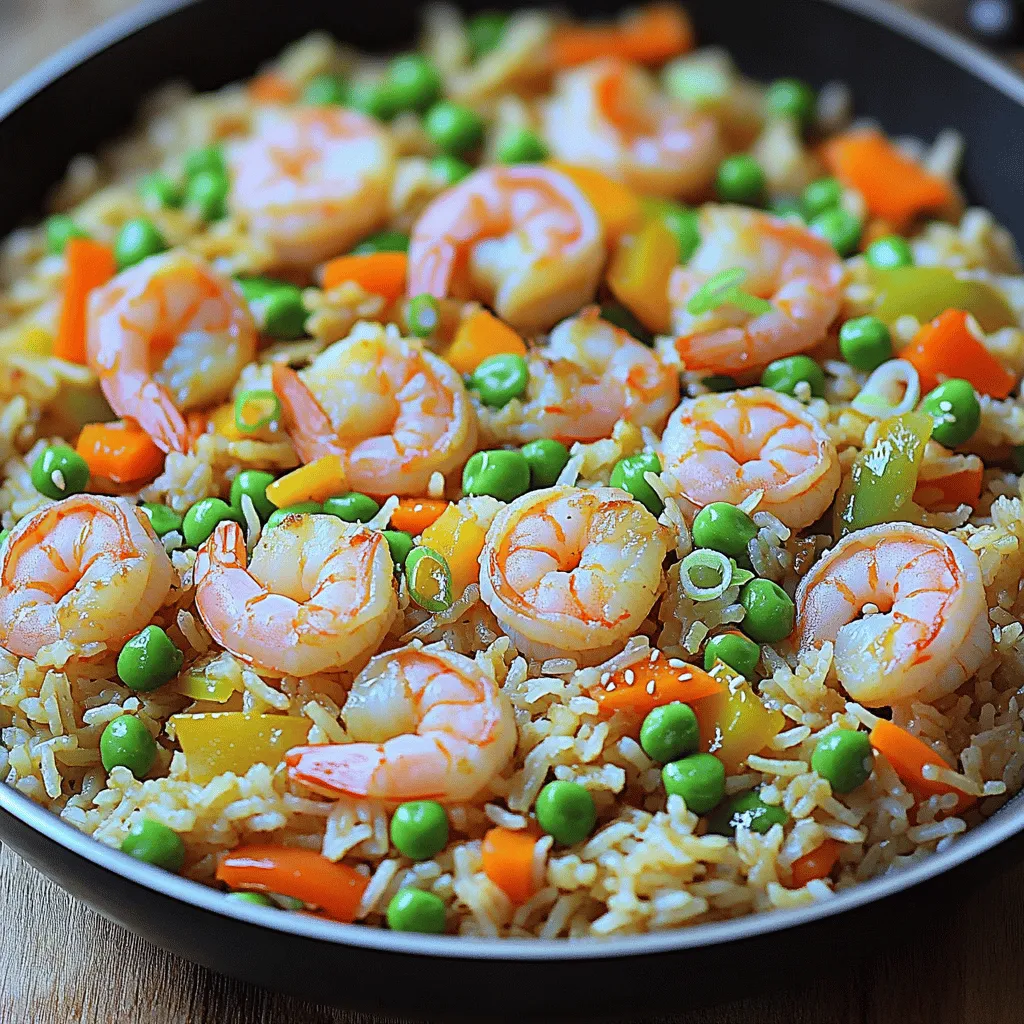
Are you ready to whip up a delicious and quick meal? This Easy Shrimp Fried Rice recipe is your answer! With simple ingredients and easy steps, you’ll be serving up a flavorful dish in no time. Whether you’re a busy parent or a cooking newbie, this meal makes dinner stress-free. Let’s dive into this tasty and satisfying recipe that you can enjoy any day of the week!
Ingredients
Main Ingredients for Easy Shrimp Fried Rice
– 1 cup uncooked jasmine rice
– 1 pound shrimp, peeled and deveined
– 2 tablespoons vegetable oil
Additional Ingredients
– 2 cloves garlic, minced
– 1 cup mixed vegetables (peas, carrots, bell peppers)
– 3 tablespoons soy sauce
Optional Ingredients
– 1 tablespoon sesame oil
– Green onions, sliced (for garnish)
In this recipe, I use jasmine rice for its soft texture and great flavor. The shrimp adds protein and a touch of sweetness. Vegetable oil helps to fry everything nicely and keeps it from sticking.
Garlic gives a wonderful aroma and taste. Mixed vegetables add color and crunch. Soy sauce provides that savory umami flavor. If you like, you can use sesame oil for a nutty twist, and green onions make a fresh garnish.
This easy shrimp fried rice recipe is perfect for busy nights.
Step-by-Step Instructions
Preparing the Rice
– Rinse the jasmine rice until water runs clear. This helps remove excess starch.
– Cook rice with water or low-sodium chicken broth. This adds great flavor to the rice.
Sautéing the Aromatics and Shrimp
– Heat vegetable oil in a large skillet over medium-high heat. This is where the magic starts.
– Sauté minced garlic and chopped onion until fragrant and soft. It takes about 2-3 minutes.
– Add the shrimp to the skillet. Cook until they turn pink and opaque, about 2-3 minutes. This step locks in flavor.
Mixing Ingredients Together
– Add mixed vegetables to the skillet. Cook them until tender, which should take another 2-3 minutes.
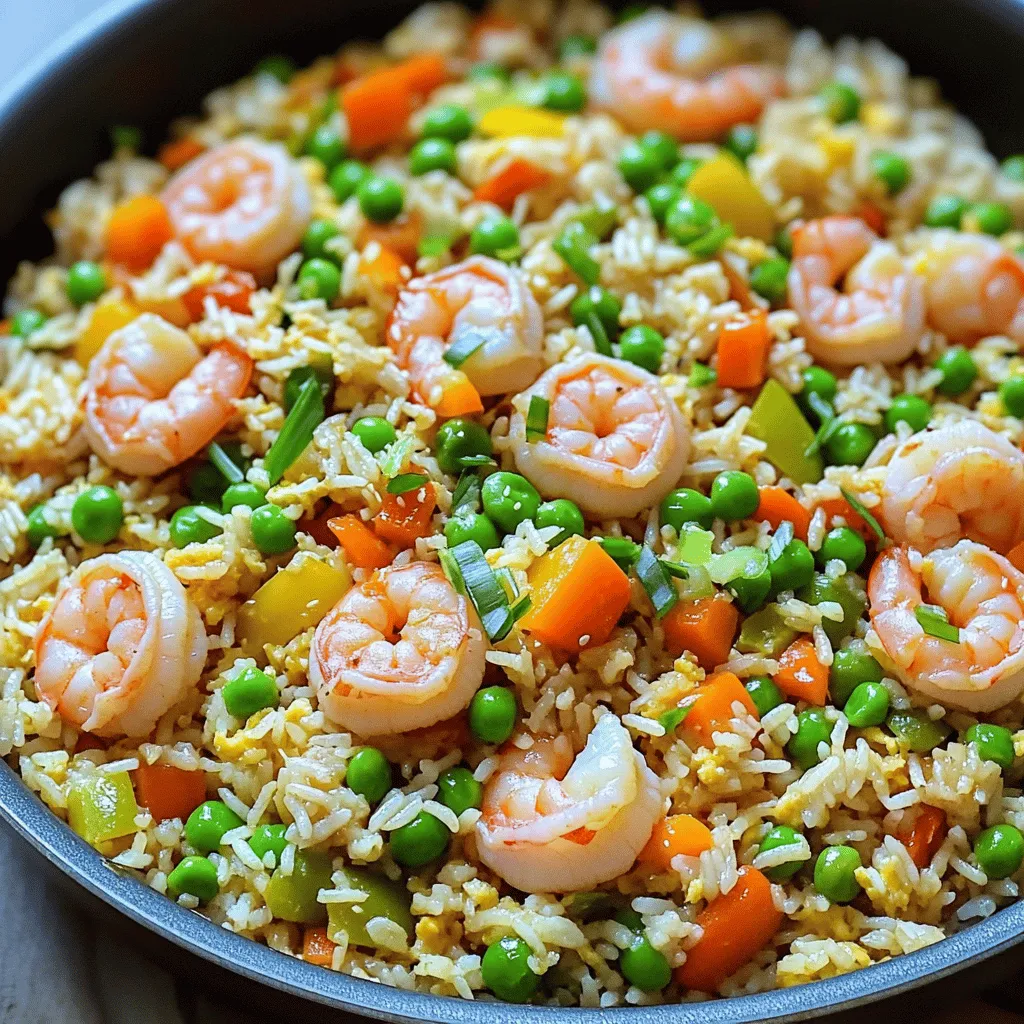
– Push the veggies to one side of the skillet. Pour in the beaten eggs on the other side and scramble them.
– Mix in the cooled rice along with the shrimp. Stir everything together for a perfect blend.
– Drizzle soy sauce and sesame oil over the mixture. Stir well to combine and season with salt and pepper. Cook for 2-3 minutes until heated through.
– Garnish with sliced green onions before serving. This adds a nice, fresh touch.Enjoy your quick and tasty meal!
Tips & Tricks
Perfecting Your Shrimp Fried Rice
To cook rice perfectly, start with rinsing jasmine rice. Rinse until the water runs clear. This step removes extra starch and helps prevent clumping. Use a pot with a tight lid. Combine 1 cup of rinsed rice with 2 cups of water or low-sodium chicken broth. Bring it to a boil, then lower the heat and cover. Let it simmer for about 15 minutes. Fluff the rice with a fork and let it cool before mixing.
For frying, I recommend vegetable oil for its high smoke point. You can also use peanut oil for a nutty flavor. Both oils work well for high heat cooking.
Enhancing Flavor
Using fresh ingredients adds vibrant taste and texture. Fresh shrimp gives a juicy bite, while fresh veggies bring color. Frozen ingredients are okay but may lack the same crunch. If you use frozen, thaw and drain them well before cooking.
Adjust the soy sauce based on your taste. Start with 3 tablespoons and taste as you go. If you like it saltier, add more. For a milder flavor, try low-sodium soy sauce or tamari.
Timing and Temperature
High heat is key for great fried rice. It helps achieve that perfect crispy texture. Heat your pan before adding oil. Once the oil shimmers, add garlic and onion. This step ensures they are fragrant and cooked well.
Cook the shrimp first, then set it aside. Next, add the veggies. This cooking order keeps everything fresh and flavorful. Finally, mix everything together at high heat. This method ensures every bite is delicious.
Variations
Protein Alternatives
You can swap out shrimp for chicken or tofu. Chicken gives a hearty taste. Just cook it until golden brown. Tofu adds a nice texture and can soak up all the flavors. For a vegetarian version, skip the eggs. You can still enjoy a tasty meal.
Veggie Add-Ins
Feel free to customize with your favorite vegetables. Peas and carrots work well. Bell peppers add a nice crunch. You can also add broccoli or corn. If you like heat, toss in some chili peppers or a splash of sriracha. These spicy additions will kick up the flavor.
Sauces and Seasonings
Try different sauces to enhance the taste. Sweet soy sauce adds a fun twist. You can also use oyster sauce for more depth. If you need gluten-free options, use tamari instead of regular soy sauce. It tastes great and keeps the dish safe for everyone.
Storage Info
Storing Leftovers
To keep your shrimp fried rice fresh, store it in the refrigerator. Use an airtight container to prevent moisture loss. Make sure it cools down before sealing the container. This helps avoid soggy rice. You can store it for up to four days.
If you want to freeze it, let the fried rice cool completely. Then, place it in a freezer-safe bag or container. Remove as much air as possible to prevent freezer burn. It can last for about three months in the freezer.
Reheating Instructions
Reheating fried rice can be tricky. You want to keep it tasty and not mushy. The best method is to use a skillet. Heat a little oil over medium heat. Add the fried rice and stir it gently. This warms it through without losing its texture.
You can also use the microwave. Place the rice in a bowl and cover it with a damp paper towel. Heat it in 30-second bursts, stirring in between. This method helps keep the rice moist.
Shelf Life
Shrimp fried rice is best enjoyed fresh. However, when stored properly, it can last. In the fridge, it stays good for about four days.
Keep an eye out for signs that it has gone bad. If it smells sour or has strange colors, it is time to throw it away. Always trust your nose and eyes when it comes to food safety.
FAQs
How do I make shrimp fried rice from scratch?
To make shrimp fried rice from scratch, follow these key steps:
1. Rinse the rice until the water is clear. This removes extra starch.
2. Cook the rice using water or chicken broth. This adds flavor.
3. Heat vegetable oil in a large skillet. Sauté garlic and onion until soft.
4. Add shrimp to the skillet. Cook until they turn pink.
5. Stir in mixed vegetables and cook until tender.
6. Push everything to one side and scramble eggs on the other side.
7. Mix in the cooled rice with the shrimp and veggies.
8. Drizzle soy sauce and sesame oil over the mix.
9. Stir well and season with salt and pepper to taste.
This method makes a tasty and quick meal.
What is the best rice to use for fried rice?
The best rice for fried rice is jasmine rice. Here’s why:
– Texture: Jasmine rice has a light, fluffy texture. This helps it separate easily when frying.
– Flavor: It has a subtle floral aroma that enhances the dish.
– Comparison: Long-grain rice works too, but it may not have the same flavor. Short-grain rice can be sticky, which isn’t ideal for fried rice.
Using jasmine rice gives your dish the best taste and texture.
Can I make shrimp fried rice ahead of time?
Yes, you can make shrimp fried rice ahead of time. Here are some tips:
– Prep in Advance: Cook the rice a day before. Cool it and store it in the fridge.
– Store Properly: Keep cooked shrimp and veggies separate until you are ready to fry them.
– Reheat with Care: When you are ready to serve, use a hot skillet. This helps bring back the texture.
Making this dish ahead of time can save you cooking time later!
Shrimp fried rice is simple and tasty. We covered key ingredients, step-by-step instructions, and helpful tips. You can use different proteins or veggies to change things up. Storing and reheating is easy with the right methods. With this guide, you can make perfect shrimp fried rice at home. Enjoy personalizing it to fit your taste. Cook it well, and it’ll be a hit every time!


