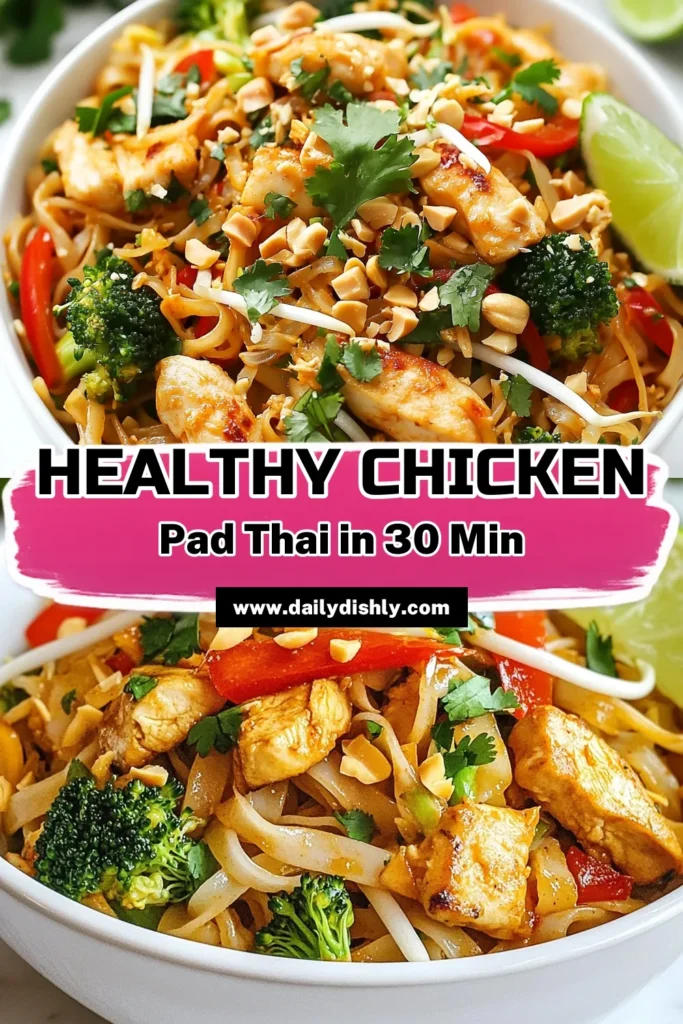
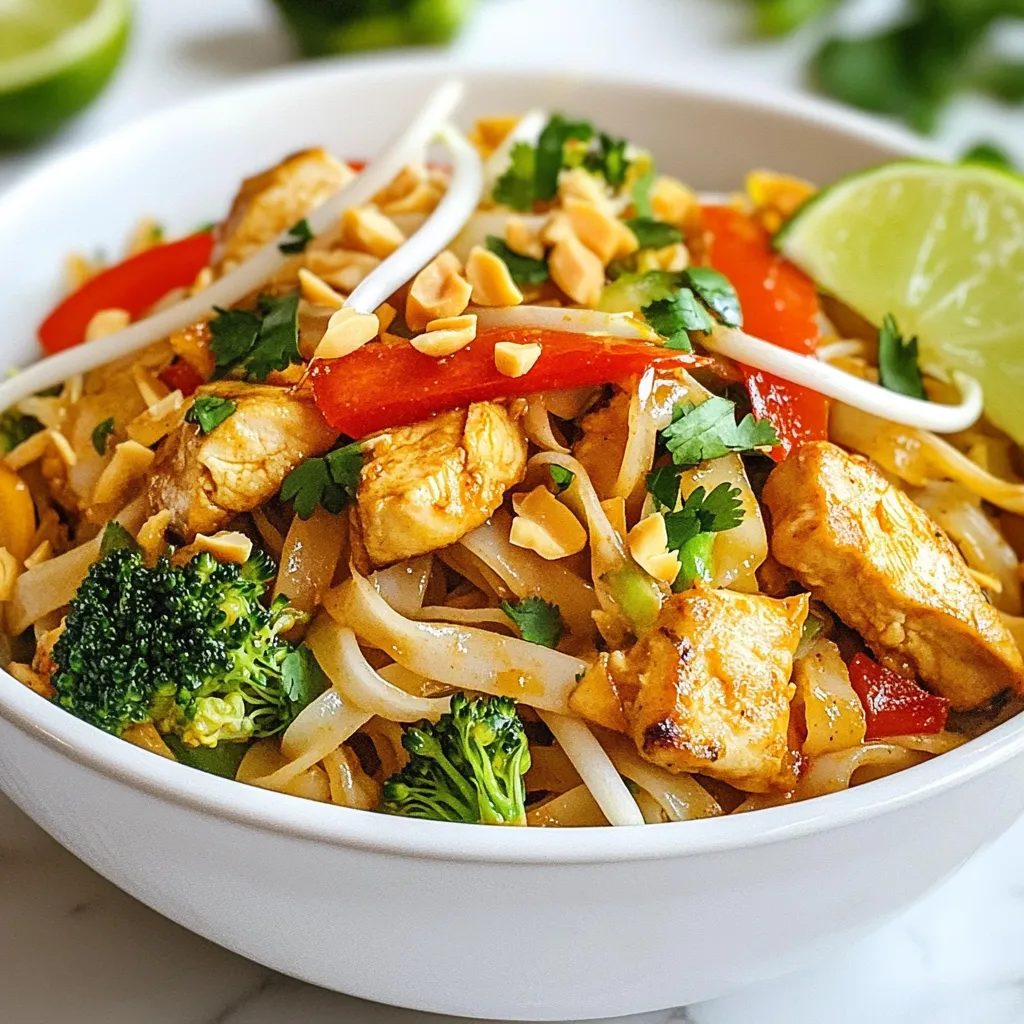
Healthy Chicken Pad Thai Flavorful and Simple Recipe
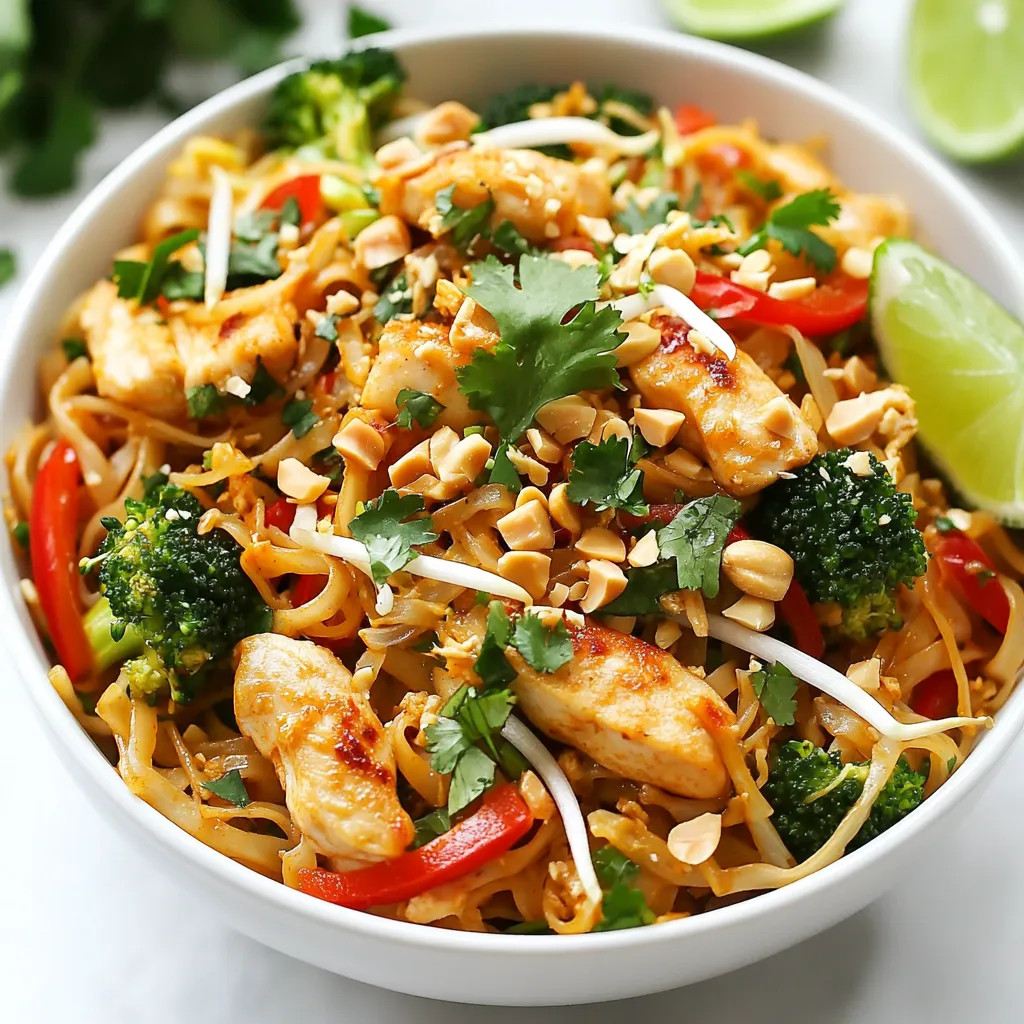
Are you craving a delicious yet healthy meal? Look no further! In this blog post, I’ll share a simple and flavorful recipe for Healthy Chicken Pad Thai. Packed with fresh veggies and wholesome ingredients, this dish is easy to make and great for any weeknight dinner. Let’s dive into the ingredients and cooking steps, so you can whip up this tasty Thai classic in no time!
Why I Love This Recipe
- Healthy Ingredients: This Chicken Pad Thai is packed with vegetables and lean protein, making it a nutritious choice for any meal.
- Quick and Easy: With a total preparation time of just 30 minutes, this dish is perfect for busy weeknights.
- Customizable: You can easily adjust the vegetables and sauces to suit your taste or dietary needs.
- Delicious Flavor: The combination of soy sauce, lime juice, and fresh cilantro creates a flavorful experience that will satisfy your taste buds.
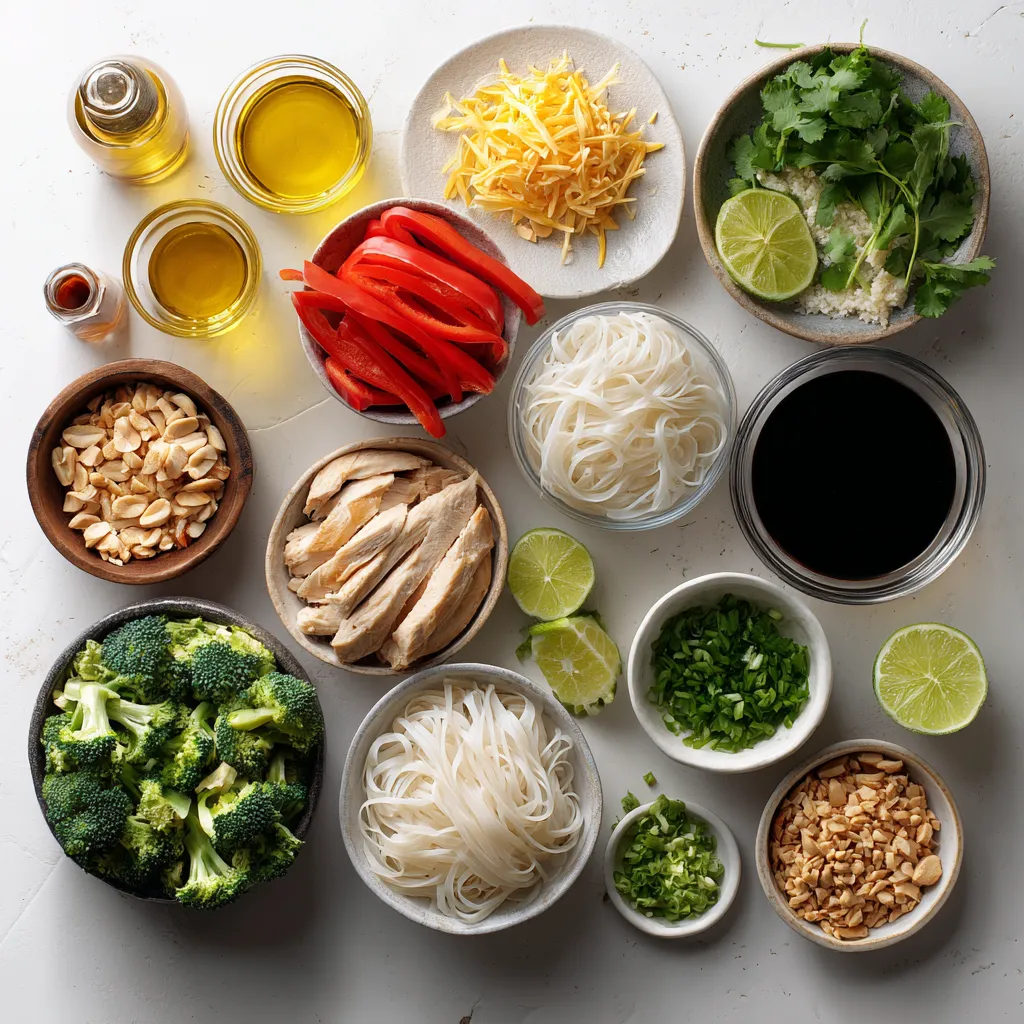
Ingredients
Main Ingredients for Healthy Chicken Pad Thai
– Rice noodles and protein: Use 8 oz of rice noodles. They provide the base. For protein, use 2 thinly sliced chicken breasts. This adds flavor and keeps it filling.
– Vegetables and aromatics: Fresh veggies are key. I use 1 cup of bean sprouts, 1 red bell pepper, and 1 cup of broccoli florets. They add crunch and color. For flavor, add 3 cloves of minced garlic.
– Sauces and seasonings: The sauce makes the dish pop. I use 3 tablespoons of low-sodium soy sauce and 1 tablespoon of lime juice. For extra depth, include 1 tablespoon of fish sauce and 1 teaspoon of brown sugar or honey.
Optional Ingredients
– Toppings and garnishes: Top your dish with ½ cup of chopped peanuts for crunch. Fresh cilantro also brightens the flavors. Serve with lime wedges for a zing.
– Dietary substitutes: If you want a vegetarian option, swap chicken with tofu. For gluten-free, choose rice noodles and use tamari instead of soy sauce.
Step-by-Step Instructions
Cooking the Rice Noodles
Start by boiling water in a pot. Add the rice noodles and cook as the package says. I recommend a soak time of about 5-7 minutes. After cooking, drain the noodles. Rinse them under cold water. This step helps to keep them from sticking. Make sure to set them aside while you prepare the rest.
Preparing the Chicken
Heat a large skillet or wok over medium-high heat. Add one tablespoon of olive oil. Once hot, add the thinly sliced chicken. Cook for about 5-7 minutes. Look for golden brown edges and no pink in the center. This shows the chicken is done. After cooking, remove the chicken and set it aside.
Combining and Cooking the Dish
In the same skillet, add the rest of the olive oil. Toss in the minced garlic and let it cook for about 30 seconds. Now, add the sliced red bell pepper and broccoli florets. Stir-fry these for 3-4 minutes until they soften a bit. Push the veggies to one side and pour in the beaten eggs. Scramble them until they are fully cooked. Mix the eggs with the veggies.
Next, add the cooked chicken back to the skillet. Then, toss in the rice noodles, bean sprouts, and chopped green onions. Pour in the soy sauce, lime juice, and brown sugar. Stir everything gently for about 2-3 minutes. This warms up the dish and blends the flavors.
Tips & Tricks
Making it Healthier
To make your chicken Pad Thai healthier, use low-sodium soy sauce. This change helps cut down on salt without losing flavor. You can also add more veggies. Try snow peas, zucchini, or carrots. These add color and nutrients to your dish.
Flavor Enhancements
For a spicy kick, add red pepper flakes or sriracha. This heat will make each bite exciting. To balance flavors, add lime juice or a bit of vinegar. This acidity brightens the dish and enhances its taste.
Cooking Equipment Recommendations
Use a large skillet or wok for best results. A non-stick option works well to prevent sticking. A good spatula helps with stirring and flipping. Also, have a sharp knife ready for quick chopping and slicing.
Pro Tips
- Soak the Noodles: Soak rice noodles in warm water for 20-30 minutes instead of boiling them to maintain a chewy texture.
- Use Fresh Ingredients: Opt for fresh vegetables and herbs for a brighter flavor and added nutrition in your dish.
- Control the Heat: Adjust your heat level when cooking to avoid burning the garlic, which can make your dish bitter.
- Customize Your Sauce: Tweak the soy sauce and lime juice to your taste; add more if you prefer a tangier flavor profile.
Variations
Dietary Preferences
You can easily adapt this Healthy Chicken Pad Thai to fit your diet. If you want a vegetarian or vegan version, swap out chicken for tofu or tempeh. These replacements will give you the protein you need while keeping the dish tasty.
For gluten-free options, use rice noodles made without wheat. You can also check for gluten-free soy sauce. It’s an easy change that keeps the dish safe for those with gluten sensitivities.
Flavor Variations
Adding regional spices can change the dish’s taste. For a Thai twist, try adding Thai basil or chili flakes. You can also mix in some curry powder for a unique flavor profile.
Seasonal vegetables can change your Pad Thai too. In the fall, add pumpkin or squash. In the summer, try zucchini or snap peas. This keeps your meal fresh and exciting.
Meal Prep Suggestions
Batch cooking is a great way to save time. You can make a large portion of the chicken and veggies at once. Store them separately from the noodles. This way, you can quickly heat and assemble meals throughout the week.
For storing, use airtight containers. Keep your Pad Thai in the fridge for up to three days. If you want to save it longer, freeze it. Just make sure to thaw it overnight before reheating.
Storage Info
Refrigeration Guidelines
Store leftover Healthy Chicken Pad Thai in the fridge. Use airtight containers to keep the dish fresh. Make sure to cool the food to room temperature before sealing. This helps prevent moisture buildup.
Freezing Options
You can freeze Chicken Pad Thai for later. Place it in a freezer-safe container. Leave some space at the top for expansion. For best results, eat it within three months. To thaw, put it in the fridge overnight. Reheat in a pan over low heat until hot.
Shelf Life
Healthy Chicken Pad Thai lasts about three to four days in the fridge. Look for signs of spoilage, like off smells or mold. If it smells funny or has changed color, throw it away. Better safe than sorry!
FAQs
How do I make Healthy Chicken Pad Thai taste authentic?
To get that real Pad Thai taste, you need some key ingredients. Use rice noodles because they are traditional. Low-sodium soy sauce adds umami without too much salt. Lime juice gives a tangy kick. Fish sauce, if you choose to use it, adds depth and a hint of funk. Fresh cilantro on top boosts the flavor and looks great.
Can I use other proteins instead of chicken?
Yes, you can! Tofu is a great option for a vegetarian dish. Shrimp works well too and cooks quickly. If you prefer beef, thin slices of flank steak are tasty. Just adjust cooking times based on the protein you select to ensure it cooks through.
What are the nutritional benefits of this recipe?
This recipe packs a nutritional punch. Chicken provides lean protein, which helps build muscle. The vegetables, like broccoli and bell peppers, are rich in vitamins A and C. Bean sprouts add fiber, which is great for digestion. Peanuts offer healthy fats and a bit of protein too. Overall, this dish is balanced and good for you!
This article covered how to make a healthy Chicken Pad Thai. We looked at key ingredients like rice noodles, protein, and fresh vegetables. I shared tips on cooking and enhancing flavors for the best taste. You learned about dietary substitutes and variations for different preferences. Finally, I explained how to store leftovers safely and keep them fresh.
Healthy cooking can be fun, creative, and easy. Enjoy making your Pad Thai your wa

Healthy Chicken Pad Thai
Ingredients
- 8 oz rice noodles
- 2 pieces chicken breasts, thinly sliced
- 2 tablespoons olive oil
- 3 cloves garlic, minced
- 2 pieces eggs, lightly beaten
- 1 cup bean sprouts
- 1 piece red bell pepper, thinly sliced
- 1 cup broccoli florets
- 3 pieces green onions, chopped
- 0.5 cup peanuts, chopped (optional)
- 3 tablespoons soy sauce (low sodium)
- 1 tablespoon fish sauce (optional)
- 1 tablespoon lime juice
- 1 teaspoon brown sugar or honey
- none Fresh cilantro for garnish
- none Lime wedges for serving
Instructions
- Cook the rice noodles according to package instructions. Drain and rinse with cold water to prevent sticking. Set aside.
- In a large skillet or wok, heat 1 tablespoon of olive oil over medium-high heat. Add the sliced chicken and cook until golden brown and no longer pink, about 5-7 minutes. Remove chicken and set aside.
- In the same skillet, add the remaining olive oil. Sauté the minced garlic until fragrant, about 30 seconds.
- Toss in the sliced red bell pepper and broccoli florets. Stir-fry for 3-4 minutes until they begin to soften.
- Push the veggies to the side of the skillet and pour in the beaten eggs. Scramble until fully cooked, then mix with the vegetables.
- Add the cooked chicken back to the skillet along with the rice noodles, bean sprouts, chopped green onions, soy sauce, fish sauce (if using), lime juice, and brown sugar. Toss everything together gently for 2-3 minutes to heat through.
- Remove from heat. Serve immediately, garnished with chopped peanuts (if using), fresh cilantro, and lime wedges on the side.
![To create this one-pan garlic herb salmon, gather the following key ingredients: - 4 salmon fillets (about 6 oz each) - 2 tablespoons olive oil - 4 cloves garlic, minced - 1 teaspoon dried oregano - 1 teaspoon dried thyme - 1 teaspoon paprika - Salt and pepper to taste - 1 lemon, sliced - 1 cup cherry tomatoes, halved - 1 zucchini, sliced - Fresh parsley, chopped (for garnish) I love using fresh salmon fillets for this dish. They provide a rich flavor and high nutrition. The olive oil is key; it helps the herbs stick and adds a nice touch. Garlic adds depth, while oregano and thyme bring out the best in the salmon. I often add paprika for a hint of warmth. The lemon brightens the dish, balancing the richness of the fish. For vegetables, I choose cherry tomatoes and zucchini. They cook well and add color. The fresh parsley makes for a lovely garnish, offering a fresh note. For the full recipe, check out the details above. This dish is simple, yet it packs a punch in flavor and presentation. 1. Preheating the oven: Start by preheating your oven to 400°F (200°C). This step is key to cooking the salmon evenly and getting the veggies just right. 2. Preparing the marinade: In a small bowl, mix 2 tablespoons of olive oil, 4 minced garlic cloves, 1 teaspoon of dried oregano, 1 teaspoon of dried thyme, 1 teaspoon of paprika, and salt and pepper to taste. This mix will give the salmon its tasty flavor. 3. Arranging the dish: Place 4 salmon fillets in a large baking dish or on a lined baking sheet. Brush the marinade over each fillet. Then, surround the salmon with lemon slices, halved cherry tomatoes, and sliced zucchini. Use any leftover marinade to drizzle over the vegetables. 1. Baking time and techniques: Bake the dish in your preheated oven for 12-15 minutes. The salmon should be flaky, and the veggies tender. Keep an eye on it to avoid overcooking. 2. Checking for doneness: To check if the salmon is done, gently poke it with a fork. If it flakes easily, it’s ready. If it feels firm, give it a few more minutes. 3. Resting time for salmon: Once out of the oven, let the salmon rest for a couple of minutes. This helps keep the juices locked in, making your meal even tastier. For the full recipe, check out the details above. Enjoy your cooking! Achieving perfect flakiness To get that perfect flaky salmon, watch the cooking time. Bake it for 12 to 15 minutes. The salmon is done when it flakes easily with a fork. Remove it from the oven right away. This helps keep it moist. Best temperature for cooking salmon I recommend cooking salmon at 400°F (200°C). This high temperature cooks the fish evenly. It also helps to brown the edges without drying it out. Using fresh herbs vs. dried herbs Fresh herbs give a bright flavor. They can make your dish pop. However, dried herbs are great for ease and shelf life. Use about three times more fresh herbs than dried herbs for the same taste. Plating the dish For a lovely presentation, use a rustic wooden board. Place the salmon fillets in the center. Arrange the veggies around them. This adds color and makes the dish inviting. Pairing with sides or salads Serve the salmon with a fresh salad or some roasted potatoes. Green beans or asparagus also work well. These sides balance the rich flavors of the salmon. Garnishing ideas for visual appeal Add fresh parsley on top for a pop of green. You can also sprinkle some lemon zest. This adds a nice touch and enhances the flavors. For a bit of crunch, consider adding some toasted nuts or seeds. For the full recipe, check out the One-Pan Garlic Herb Salmon. {{image_2}} You can change up the veggies for this dish. Try bell peppers, asparagus, or green beans. They all cook well with salmon and add color. For a protein swap, use chicken or tofu. Both work nicely with the garlic herb marinade. If you want to switch up the spices, add cumin for warmth or lemon zest for brightness. You can also replace dried herbs with fresh ones for a stronger flavor. You can make this dish in different ways. Pan-searing gives the salmon a nice crust. To do this, heat oil in a skillet and cook the fillets for about 4-5 minutes on each side. Baking is easy and hands-off. Just follow the [Full Recipe] for perfect results every time. You can also grill the salmon. This adds a smoky taste and crispy skin. Lastly, using a sheet pan lets you cook everything at once. It makes clean-up a breeze, too. After you enjoy your one-pan garlic herb salmon, you might have leftovers. To keep your salmon fresh, store it in an airtight container. This helps lock in moisture and flavor. Place the container in the fridge. Your salmon will stay good for about 3 days. When it comes to reheating, you have a few options. You can use the microwave for a quick fix. Just heat it on low power to avoid drying it out. Another great method is using the oven. Set it to 350°F (175°C) and warm the salmon for about 10 minutes. This method keeps the fish tender and juicy. Can you freeze one-pan garlic herb salmon? Yes, you can! Freezing is a smart way to save your leftovers for later. To do this, let the salmon cool completely before you freeze it. To properly freeze portions, wrap each piece tightly in plastic wrap. Then, place the wrapped salmon in a freezer-safe bag or container. This way, it won’t get freezer burn. Your salmon can last in the freezer for about 2 months. When you’re ready to eat it, simply thaw it in the fridge overnight. Reheat it just like before for a tasty meal! How long do you bake salmon at 400°F? You bake salmon at 400°F for 12 to 15 minutes. This time allows the fish to cook through but remain tender. Check if the salmon flakes easily with a fork. If it does, it is ready to eat. Can you use frozen salmon for this recipe? Yes, you can use frozen salmon. Just thaw it first for even cooking. Place the frozen fillets in the fridge overnight. If you need it fast, you can put the salmon in a sealed bag and run it under cold water. What to serve with garlic herb salmon? You can serve garlic herb salmon with many sides. Some great choices include rice, quinoa, or a fresh salad. Roasted or steamed veggies also pair well. For a light touch, add a slice of lemon on the side. For the full recipe, check out the One-Pan Garlic Herb Salmon. This blog post detailed how to make a one-pan garlic herb salmon dish. You learned about main ingredients, step-by-step prep and cooking, plus helpful tips. I shared variations for extra creativity and storage tips for leftovers. In conclusion, you can enjoy this dish in many ways. Make it yours by experimenting with ingredients and methods. Cooking salmon can be easy and fun. Enjoy your meal!](https://dailydishly.com/wp-content/uploads/2025/06/57d74547-3b02-425a-a5fa-1ca9189b97a5-768x768.webp)