Zucchini and Black Bean Enchiladas Flavorful Delight

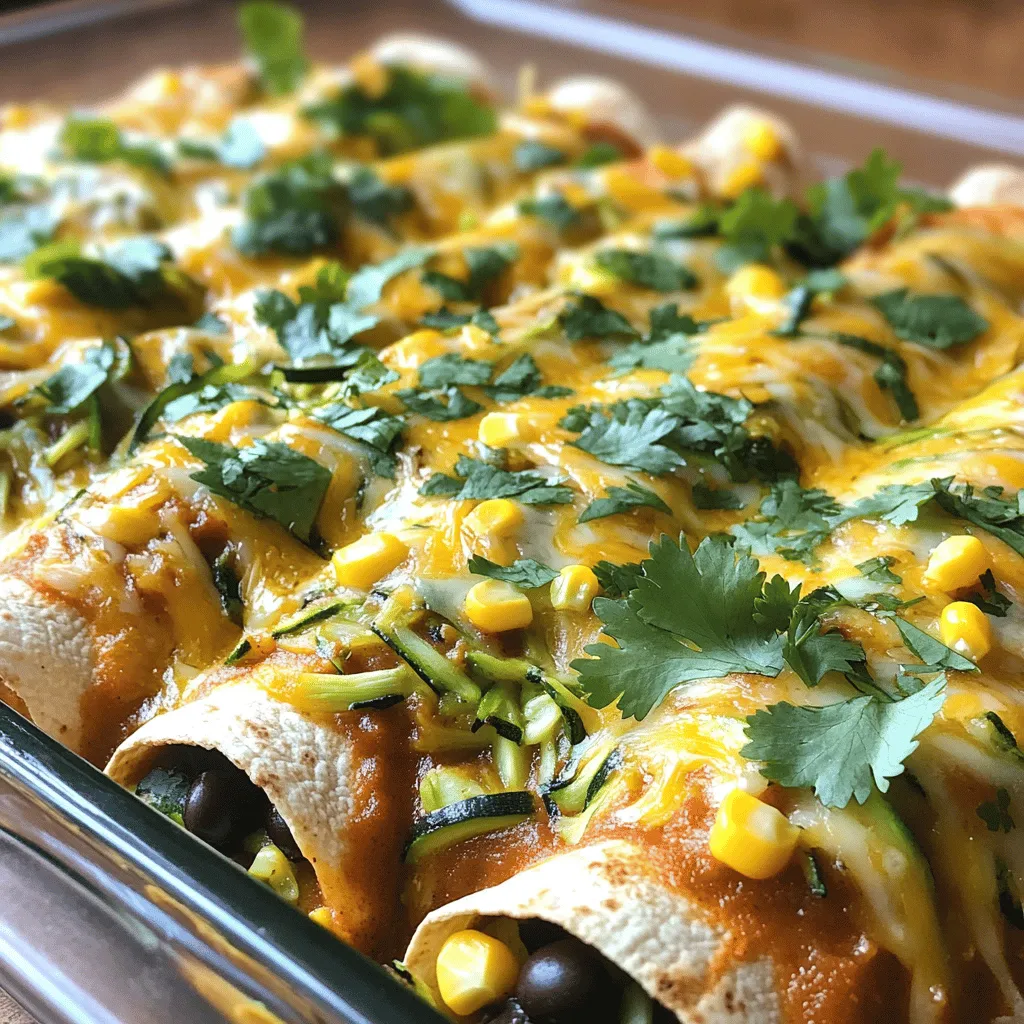
Welcome to a flavorful journey with my Zucchini and Black Bean Enchiladas! You’ll find this dish both tasty and simple to make. Packed with fresh veggies and beans, it’s perfect for a weeknight dinner or a cozy gathering. In this post, I’ll share step-by-step instructions, tips for choosing the best ingredients, and tricks to elevate your enchilada game. Let’s dive in and create something delicious together!
Ingredients
Complete ingredient list for Zucchini and Black Bean Enchiladas
To make Zucchini and Black Bean Enchiladas, gather these ingredients:
– 2 medium zucchinis, grated
– 1 can (15 oz) black beans, drained and rinsed
– 1 cup corn kernels (fresh or frozen)
– 1 small red onion, finely chopped
– 2 cloves garlic, minced
– 1 teaspoon cumin
– 1 teaspoon smoked paprika
– 1 cup enchilada sauce (store-bought or homemade)
– 8 whole wheat tortillas
– 1 cup shredded cheese (cheddar or a vegan alternative)
– 2 tablespoons olive oil
– Salt and pepper, to taste
– Fresh cilantro, chopped, for garnish
Tips for selecting fresh zucchinis and beans
When picking zucchinis, look for firm ones with smooth skin. Choose smaller zucchinis; they taste better. Avoid any with soft spots or blemishes. For black beans, select cans with no dents. Check the expiration date, too. Fresh beans should have a bright color. If you can, try to buy organic for better taste.
Recommended brands for enchilada sauce and cheese
For enchilada sauce, I like to use brands like Old El Paso or Hatch. They offer good flavor and quality. If you want a healthier option, try making your own sauce with tomatoes and spices. For cheese, look for Tillamook or Daiya if you want a vegan choice. They melt well and taste great. These brands help make your enchiladas even more delicious!
Step-by-Step Instructions
Detailed cooking instructions for enchiladas
Start by preheating your oven to 375°F (190°C). In a skillet, heat 2 tablespoons of olive oil over medium heat. Add 1 small finely chopped red onion. Sauté it for about 3-4 minutes until it turns soft and clear. Now, add 2 minced garlic cloves and cook for another minute. This brings out the lovely garlic smell. Next, stir in 2 medium grated zucchinis, 1 can of drained black beans, and 1 cup of corn. Sprinkle in 1 teaspoon of cumin, 1 teaspoon of smoked paprika, salt, and pepper to taste. Cook this mix for 5-7 minutes. You want the zucchini to soften but not lose all its shape.
Once cooked, take the skillet off the heat. Mix in half of the enchilada sauce. Next, lay a whole wheat tortilla flat on a clean surface. Spoon a generous amount of the zucchini mixture down the center. Roll the tortilla tightly, placing it seam-side down in a baking dish. Repeat this for the remaining tortillas and filling. After that, pour the rest of the enchilada sauce over the rolled tortillas. Top them with 1 cup of shredded cheese, either cheddar or a vegan option.
Tips for rolling tortillas without breaking
Rolling tortillas can be tricky. To avoid breaking them, warm the tortillas first. You can microwave them for about 20-30 seconds. This softens them, making them easier to roll. Another tip is to use fresh tortillas. They are more pliable compared to older ones. If you do have a break, just patch it up with some of the filling. No one will notice!
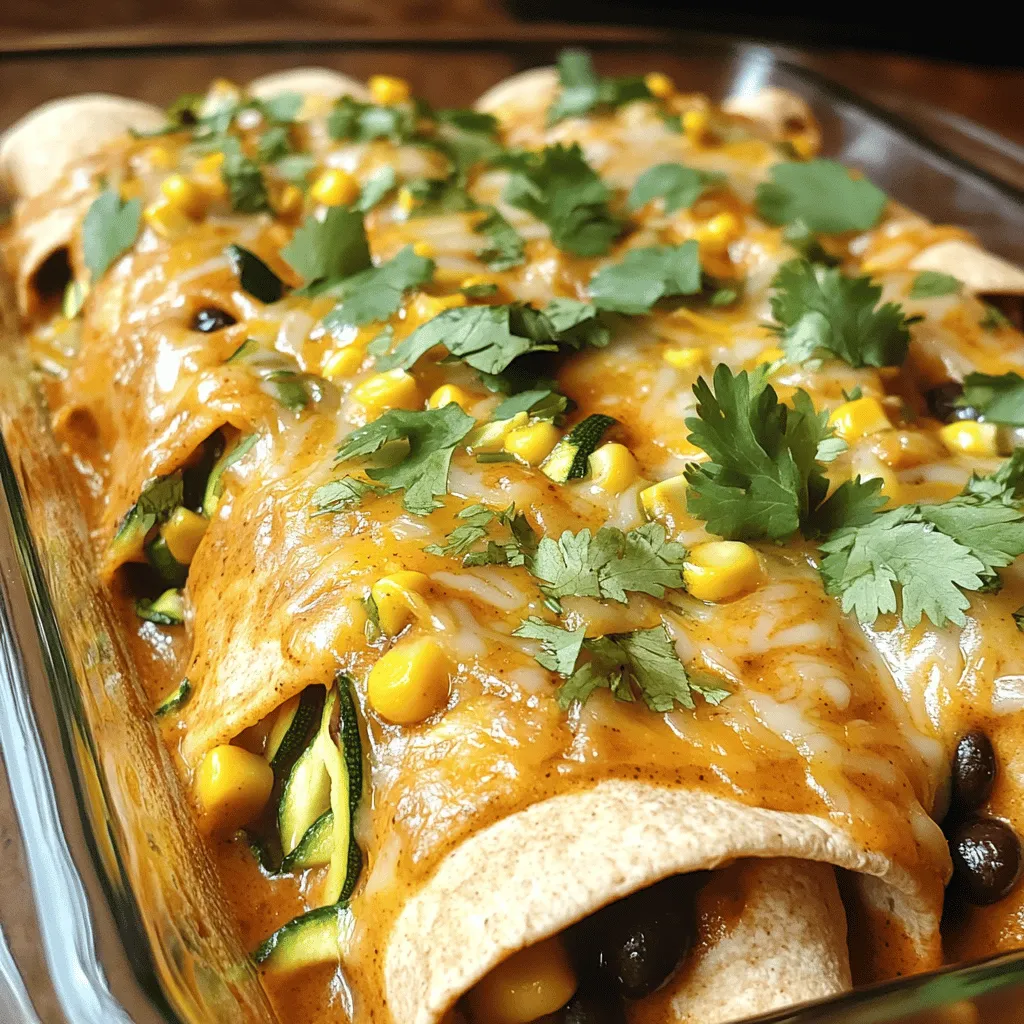
Baking instructions for achieving perfectly melted cheese
Cover your baking dish with foil and place it in the oven. Bake for 20 minutes to allow the flavors to blend. After that, remove the foil and continue baking for an extra 10 minutes. This step helps the cheese melt and bubble nicely. You want it golden and delicious! Once done, let the enchiladas cool for a few minutes. Garnish them with freshly chopped cilantro for an added touch. Enjoy your flavorful Zucchini and Black Bean Enchiladas!
Tips & Tricks
How to customize the spice level of the dish
To change the spice level, start with the cumin and smoked paprika. You can add more or less to fit your taste. For heat, try adding chopped jalapeños or a pinch of cayenne pepper. If you want it milder, skip these ingredients. Remember, taste as you go. This way, you can find the perfect balance for your family.
Suggestions for garnishing and serving
Garnishing can elevate your dish. Fresh cilantro adds a bright touch. You can also use avocado slices for creaminess. A dollop of sour cream or Greek yogurt works well too. Serve with a side of rice or a fresh salad for color. This makes the meal feel festive and fun!
Common mistakes to avoid while making enchiladas
One mistake is overfilling the tortillas. If you add too much filling, they can break. Another mistake is not heating the tortillas first. Warm tortillas bend easier, preventing tears. Lastly, be careful not to skip the foil when baking. This keeps the enchiladas moist. Follow these tips for a tasty outcome.

Variations
Alternative ingredients for a vegetarian or vegan version
To make these enchiladas vegan, skip the cheese. Use a plant-based cheese or none at all. You can also add nutritional yeast for a cheesy flavor. If you want extra protein, swap black beans for lentils or chickpeas. These changes keep the dish filling and tasty.
Substitutes for cheese and tortillas
If you want to avoid dairy, try these cheese substitutes:
– Vegan cheese shreds
– Cashew cream
– Silken tofu blended with lemon juice
For tortillas, choose whole wheat or corn tortillas. You can also use lettuce wraps for a low-carb option. This keeps the dish fresh and fun.
Suggestions for incorporating additional vegetables
Adding veggies boosts the nutrition of your enchiladas. Try these:
– Spinach or kale for greens
– Bell peppers for sweetness
– Mushrooms for a meaty texture
Chop them finely and mix them into the filling. This adds color and flavor. You can play with different combinations to find your favorite mix. Each variation brings a new twist to the classic dish.
Storage Info
Best practices for storing leftover enchiladas
To keep your enchiladas fresh, let them cool first. Place them in an airtight container. This will help keep moisture in and prevent them from drying out. Be sure to store them in the fridge if you plan to eat them within a few days. If you want to save them for longer, freezing is a great option.
How to freeze after cooking for later use
To freeze your enchiladas, it’s best to do this before baking. Wrap each rolled enchilada tightly in plastic wrap. Then, place them in a freezer-safe bag or container. Label the bag with the date. You can freeze them for up to three months. When you’re ready to eat, thaw them in the fridge overnight before baking.
Reheating tips to maintain taste and texture
When you’re ready to reheat your enchiladas, preheat your oven to 350°F (175°C). Place the enchiladas in a baking dish and cover them with foil. This helps keep them moist. Bake for about 20 minutes. If they seem dry, add a splash of enchilada sauce on top before reheating. Enjoy your flavorful delight!
FAQs
What can I serve with Zucchini and Black Bean Enchiladas?
You can pair these enchiladas with a fresh salad. A simple green salad works well. You might also like serving them with Mexican rice. For added flavor, try a side of guacamole or sour cream. Fresh salsa brings a nice kick too. A cool drink, like lemonade, complements the meal perfectly.
Can I make these enchiladas ahead of time?
Yes, you can prepare these enchiladas ahead of time. Simply follow the recipe until you pour the sauce on top. Cover the dish with foil and refrigerate it. When you are ready to bake, take it out and let it sit for about 15 minutes.This makes it easy for busy days.
How do I adjust the recipe for a larger serving?
To serve more people, simply double the ingredients. Use more zucchinis and black beans. You can also add more tortillas and sauce. Make sure to use a bigger baking dish. Cooking time might be a little longer, so check for doneness. Enjoy the extra servings with family or friends!
Zucchini and Black Bean Enchiladas are both tasty and easy to make. We covered the key ingredients and steps needed to create this dish. You learned how to pick fresh zucchinis and delicious enchilada sauce. I shared ways to customize spice levels and avoid common mistakes. Remember, you can store leftovers well to enjoy later. This dish is versatile and perfect for any meal. Enjoy experimenting and make it your own. You’ll impress anyone who tastes your delicious enchiladas!


![- 1 lb chicken breast, cut into 1-inch cubes - 2 ripe mangoes, pureed - Zest and juice of 2 limes For the Mango Lime Chicken Skewers, the main ingredients bring the dish to life. Chicken breasts provide a lean protein base. Ripe mangoes lend sweetness and a tropical touch. Lime zest and juice add a bright, tangy flavor that balances the sweetness of the mango. - 2 tablespoons honey - 2 tablespoons olive oil - 1 teaspoon garlic powder - 1 teaspoon ground cumin - Salt and pepper to taste The marinade is key to creating depth in the flavor. Honey adds a hint of sweetness that complements the mango. Olive oil keeps the chicken moist while adding richness. Garlic powder brings a savory note, while ground cumin offers warmth and earthiness. Salt and pepper enhance all the flavors. - Fresh cilantro, for garnish - Wooden or metal skewers Garnishing with fresh cilantro adds a pop of color and fresh taste. It brightens the dish and elevates the presentation. You can use wooden or metal skewers for holding the chicken. Just remember to soak wooden skewers in water for 30 minutes before grilling to prevent burning. By using these ingredients, you set the stage for a flavorful and vibrant meal. For the full recipe, check the link provided. First, gather your ingredients. In a large bowl, combine 2 ripe mangoes pureed, zest and juice of 2 limes, and 2 tablespoons honey. Add 2 tablespoons olive oil, 1 teaspoon garlic powder, 1 teaspoon ground cumin, along with salt and pepper to taste. Mix well until everything blends smoothly. This marinade gives the chicken a sweet and tangy flavor, making it truly special. Next, take 1 pound of chicken breast cut into 1-inch cubes. Coat these chicken cubes with the marinade you just made. Make sure each piece is fully covered. This step is key for the flavor to soak in. Cover your bowl with plastic wrap and place it in the fridge. Let the chicken marinate for at least 1 hour. If you have time, refrigerate overnight for an even better taste. Now, it’s time to grill! Preheat your grill or grill pan to medium-high heat. While it heats up, thread the marinated chicken cubes onto wooden or metal skewers. Leave a little space between each piece for even cooking. Once your grill is ready, place the skewers on it. Cook for about 10 to 12 minutes, turning occasionally. Check the chicken to make sure it’s fully cooked and has nice grill marks. After grilling, let the skewers rest for a few minutes. Garnish with chopped fresh cilantro. Enjoy your Mango Lime Chicken Skewers! For more details, check the Full Recipe. For the best flavor, marinate your chicken for at least one hour. If you have time, let it sit overnight. This longer time allows the flavors to soak in deeply. When you coat the chicken, make sure every piece gets the marinade. Use your hands or a spoon to mix it well. This helps every bite to be bursting with mango and lime. Grill your skewers at medium-high heat. This temperature creates a nice char without burning the chicken. Cook the skewers for about 10 to 12 minutes. Turn them a few times to ensure even cooking. Check the chicken for doneness by cutting a piece open. It should be white inside with no pink. Serve your skewers with fresh sides like a salad or rice. A mango salsa or a zesty yogurt dip also pairs well. For a colorful plate, arrange the skewers neatly and drizzle some extra mango puree on top. Add lime wedges for garnish to give a bright look and extra flavor. You can also sprinkle fresh cilantro for a pop of color. {{image_2}} You can switch out the chicken for shrimp or firm tofu. Shrimp cooks fast and takes on flavors well. Just marinate them the same way as chicken. Firm tofu absorbs all the good taste. Cut it into cubes and let it soak in the marinade for at least 30 minutes. Both options create a tasty dish that fits different diets. To make the dish even more exciting, add spices like chili powder or ginger. Chili powder gives a warm kick, while ginger adds a fresh touch. You can also try different fruits. Pineapple, for example, brings a sweet and tangy flavor. Just chop the fruit and mix it into your marinade. Experimenting with these flavors can lead to fun new tastes. You don’t have to stick to just chicken or shrimp. Try using veggies or other fruits on your skewers. Bell peppers, zucchini, and onions work great and add color. Fruits like pineapple or peaches can also be skewered. They caramelize beautifully on the grill. This not only makes your meal more colorful but also adds more nutrients. To store leftover mango lime chicken skewers, place them in an airtight container. This keeps them fresh. Make sure to cool them to room temperature first. Store them in the fridge for up to three days. For reheating, you can use your grill or a skillet. Heat them on medium until warm. This helps keep the chicken juicy and tasty. Avoid using a microwave, as it can make the chicken dry. Yes, you can freeze mango lime chicken skewers! This is great for meal prep. To freeze, wrap each skewer in plastic wrap. Then, place them in a freezer-safe bag. This keeps them safe from freezer burn. They can last up to three months in the freezer. When ready to eat, thaw them in the fridge overnight. This helps them defrost evenly. Then, grill or reheat as you like. In the fridge, mango lime chicken skewers last for about three days. If you freeze them, they can last for about three months. Always check for any off smell or color before eating! Proper storage ensures your meal stays safe and delicious. To marinate chicken well, use a mix of acid and fat. The acid helps to tenderize the meat. For Mango Lime Chicken Skewers, marinate for at least 1 hour. If you have time, letting it sit overnight gives better flavor. Keep the chicken in the fridge while it marinates. Yes, you can cook these skewers in the oven. Preheat your oven to 400°F. Place the skewers on a baking sheet lined with foil. Bake for about 20-25 minutes. Flip the skewers halfway through cooking for even results. This method works well if you can't grill. To check chicken doneness, look for clear juices. If the juices run clear when you cut into the chicken, it’s done. The meat should not be pink inside. You can also cut a piece in half to check. Always ensure it reaches a safe internal temperature. These skewers are great with a side of rice or a fresh salad. You can also serve them with grilled veggies. Try adding a light dipping sauce, like yogurt or a mango salsa. This adds flavor and balance to your meal. For the complete Mango Lime Chicken Skewers recipe with all details, check out the [Full Recipe]. This blog post covered making delicious Mango Lime Chicken Skewers. You learned about the key ingredients, like chicken and mangoes, and how to prepare a tasty marinade. We went through grilling tips and serving ideas to make your meal shine. You can even try different proteins or spices to mix things up. Remember to store leftovers correctly for later enjoyment. Now, you have all the tools needed to create a flavorful dish that your friends and family will love. Enjoy your cooking adventure with these tasty skewers!](https://dailydishly.com/wp-content/uploads/2025/05/700a395d-140d-49bc-8652-e5807e5ab179-768x768.webp)
![To make roasted garlic and tomato pasta, you need these simple items: - 1 pound spaghetti or your favorite pasta - 8 cloves garlic, unpeeled - 4 cups cherry tomatoes, halved - 1/4 cup extra-virgin olive oil - 1 teaspoon dried oregano - 1 teaspoon red pepper flakes (adjust for spice preference) - Salt and pepper to taste - 1/4 cup fresh basil, chopped - 1/2 cup freshly grated Parmesan cheese (optional) Fresh ingredients make a big difference in taste. When cooking, I always use ripe cherry tomatoes. They burst with flavor. Fresh garlic gives a sweet, nutty taste after roasting. Fresh basil adds a bright note to the dish. Using these ingredients helps create a dish that feels special. You can adjust this pasta to fit your needs. If you're gluten-free, choose gluten-free pasta. For a vegan option, skip the Parmesan cheese or use a plant-based alternative. You can even swap cherry tomatoes for canned diced tomatoes if fresh ones aren't available. This way, anyone can enjoy this tasty dish. For a heartier meal, add cooked chicken or shrimp. Feel free to mix in veggies like spinach or zucchini for added nutrition. For the full recipe, check out the details above. Start by gathering your ingredients. For this dish, you need: - 1 pound spaghetti or your favorite pasta - 8 cloves garlic, unpeeled - 4 cups cherry tomatoes, halved - 1/4 cup extra-virgin olive oil - 1 teaspoon dried oregano - 1 teaspoon red pepper flakes (adjust for spice preference) - Salt and pepper to taste - 1/4 cup fresh basil, chopped - 1/2 cup freshly grated Parmesan cheese (optional) Preheat your oven to 400°F (200°C). This helps the garlic and tomatoes roast perfectly. On a baking sheet, place the unpeeled garlic cloves and halved cherry tomatoes. Drizzle with half of the olive oil. Sprinkle with oregano, red pepper flakes, salt, and pepper. Toss gently to coat. Roast in the oven for 20-25 minutes. Look for blistered tomatoes and soft garlic. The smell will guide you! Meanwhile, cook your pasta. Use a large pot of salted boiling water and follow the package instructions. Cook until it’s al dente. Don’t forget to save 1 cup of pasta water before draining. Once the tomatoes and garlic are done, let them cool a bit. Squeeze the roasted garlic out of its skin into a bowl. Mash it with a fork to create a creamy base. Mix the mashed garlic with the roasted tomatoes. Add the remaining olive oil and a splash of the reserved pasta water. Stir well to make a sauce. Now, add the drained pasta to the sauce. Toss it all together until the pasta is well coated. If the sauce is too thick, add more reserved pasta water until you like the consistency. Finally, stir in fresh basil. Taste and adjust seasoning with salt and pepper if needed. Serve your roasted garlic and tomato pasta immediately. If you want, sprinkle some grated Parmesan cheese on top. Enjoy this meal! For the full recipe, check the earlier section. Roasting garlic is simple. Start by placing unpeeled garlic cloves on a baking sheet. Cook them at 400°F (200°C) for about 20 to 25 minutes. You want them soft and golden. When done, let them cool a bit. Squeeze the garlic out of the skin with your fingers. It should be creamy and sweet. This garlic adds a rich, deep flavor to your pasta. Cooking pasta seems easy, but timing is key. Follow the package directions for cooking time. Use a large pot with plenty of salted boiling water. This boosts flavor and helps keep pasta from sticking. For the best texture, aim for "al dente," which means it should be firm to the bite. Remember to reserve some pasta water before draining. This starchy water helps thicken your sauce. Want to make your roasted garlic and tomato pasta pop? Here are some ideas: - Herbs: Add fresh basil or parsley for a bright touch. - Cheese: Toss in some feta or goat cheese for creaminess. - Nuts: Pine nuts or walnuts give a nice crunch. - Spices: For heat, add more red pepper flakes or a dash of smoked paprika. - Zest: A sprinkle of lemon zest can brighten the flavors. These enhancements will take your dish to the next level. Check out the Full Recipe for a complete guide to making this tasty meal! {{image_2}} Roasted garlic and tomato pasta is great for everyone. For a vegetarian twist, skip the cheese. You can add nutritional yeast for a cheesy taste. If you want a vegan option, use a plant-based cheese. This makes it creamy without dairy. You can also toss in fresh spinach or kale. These greens add color and nutrients to your dish. You can switch up the pasta for fun! Try whole wheat pasta for more fiber. Gluten-free pasta works well if you need it. You can even use zucchini noodles for a low-carb choice. Each type will change the dish's texture, so experiment to find your favorite. Want to make it heartier? Add protein like grilled chicken or shrimp. Cook these separately and toss them in at the end. For a veggie boost, add bell peppers or mushrooms. They roast well and taste amazing with garlic and tomatoes. Broccoli or asparagus are also great choices. These keep the dish fresh and colorful. For more details, check out the full recipe. To keep your roasted garlic and tomato pasta fresh, store it in an airtight container. Make sure it cools down before sealing. This will help keep the flavors intact. The pasta can last in the fridge for about 3 to 5 days. If you notice any off smells or changes in color, it's best to toss it. When you’re ready to enjoy your leftovers, reheating properly is key. Use a pan over low heat for the best results. Add a splash of water or olive oil to help the pasta regain its moisture. Stir often to prevent sticking. You can also microwave it, but cover the dish to retain moisture. Heat in 30-second intervals, stirring in between. If you want to save some pasta for later, freezing is a great option. Portion the pasta into individual servings and place them in freezer-safe bags. Remove as much air as possible before sealing. It keeps well for about 2 to 3 months in the freezer. When you're ready to eat, thaw it in the fridge overnight, then reheat as mentioned above. For the best taste, enjoy it within a month. Yes, you can use many types of tomatoes. Roma tomatoes add a rich flavor. Beefsteak tomatoes are juicy and sweet. You can also use canned tomatoes if fresh ones are not available. Just be sure to drain them well. This will keep your pasta from getting too watery. Experiment and find what you like best! To make this recipe gluten-free, choose gluten-free pasta. Many brands offer great options that taste good. You can find pasta made from rice, corn, or lentils. These pastas cook a bit differently, so check the package for instructions. Follow the same steps in the recipe, and enjoy your meal worry-free! Roasted garlic and tomato pasta pairs well with many sides. A fresh green salad adds crunch and color. Garlic bread is a classic choice that everyone loves. You can also serve it with grilled vegetables for a healthy twist. A nice glass of red wine makes the meal even better. Enjoy exploring different pairings! For the complete recipe, check out the [Full Recipe]. This blog post covered key ingredients for roasted garlic and tomato pasta. We explored fresh ingredients and alternatives for dietary needs. I shared step-by-step cooking instructions and helpful tips, like roasting garlic perfectly. We also discussed pasta variations and storage tips to keep leftovers fresh. In summary, this dish is simple, versatile, and delicious. You can make it fit your tastes and needs. Enjoy experimenting with flavors and ingredients! Your next meal can be a hit.](https://dailydishly.com/wp-content/uploads/2025/06/d553d96f-6423-4985-8dca-dedfc8f9e127-768x768.webp)


