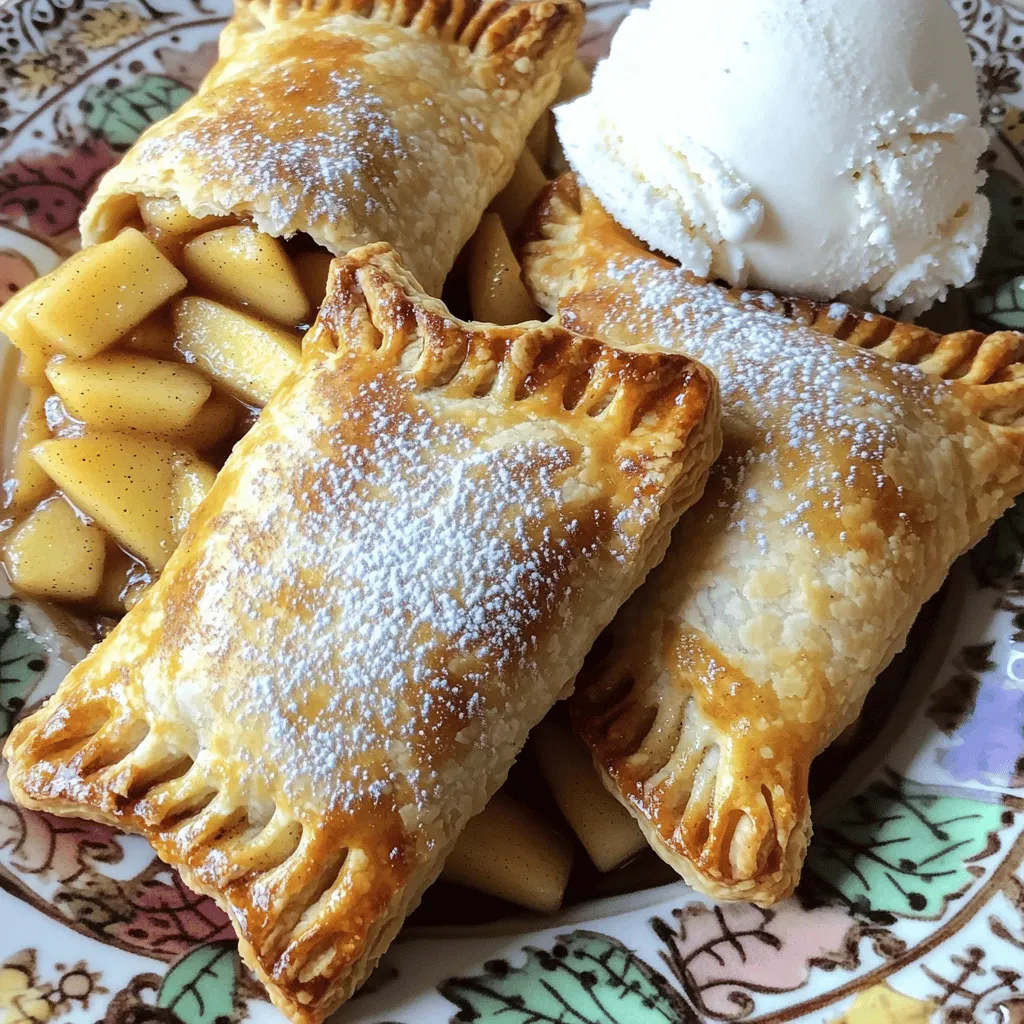
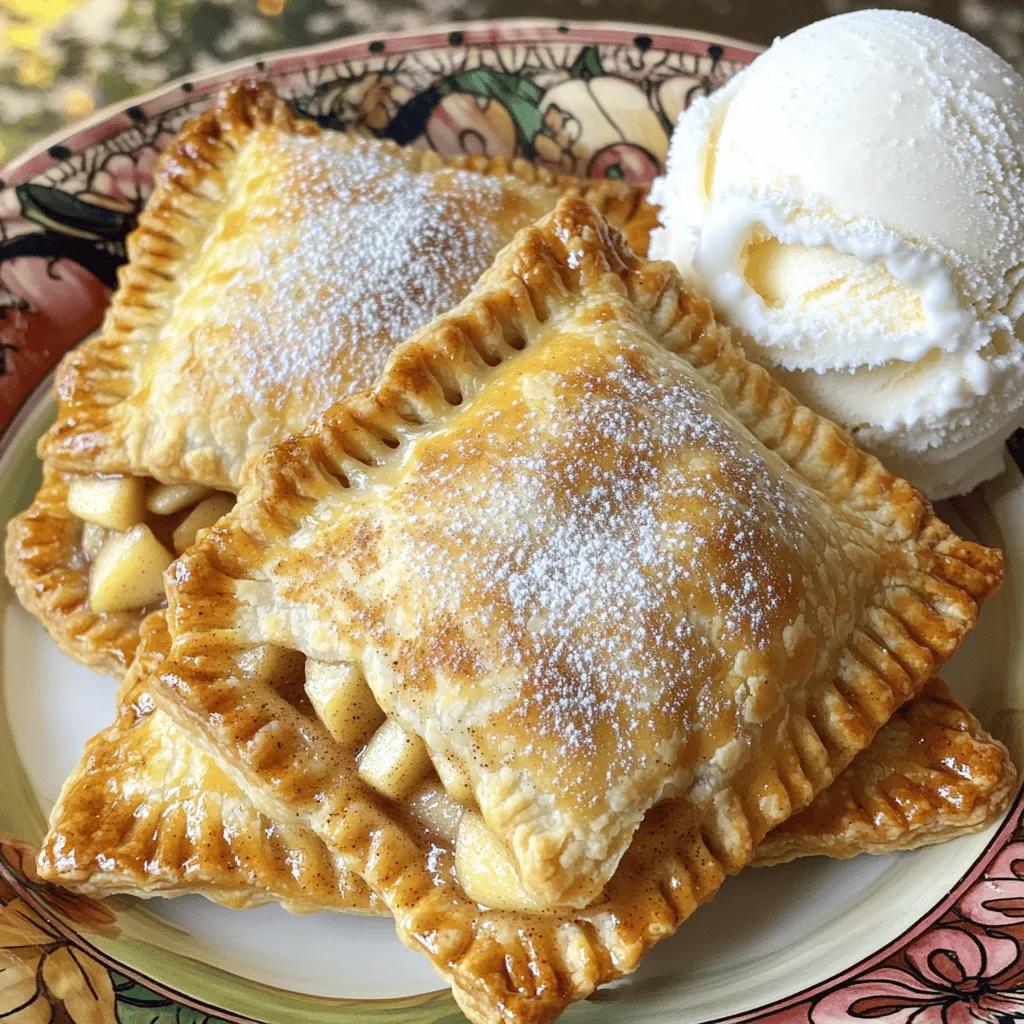
Get ready to enjoy a tasty treat with my Air Fryer Apple Hand Pies! These delightful little pies are easy to make and packed with sweet, spiced apple goodness. You only need a few simple ingredients, so you can whip them up in no time. Whether you’re a kitchen pro or a beginner, these hand pies are the perfect snack for any occasion. Let’s dive into this delicious recipe!
Ingredients
List of Ingredients
– 2 large apples (Granny Smith or Honeycrisp), peeled and diced
– 1/4 cup brown sugar
– 1 teaspoon cinnamon
– 1/4 teaspoon nutmeg
– 1 tablespoon lemon juice
– 1 tablespoon cornstarch
– 1 package of refrigerated pie crusts (or homemade if preferred)
– 1 egg, beaten (for egg wash)
– Powdered sugar (for dusting, optional)
To make these hand pies, we need fresh apples. I love using Granny Smith or Honeycrisp apples. They give the perfect sweet and tart balance. The brown sugar adds a rich sweetness. Cinnamon and nutmeg bring warmth and spice. A splash of lemon juice brightens the flavors. Cornstarch thickens the filling so it won’t leak out.
You can use store-bought pie crusts to save time. If you prefer, feel free to make your own crust. It adds a personal touch. Don’t forget the beaten egg. This gives the pies a lovely golden color when baked.
Optionally, you can dust the pies with powdered sugar. It adds a nice finish and looks beautiful on a plate. With these ingredients, you’re all set to create a delicious treat that’s sure to impress!
Step-by-Step Instructions
Preparing the Apple Filling
First, take two large apples. I like using Granny Smith or Honeycrisp for their sweet and tart flavor. Peel and dice them into small pieces. In a medium bowl, combine the diced apples with 1/4 cup of brown sugar, 1 teaspoon of cinnamon, and 1/4 teaspoon of nutmeg. Add 1 tablespoon of lemon juice and 1 tablespoon of cornstarch. Mix everything until the apples are well-coated. Let this sit for about 10-15 minutes. This time allows the flavors to meld nicely.
Preparing the Dough
Next, roll out your pie crusts on a lightly floured surface. You can use store-bought or homemade crusts. Use a round cutter or a glass to cut circles that are about 4-5 inches wide. Depending on the size of your pie crust, you should get about 8-10 circles. Keep them ready for filling.
Cooking in the Air Fryer
Now it’s time to cook! Preheat your air fryer to 350°F (175°C). Place a tablespoon of the apple filling in the center of each dough circle. Fold the crust over to make a half-moon shape. Use a fork to crimp the edges and seal the pies well. Brush the tops with a beaten egg for that golden color. Place the hand pies in a single layer in the air fryer basket. You might need to cook them in batches. Cook for about 10-12 minutes, or until they turn golden brown and crisp. Once done, take them out and let them cool a bit before dusting with powdered sugar, if you like.
Tips & Tricks
Achieving a Crispy Crust
To get a crispy crust, start with the right temperature. Set your air fryer to 350°F (175°C). Make sure to give it enough time to preheat. This step is key for even cooking.
Also, avoid overcrowding the basket. Place the hand pies in a single layer. This allows hot air to circulate freely. You can cook them in batches if needed.
Common Troubleshooting
If your dough does not seal well, try crimping the edges firmly. Use a fork to press down. This helps keep the filling inside. If you notice any gaps, patch them with extra dough.
To prevent soggy bottoms, make sure you use cornstarch in the filling. It helps absorb extra moisture from the apples. Allow the filling to sit for 10-15 minutes. This step blends the flavors and thickens the mix.
Serving Suggestions
Serve these hand pies warm on a nice plate. For a special touch, add a scoop of vanilla ice cream or a dollop of whipped cream. Dust with powdered sugar for a sweet finish.
You can also pair them with a drizzle of caramel sauce. This adds a rich flavor that complements the apples. For a fun twist, serve with a side of cinnamon sugar for dipping!
Variations
Flavor Enhancements
You can make your air fryer apple hand pies even more special. Adding nuts or raisins to the filling brings great texture and flavor. Chopped walnuts or pecans add a nice crunch. Raisins provide a sweet burst in every bite.
Exploring different spices can also change the taste. Try adding a bit of ginger for warmth or allspice for a rich flavor. These spices can make your pies feel unique and exciting.
Dough Options
You have choices when it comes to dough. You can use store-bought pie crusts for quick prep. They save time and are easy to handle. If you prefer, you can make homemade crusts for a personal touch.
For those who need gluten-free options, look for gluten-free pie crusts. Many brands offer tasty alternatives. You can also make your own gluten-free dough with almond or coconut flour.
Alternative Fillings
Don’t limit yourself to apples! You can use other fruits for different flavors. Cherries and blueberries are great options. They add a sweet and tangy taste to the pies.
If you want to try something savory, consider using cooked meats or vegetables. Cheese and spinach make a tasty filling too. These options turn your hand pies into a fun meal rather than just a dessert.
Storage Info
Storing Hand Pies
To keep your hand pies fresh, store them in the fridge. Place them in an airtight container. They stay good for up to three days. If you want to keep them longer, freezing is a great option. Wrap each hand pie tightly in plastic wrap. Then, place them in a freezer bag. This way, they last for up to three months.
Reheating Instructions
When you’re ready to enjoy your hand pies again, the air fryer is your best friend. Preheat it to 350°F (175°C). Place the hand pies in the basket and heat for about 5 minutes. This brings back their crispiness.
You can also use an oven. Preheat it to 350°F (175°C) and place the pies on a baking sheet. Heat them for about 10 minutes. If you’re in a hurry, the microwave works too. Just warm them for about 30 seconds. This method won’t keep them crispy, but it’s fast.
FAQs
How do you prevent apple hand pies from leaking?
To stop your hand pies from leaking, make sure to seal the edges well. Use a fork to crimp the edges tightly. This keeps the delicious filling inside. Also, avoid overfilling the pies. A tablespoon of filling is just right. For extra security, let the filled pies rest for a few minutes before cooking. This helps the filling set a bit.
Can I make these hand pies ahead of time?
Yes, you can prepare these hand pies ahead of time. Make the filling and store it in the fridge for up to two days. You can also assemble the pies in advance. Just keep them in the fridge before cooking. If you want to freeze them, wrap each pie well and store them in a freezer bag. When ready to cook, just pop them in the air fryer from frozen.
What can I use instead of cornstarch for thickening?
If you need a substitute for cornstarch, flour works well. Use twice the amount of flour as cornstarch. For example, if your recipe calls for 1 tablespoon of cornstarch, use 2 tablespoons of flour. Tapioca starch is another great option. It can thicken just like cornstarch. Use the same amount as you would cornstarch.
Making apple hand pies is simple and fun. We covered the ingredients, instructions, and tips to help you along the way. You learned how to make the filling, prep your dough, and achieve that perfect crispy crust in the air fryer. Don’t forget the variations! You can switch up spices or use other fruits. Proper storage and reheating keep them fresh and tasty. Enjoy your tasty treats, and impress your friends with your new skills!