Air Fryer Crispy Sweet Potato Fries Simple and Tasty

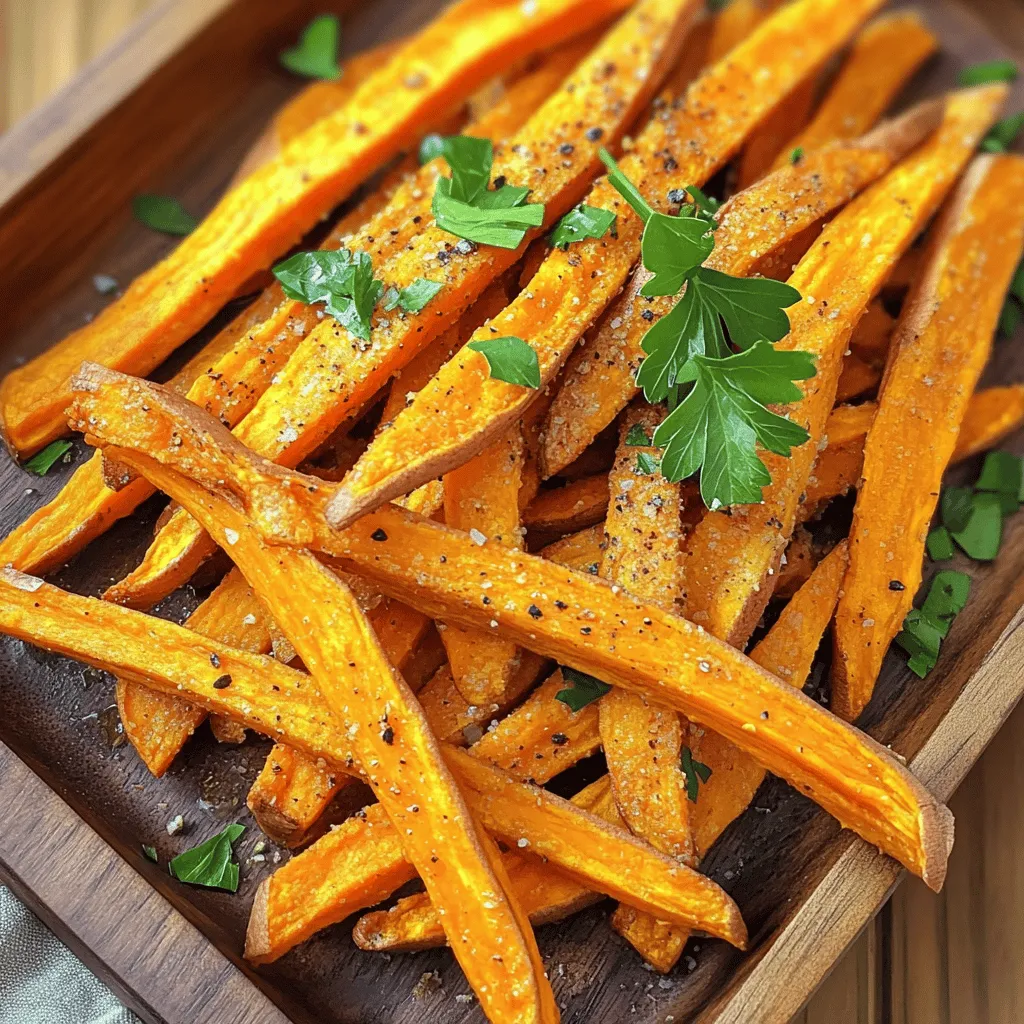
If you crave a crunchy snack that’s both simple and delicious, you’ve come to the right place! In this post, I’ll share my go-to recipe for Air Fryer Crispy Sweet Potato Fries. You’ll learn how to make these tasty fries with just a few ingredients, easy steps, and helpful tips. Whether for a quick treat or a fun side dish, these fries are sure to please. Let’s get frying!
Ingredients
To make Air Fryer Crispy Sweet Potato Fries, you need simple ingredients. Here’s what you will need:
– 2 large sweet potatoes, peeled and cut into fries
– 2 tablespoons olive oil
– 1 teaspoon garlic powder
– 1 teaspoon paprika
– 1/2 teaspoon chili powder (optional for heat)
– Salt and pepper to taste
– Fresh parsley, chopped (for garnish)
These ingredients bring out the best flavors in your fries. Sweet potatoes are sweet, soft, and healthy. Olive oil helps them crisp up nicely. Garlic powder and paprika add depth and warmth. If you like heat, add chili powder. Salt and pepper are key to enhance all the flavors. Lastly, parsley gives a fresh touch and a pop of color.
Gather these ingredients, and you’re ready to make something tasty!
Step-by-Step Instructions
Preparation Steps
First, we soak the sweet potato fries. This step helps make them crispy. Place the fries in cold water for about 30 minutes. Soaking removes extra starch. This simple act is key to crunchy fries.
After soaking, drain the fries well. Use a clean kitchen towel to pat them dry. Make sure they are not wet. Dry fries will fry better and get crispier.
Cooking Instructions
Next, we preheat the air fryer. Set it to 380°F (190°C) and preheat for about 5 minutes. A hot fryer is crucial for even cooking.
Once preheated, add the fries to the air fryer basket. Place them in a single layer. Do not let them overlap. This ensures they cook evenly. Cook the fries for 15-20 minutes. Shake the basket halfway through cooking. This helps them crisp all over. If you like them crispier, add 2-3 more minutes.
Finishing Touches
After cooking, check if the fries are golden brown. If they look good, remove them from the fryer. Place the fries on a serving dish.
Garnish with freshly chopped parsley for a pop of color. You can serve these fries as a snack or side dish. Pair them with your favorite dipping sauce for extra fun!
Tips & Tricks
Achieving Optimal Crispiness
Soaking sweet potato fries is key. It removes extra starch, which helps them crisp up. I soak my fries for 30 minutes in cold water. This simple step changes the game for your fry texture.
Once soaked, drying is crucial. I drain the fries and pat them dry with a kitchen towel. This helps to get rid of moisture. Less moisture means more crispiness when cooking.
Seasoning Advice
Great seasoning makes a big difference. I love to mix garlic powder and paprika for a classic flavor. If you like heat, add chili powder. Just half a teaspoon gives a nice kick.
Feel free to adjust spices based on your taste. You can try adding cumin or cayenne for a twist. Experiment with different herbs for unique flavors.
Air Fryer Settings
Setting the right temperature is important. I preheat my air fryer to 380°F (190°C) for five minutes. This ensures even cooking from the start.
For cooking time, I air fry my fries for 15-20 minutes. Shake the basket halfway through. If you want them crispier, add 2-3 more minutes. Keep an eye on them as they cook. You want a golden brown color for the best results.

Variations
Flavor Variations
You can change the taste of your sweet potato fries easily. Try different seasonings to find your favorite. Here are some ideas:
– Cinnamon Sugar: For a sweet treat, mix cinnamon and sugar.
– Italian Herbs: Use oregano, basil, and thyme for an Italian twist.
– Curry Powder: This adds warmth and a unique flavor.
– Lemon Zest: Fresh zest brightens the fries.
If you don’t have olive oil, use coconut oil or avocado oil for frying. These oils work well and add different flavors too.
Sweet Potato Fry Shapes
Cutting your fries in different shapes can make them fun. Here are some styles to try:
– Curly Fries: Use a spiralizer for a fun twist.
– Waffle Fries: Cut sweet potatoes into a grid for a unique shape.
– Steak Fries: Make thick cuts for a hearty fry.
You can also try sweet potato rounds for a different look. Just slice them into 1/4-inch thick circles, and they will cook nicely.
Serving Ideas
Dipping sauces can take your fries to the next level. Here are some tasty options:
– Ketchup: A classic choice that everyone loves.
– Ranch Dressing: Creamy and delicious for dipping.
– Garlic Aioli: A fancy twist that pairs well with sweet potatoes.
– Spicy Mayo: Mix mayo with sriracha for some heat.
These fries also pair well with burgers, sandwiches, or salads. They make a great side dish for any meal.
Storage Info
Refrigeration Guidelines
To store your leftover fries, place them in an airtight container. Make sure they are cool before sealing the lid. This helps keep them fresh longer. You can also use a resealable bag. Remove as much air as possible. The fries will stay good in the fridge for about 3 days.
Reheating Tips
The best way to reheat your sweet potato fries is in the air fryer. Set it to 350°F (175°C). Cook for about 5 to 7 minutes. This method helps keep them crispy. You can also use an oven. Place the fries on a baking sheet and heat for 10 to 12 minutes at the same temperature. Avoid using a microwave as it can make them soggy. For extra crispiness, shake the basket or flip them halfway through reheating. Enjoy your tasty fries just like they were fresh!
FAQs
Can I use regular potatoes instead of sweet potatoes?
Yes, you can use regular potatoes. They will taste different. Regular potatoes have less sweetness and a starchy texture. You may need to adjust the cooking time, as they can cook faster. Keep an eye on them to avoid burning.
How can I prevent fries from sticking in the air fryer?
To stop fries from sticking, make sure to dry them well after soaking. Tossing them in olive oil helps too. Place the fries in a single layer in the air fryer basket. Avoid overcrowding, as this can cause sticking and uneven cooking.
How long do I need to soak sweet potato fries?
Soak the sweet potato fries for about 30 minutes. This step removes excess starch, which helps them become crispier. After soaking, drain and pat them dry for the best results.
In this article, we explored how to make the best sweet potato fries. We covered ingredients, preparation steps, and cooking methods. Tips on achieving crispiness and seasoning were also included. You learned about different flavor variations and storage tips.
With these steps, you can enjoy delicious, homemade fries any time. Just remember to experiment with flavors and shapes to keep it fun. Now, get cooking and enjoy your tasty treats!


![For the best garlic butter steak bites, I recommend using sirloin steak. Sirloin is tender and flavorful, making it perfect for this dish. Cut the steak into 1-inch cubes. This size cooks quickly and evenly. Make sure to pat the steak dry with paper towels. This step removes moisture and helps achieve a nice sear. The flavors come alive with fresh herbs. I use 1 teaspoon of fresh rosemary and 1 teaspoon of fresh thyme. You can also use dried herbs if you prefer. Just use half the amount. Don't forget salt and pepper! Season the steak well on all sides to enhance its natural taste. You’ll need 4 tablespoons of unsalted butter and 5 cloves of minced garlic. The butter adds richness, and the garlic brings a wonderful aroma. Finally, garnish with fresh parsley for a pop of color. This simple ingredient list makes the garlic butter steak bites shine. For the full recipe, check out the [Full Recipe]. First, you need to prepare the steak. Take 1 lb of sirloin and cut it into 1-inch cubes. Pat these cubes dry with paper towels. This step helps to make a great sear. Now, season the cubes with salt and pepper on all sides. Use enough seasoning, so the flavor shines through. Next, heat a large skillet over medium-high heat. Add 2 tablespoons of unsalted butter. Wait until the butter is foamy and starts to brown. Then, add half of the steak cubes to the skillet. Sear the steak bites for about 2-3 minutes on each side. Look for a nice brown color. Once done, take them out and set them aside. Repeat for the other half, adding more butter if needed. Now it's time to bring it all together. Lower the heat to medium-low and return all the steak bites to the skillet. Add 5 minced garlic cloves, 1 teaspoon of chopped fresh rosemary, and 1 teaspoon of chopped fresh thyme. Cook for 1-2 minutes while stirring often. You want the garlic to be fragrant but not burnt. Finally, remove the skillet from heat. Stir in the last tablespoon of butter until it melts and mixes well with the steak bites. Adjust the seasoning if needed. Garnish with chopped fresh parsley before you serve. For a complete guide, check the Full Recipe. To get a great sear, start with dry steak cubes. Patting them dry helps. Next, heat your skillet until it’s hot. Add butter when the skillet is ready and foamy. Place the steak cubes in the skillet without crowding them. This allows each piece to brown well. Cook for about 2-3 minutes on each side. Look for a nice brown color. This gives you that tasty crust. To boost the flavor, use fresh herbs like rosemary and thyme. Chop them finely and add them to the skillet with garlic. The garlic adds a lovely aroma. You can also add a splash of Worcestershire sauce for extra depth. Adjust salt and pepper to your taste. Don’t forget to garnish with fresh parsley before serving. This adds a pop of color and freshness. Cooking steak bites to the right temperature is key. For medium-rare, aim for about 130°F. Use a meat thermometer to check. If you prefer medium, go for 140°F. Remember, the steak will keep cooking after you take it off the heat. Let it rest for a few minutes. This helps the juices settle. Enjoy your garlic butter steak bites with the perfect doneness! For the complete recipe, check out the [Full Recipe]. {{image_2}} You can use many cuts of steak for this dish. Sirloin is great, but try ribeye for more flavor. Tenderloin offers a soft bite, while flank steak gives a nice chew. Each cut brings a unique texture and taste. Just remember, adjust the cooking time based on the cut. Thicker cuts need longer cooking, while thinner ones cook faster. The seasonings can change the taste of garlic butter steak bites. Want a spicy kick? Add red pepper flakes or smoked paprika. For a sweeter touch, try a bit of honey or brown sugar. You can swap out rosemary and thyme for herbs like oregano or basil. Each herb adds its own twist, so feel free to experiment. If you want a vegetarian version, use mushrooms instead of steak. Portobello or cremini mushrooms work well. They soak up the garlic butter and give a rich flavor. You can also use tofu or tempeh for plant-based protein. Just make sure to press out any extra water before cooking. This helps them get crispy and tasty. For the full recipe, check out the Garlic Butter Steak Bites section. Store leftover garlic butter steak bites in an airtight container. Make sure they cool first. They will last for 3 to 4 days in the fridge. If you plan to eat them later, try to separate them from the sauce. This keeps the steak from getting too soggy. To reheat, place the steak bites in a skillet over low heat. Add a splash of beef broth or water to keep them moist. Stir often for about 5 minutes until heated through. You can also use a microwave. Heat in short bursts, about 30 seconds each, checking often. You can freeze garlic butter steak bites for up to 3 months. Place them in a freezer-safe container. Make sure to label the container with the date. When you’re ready to eat, thaw them in the fridge overnight. Reheat as mentioned above for the best taste. If you want the full recipe, check the link for more details! It takes about 20 minutes to cook garlic butter steak bites. The prep time is 10 minutes, and cooking takes around 10 minutes. You want to sear the steak for about 2-3 minutes on each side. This gives it a nice brown color. Adjust the time for more doneness if needed. Yes, you can use frozen steak, but it needs to be thawed first. Thaw the steak overnight in the fridge for best results. This keeps the meat juicy and tender. If you hurry, you can use the microwave to defrost it. Just be careful to avoid cooking the edges. Garlic butter steak bites go well with many sides. Try these options: - Sautéed vegetables - Mashed potatoes - Rice pilaf - Crispy roasted potatoes - Fresh salad These sides add flavor and balance to your meal. Feel free to mix and match! For the full recipe, check the earlier section. In this blog post, we covered how to make garlic butter steak bites. We discussed choosing the right meat and using tasty herbs. I shared step-by-step instructions for getting that perfect sear and mixing in garlic butter. We also looked at tips to enhance flavors and suggested variations for different diets. Remember to store leftovers properly and reheat them well. Now you have all the tools to enjoy this simple dish. Cooking is fun, so try it out!](https://dailydishly.com/wp-content/uploads/2025/06/daf37226-e56f-491f-87e9-6665894a306e-768x768.webp)

![To make Roasted Garlic Parmesan Cauliflower, gather the following main ingredients: - 1 medium head of cauliflower, cut into florets - 6 cloves of garlic, minced - 1/4 cup grated Parmesan cheese - 3 tablespoons olive oil - 1 teaspoon garlic powder - 1/2 teaspoon smoked paprika - Salt and pepper to taste - Fresh parsley, chopped (for garnish) These ingredients create a rich and savory flavor in the dish. The garlic gives it a nice punch, while the Parmesan adds creaminess. You can add some optional ingredients to change up the flavor. Here are a few ideas: - Lemon juice for a tangy twist - Red pepper flakes for heat - Thyme or rosemary for an herbaceous note Using these optional ingredients can give you a unique spin on the original dish. To prepare this delicious dish, you’ll need a few basic tools: - A large mixing bowl - A baking sheet - Parchment paper for easy cleanup - A sharp knife for cutting the cauliflower - A spatula for tossing the florets Having the right tools makes cooking easier and more fun. You can find the full recipe in the guide above. First, you need to wash the cauliflower. Remove the leaves and cut the head into small florets. Make sure they are about the same size. This helps them cook evenly. You want each floret to be bite-sized. It makes serving easier and more fun to eat. In a large bowl, add your cauliflower florets. Now, add minced garlic, olive oil, garlic powder, smoked paprika, salt, and pepper. Toss everything well. Ensure each floret gets coated in the tasty mix. This step is key for great flavor. The garlic and spices will really shine through. Preheat your oven to 425°F (220°C). Spread the seasoned florets on a baking sheet lined with parchment paper. Make sure they are in a single layer. This helps them roast well. Bake for about 20-25 minutes. Stir halfway through to ensure even roasting. The cauliflower should turn tender and golden brown. When you take them out, sprinkle the Parmesan cheese on top. Pop them back in the oven for 5 more minutes. This will melt the cheese and make everything delicious. Finally, let the roasted cauliflower cool for a couple of minutes. Garnish with fresh parsley before serving. Enjoy your flavorful dish! For the full recipe, check [Full Recipe]. To get the best flavor, use fresh garlic. Fresh garlic gives a strong, rich taste. Mince the garlic finely for even better flavor. You can also add a pinch of lemon zest. This adds a bright note that balances the richness of the cheese. Roasting cauliflower is all about the heat. Preheat your oven to 425°F (220°C). This high heat gives the cauliflower a nice golden color. Spread the florets out on the baking sheet. If they are too close, they will steam instead of roast. Stir them halfway through cooking. This helps to brown all sides evenly. Roasted garlic parmesan cauliflower shines on its own. Serve it as a side dish with grilled chicken or fish. You can also toss it into salads for extra flavor. For a fun twist, make it a topping for baked potatoes. The creamy cheese and garlic mix perfectly with the fluffy potato. Don’t forget to check the Full Recipe for more tips! {{image_2}} You can switch up the cheese in this dish. Try using cheddar for a sharper taste. Goat cheese adds a creamy touch that melts nicely. Feta gives a tangy bite that pairs well with garlic. If you want a nutty flavor, use Gruyère instead. Each cheese brings its own flair to the roasted cauliflower. You can mix in other veggies for more color and taste. Broccoli works great with cauliflower. Brussels sprouts add a nice crunch. Carrots give a sweet note that balances the garlic. Feel free to toss in bell peppers or zucchini for extra flavor. Roasting them together makes a tasty medley. If you want a vegan version, swap the Parmesan for nutritional yeast. It gives a cheesy flavor without dairy. You can also use vegan cheese shreds that melt well. For extra creaminess, add a splash of almond milk. This way, you keep the dish flavorful and plant-based. You can find the full recipe for Roasted Garlic Parmesan Cauliflower [here]. After enjoying your Roasted Garlic Parmesan Cauliflower, let it cool first. Place any leftovers in an airtight container. You can store it in the fridge for up to 3 days. This keeps the flavors fresh and the texture nice. To reheat, preheat your oven to 350°F (175°C). Spread the cauliflower on a baking sheet. Heat it for about 10 to 15 minutes. This method keeps the cauliflower crisp. You can also microwave it for 1 to 2 minutes, but the texture may change. If you want to freeze this dish, first let it cool completely. Transfer the cauliflower to a freezer-safe bag or container. It can last for up to a month. To enjoy, thaw it overnight in the fridge. Reheat it in the oven for the best results. For more details, check the Full Recipe. Roasting cauliflower takes about 20 to 25 minutes. Preheat your oven to 425°F (220°C). Spread the cauliflower florets on a baking sheet. Roast until they turn tender and golden brown. Remember to stir halfway through for even cooking. Yes, you can prepare this dish ahead of time. You can cut the cauliflower and mix in the garlic and oil. Store it in the fridge for up to 24 hours before roasting. When you’re ready, just pop it in the oven. This makes it easy for busy days! You can serve Roasted Garlic Parmesan Cauliflower with many dishes. It pairs well with grilled chicken or fish. You can also enjoy it as a side for pasta. For a vegetarian meal, serve it with quinoa or a fresh salad. The flavors work great together and make for a fun meal! For the full recipe, check out the section above. This recipe for Roasted Garlic Parmesan Cauliflower covers everything from ingredients to storage tips. You learned how to prepare, season, and roast the cauliflower for the best flavor. Remember to try different cheeses or veggie options for fun twists. When storing leftovers, keep them safe for another meal. Enjoy this dish alongside your favorites. Cook with confidence, and let your taste buds guide you!](https://dailydishly.com/wp-content/uploads/2025/06/e2797ad0-ebfe-4fec-85bd-8200cd052b8d-768x768.webp)
. If you need a substitute for quinoa, try these options: - Brown rice - Bulgur wheat - Couscous - Farro - Barley These grains provide a similar texture and can carry flavors well. Each option has its own taste and cooking time, so pick what you like best! Yes, Lemon Garlic Quinoa Salad is very healthy! Quinoa is a complete protein, meaning it has all nine essential amino acids. It is also gluten-free and high in fiber. The fresh vegetables add vitamins and minerals. Olive oil gives healthy fats, while lemon juice adds vitamin C. This salad is low in calories and full of nutrients. It’s a great choice for a light meal or side dish. Yes, you can make this salad in advance! It tastes even better after sitting for a while. Prepare it a few hours before serving. Just keep it in the fridge. The salad can marinate, letting the flavors mix well. If you plan to make it one day ahead, wait to add the feta cheese until serving. This keeps it fresh and tasty. This blog post covered how to make a delicious quinoa salad. We explored main ingredients like quinoa, fresh vegetables, and tasty dressings. I shared tips for cooking quinoa and ways to prep veggies. You learned how to make the dressing and assemble the salad for the best results. Plus, I provided ideas for variations and storage methods. Making this salad can be easy and fun. Trying different flavors can keep it exciting. Enjoy every bite and make it your own!](https://dailydishly.com/wp-content/uploads/2025/07/e42a7f06-4d66-46b9-9caa-936cc7f21d46-768x768.webp)

