Air Fryer Garlic Butter Mushrooms Flavorful Side Dish

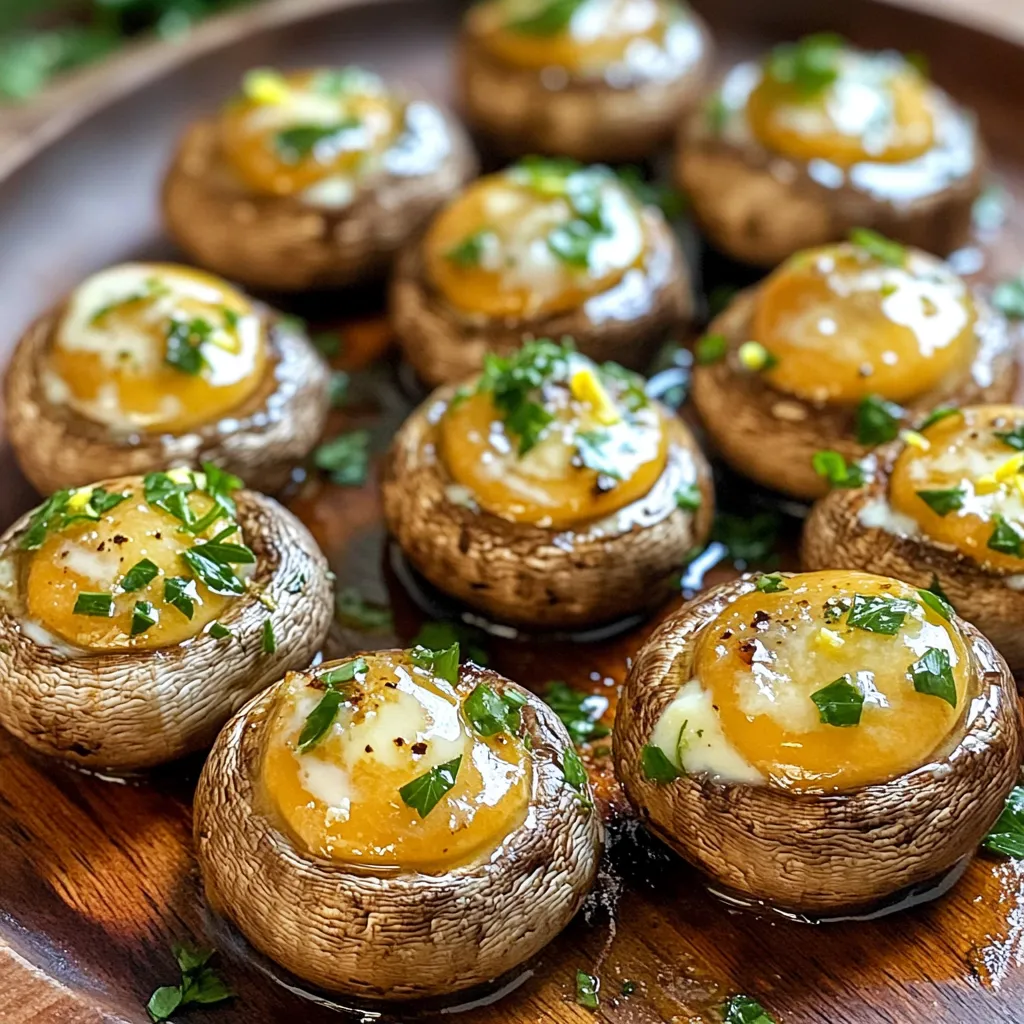
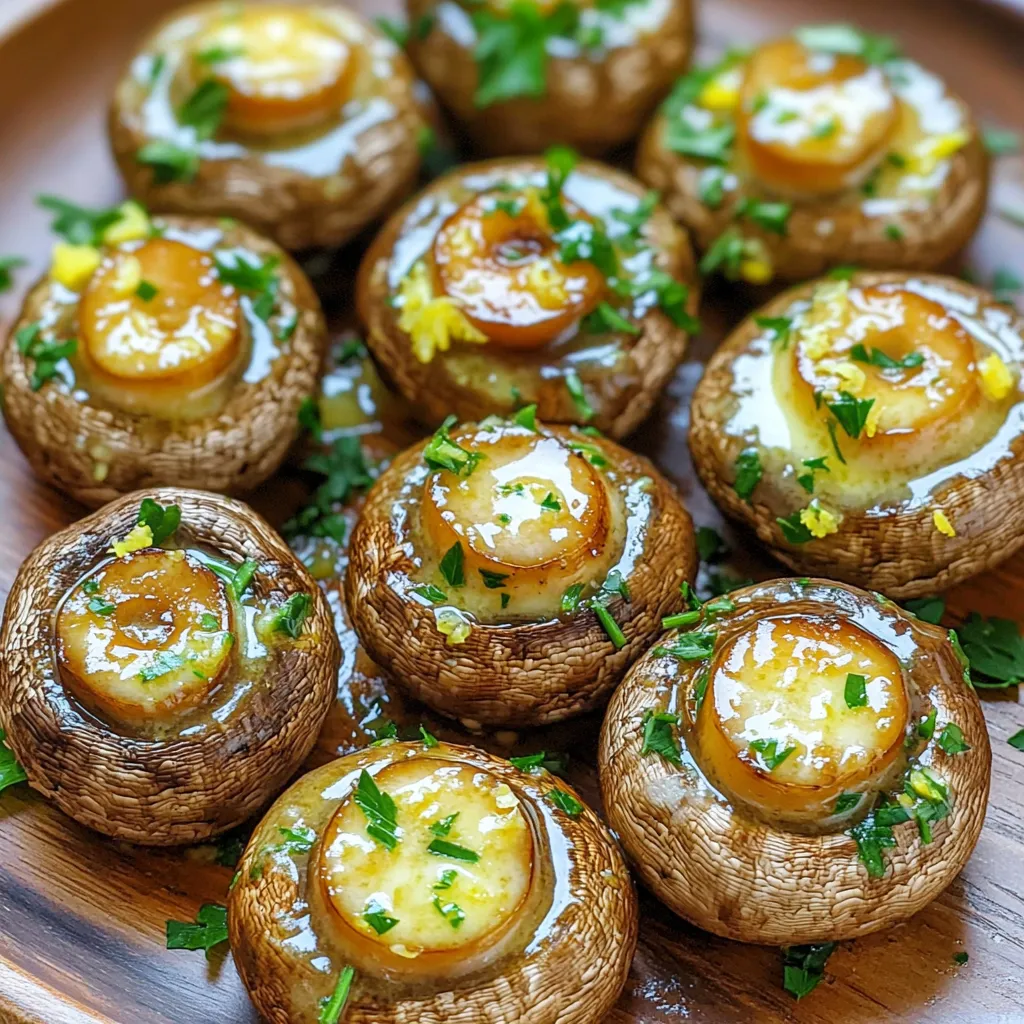
If you’re looking for a quick and tasty side dish, air fryer garlic butter mushrooms are a must-try! These little bites of flavor are easy to make and full of rich garlic and herb goodness. In this article, I’ll share the best ingredients, simple steps, and useful tips to help you nail this dish every time. Let’s dive in and elevate your meal with this delicious recipe!
Ingredients
Main Ingredients
– 16 oz (450g) baby bella mushrooms, cleaned and stems trimmed
– 4 tablespoons unsalted butter, melted
– 4 cloves garlic, minced
– 1 tablespoon fresh parsley, chopped
– 1 teaspoon dried thyme
The main stars of this dish are the baby bella mushrooms. They are rich in flavor and have a nice, meaty texture. You will melt unsalted butter to create a rich base. Minced garlic adds a punch of flavor. Fresh parsley and dried thyme bring in brightness and depth, making each bite delightful.
Optional Ingredients
– Salt and pepper to taste
– Lemon zest
You can add salt and pepper to enhance the taste. A sprinkle of lemon zest adds a fresh twist. This small touch can brighten up the dish, making it even more enjoyable.
Serving Suggestions
These garlic butter mushrooms make a great side dish. They pair well with grilled chicken, steak, or fish. You can even serve them as an appetizer.
For garnish, add a sprinkle of fresh parsley on top before serving. This adds color and a fresh touch. Drizzle any remaining garlic butter from the bowl over the mushrooms for extra flavor. Enjoy these warm for the best taste!
Step-by-Step Instructions
Preparation
How to clean and trim mushrooms
Start by rinsing the baby bella mushrooms under cold water. Use a soft brush or a damp cloth to remove any dirt. Trim the stems to about half an inch long. This helps the mushrooms cook evenly and soak up the flavors.
Making garlic butter mixture
In a medium bowl, mix 4 tablespoons of melted unsalted butter with 4 minced garlic cloves, 1 tablespoon of chopped fresh parsley, and 1 teaspoon of dried thyme. Add salt and pepper to taste. If you want a bright flavor, add the zest of one lemon. Stir well until everything is combined.
Cooking Process
Preheating the air fryer
Preheat your air fryer to 375°F (190°C). Let it warm up for about 3-5 minutes. This step is crucial for cooking the mushrooms evenly from the start.
Arranging mushrooms in the basket
Once preheated, take the mushrooms and coat them well in the garlic butter mixture. Place them in the air fryer basket in a single layer. If your air fryer is small, you might need to cook them in batches. This ensures each mushroom gets enough heat.
Cooking Time and Temperature
Optimal cooking duration
Cook the mushrooms in the air fryer for 10-12 minutes. Halfway through cooking, shake the basket gently. This helps the mushrooms brown nicely on all sides.
Checking doneness
After 10-12 minutes, check if the mushrooms are tender and slightly golden. If needed, adjust the seasoning with more salt and pepper.
Tips & Tricks
Achieving Perfectly Cooked Mushrooms
To ensure your mushrooms cook evenly, remember to shake the basket halfway through. This step helps them brown nicely and avoids sogginess. Serve the mushrooms right after cooking. They taste best when hot and fresh.
Flavor Enhancements
You can easily boost the flavor of these mushrooms. Try adding spices like paprika or cayenne for heat. Fresh herbs like rosemary or basil can also add depth. For a cheesy twist, sprinkle parmesan over the mushrooms before serving. The combination of garlic and cheese is always a hit!
Equipment Recommendations
For this recipe, an air fryer with a capacity of at least 4 quarts works well. Look for one that has adjustable temperature settings. Essential utensils include a mixing bowl, a sharp knife, and a sturdy cutting board. Having a good pair of tongs makes serving easier.

Variations
Different Mushroom Types
You can use many types of mushrooms in this dish. Baby bella mushrooms are great, but button or shiitake mushrooms work well too. Each type brings its unique taste. Button mushrooms are mild and easy to find. Shiitake mushrooms add a rich, earthy flavor. Experiment with your favorites to see what you like best.
Adding Vegetables
You can mix in other veggies for a fun medley. Try adding bell peppers, zucchini, or asparagus. These veggies add color and nutrients. Just chop them into bite-sized pieces. Toss them in with the mushrooms when you coat them in the garlic butter. This way, everything cooks together nicely.
Dietary Adaptations
If you want to make this recipe vegan, swap the butter for olive oil or vegan butter. This keeps the flavor while fitting your diet. For low-fat options, you can cut down on the butter. Use just two tablespoons instead of four. The dish will still taste great!
Storage Info
Storing Leftovers
To keep your air fryer garlic butter mushrooms fresh, store them in the fridge. Use airtight containers to avoid drying out. Glass or plastic containers work well. Make sure they cool down before sealing. This helps keep the flavors locked in. Try to use them within three days for the best taste.
Reheating Instructions
You can reheat mushrooms in either an air fryer or a microwave. For the air fryer, set it to 350°F (175°C) and heat for about 5 minutes. This keeps them crispy. In a microwave, place them in a bowl and cover with a paper towel. Heat for 1-2 minutes, stirring halfway. This helps keep the flavors intact.
Freezing Tips
Yes, you can freeze cooked mushrooms! Start by letting them cool completely. Then, place them in freezer-safe bags. Remove as much air as possible to prevent freezer burn. Label the bags with the date, so you remember when you froze them. They can last up to three months in the freezer. When ready to eat, thaw in the fridge overnight before reheating.
FAQs
How long do you cook mushrooms in an air fryer?
You cook mushrooms in an air fryer for 10-12 minutes. Start by preheating the air fryer to 375°F (190°C). Place the mushrooms in a single layer in the basket. Shake the basket halfway through to cook them evenly. They should be tender and golden when done.
Can you use frozen mushrooms for this recipe?
Yes, you can use frozen mushrooms. However, thaw them first. Pat them dry with a paper towel to remove excess moisture. This will help them cook better and get that nice golden color. Adjust cooking time if needed since frozen mushrooms may take a bit longer.
What can I serve with garlic butter mushrooms?
Garlic butter mushrooms pair well with many dishes. You can serve them with steak, chicken, or fish. They also go great with pasta or on top of rice. A fresh salad can balance the rich flavors nicely. Don’t forget to drizzle any leftover garlic butter on top!
How do I make garlic butter from scratch?
Making garlic butter is simple. Just follow these steps:
– Melt 4 tablespoons of unsalted butter in a bowl.
– Add 4 minced garlic cloves.
– Mix in fresh herbs like parsley and thyme for flavor.
– Season with salt and pepper to taste.
You can adjust the garlic amount based on your taste. Enjoy this easy, homemade garlic butter!
In this post, I shared a simple and tasty air fryer mushrooms recipe. You learned about the main and optional ingredients, and tips to ensure perfect cooking. I also covered variations, storage tips, and answered common questions.
Cooking can be easy and fun with the right tools and ideas. Try out this recipe, and make it your own! Enjoy delicious garlic butter mushrooms any time.


![- 2 cups diced apples - 1 cup celery, chopped - 1 cup grapes, halved - 1 cup walnuts, toasted - 1/2 cup raisins - 1/2 cup plain Greek yogurt - 2 tablespoons mayonnaise - 1 tablespoon lemon juice - Salt and pepper to taste - Fresh mint leaves for garnish The main ingredients create a great mix of flavors and textures. I love using tart apples, like Granny Smith. Their crunch adds freshness to the salad. Celery adds a nice crunch, while grapes bring sweetness. Toasted walnuts give a rich, nutty flavor. Raisins add little bursts of sweetness throughout. - Yogurt alternatives (like sour cream or vegan yogurt) - Different nut options (like pecans or almonds) - Additional fruits (like oranges or pears) Feel free to switch things up! You can use sour cream or vegan yogurt if you prefer. Pecans and almonds also work great if you want different nuts. Adding fruits like oranges or pears can give the salad a unique twist. For the full recipe, check [Full Recipe]. Start by dicing the apples into small, even pieces. I like using Granny Smith for a nice tart flavor. Next, chop the celery into thin slices. This adds a great crunch to the salad. Then, halve the grapes. You can use red or green grapes, depending on your preference. This will add sweetness and color. Finally, toast the walnuts in a dry pan on medium heat. Stir them often until they smell nutty. This step brings out their flavor. In a small bowl, mix the Greek yogurt and mayonnaise. Add the lemon juice, salt, and pepper. Whisk until smooth and creamy. This dressing adds a tangy taste that pairs well with the fruit. In a large mixing bowl, combine the fruit and nut mixture with the dressing. Gently mix everything until the apples and grapes are evenly coated. This ensures every bite is flavorful. Next, chill the salad in the refrigerator for at least 30 minutes. This helps the flavors meld together. Just before serving, toss the salad lightly and garnish with fresh mint leaves. Enjoy your Classic Waldorf Salad! For the full recipe, check out the details above. Choosing the right apple is key. I love using Granny Smith apples. They give the salad a tart flavor that contrasts well with the sweet grapes. Other options include Honeycrisp or Fuji for a sweeter taste. Always pick crisp apples for the best crunch. Toasting walnuts can boost their flavor. Start by placing them in a dry pan over medium heat. Stir them often for about 5-7 minutes. Watch for a golden color and a nutty smell. This step adds depth to your salad. You can add simple spices or herbs to elevate the taste. A pinch of cinnamon or nutmeg can add warmth. Fresh herbs like parsley or dill can brighten your dish. Experiment with a bit of fresh lemon zest for a zesty kick. For sweetness, consider using honey or maple syrup. A teaspoon of honey can balance the tartness of the apples. Maple syrup offers a unique flavor and a touch of earthiness. Adjust the sweetness to your taste, but don't overdo it. You want a nice balance. For the full recipe, check out the Classic Waldorf Salad recipe. {{image_2}} You can make the Waldorf salad your own. Adding protein is a great option. Cooked chicken or shrimp works well. This change adds heartiness and makes it more filling. You can also make a vegan version. Use chickpeas or tofu instead of yogurt and mayo. This keeps the salad creamy and tasty without dairy. Switching up the fruits can change the whole flavor. In fall, use crisp pears or sweet figs. In summer, try fresh berries for a juicy twist. You can also change the dressing. A light vinaigrette can give it a new taste. Or, try adding a hint of honey for extra sweetness. These variations keep your Waldorf salad fresh and exciting. For the classic recipe, check out the Full Recipe. To keep your Waldorf salad fresh, store it in the fridge. Use an airtight container. This helps to keep the salad cool and crisp. Avoid using metal containers, as they can react with the ingredients. Glass or plastic works best. You can keep the salad in the fridge for up to three days. After that, the fruits may lose their crunch. It is not a good idea to freeze Waldorf salad. The texture of the apples and grapes changes when frozen. Enjoy it fresh for the best taste! For the full recipe, check out the earlier section. Waldorf Salad started in the late 1800s. A chef at the Waldorf Astoria Hotel in New York created it. It was first served at a charity ball in 1896. The salad features apples, celery, and walnuts. Over time, it has become a classic dish. It mixes sweet and crunchy flavors, making it popular. Yes, you can prepare Waldorf Salad ahead. This dish tastes even better after sitting in the fridge. To do this, chop the fruits and mix them with the dressing. Store it in an airtight container for up to 24 hours. Just remember to add the nuts just before serving. This keeps them crunchy and fresh. Waldorf Salad pairs well with many dishes. It makes a great side for roasted chicken or turkey. You can also serve it alongside sandwiches for lunch. The salad’s fresh taste balances rich flavors nicely. Try it with grilled fish for a light dinner option. To make Waldorf Salad healthier, you can swap some ingredients. Use low-fat yogurt instead of regular mayo. You can also add more fruits, like berries or oranges. For a nut-free version, try sunflower seeds. These changes help cut calories while keeping the flavor. You can find the full recipe for Classic Waldorf Salad right here. It includes all the details you need to create this tasty dish. Enjoy making it at home! Waldorf salad is a tasty mix of fruits, nuts, and creamy dressing. You now know the key ingredients, how to prepare them, and some handy tips for extra flavor. Think about adding your favorite fruits or proteins to make it unique. Remember, it’s easy to store and great for meal prep. Enjoy sharing this delicious dish with family and friends or serving it at your next gathering. Your tasty, fresh Waldorf salad will impress!](https://dailydishly.com/wp-content/uploads/2025/06/915437da-33d1-4ffb-bb72-5bb8c719e96d-768x768.webp)
![When making lemon garlic shrimp skewers, you need fresh and simple ingredients. Here’s what you will need: - 1 lb large shrimp, peeled and deveined - 3 tablespoons olive oil - Zest and juice of 2 lemons - 4 cloves garlic, minced - 1 teaspoon red pepper flakes - 1 teaspoon smoked paprika - Salt and pepper to taste - Fresh parsley, chopped - Skewers, soaked if wooden Each ingredient plays a key role in creating the bright and zesty flavor of the dish. The shrimp should be large and fresh for the best taste. This recipe uses lemon juice and zest to add brightness. Minced garlic gives a strong, savory kick. Red pepper flakes add some heat, while smoked paprika gives a nice depth of flavor. Don’t forget to soak wooden skewers in water for at least 30 minutes. This step helps to prevent burning on the grill. You can find the full recipe details in the recipe section. Enjoy the bright, fresh taste of lemon garlic shrimp skewers! To start, gather your ingredients. You will need olive oil, lemon zest, lemon juice, garlic, red pepper flakes, smoked paprika, salt, and pepper. In a large bowl, combine these ingredients. Whisk them together until they blend well. The smell of the lemon and garlic will fill your kitchen. This marinade packs a punch and will soak into the shrimp. Next, add your shrimp to the marinade. Make sure each shrimp gets a good coat of that zesty mix. This step is key for flavor. Once all the shrimp are coated, cover the bowl. Place it in the fridge for at least 30 minutes. This wait allows the flavors to seep into the shrimp, making them taste amazing. Now, it's time to grill. Preheat your grill or grill pan to medium-high heat. While it heats up, thread the marinated shrimp onto skewers. Don’t crowd them; leave some space for even cooking. When the grill is hot, place the skewers on it. Grill each side for 2-3 minutes. You will know the shrimp are done when they turn pink and opaque. This means they are perfectly cooked. Enjoy the aroma as they grill! For the full recipe, check the section above. To get the best shrimp, cook them for 2-3 minutes on each side. Use medium-high heat on your grill or grill pan. Watch for key signs of doneness: the shrimp should turn bright pink and become opaque. If they curl tightly, they may be overcooked. You can adjust the spices to match your taste. Try adding more red pepper flakes for heat, or use fresh herbs like cilantro or basil. If you want to swap oils, avocado oil works great too. You can even add a splash of soy sauce for a different twist. These lemon garlic shrimp skewers pair well with many sides. Try serving them with a fresh salad, rice, or grilled vegetables. For garnishing, sprinkle fresh parsley or lemon zest on top. This adds a pop of color and extra flavor. For the full recipe, check out the [Full Recipe]. {{image_2}} You can make your lemon garlic shrimp skewers even better by adding vegetables. I love using bell peppers, zucchini, or onions. These veggies add color and flavor. Here’s how to do it: - Bell Peppers: Cut them into bite-sized pieces. They add sweetness and crunch. - Zucchini: Slice it into thick rounds. It cooks quickly and stays tender. - Onions: Use red or yellow onions. Cut into wedges for a nice char. For mixed skewers, cook the shrimp and veggies together for about 2-3 minutes on each side. Just keep an eye on the cooking time. You want everything to be tender and cooked through. If you want more or less heat, it’s easy to adjust. To reduce heat, cut back on red pepper flakes. You can also use a milder spice blend. For more heat, add extra red pepper flakes or a dash of hot sauce. Try different marinades for new flavors. A honey-soy mix gives a sweet twist. A cilantro-lime marinade offers a fresh taste. These changes can make your skewers even more fun! If you want to switch things up, consider other seafood. Scallops are a great choice. They cook fast and taste amazing. You can also use firm fish like salmon or tuna. Just cut them into chunks. When cooking different seafood, adjust the cooking time. Fish usually cooks in 4-5 minutes. Scallops need about 2-3 minutes per side. Always look for that perfect pink and opaque look to know it’s done. To keep your shrimp skewers fresh, place them in an airtight container. You can store them in the fridge for up to three days. If you want to keep them longer, freeze them. Wrap each skewer in plastic wrap and then place them in a freezer bag. They can stay in the freezer for up to three months. When you reheat shrimp skewers, do it gently to keep them juicy. The oven works best. Preheat it to 350°F (175°C). Place the skewers on a baking sheet and cover them with foil. Heat for about 10 minutes. You can also use a microwave if you are in a hurry. Just heat them for 30 seconds at a time. Check often to avoid overcooking. Preparing shrimp skewers in advance is easy. You can marinate them the night before and store them in the fridge. This way, all the flavors mix well. If you have leftover shrimp, use them in salads, tacos, or pasta dishes. They add great flavor and protein to your meals. For more fun, try mixing them with veggies to make a stir-fry. For the full recipe, check out the Zesty Lemon Garlic Shrimp Skewers. I recommend marinating the shrimp for at least 30 minutes. This time allows the shrimp to soak up the lemon and garlic flavors. If you have more time, you can marinate them for up to 2 hours. Just don't go too long, or the shrimp may become tough from the acid in the marinade. Yes, you can prepare the skewers ahead of time. Just marinate the shrimp and thread them onto skewers. Cover and store them in the fridge for up to 2 hours before grilling. If you need more time, you can freeze the marinated skewers for later use. Just thaw them in the fridge before cooking. Look for large shrimp, ideally 16-20 count per pound. Large shrimp stay juicy and cook evenly on the grill. Always choose fresh or frozen shrimp that are peeled and deveined for the best results. Fresh shrimp should smell like the sea and have a firm texture. Perfectly cooked shrimp turn pink and opaque. This usually takes about 2-3 minutes per side on the grill. If you see them curl into a C shape, that’s a sign they are done. Overcooking shrimp can make them tough, so keep an eye on them while grilling. You learned how to make delicious lemon garlic shrimp skewers using simple ingredients. We covered marinating, grilling, and tips for perfect shrimp. You can spice it up or add veggies for new flavors. These skewers are easy to store, reheat, and even use in other meals. Enjoy making this dish and impressing friends or family with your grilling skills.](https://dailydishly.com/wp-content/uploads/2025/06/a1f3f783-88f9-44d5-88e1-43cf245073bc-768x768.webp)