Air Fryer Parmesan Zucchini Chips Healthy Snack Recipe

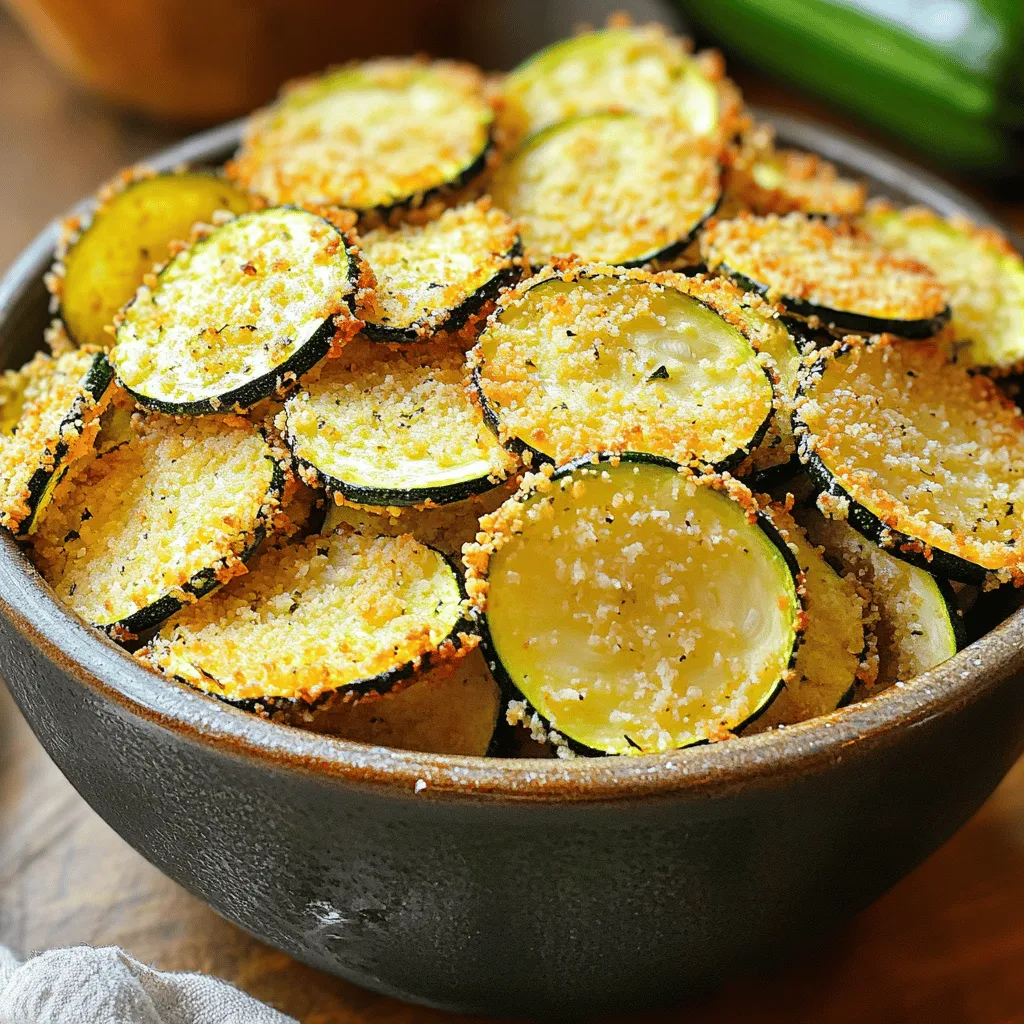
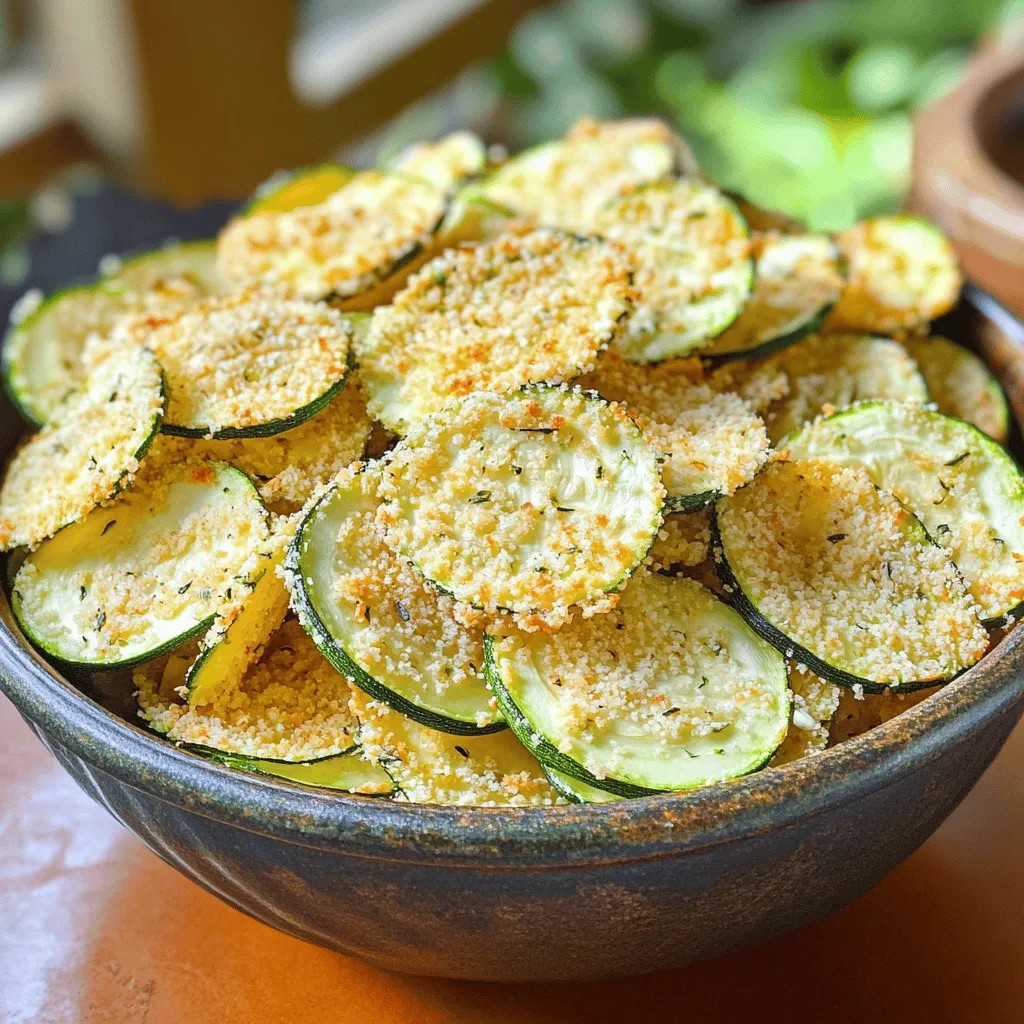
Want a healthy snack that’s both crunchy and cheesy? You’re in the right place! My Air Fryer Parmesan Zucchini Chips are easy to make and full of flavor. If you’re tired of chips that ruin your diet, these crispy delights will make you smile. Follow my simple recipe, and you’ll enjoy a guilt-free treat that’s perfect for any time of the day! Ready to get started? Let’s dive into the details!
Ingredients
Main Ingredients
– 2 medium zucchinis, sliced thinly
– 1/2 cup grated Parmesan cheese
– 1/2 cup breadcrumbs (panko for extra crunch)
Seasoning Components
– 1 teaspoon garlic powder
– 1 teaspoon onion powder
– 1 teaspoon Italian seasoning
Additional Items
– Salt and pepper to taste
– 1 large egg, beaten
– Olive oil spray
The heart of this recipe is the zucchini. I love using fresh zucchinis because they are crisp and light. When sliced thin, they turn into lovely chips. Next, we have Parmesan cheese. It adds a rich flavor and a nice crunch when baked. I often use panko bread crumbs for extra crispiness. They give a great texture to each chip.
For flavor, I include garlic powder, onion powder, and Italian seasoning. These spices make the chips taste amazing. A pinch of salt and pepper brings out the other flavors. You will also need one large egg. This acts as a binder for the coatings. Finally, I use olive oil spray to help the chips crisp up in the air fryer. It’s a small step that makes a big difference.
Step-by-Step Instructions
Preheating the Air Fryer
Set your air fryer to 400°F (200°C). This high heat gives the zucchini chips a crispy texture. Preheating ensures even cooking. It’s a key step for great results.
Preparing the Coating
In a large bowl, mix these dry ingredients:
– 1/2 cup grated Parmesan cheese
– 1/2 cup breadcrumbs (panko for extra crunch)
– 1 teaspoon garlic powder
– 1 teaspoon onion powder
– 1 teaspoon Italian seasoning
– Salt and pepper to taste
This blend adds flavor and crunch to the zucchini. In a separate bowl, beat one large egg. This will help the coating stick.
Coating the Zucchini Slices
Take each zucchini slice and dip it into the beaten egg. Make sure it’s well coated. Next, press the egg-coated slice into the breadcrumb mixture. Cover both sides fully. Repeat this for all the slices. This step is key for flavor and crunch.
Air Frying the Chips
Lightly spray the air fryer basket with olive oil. This helps prevent sticking. Place the coated zucchini chips in a single layer. Make sure they do not overlap. If needed, work in batches.
Spray the tops of the zucchini chips lightly with olive oil. This adds extra crispiness. Air fry the chips for 12-15 minutes. Flip them halfway through cooking. Look for a golden and crispy texture. Once done, remove the chips and let them rest for a minute. Enjoy them warm!
Tips & Tricks
Perfecting Crispiness
To make your Air Fryer Parmesan Zucchini Chips super crispy, follow these tips. First, avoid overlapping the zucchini slices in the air fryer. This allows hot air to reach every piece and cook them evenly. Second, use olive oil spray. A light mist helps create a golden, crunchy texture without adding too much fat.
Troubleshooting
If your chips come out soggy, don’t worry; it’s easy to fix. Check the oil spray. Too much oil can make them soft. Ensure you coat them lightly. Also, make sure your air fryer temperature is set correctly. If they are still soggy, try cooking them a little longer. A few extra minutes can make a big difference.
Serving Suggestions
Pair your chips with tasty dips for extra flavor. Try marinara sauce or ranch dressing. They also go well with guacamole for a fun twist. For a lighter option, serve them with a yogurt dip mixed with herbs. These pairings make your zucchini chips a fun snack or side dish!

Variations
Flavor Enhancements
You can easily boost the flavor of your zucchini chips. Try adding spices or herbs to the breadcrumb mix. A bit of paprika gives a smoky touch. For a spicy kick, add cayenne pepper. You can also mix in fresh herbs like thyme or rosemary. These will add a fresh taste. Experiment and find your favorite combination!
Cheese Alternatives
While Parmesan is tasty, you can switch up the cheese. Try using cheddar for a sharp flavor. Mozzarella gives a nice melt and stretch. If you want a nutty taste, use Pecorino Romano. Each cheese brings a different vibe. This allows you to customize your chips to match your mood.
Alternative Techniques
If you don’t have an air fryer, you can bake these chips in the oven. Preheat the oven to 425°F (220°C). Arrange the zucchini on a baking sheet in a single layer. Bake for about 20-25 minutes, flipping halfway through. This method still gives you crispy chips. Just make sure to watch them closely to avoid burning.
Storage Info
Storing Leftovers
To store your zucchini chips, let them cool first. Place them in an airtight container. This keeps them fresh for up to three days in the fridge. Make sure to layer them with parchment paper. This helps prevent them from getting soggy.
Reheating Tips
When you’re ready to enjoy your chips again, use the air fryer to reheat them. Set it to 350°F (175°C) for about 5 minutes. This restores their crispiness. You can also use a regular oven. Heat it to 350°F (175°C) and bake for 5-8 minutes. Avoid the microwave, as it makes them soft.
Freezing Guidance
To freeze zucchini chips, let them cool completely first. Place them in a single layer on a baking sheet. Freeze for about an hour. Once frozen, transfer them to a freezer-safe bag. They can last for up to two months. When you want to eat them, just reheat directly from frozen in the air fryer. Enjoy your crispy snack!
FAQs
What is the best way to cut zucchini for chips?
For the best zucchini chips, slice them thin. Aim for about 1/8 inch thick. This thickness helps them cook evenly and get crispy. If they are too thick, they may turn out soft. If they are too thin, they may burn. Use a sharp knife for clean cuts. A mandoline slicer also works well for uniform pieces.
Can I make these chips gluten-free?
Yes, you can easily make these zucchini chips gluten-free! Instead of regular breadcrumbs, use gluten-free panko or crushed gluten-free crackers. Both options give a nice crunch. Just check the labels to ensure they are truly gluten-free. You can also use ground oats for a different texture.
How long will these zucchini chips stay fresh?
These zucchini chips taste best fresh. However, if you have leftovers, store them in an airtight container. They can last up to 3 days in the fridge. Keep them away from moisture to avoid sogginess. For longer storage, consider freezing them. Just remember to reheat them in the air fryer for crispiness.
In this blog post, we covered making delicious zucchini chips step-by-step. We discussed key ingredients like zucchini, parmesan, and spices. I shared tips for crispiness and ways to fix soggy chips. You learned about variations and how to store leftovers.
Finally, enjoy experimenting with flavors and adapt this recipe to your taste. Homemade zucchini chips can be a fun snack for everyone. Stay creative and enjoy your time in the kitchen!


![To make a tasty Zesty Greek Pasta Salad, you need fresh, vibrant ingredients. Here’s what to gather: - 8 oz. farfalle pasta (or your choice of pasta) - 1 cup cherry tomatoes, halved - 1 cucumber, diced - 1/2 red onion, thinly sliced - 1 cup Kalamata olives, pitted and halved - 1 cup feta cheese, crumbled - 1/4 cup fresh parsley, chopped - 1/4 cup olive oil - 2 tablespoons red wine vinegar (or lemon juice) - 1 teaspoon dried oregano - 1 clove garlic, minced - Salt and pepper to taste These ingredients create a bright flavor that makes the salad shine. You can add your own twist to this salad. Here are some options: - Bell peppers for extra crunch - Artichoke hearts for a tangy bite - Spinach or arugula for more greens - Chickpeas for added protein - Avocado for creaminess Feel free to mix in these ingredients based on what you like. If you can’t find some ingredients, don’t worry! Here are some tips: - Use any pasta shape you prefer. Penne or rotini work well too. - Swap Kalamata olives for green olives if desired. - Feta can be replaced with goat cheese for a different flavor. - Use fresh herbs like dill or mint instead of parsley for a unique taste. These swaps help you create a salad that suits your taste. For the complete recipe, check the [Full Recipe]. To make a great Zesty Greek Pasta Salad, start with the pasta. Use 8 oz. of farfalle or your favorite kind. Bring a big pot of salted water to a boil. Add the pasta and cook it until it's al dente. This usually takes about 8 to 10 minutes. Drain the pasta and rinse it with cold water. This stops the cooking and cools the pasta. You want it nice and firm. Next, let’s make the zesty dressing. In a small bowl, add 1/4 cup olive oil. Then, mix in 2 tablespoons of red wine vinegar. You can use lemon juice if you prefer. Now, add 1 clove of minced garlic and 1 teaspoon of dried oregano. Sprinkle in salt and pepper to taste. Whisk everything until it blends well. This dressing brings a bright flavor to the salad. Now, it's time to combine everything! In a large bowl, add the cooled pasta. Then, toss in 1 cup of halved cherry tomatoes, 1 diced cucumber, and 1/2 sliced red onion. Next, add 1 cup of Kalamata olives and 1 cup of crumbled feta cheese. Pour the zesty dressing over the top. Gently toss to coat everything evenly. Finally, sprinkle 1/4 cup of chopped parsley. Give it one last toss. For the best taste, chill the salad for at least 30 minutes. This lets all the flavors mix nicely. Check the seasoning once more, then serve. Enjoy your fresh and tasty Zesty Greek Pasta Salad! For more details, see the Full Recipe. To make your Zesty Greek Pasta Salad shine, use fresh ingredients. Fresh herbs, like parsley, add bright flavor. A squeeze of lemon juice can also boost taste. For a kick, try adding red pepper flakes. They bring heat without overpowering the dish. When mixing, taste as you go. Adjust salt and pepper as needed for balance. The texture of your pasta salad is key. Cook the farfalle pasta just until tender, or al dente. Rinse it under cold water after cooking. This stops the cooking process and keeps it firm. When you mix in the veggies, chop them evenly. This ensures every bite has a bit of everything. Letting the salad chill helps the flavors blend while keeping the crunch. Presentation matters! Serve your Zesty Greek Pasta Salad in a big bowl. This invites guests to help themselves. For a pop of color, add whole olives on top. A sprinkle of fresh parsley brightens it further. Drizzle a bit more olive oil before serving for shine. Pair it with crusty bread or grilled chicken for a full meal. Enjoy the vibrant colors and flavors! {{image_2}} You can easily add a Mediterranean twist to your Zesty Greek Pasta Salad. Try adding artichoke hearts or sun-dried tomatoes for a new flavor. Roasted red peppers bring a sweet touch. You could also toss in some capers for a salty bite. Each addition makes the dish more vibrant and exciting. Boost the nutrition in your salad with healthy add-ins. Consider adding chickpeas for protein and fiber. Spinach or arugula adds a fresh green crunch. You can also mix in some toasted nuts for healthy fats. Each of these options makes your salad not just tasty, but also good for you. While the olive oil dressing is classic, you can try other options too. A lemon-tahini dressing offers a creamy texture and a tangy flavor. Greek yogurt dressing gives a rich taste and adds protein. A balsamic vinaigrette can bring a sweet twist. Each dressing changes the salad's flavor while keeping it fresh and light. For the full recipe, check out the detailed steps to create this delightful dish. After making your Zesty Greek Pasta Salad, store it in an airtight container. This keeps the flavors fresh and prevents spills. Place parchment paper between layers if you stack ingredients. This way, the salad stays crisp and delicious. Your salad stays tasty in the fridge for about 3 to 5 days. The flavors blend well over time, which is a bonus. Just make sure to check for freshness before eating. If any ingredients look off, it’s best to toss them. I don’t recommend freezing this salad. Freezing can change the texture of fresh vegetables and cheese. However, if you must freeze it, leave out the tomatoes and cucumbers. Store it in a freezer-safe container. It can last up to 2 months. When ready to eat, thaw it in the fridge overnight and mix in fresh veggies before serving. For the complete recipe, check out the Full Recipe section. Yes, you can use any pasta you like. I often choose rotini or penne for this salad. These shapes hold the dressing well. You can even try whole wheat or gluten-free pasta for a healthier option. Absolutely! This salad is great for meal prep. It stays fresh in the fridge for about three days. Just store it in an airtight container. Make sure to add fresh herbs right before serving for the best taste. Adding protein boosts this salad nicely. Grilled chicken, shrimp, or chickpeas work well. You can also try diced turkey or even canned tuna. These options make the salad heartier and more filling. For the full recipe, check out the details above. This blog post covered how to make a tasty Zesty Greek Pasta Salad. We explored key ingredients and options for customization. Simple steps guided the cooking and mixing. Tips helped enhance flavor and texture. We also looked at fun variations and storage tips. In conclusion, you can enjoy this salad in many ways. Whether for a meal or a party, it’s a crowd-pleaser. Get creative with your ingredients, and have fun making it!](https://dailydishly.com/wp-content/uploads/2025/07/db2e56f5-892c-4a59-805f-2ecaeb9e2bc5-768x768.webp)


![To make a refreshing Lemon Basil Chickpea Salad, you need the following: - 1 can (15 oz) chickpeas, drained and rinsed - 1 cup cherry tomatoes, halved - 1 cucumber, diced - 1 bell pepper (any color), diced - 1/4 red onion, finely chopped - 1/4 cup fresh basil leaves, chopped - Juice of 1 lemon - 3 tablespoons extra-virgin olive oil - Salt and pepper to taste - 1/4 teaspoon garlic powder - 1/4 teaspoon red pepper flakes (optional) When picking your produce, choose firm tomatoes and bright, crisp cucumbers. Look for bell peppers that feel heavy for their size. Fresh basil should smell sweet and look vibrant. These tips help ensure your salad shines with flavor. You can add extra flavor and texture to your salad with these options: - Avocado, diced for creaminess - Feta cheese, crumbled for a salty kick - Olives, sliced for a briny touch - Grilled corn for sweetness Feel free to swap ingredients based on what’s in season. For example, use zucchini in summer or roasted butternut squash in fall. This flexibility makes the salad fun and fresh all year long. For the complete recipe, check out the [Full Recipe]. To make the Lemon Basil Chickpea Salad, start with a large bowl. Combine the following ingredients: - 1 can (15 oz) chickpeas, drained and rinsed - 1 cup cherry tomatoes, halved - 1 cucumber, diced - 1 bell pepper (any color), diced - 1/4 red onion, finely chopped - 1/4 cup fresh basil leaves, chopped Mix these well. The chickpeas add protein and texture. The tomatoes and cucumber bring freshness and crunch. The bell pepper adds color, while the onion gives a mild zing. Once mixed, let’s prepare the dressing. You can serve the salad right away, but I suggest letting it sit for at least 10 minutes. This time helps the flavors blend nicely. For the dressing, grab a small bowl. Whisk together these ingredients: - Juice of 1 lemon - 3 tablespoons extra-virgin olive oil - Salt and pepper to taste - 1/4 teaspoon garlic powder - 1/4 teaspoon red pepper flakes (optional) The lemon juice gives a bright, tangy taste. Olive oil adds richness. Adjust the salt and pepper to your liking. If you want a kick, add the red pepper flakes. Aim for a smooth blend in your dressing. Drizzle it over your salad and toss gently. Taste the salad and adjust seasoning if needed. Enjoy this vibrant dish fresh, or chill it for a refreshing bite. For the full recipe, check out the detailed instructions. You can pair Lemon Basil Chickpea Salad with many dishes. It goes well with grilled chicken or fish. You can also serve it with warm pita bread for a filling meal. For a light lunch, try it with a scoop of quinoa. When presenting the salad, use a large, bright bowl. This makes the colors pop and draws attention. Garnish with extra basil leaves or lemon slices for a fresh look. Adjusting the seasonings can make this salad perfect for your taste. If you like more zest, add extra lemon juice. For added heat, sprinkle in more red pepper flakes. You can also mix in more garlic powder for a stronger flavor. If you have leftovers, store them in an airtight container. To enhance the flavors, let the salad rest for a bit before eating. Reheating is not usually needed, but you can warm it slightly if you prefer. Just be careful not to heat it too much, as the fresh veggies taste best cold. {{image_2}} You can easily switch up the vegetables in your Lemon Basil Chickpea Salad. Here are some ideas: - Zucchini: Grate or dice it for a fresh crunch. - Carrots: Shred them for a sweet touch. - Corn: Add sweet corn for extra flavor and texture. You can also swap out chickpeas for other legumes: - Black beans: They add a rich, earthy taste. - Lentils: These will make your salad even heartier. For herbs, feel free to get creative: - Mint: It gives a refreshing twist. - Cilantro: Perfect if you love its bold flavor. When it comes to dressings, you can personalize it: - Balsamic vinaigrette: Adds a tangy sweetness. - Greek yogurt dressing: For a creamy element. This salad is versatile for different diets. To make it vegan, simply ensure the dressing is plant-based. You can replace any non-vegan ingredients with plant-friendly options: - Use nutritional yeast instead of cheese for a cheesy flavor without dairy. For gluten-free needs, this salad is already safe! Just make sure any added ingredients are gluten-free. To lower calories, skip the oil or use less. You can also add more veggies to bulk it up without extra calories. If you want to boost protein, consider these options: - Feta cheese: Crumble it on top for creamy richness. - Grilled chicken: Adds heartiness and flavor. With these variations, your Lemon Basil Chickpea Salad can fit any taste or diet. Check out the Full Recipe for all the details! To keep your Lemon Basil Chickpea Salad fresh, store it in an airtight container. Glass containers work well, but plastic ones are fine too. Make sure the lid closes tightly. Place the salad in the fridge right away. This helps lock in flavors and keeps everything crisp. If you have extra dressing, store it separately. This way, your salad won’t get soggy. When you’re ready to eat, simply drizzle the dressing over the salad and toss it again. Your salad will stay fresh in the fridge for about three days. After that, the veggies may lose their crunch. Look for signs of spoilage. If the salad smells off or looks slimy, it’s time to toss it. Make sure to check the basil too. If the leaves turn brown or wilt, it’s best to discard them. Enjoy your salad while it’s fresh for the best taste. For the full recipe, check [Full Recipe]. What can I add to make this salad heartier? You can add cooked quinoa or farro for more fiber. Chopped avocado adds creaminess. Grilled chicken or shrimp boosts protein. Can I make this salad ahead of time? Yes, you can make this salad ahead. It tastes even better after sitting for a while. Just store it in the fridge. Is there a substitute for chickpeas in this recipe? If you don't have chickpeas, try black beans or cannellini beans. Both offer protein and a nice texture. This salad is not just tasty; it’s healthy too. One serving has about 250 calories. It has 10 grams of fat and 12 grams of protein. - Chickpeas provide protein and fiber. - Tomatoes add vitamins and antioxidants. - Cucumbers keep the salad light and refreshing. - Basil offers flavor and has anti-inflammatory properties. How to make the salad more flavorful? To enhance the taste, add more lemon juice or fresh herbs. A pinch of cumin can also add depth. Recommendation for preparing for meal prepping When meal prepping, keep the dressing separate. This keeps the salad fresh and crisp. Store it in airtight containers for best results. This blog post walked you through making a fresh and tasty Lemon Basil Chickpea Salad. We covered the main ingredients and tips for choosing the best produce. You learned how to make a flavorful dressing and plenty of serving ideas. In conclusion, this salad is easy to customize for any diet and season. With proper storage, it stays fresh and tasty for days. Enjoy making this salad and share it with friends and family for a healthy treat!](https://dailydishly.com/wp-content/uploads/2025/07/d3747d36-0043-45e0-9a82-fe789303a34f-768x768.webp)
