Air Fryer Spicy Sweet Potato Fries Crunchy Delight

Looking for a tasty snack? Air Fryer Spicy Sweet Potato Fries are the perfect choice! This simple recipe gives you crispy, spicy goodness in no time. You only need a few ingredients, and I’ll walk you through each step. Get ready to impress yourself and your friends with this crunchy delight. Let’s dive into making these fries and explore tips for perfection!
Ingredients
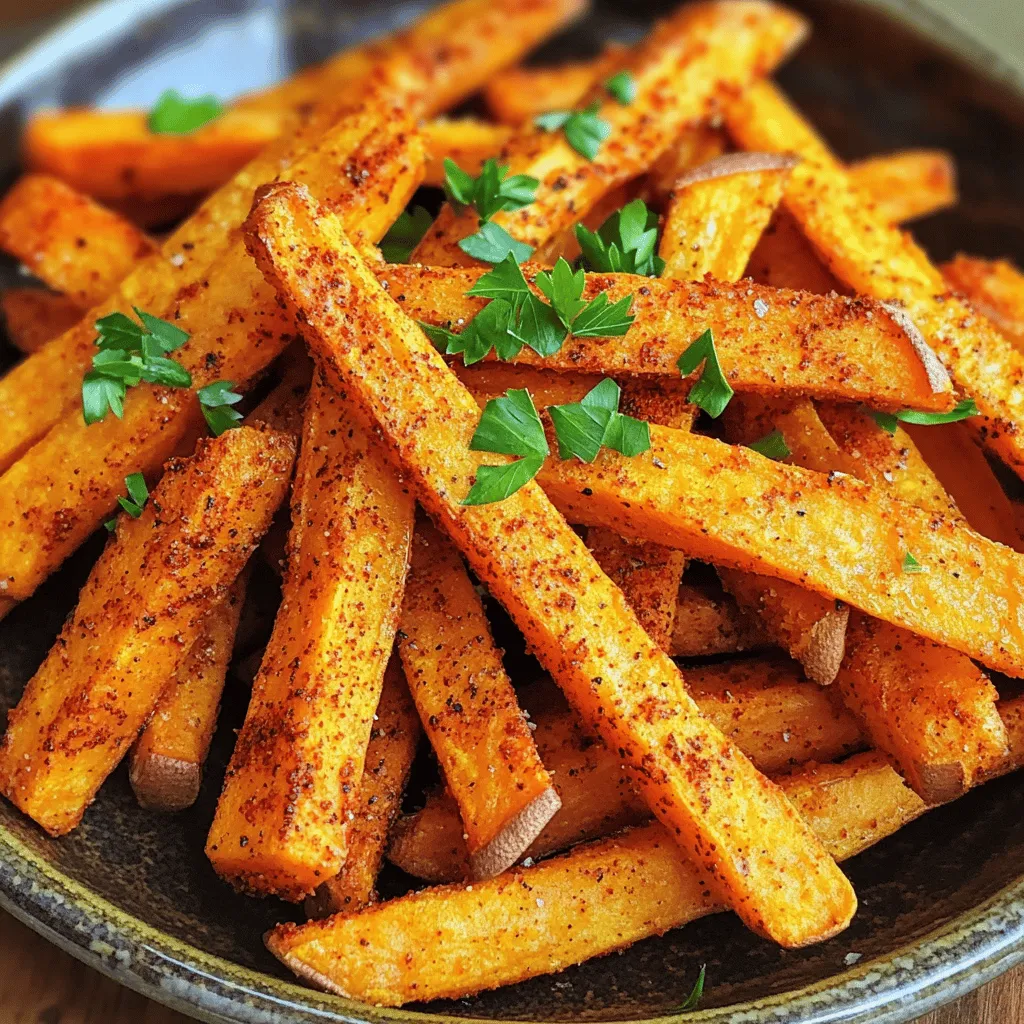
List of Required Ingredients
– 2 large sweet potatoes, peeled and cut into fries
– 2 tablespoons olive oil
– 1 teaspoon paprika
– 1 teaspoon chili powder
– 1/2 teaspoon cayenne pepper (adjust for spice level)
– 1 teaspoon garlic powder
– 1/2 teaspoon cumin
– Salt to taste
– Fresh parsley, chopped (for garnish)
Sweet potatoes are the star of this dish. They add a natural sweetness that balances the heat from the spices. I prefer using large sweet potatoes because they yield more fries. Make sure to peel and cut them evenly for the best results.
Olive oil plays a key role here. It helps the fries crisp up nicely in the air fryer. You can use other oils, but olive oil adds a great flavor.
The spices and seasonings give these fries their kick. Paprika adds color, chili powder brings heat, and cayenne pepper can make it spicier. Adjust the cayenne to suit your taste. Garlic powder and cumin round out the flavor. Don’t forget to add salt to enhance all the other tastes.
Garnish options are simple. Fresh parsley not only looks nice but adds a fresh taste. You can also add extra chili flakes for more heat. This mix of ingredients makes for a fun and tasty treat that you will enjoy!
Step-by-Step Instructions
Preheating the Air Fryer
Start by preheating your air fryer to 400°F (200°C). This step takes about 5 minutes. Preheating helps the fries cook evenly and become crispy.
Preparing the Sweet Potatoes
Next, take 2 large sweet potatoes. Peel them and cut them into fry shapes. Aim for uniform sizes. This helps them cook at the same rate.
Seasoning the Fries
In a large bowl, add the cut sweet potatoes along with 2 tablespoons of olive oil. Toss them well to coat every fry. Then, add the spices: 1 teaspoon paprika, 1 teaspoon chili powder, 1/2 teaspoon cayenne pepper, 1 teaspoon garlic powder, and 1/2 teaspoon cumin. Season with salt to taste. Mix everything well to ensure each fry is flavorful.
Air Frying the Sweet Potato Fries
Place the seasoned fries in the air fryer basket. Make sure to lay them in a single layer. Leave some space between them for air to flow. Cook them at 400°F (200°C) for 15-20 minutes. Shake the basket halfway through. This helps them crisp up evenly. Look for a golden brown color when done.
Serving Suggestions
Once cooked, take the fries out and put them on a serving plate. For a fresh touch, add chopped parsley on top. Serve them hot with your favorite dipping sauce. Spicy mayo or avocado ranch pairs well. Sprinkle extra chili flakes for a fun kick!
Tips & Tricks
How to Achieve Extra Crispy Fries
To get your sweet potato fries extra crispy, follow these steps. First, soak the cut fries in water for about 30 minutes. This helps remove some starch. After soaking, dry them well using a kitchen towel. Next, use enough olive oil to coat the fries but not too much. A light coating works best. Finally, air fry them in a single layer. If needed, cook in batches.
Spice Level Adjustments
You can control the heat of your fries easily. If you like it mild, skip the cayenne pepper. You could also reduce the chili powder. For more heat, add more cayenne or chili powder. Mix well to ensure even spice distribution. This way, everyone can enjoy their perfect level of spice.
Recommended Dipping Sauces
Pair your spicy sweet potato fries with tasty dips. Some great options are spicy mayo, avocado ranch, or garlic aioli. For a twist, try a tangy yogurt dip with lime juice. These sauces bring out the flavors of the fries. Plus, they make the meal even more fun!

Variations
Adding Different Spices or Herbs
You can change the flavor of your fries. Try adding different spices or herbs. For a smoky taste, add smoked paprika. If you want a fresh kick, use fresh rosemary or thyme. You can also try Italian seasoning for a unique twist. Just mix these spices with the olive oil and sweet potatoes. This adds layers of flavor to your dish.
Sweet Potato Fry Alternatives
If you want to switch things up, try other vegetables. Carrots, zucchini, or even eggplant work great. Cut them into fry shapes and follow the same steps. Just remember to adjust the cooking time. Each veggie has its own cooking needs. Experiment with different flavors and find what you love best!
Cooking in Batches
Cooking in batches helps your fries turn out crispy. If you overcrowd the air fryer, they might get soggy. Cook a small amount at a time. This allows hot air to circulate around each fry. You can always keep the first batch warm in the oven. This way, all your fries will be hot and crunchy when served.
Storage Info
Best Storage Practices
To keep your spicy sweet potato fries fresh, let them cool first. Place the fries in an airtight container. This helps keep them from getting soggy. Store them in the fridge for up to three days. If you want to keep them longer, consider freezing them.
Reheating Leftover Fries
When it’s time to eat your leftovers, you can reheat them in the air fryer. Set the air fryer to 350°F (175°C). Heat the fries for about 5 to 7 minutes. This method helps restore their crispiness. You can also use a regular oven at the same temperature.
Freezing Tips
If you want to freeze your fries, follow these steps. First, let the fries cool completely. Next, place them in a single layer on a baking sheet. Freeze them for about one hour. This helps them stay separate. Once frozen, transfer them to a freezer bag. They can last for up to three months in the freezer. When you’re ready to cook, just air fry them straight from the freezer for about 15 to 20 minutes.
FAQs
Can I make these fries without an air fryer?
Yes, you can make these fries in an oven. Set your oven to 425°F (220°C). Spread the fries on a baking sheet. Bake them for about 25-30 minutes. Flip them halfway for even cooking. They will not be as crispy, but they will still taste great!
How do I cut sweet potatoes for fries?
Cutting sweet potatoes for fries is easy. Start by peeling the sweet potatoes. Then, slice them into long, thin sticks. Aim for a size of about 1/4 inch thick. This size helps them cook evenly and become crispy.
What can I serve with spicy sweet potato fries?
These fries pair well with many dips. Try spicy mayo, avocado ranch, or ketchup. You can also serve them with a side of grilled chicken or fish. They add a nice kick to any meal!
How long do leftovers last in the fridge?
Leftover fries can last up to three days in the fridge. Store them in an airtight container. To enjoy them again, reheat in the air fryer or oven. This will help them regain some crispiness.
This blog post covered how to make tasty sweet potato fries in an air fryer. First, we looked at essential ingredients and seasonings. I shared easy steps for preparing and cooking the fries. Tips for extra crispiness and spice adjustments followed. We also discussed fun ways to vary your fries and proper storage methods.
In conclusion, making sweet potato fries is simple and rewarding. Enjoy experimenting with flavors and serving options. Happy cooking!


![- 1 pound large shrimp, peeled and deveined - 1/4 cup honey - 3 cloves garlic, minced - 2 tablespoons soy sauce - 1 tablespoon fresh lemon juice For the best flavor, fresh ingredients work wonders. When I use large shrimp, they soak up the marinade well. Honey adds sweetness, while garlic brings a rich taste. Soy sauce provides a savory kick, and lemon juice balances the flavors. - 1 tablespoon olive oil - 1 teaspoon crushed red pepper flakes - Salt and pepper to taste - Skewers (soaked in water if wooden) Olive oil helps the shrimp cook well on the grill. The red pepper flakes add a bit of heat, so adjust them based on your spice preference. Always season with salt and pepper to enhance the dish. If you use wooden skewers, soaking them prevents burning while grilling. - Lemon wedges - Fresh parsley Lemon wedges brighten the dish and make it look appealing. Fresh parsley adds a pop of color and freshness. These garnishes make your skewers not just tasty but also beautiful. For the full recipe, check out the details above. First, gather your marinade ingredients. In a bowl, mix together the honey, minced garlic, soy sauce, lemon juice, olive oil, crushed red pepper flakes, salt, and pepper. Whisk this mixture well until it’s blended. Next, add your peeled and deveined shrimp to the bowl. Make sure each shrimp gets coated with the marinade. Cover the bowl with plastic wrap and place it in the fridge. Let it marinate for at least 30 minutes. This helps the shrimp soak up all that yummy flavor. While the shrimp marinates, it's time to get your grill ready. Preheat the grill to medium-high heat. If you use wooden skewers, soak them in water for about 30 minutes. This step is key. It stops the skewers from burning while grilling. Now for the fun part! Start by threading the marinated shrimp onto the skewers. Leave a little space between each shrimp to help them cook evenly. Place the skewers on the grill. Cook the shrimp for about 2-3 minutes on each side. You’ll know they’re done when they turn pink and opaque. During cooking, brush any extra marinade over the shrimp. This gives them an extra burst of flavor. Once cooked, remove the skewers from the grill and let them rest for a minute. Enjoy these delicious Honey Garlic Shrimp Skewers! For the full recipe, check out the details above. To get the best Honey Garlic Shrimp Skewers, set your grill to medium-high heat. This temperature cooks the shrimp nicely without burning them. You want the grill hot enough to sear the shrimp but not so hot that they turn dry. Leave a little space between each shrimp on the skewers. This helps them cook evenly. If they are too close, they will steam instead of grilling. Proper spacing lets the heat circulate around each piece. Want to spice things up? You can add extra herbs like cilantro, basil, or even a pinch of cumin. These will give your skewers a unique twist. If you want a touch of sweetness, try adding a bit of orange juice or zest. For a different flavor, you can swap the marinade. Try teriyaki sauce for a sweet and savory taste. Or use a spicy chili paste for heat. The options are endless, and each twist can create a new favorite. Pair your Honey Garlic Shrimp Skewers with fresh sides. A light salad with mixed greens and a citrus dressing works great. You can also serve them with a side of grilled vegetables for added color and flavor. For presentation, arrange the skewers on a large platter. Add lemon wedges and sprigs of parsley for a pop of color. This not only makes it look appealing but adds freshness to each bite. Don’t forget to have extra dipping sauce on the side for your guests! {{image_2}} You can change the main protein in this recipe. If you want to swap shrimp for chicken, use boneless chicken breast cut into bite-sized pieces. For a plant-based option, tofu works great too. Just press the tofu to remove excess water before marinating. You can also switch the sweetener. If honey is not your thing, try maple syrup or agave. These options will add a unique twist to the flavor. You can cook these shrimp in different ways. Grilling adds a smoky taste, which makes the dish special. However, if you don’t have a grill, you can bake the shrimp in the oven. Set your oven to 400°F (200°C) and cook for about 10-12 minutes. Another great option is to use a skillet on the stovetop. Heat a bit of oil and cook the shrimp for 2-3 minutes on each side until they turn pink and opaque. To enhance the taste, you can add tropical elements. Pineapple chunks or shredded coconut can give your skewers a fun twist. Don’t be afraid to experiment with herbs! Fresh cilantro, basil, or mint can add freshness and depth. Try adding a mix of herbs to see what suits your taste best. For the full recipe, check out the Honey Garlic Shrimp Skewers section. After you enjoy your honey garlic shrimp skewers, store any leftovers in the fridge. Place them in a clean, airtight container. This will keep them fresh and safe to eat. Try to eat them within three days for the best taste. If you want to keep them longer, you can freeze them. Wrap the skewers tightly in plastic wrap or foil, then put them in a freezer bag. Cooked shrimp skewers can last up to three months in the freezer. When it's time to eat your leftovers, reheating them properly is key. The oven works best for this. Preheat your oven to 350°F. Place the skewers on a baking sheet and cover them with foil. Heat for about 10-15 minutes until warm. If you're in a rush, you can use the microwave. Place the shrimp on a microwave-safe plate and cover it with a damp paper towel. Heat in short bursts of 30 seconds until warmed. To keep the shrimp juicy, avoid overheating them. Cooked honey garlic shrimp skewers can last in the fridge for about three days. After that, the shrimp may spoil. Signs of spoilage include a sour smell, a slimy texture, or discoloration. If you notice any of these signs, it's best to throw them away. Always prioritize your health and safety when it comes to food storage. For the best flavor, marinate the shrimp for at least 30 minutes. This time allows the shrimp to soak up the sweet and savory notes of the marinade. If you have time, marinating for up to 2 hours enhances the taste even more. Just remember not to exceed this time, as shrimp can become mushy. Yes, you can use frozen shrimp. To prepare frozen shrimp, first, thaw them in the fridge overnight. If you need them quicker, place the shrimp in a sealed bag and submerge it in cold water for about 15-20 minutes. Once thawed, rinse them under cold water and pat dry before marinating. Several sides pair well with Honey Garlic Shrimp Skewers. Try serving them with: - Steamed rice or quinoa for a filling base. - Grilled vegetables like zucchini or bell peppers for a colorful plate. - A fresh salad with mixed greens and a light vinaigrette for crunch. - Garlic bread to soak up any extra sauce. Yes, you can make Honey Garlic Shrimp Skewers in the oven. Preheat your oven to 400°F (200°C). Place the skewers on a baking sheet lined with foil. Bake for about 8-10 minutes, flipping halfway through. The shrimp should be pink and opaque when done. This method is perfect if you don’t have a grill. For more details, check the [Full Recipe]. This blog post covers all you need for perfect Honey Garlic Shrimp Skewers. You learned about the key ingredients, including shrimp, honey, and garlic. I shared step-by-step grilling instructions and useful tips for a better cook. Plus, I offered variations for different tastes and storage advice for leftovers. Now you can make delicious skewers with confidence. Enjoy trying new flavors and impressing your friends and family with this recipe!](https://dailydishly.com/wp-content/uploads/2025/07/c236e5ff-bf7a-4bb5-97d9-fa918dc47393-768x768.webp)


. High-quality images are key for any recipe. They help you see the colors and textures of the dish. When serving, a bright bowl can make your salad pop. Try to layer the ingredients for a beautiful look. You can also add a sprig of cilantro on top for that finishing touch. How long does the salad last in the fridge? This salad lasts about 2 to 3 days in the fridge. Store it in a sealed container. The avocados may brown, but the taste stays good. Can I use canned beans instead of dried? Yes, canned beans are great for this salad. They save time and are easy to use. Just rinse and drain them before adding. Can I make this salad ahead of time? You can make this salad a few hours ahead. Just wait to add the avocados until right before serving. This keeps them fresh and green. What are the best toppings to add? Toppings like crumbled feta, fresh cilantro, or diced jalapeños really enhance the salad. You can also add a sprinkle of nuts for crunch. Is this salad gluten-free? Yes, this salad is naturally gluten-free. It contains no wheat or gluten products. What are the health benefits of black beans and avocados? Black beans are high in fiber and protein. They help with digestion and keep you full. Avocados are rich in healthy fats and vitamins. They support heart health and skin. This salad is a nutrient-packed choice. For the full recipe, check out the detailed instructions and enjoy creating this tasty dish! This avocado and black bean salad is fresh, nutritious, and easy to make. You learned about essential ingredients, how to prepare them, and tips for the best results. The recipe allows for tasty twists and options for everyone. Enjoy creating your own version while keeping it healthy and satisfying. This salad is a great dish for lunch, dinner, or gatherings. With vibrant flavors and colors, it’s sure to impress. Dive in and savor every bite!](https://dailydishly.com/wp-content/uploads/2025/06/59c4ae36-0ebd-4eac-932b-d71541cf887d-768x768.webp)

![- 4 medium russet potatoes - 4 tablespoons unsalted butter, melted - 4 cloves garlic, minced - 1 teaspoon dried thyme - 1 teaspoon dried oregano - Salt and pepper to taste - Fresh parsley, chopped (for garnish) - 1 cup grated Parmesan cheese The main ingredients in this dish create a rich and satisfying flavor. The russet potatoes serve as a hearty base. Their starchy texture makes them perfect for baking. The melted butter adds a creamy touch while the minced garlic gives it a bold kick. For seasoning, dried thyme and oregano bring out herbal notes. Salt and pepper help balance the dish. Fresh parsley adds a burst of color and freshness at the end. The cheese component is key. Grated Parmesan cheese melts beautifully and provides a salty, nutty flavor. It also creates a lovely golden crust on top. This mix of ingredients turns simple potatoes into an irresistible delight. You can find the full recipe to make these Garlic Parmesan Hasselback Potatoes and enjoy this delicious dish. - Preheat the oven to 425°F (220°C). - Wash and scrub the potatoes thoroughly. This step cleans off dirt and helps the skin crisp up. - Make horizontal slices to create Hasselback cuts. - Cut about 1/8 inch apart, but do not cut all the way through. This keeps the potato intact. The cuts allow for crispiness and flavor to soak in. - Mix the melted butter, minced garlic, dried thyme, oregano, salt, and pepper in a bowl. - Brush this garlic butter mix over each potato. Let it seep into the cuts for maximum flavor. - Place the potatoes on a baking sheet lined with parchment paper. This helps with easy cleanup. - Bake the potatoes for 40-45 minutes, brushing with more garlic butter halfway through for extra flavor. These steps will help you create perfectly crispy and tasty Garlic Parmesan Hasselback Potatoes. For the complete recipe, check the Full Recipe section. To make sure your Hasselback potatoes cook evenly, slice them correctly. Cut the potatoes into thin slices, about 1/8 inch apart. Do not cut all the way through. Leave about 1/4 inch at the bottom. This helps the potato hold its shape and cook evenly. If your potatoes are larger, make deeper cuts. Always check if they are tender by sticking a fork in them. You can add more flavor to your Garlic Parmesan Hasselback potatoes. Try using smoked paprika for a smoky taste. A sprinkle of red pepper flakes gives it a nice kick. You can also add fresh herbs like rosemary or basil. Just chop them finely and mix them into your garlic butter. This will make the dish even more exciting. For a stunning presentation, arrange the potatoes on a serving platter. You can fan them out slightly for a beautiful look. Drizzle some of the leftover garlic butter over the top before serving. This adds shine and extra flavor. Finally, sprinkle chopped parsley on top. The green color will pop against the golden potatoes. For the best effect, serve them right away while they are hot. For the complete recipe, check out the [Full Recipe]. {{image_2}} You can easily change the herbs in this recipe. Use fresh herbs for a brighter taste. Here are some options to try: - Rosemary: Adds a pine-like flavor that pairs well with garlic. - Basil: Offers a sweet, slightly peppery taste. - Sage: Provides a warm, earthy flavor that complements the potatoes. Feel free to mix and match these herbs. Each one brings its unique touch, making your dish special. If you want to switch up the cheese, there are many tasty options. Each type of cheese gives a different flavor. Here are a few ideas: - Cheddar: Sharp and creamy, cheddar melts beautifully. - Gruyère: This Swiss cheese adds a nutty flavor. - Feta: Crumbled feta gives a salty and tangy twist. Experiment with these cheeses to find your favorite combination. You can make this recipe fit different diets. Here are some easy swaps: - Gluten-Free: Use certified gluten-free breadcrumbs instead of regular ones. - Dairy-Free: Replace butter with olive oil and use a dairy-free cheese option. These changes make it easier for everyone to enjoy this dish. Don't hesitate to customize it to fit your needs. For the complete recipe, check the Full Recipe section. To store leftover Garlic Parmesan Hasselback Potatoes, let them cool first. Place them in an airtight container. Make sure to keep them in the fridge. They will stay fresh for about three to four days. If you want to enjoy them later, store them without the cheese on top. This way, the potatoes will hold up better. When reheating, the goal is to keep the crispness. The best method is to use an oven. Preheat it to 350°F (175°C). Place the potatoes on a baking sheet. Heat them for about 15 to 20 minutes. This helps restore their crunch. You can cover them loosely with foil to prevent drying out. If you like, add a bit more cheese on top before reheating for extra flavor. Yes, you can freeze these delicious potatoes! To do this, let them cool completely. Wrap each potato tightly in plastic wrap. Then place them in a freezer-safe bag. They can last up to two months in the freezer. When you want to eat them, thaw them in the fridge overnight. After that, reheat in the oven as mentioned above. This keeps them tasty and fresh! For the full recipe, check out the details and get cooking! Hasselback potatoes are a fun and tasty style of baked potato. They have thin, evenly spaced slices cut into the potato, but not all the way through. This style lets the butter and seasonings seep in, making every bite delicious. The name comes from a restaurant in Sweden called Hasselbacken, where this style first appeared. The crispy edges and tender inside make them a favorite! Yes, you can! To prepare these potatoes ahead of time, follow these steps: - Wash and slice the potatoes as directed in the recipe. - Mix your garlic butter, but don't bake them yet. - Place the sliced potatoes in a bowl of water with lemon juice to stop browning. - Cover and store in the fridge for up to 24 hours. - When ready, brush with the garlic butter and bake according to the full recipe. This way, you can save time on busy days. Hasselback potatoes pair well with many dishes. Here are some ideas: - Grilled chicken for a hearty meal - A fresh salad to balance the flavors - Steamed vegetables for a healthy side - Steak or pork for a filling dinner These sides enhance the meal while keeping the focus on the garlic parmesan goodness of the potatoes. Enjoy your cooking! In this article, we explored making Garlic Parmesan Hasselback Potatoes. You learned about the ingredients, from russet potatoes to cheese options. I shared step-by-step instructions, helpful tips, and variations for personalization. Storing and reheating methods ensure delicious leftovers. Remember, this dish not only dazzles your guests but also adds a tasty twist to meals. Try different herbs and cheeses to make it your own. Enjoy the cooking process and share your creations!](https://dailydishly.com/wp-content/uploads/2025/07/b691fae6-fd13-450a-8675-22670865cf74-768x768.webp)