Looking for a quick meal that’s fun and full of flavor? Asian Chicken Lettuce Wraps are your answer! You’ll love how simple they are to make and how delicious they taste. With easy steps and fresh ingredients, this dish is perfect for busy weeknights or casual gatherings. Let’s dive into this tasty recipe and get you cooking a meal that everyone will enjoy!
Ingredients
Main Ingredients
– 1 lb ground chicken
– 1 cup shiitake mushrooms, finely chopped
– 1 red bell pepper, diced
Sauce Components
– 3 tablespoons soy sauce
– 1 tablespoon hoisin sauce
– 1 tablespoon sesame oil
Garnishes and Wraps
– 1 head of butter lettuce or romaine lettuce leaves, separated
– Chopped peanuts or cashews for garnish
– Fresh cilantro for garnish
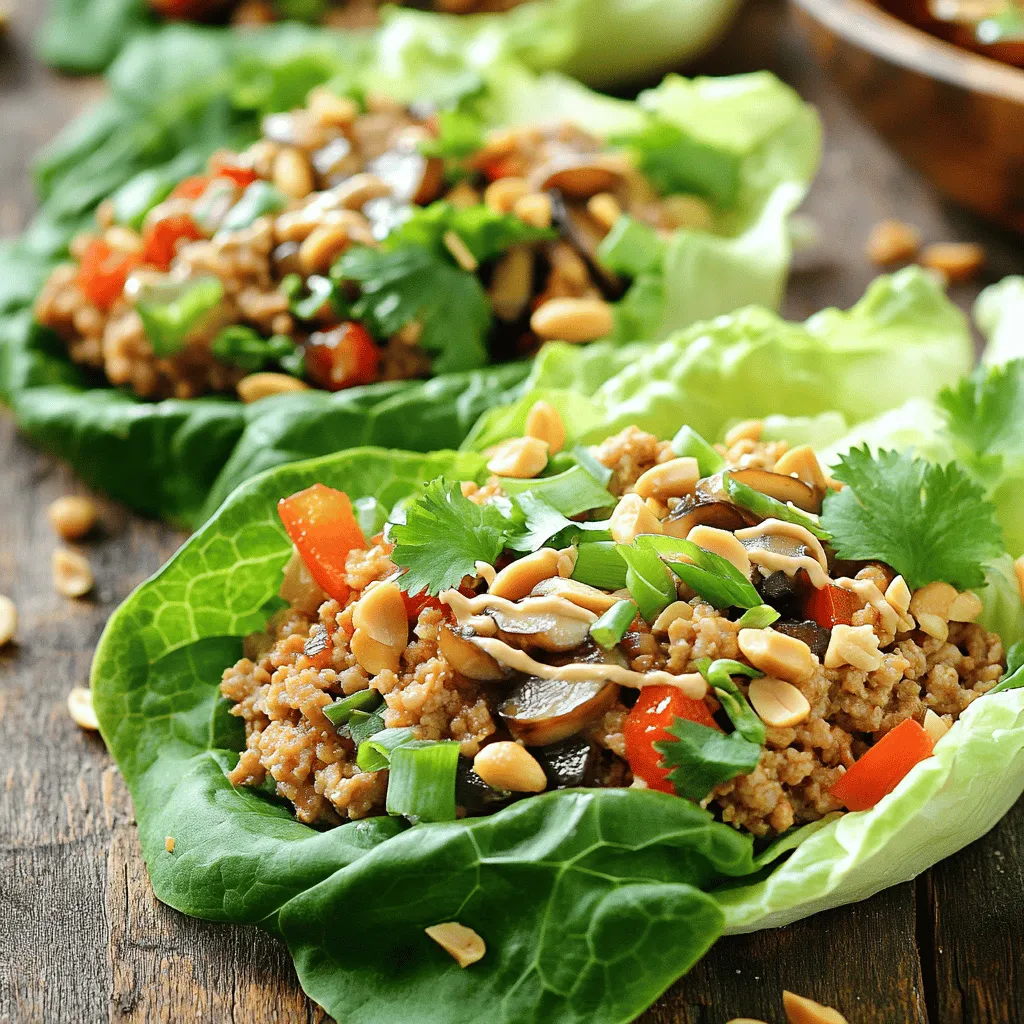
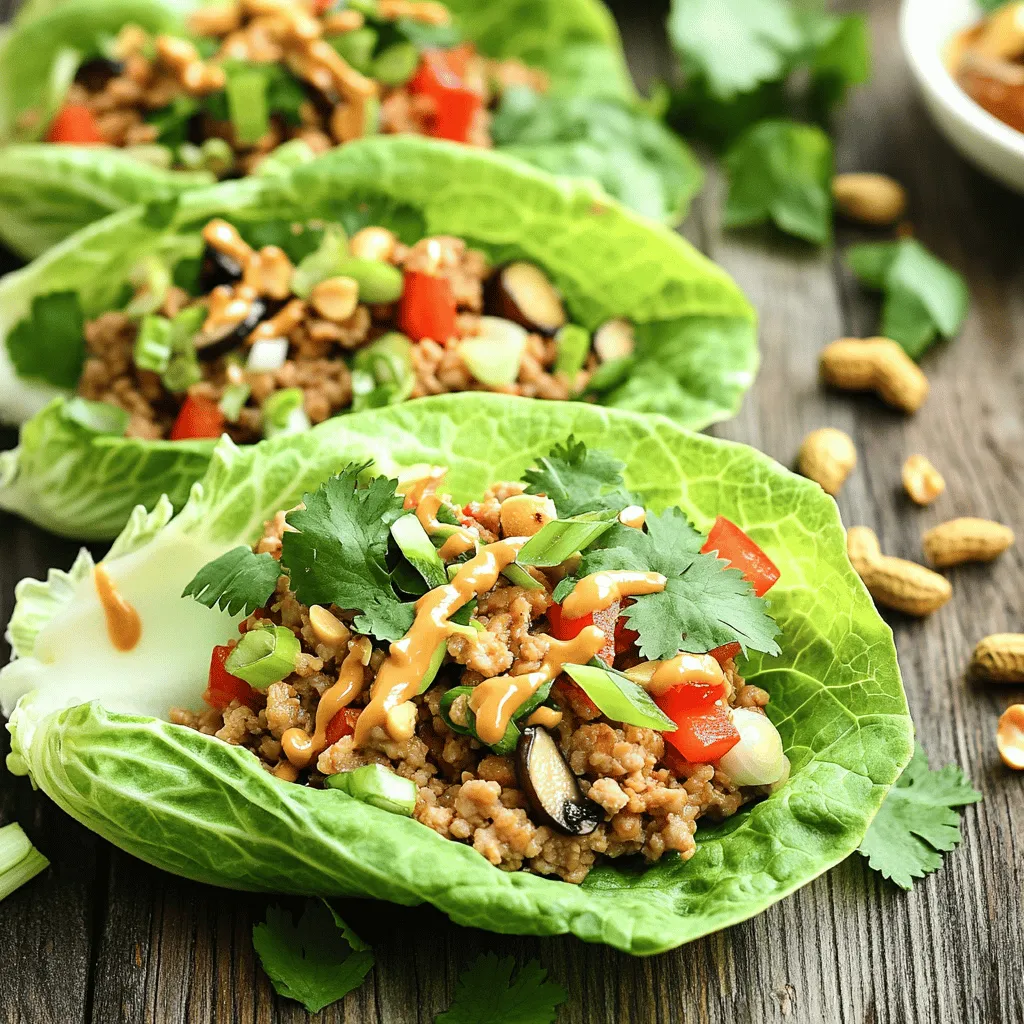
The main ingredients in this recipe create a tasty base for your wraps. Ground chicken provides protein and moisture. Shiitake mushrooms add umami and depth. Diced red bell pepper brings sweetness and color.
For the sauce, soy sauce gives a salty kick. Hoisin sauce adds sweetness and richness. Sesame oil brings a nutty flavor that ties it all together.
Finally, the garnishes are key. Fresh lettuce leaves cradle your filling. Chopped peanuts or cashews add crunch. Fresh cilantro gives a pop of herbiness.Enjoy crafting these delicious wraps!
Step-by-Step Instructions
Preparation
First, heat sesame oil in a large skillet over medium heat. This oil gives the wraps a nice flavor. Next, add minced garlic and grated ginger. Sauté for about one minute until you smell their aroma. Then, add the ground chicken to the skillet. Break it apart with a wooden spoon. Cook for about 5 to 7 minutes until the chicken is browned and fully cooked.
Cooking the Filling
Now, stir in the chopped shiitake mushrooms and diced red bell pepper. Cook these for an additional 3 to 4 minutes until the vegetables are tender. This step adds texture and color to your dish. After that, pour in the soy sauce, hoisin sauce, and rice vinegar. Stir everything together until well mixed. Season with salt and pepper to taste. This mixture brings all the flavors together.
Assembling the Wraps
To assemble, scoop a generous spoonful of the chicken mixture into a lettuce leaf. This is where the fun begins! Top with chopped peanuts or cashews for some crunch. Add fresh cilantro for a burst of freshness. Serve immediately, letting guests wrap their own lettuce cups. This makes for a fun and interactive meal.
Tips & Tricks
Cooking Tips
To cook ground chicken well, heat your skillet first. Add sesame oil and let it get hot. Then, add minced garlic and grated ginger. Cook until fragrant, about one minute. Next, add the ground chicken. Break it apart with a spoon. Cook for five to seven minutes until it’s brown.
For crunchy veggies, don’t overcook them. After adding shiitake mushrooms and red bell pepper, cook for just three to four minutes. This keeps them crisp and fresh.
Flavor Enhancements
To add heat, try chili paste or sriracha. Start with a small amount. You can always add more if you want it spicier.
Also, feel free to play with spices. Try adding a pinch of five-spice powder or a dash of black pepper. Each spice adds a new layer of flavor.
Presentation Suggestions
For serving, arrange the wraps on a large plate. Place the chicken mixture in the center. This way, guests can serve themselves.
To keep the lettuce crisp, wash and dry the leaves well. Store them in a sealed bag with a paper towel. This helps absorb moisture and keeps the leaves fresh.
Variations
Protein Options
You can switch the ground chicken for other meats. Ground turkey works great. It has less fat and a mild flavor. Ground beef is another option if you want a richer taste.
If you want a vegetarian dish, try using tofu. Press the tofu first to remove extra water. Then crumble it into small pieces. Cook it just like you would the chicken. It will soak up all the nice flavors.
Different Sauces
The sauce makes the dish pop. You can try different sauces for fun. Teriyaki sauce adds sweetness and a nice glaze. Peanut sauce gives a creamy texture that many love.
If you need a gluten-free option, use tamari instead of soy sauce. It tastes similar but is safe for those avoiding gluten. This change will keep your meal flavorful.
Additional Fillings
Adding more veggies makes your wraps even better. Carrots add crunch and sweetness. Water chestnuts give a nice texture. Chop them up small and stir them in with the chicken.
Fresh herbs can boost the flavor too. Cilantro adds brightness, while mint gives a fresh taste. Just sprinkle them in before you wrap everything up.
Storage Info
Refrigerating Leftovers
To store your chicken mixture, let it cool first. Place it in a clean, airtight container. This keeps it fresh for up to three days. To keep your lettuce fresh, wrap the leaves in a damp paper towel. Then, place them in a plastic bag. Store this in the vegetable crisper of your fridge.
Freezing Instructions
Yes, you can freeze the chicken mixture! Use an airtight container or freezer bag. Be sure to label it with the date. It can last up to three months in the freezer. For thawing, place it in the fridge overnight. Reheat in a skillet over medium heat until hot. Stir well to ensure even warming.
Shelf Life
Leftovers last about three days in the fridge. After that, they may spoil. Signs of spoilage include a sour smell or a change in color. If you see mold, throw it away. Always trust your senses when checking for freshness.
FAQs
What are the best types of lettuce to use for wraps?
I love using butter lettuce for wraps. Its leaves are tender and perfect for holding the filling. Butter lettuce has a nice, soft texture, making it easy to bite into.
Romaine is another option. It has a crisp and sturdy texture. Romaine leaves can hold more filling, but they may be a bit tougher to chew.
Both types work well, but I prefer butter lettuce for its flavor and feel.
Can I make Asian Chicken Lettuce Wraps in advance?
Yes, you can prep ahead. Cook the chicken mixture and let it cool down. Then, store it in an airtight container in the fridge.
Store the lettuce leaves separately to keep them fresh. This way, you can assemble the wraps right before serving.
You can also chop the veggies ahead of time. Just keep them in the fridge until you are ready to cook.
What are some serving suggestions for Asian Chicken Lettuce Wraps?
You can serve the wraps with a side of rice or quinoa. This adds some heartiness to the meal.
Try a simple dip like sweet chili sauce or soy sauce for extra flavor. Fresh vegetables on the side, like carrot sticks or cucumber slices, also make a great addition.
Don’t forget to offer chopped peanuts or cashews as a crunchy garnish.
How do I make the dish gluten-free?
To make it gluten-free, switch soy sauce for tamari. Tamari has a similar taste but is gluten-free.
You should also check hoisin sauce for gluten. Some brands offer gluten-free versions.
Use fresh ingredients and avoid pre-packaged sauces unless they are labeled gluten-free. These small changes let everyone enjoy the meal without worry.
Asian Chicken Lettuce Wraps combine simple ingredients and delightful flavors. You learned to prepare juicy ground chicken, fresh veggies, and a tasty sauce. Remember to play with different proteins and sauces for variety. Store leftovers wisely to keep them fresh. These wraps are fun to make and even better to eat. Enjoy creating your versions and impress your family or friends with great snacks!


