Avocado and Tomato Toast Savory Simple Delight

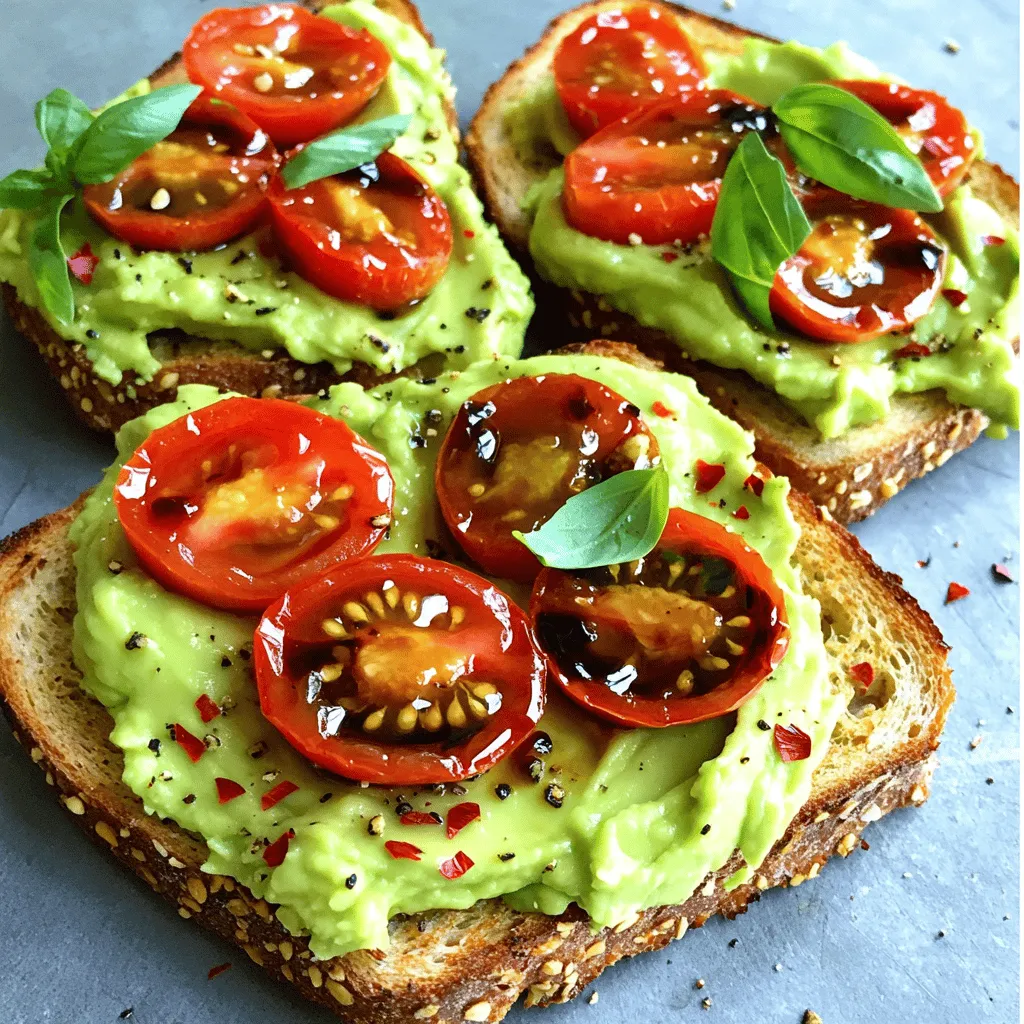
Looking for a tasty and healthy snack? Avocado and Tomato Toast is your answer! It’s quick to make, packed with flavor, and perfect for any time of day. With ripe avocados, juicy cherry tomatoes, and fresh basil, this blend ignites your taste buds. Join me as I share simple steps, handy tips, and fun variations to create your own savory delight. Let’s dive into this delicious recipe!
Ingredients
To make a delicious avocado and tomato toast, you need fresh and simple ingredients. Here’s what you’ll need:
– Ripe avocados
– Cherry tomatoes
– Balsamic vinegar
– Olive oil
– Garlic
– Fresh basil
– Whole grain or sourdough bread
– Salt and pepper
– Optional: Red pepper flakes
Each ingredient plays a key role. The ripe avocados give a creamy base, while the cherry tomatoes add bright flavor. Balsamic vinegar brings a sweet tang, and olive oil adds richness. Garlic gives a nice kick, and fresh basil adds a fragrant touch. Choose whole grain or sourdough bread for a hearty crunch. Salt and pepper enhance all the flavors, and red pepper flakes can add a bit of heat if you like.This toast is simple yet satisfying, perfect for breakfast or a quick snack.
Step-by-Step Instructions
Preparing the Avocado Spread
Start by cutting the ripe avocados in half. Remove the pit and scoop out the green flesh into a medium bowl. Use a fork to mash the avocados until smooth. Add the minced garlic, olive oil, salt, and pepper. Mix everything well. This creamy spread forms the base of your toast.
Marinating the Tomatoes
In a separate bowl, take your halved cherry tomatoes. Add balsamic vinegar, chopped basil, and a pinch of salt and pepper. Toss the mix gently. Let it sit for about 10 minutes. This helps the tomatoes soak in all the tasty flavors.
Toasting the Bread
While the tomatoes marinate, grab your slices of whole grain or sourdough bread. Toast them until they are golden brown and crispy. I love using a toaster oven for even heating. This step adds a nice crunch to your toast.
Assembling the Toast
Once the bread is toasted, it’s time to assemble. Take each slice and spread a generous layer of the avocado mix on top. Next, add the marinated cherry tomatoes. Make sure each slice gets a good amount of the colorful topping.
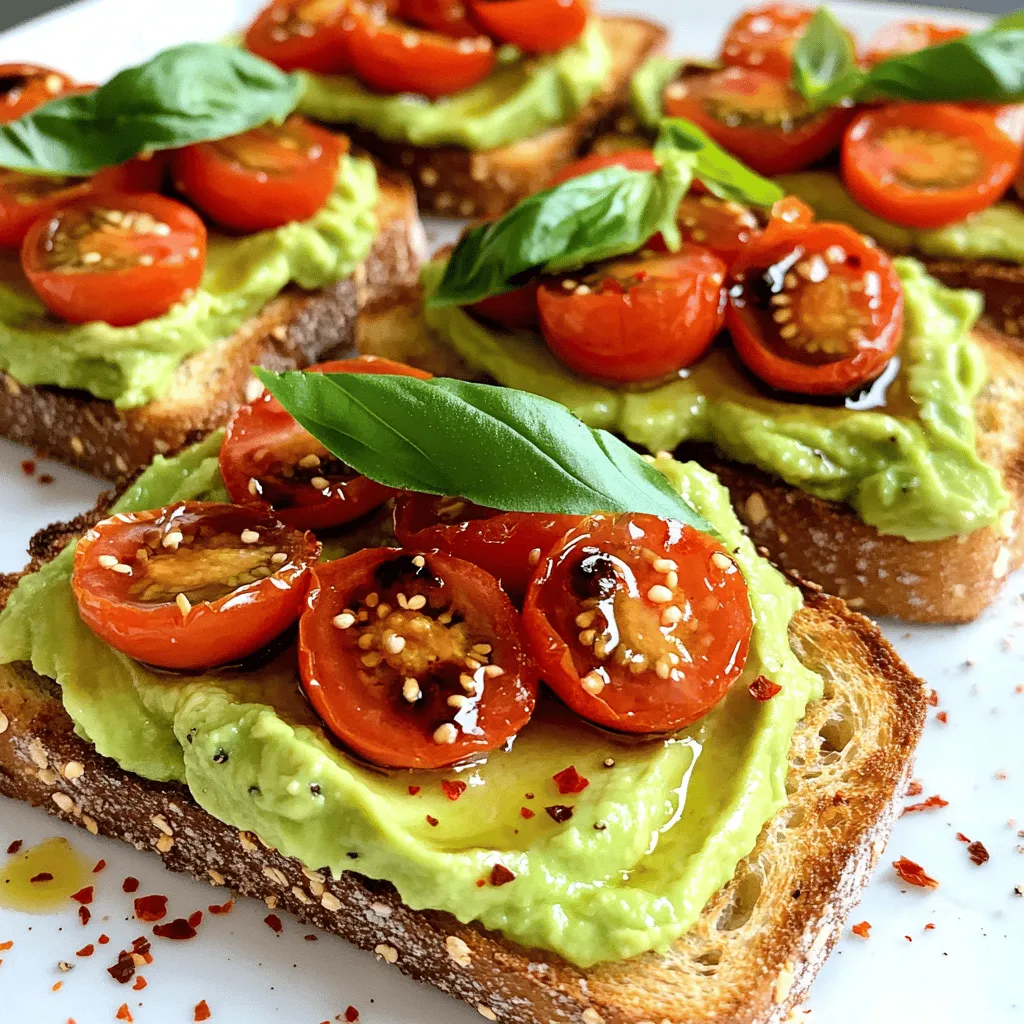
Garnishing and Serving
To finish your toast, sprinkle some extra basil leaves on top. Drizzle a bit of olive oil for added richness. If you like heat, sprinkle some red pepper flakes. Serve your toast right away. It’s a bright, fresh dish you can enjoy anytime.
Tips & Tricks
Choosing the Right Avocados
Pick ripe avocados for the best taste. A ripe avocado will yield slightly when you press it. If it feels too hard, let it ripen for a few days. Avoid avocados with dark spots or dents. These usually indicate overripeness. If you want to speed up ripening, place avocados in a paper bag with a banana. The ethylene gas from the banana speeds up the ripening process.
Best Practices for Toasting Bread
Toasting your bread can make all the difference. Aim for a crisp texture that holds toppings well. Use whole grain or sourdough for added flavor and health benefits. Set your toaster to medium or medium-high for even browning. Check the bread often to avoid burning. If you prefer, use a skillet over medium heat. Add a little olive oil for extra flavor and crispiness.
Incorporating Flavors
To elevate your toast, think about layering flavors. Add garlic to your avocado spread for a zesty kick. Fresh herbs like basil bring brightness and freshness. Cherry tomatoes marinated in balsamic vinegar add a sweet and tangy note. For some heat, sprinkle red pepper flakes on top. This combo creates a delicious balance, making each bite a savory delight. Try these tips to make your avocado and tomato toast even better.

Variations
Different Toppings Ideas
You can change your avocado and tomato toast with many fun toppings. Try adding sliced radishes for a crunchy bite. Feta cheese brings a salty flavor that pairs well. If you like heat, sprinkle jalapeño slices on top. You can also add pickled onions for a sweet and tangy touch. The possibilities are endless!
Using Alternate Spreads
If you want to mix it up, use different spreads. Hummus can add creaminess and flavor. You could also use a layer of cream cheese for a rich base. For a vegan option, try a nut butter like almond or cashew. Each spread gives a new taste to your toast.
Adding Proteins
Adding protein can make your toast more filling. Top it with a poached egg for a runny yolk that blends well. You can also add cooked bacon or smoked salmon for a savory twist. Chickpeas or black beans are great plant-based options, too. They add texture and keep you satisfied longer.
Storage Info
How to Store Leftovers
You can store leftover avocado and tomato toast easily. First, keep the avocado spread and tomatoes separate. This helps prevent browning. Place the avocado in an airtight container. Squeeze a bit of lemon juice on top. This keeps it fresh longer. Store the marinated tomatoes in another container. They can stay good for up to three days in the fridge.
Best Ways to Reheat
To reheat, toast your bread slices again. This brings back the crunch. Avoid using the microwave, as it makes the bread soggy. You can also enjoy the avocado spread cold. Just add the marinated tomatoes on top when ready to eat.
Serving Suggestions for Meal Prep
Meal prep is a breeze with this recipe. You can prepare the avocado spread and the marinated tomatoes ahead of time. Store them in separate containers. When you are ready to eat, toast your bread. Then simply assemble the toast with your prepped ingredients. This way, you can have fresh avocado and tomato toast in minutes! For a twist, try adding a poached egg on top for extra protein.
FAQs
How do I make avocado toast not turn brown?
To keep avocado toast fresh, use some lemon juice. The acid slows browning. You can also cover the toast with plastic wrap. It helps keep air out. If you store the spread, place plastic wrap directly on the surface. This will help too.
Can I use a different type of bread?
Yes, you can! Any bread you like works well. Sourdough adds a crunchy bite. Whole grain is healthy and filling. You can also try rye or gluten-free bread. Just make sure it’s sturdy enough to hold the toppings.
What can I add to enhance the flavor of my avocado and tomato toast?
There are many great options! Try adding feta cheese for creaminess. A sprinkle of lemon zest adds brightness. You can also use sliced radishes for crunch. For a kick, add red pepper flakes. Fresh herbs like cilantro or chives also boost flavor.Each slice of toast is a perfect bite. You can easily double it for a crowd. Everyone loves this simple dish, so it’s a great choice for brunch!
This blog post covers how to make a delicious avocado toast. You learned about the key ingredients, from ripe avocados to optional red pepper flakes. I walked you through each step, from preparing the spread to garnishing the toast. You also got tips on choosing the best avocados and toasting bread. Finally, we explored fun variations and smart storage tips. Enjoying this meal can boost your day. Try it out, mix flavors, and have fun in the kitchen!


![- Chickpeas and seasoning - 1 can (15 oz) chickpeas, drained and rinsed - 2 tablespoons olive oil - 1 teaspoon smoked paprika - 1/2 teaspoon garlic powder - 1/2 teaspoon cumin - Salt and pepper to taste Chickpeas are the star of this dish. They are high in protein and fiber. Their nutty flavor pairs well with spices. I love using smoked paprika for a warm taste. The garlic powder adds depth, while cumin brings a nice earthiness. You can adjust the salt and pepper to your liking. - Fresh vegetable ingredients - 4 cups mixed greens (spinach, arugula, and lettuce) - 1 cup cherry tomatoes, halved - 1/2 cucumber, diced - 1/4 red onion, thinly sliced Fresh vegetables add crunch and color. Mixed greens provide a lovely base. Cherry tomatoes burst with flavor and sweetness. Diced cucumber gives a refreshing bite. Red onion offers a sharp contrast. Feel free to mix and match your favorite greens. - Optional toppings and dressing ingredients - 1/4 cup feta cheese, crumbled (optional) - 2 tablespoons tahini - 1 tablespoon lemon juice - Fresh parsley for garnish Feta cheese adds creaminess and saltiness. If you want to keep it vegan, skip the feta. The tahini dressing is rich and nutty. A little lemon juice brightens the flavors. Fresh parsley gives a pop of green and freshness. You can use other herbs too, like basil or cilantro. For the full recipe, check the complete list above. 1. Start by preheating your oven to 400°F (200°C). Line a baking sheet with parchment paper. This helps the chickpeas crisp up nicely. 2. In a medium bowl, take your drained chickpeas. Add 2 tablespoons of olive oil, 1 teaspoon of smoked paprika, 1/2 teaspoon of garlic powder, 1/2 teaspoon of cumin, and a pinch of salt and pepper. Toss everything well until the chickpeas are coated. 3. In a large bowl, mix the salad components. Combine 4 cups of mixed greens, 1 cup of halved cherry tomatoes, 1/2 diced cucumber, and 1/4 sliced red onion. This mix adds crunch and freshness. 1. Spread the seasoned chickpeas on the lined baking sheet. Make sure they are in a single layer for even cooking. 2. Bake them in the preheated oven for 25-30 minutes. Halfway through, shake the pan. This helps them cook evenly and become crispy. Watch closely near the end to avoid burning. 1. Once the chickpeas are golden and crispy, remove them from the oven and let them cool for a minute. 2. Top your salad mix with the crispy chickpeas. Drizzle your tahini dressing over everything. To make the dressing, whisk together 2 tablespoons of tahini, 1 tablespoon of lemon juice, and a pinch of salt and pepper in a small bowl. You can add a bit of water if you want it thinner. 3. If you like, sprinkle 1/4 cup of crumbled feta cheese on top. Finish with fresh parsley for that pop of color. Follow these steps from the Full Recipe to create a tasty, crunchy salad that’s sure to impress! To boost flavor, consider adding spices like cayenne pepper or turmeric. You could also mix in fresh herbs such as cilantro or basil. Each herb or spice brings a unique taste. For the dressing, try using yogurt instead of tahini for a creamier texture. You can also add a splash of balsamic vinegar for a tangy kick. A sprinkle of lemon zest can brighten the dish too. To get crispy chickpeas, drying them well is key. After rinsing, pat them dry with a towel. This step helps them crisp up nicely. When baking, spread them out on the pan without overcrowding. This allows hot air to circulate. You can also shake the pan halfway through baking for even crispness. If you have an air fryer, use it! It cooks chickpeas faster and often makes them crispier. Cook them at 400°F for about 15 minutes, shaking halfway through. For the full recipe, check out the Crispy Chickpea Delight Salad section. Enjoy your cooking! {{image_2}} You can change up the greens in this salad. Try kale, romaine, or even cabbage. Each green adds its own flavor and texture. If you want a vegan option, leave out the feta cheese. You can still enjoy a tasty salad without it. Consider adding avocado for creaminess instead. Want to boost the protein? Add grilled chicken or shrimp. You can even toss in quinoa for a hearty touch. For toppings, think nuts or seeds. Toasted almonds or sunflower seeds add a nice crunch. You could also sprinkle some fresh herbs like basil or cilantro for extra flavor. These small changes can make your crispy chickpea salad feel new and exciting. For the complete recipe, check out the [Full Recipe]. To keep your salad fresh, store it in an airtight container. Make sure to refrigerate it right away. The greens will stay crisp for a day or two. Avoid mixing the dressing with the salad until you are ready to eat. This keeps everything from getting soggy. For the crispy chickpeas, store them in a separate container. Use a glass jar or a paper bag. This helps them stay crunchy longer. If you store them with the salad, they will lose their crispiness. When you reheat crispy chickpeas, use the oven for best results. Preheat your oven to 350°F (175°C). Spread the chickpeas on a baking sheet. Heat them for about 5 to 10 minutes. Check often to avoid burning. If you want to use the microwave, place the chickpeas on a plate. Cover them with a paper towel. This helps absorb moisture. Heat them in short bursts of 30 seconds until warm. Avoid heating too long, as they will get soggy. Enjoy your crispy chickpeas as a tasty snack or salad topping! You can use almond butter or sunflower seed butter instead of tahini. Both have a nice, creamy texture. They add a different flavor but still taste great in the salad. You can also try using Greek yogurt for a tangy twist. This salad is mostly gluten-free already! Just make sure the tahini and any store-bought ingredients are gluten-free. Always check labels for hidden gluten. Using fresh produce and canned chickpeas keeps it safe. Yes, you can prep parts of the salad ahead. Keep the crispy chickpeas separate until serving. This way, they stay crunchy. You can mix the greens and veggies in advance and dress them just before eating. Absolutely! This salad works well for meal prep. Just store the chickpeas, salad, and dressing in separate containers. You can enjoy it all week. It makes a great lunch or dinner option. To get crispy chickpeas, dry them well before seasoning. Use a towel to remove moisture. Bake them at a high temperature, around 400°F (200°C). Shake the pan halfway through baking for even crispiness. For even better results, try using an air fryer! Check the [Full Recipe] for more details. In this blog post, we explored a tasty chickpea salad recipe. We covered key ingredients, like chickpeas and fresh veggies, to create a great meal. You learned step-by-step instructions for preparation, baking, and assembly. I shared tips on enhancing flavors and achieving the perfect crispiness. You also discovered variations to suit your taste, storage tips for leftovers, and answers to common questions. Try this chickpea salad and make it your own. You will love the flavors and textures! Enjoy!](https://dailydishly.com/wp-content/uploads/2025/06/a0161600-1d29-449f-a743-39fb8b2e717a-768x768.webp)
![- 1 large head of cauliflower - 3 tablespoons olive oil - 1 cup grated Parmesan cheese - 2 teaspoons garlic powder - 1 teaspoon onion powder - 1 teaspoon smoked paprika - Salt and black pepper to taste - Fresh parsley, chopped Gathering the right ingredients is key to making Parmesan roasted cauliflower. Start with one large head of cauliflower. Cut it into small florets. This shape helps the cauliflower cook evenly and get that crispy texture we love. Next, you'll need three tablespoons of olive oil. It adds healthy fat and helps the cheese stick. You'll also need one cup of grated Parmesan cheese. This cheese gives a salty, nutty flavor. Now, let’s talk seasonings. You’ll want two teaspoons of garlic powder for that aromatic kick. One teaspoon of onion powder adds sweetness. Smoked paprika, at one teaspoon, brings a nice depth of flavor. Don’t forget salt and black pepper to taste. These simple seasonings make the dish shine. Finally, fresh parsley will be your garnish. It adds color and a fresh taste. This ingredient list is simple but powerful. You can find the full recipe for more details on prep and baking. Enjoy your cooking! 1. First, preheat your oven to 425°F (220°C). This heat helps the cauliflower become crispy. 2. Next, line a baking sheet with parchment paper. This makes for easy cleanup. 3. In a large bowl, toss the cauliflower florets with 3 tablespoons of olive oil. Make sure every piece is coated well. 1. In a small bowl, combine 1 cup of grated Parmesan cheese, 2 teaspoons of garlic powder, 1 teaspoon of onion powder, and 1 teaspoon of smoked paprika. 2. Add salt and black pepper to taste. Mix well to combine all the flavors. 3. Sprinkle the Parmesan mixture over the cauliflower. Toss until each floret is evenly coated with the seasoning mix. 1. Spread the seasoned cauliflower in a single layer on your prepared baking sheet. 2. Roast in the oven for 25-30 minutes. Flip the cauliflower halfway through cooking. This ensures even browning. 3. Once the cauliflower is golden brown and tender, remove it from the oven. Let it cool slightly. 4. For a final touch, garnish with fresh chopped parsley before serving. For the complete details, check the [Full Recipe]. To get crispy cauliflower, start by cutting the florets into similar sizes. This helps them cook evenly. Toss the florets with olive oil until they are well coated. Use enough oil to help with crisping but don’t drown them. For perfect tenderness, roast the cauliflower at 425°F (220°C). This high heat gets a nice brown color while keeping the inside soft. Flip the florets halfway through cooking for even browning. Use a nice serving platter to show off your roasted cauliflower. A sprinkle of fresh parsley adds a pop of color. Drizzle a little olive oil on top for extra shine and flavor. This dish pairs well with grilled chicken or fish. It also goes great with a hearty salad for a fresh meal. Sometimes, cauliflower can get soggy. Avoid this by not overcrowding the baking sheet. If they are too close, steam builds up, which makes them soft. If the edges burn, check your oven temperature. You might need to lower it slightly. For more flavor, try adding lemon zest or a squeeze of lemon juice before serving. This brightens up the dish beautifully. {{image_2}} You can spice things up with chili flakes for a kick. This simple addition makes a bold flavor. You can also try herbs like thyme or rosemary. These fresh herbs add a nice touch and depth. If you want a twist, try using cheddar or goat cheese. These options bring a new taste to the dish. For those who prefer dairy-free, there are great vegan cheeses. These can mimic the creamy texture of Parmesan. Feel free to mix in other veggies like broccoli or bell peppers. This adds color and nutrition to your meal. You can also toss in nuts or seeds for extra crunch. Almonds or sunflower seeds work well here. You can customize this dish to fit your taste and diet. For the full recipe, check out the detailed instructions above. To keep your Parmesan roasted cauliflower fresh, store it in an airtight container. This helps lock in moisture and flavor. You can use glass or plastic containers with tight lids. Make sure the cauliflower is completely cool before sealing it. If you want to keep it extra fresh, place a paper towel inside the container. This absorbs extra moisture. The best way to reheat your leftovers is in the oven. Preheat the oven to 350°F (175°C). Place the cauliflower on a baking sheet and heat for about 10-15 minutes. This keeps the cauliflower crispy. You can also use an air fryer for a quicker option. Just set it to 350°F and heat for about 5-7 minutes. If you want to freeze the cauliflower, store it in a freezer-safe bag. It can last up to 3 months. Just remember to let it cool completely before freezing. Your Parmesan roasted cauliflower lasts about 3-5 days in the fridge. Always check for signs of spoilage. Look for a slimy texture or an off smell. If you notice either, it’s best to toss it out. Enjoy your dish while it's fresh for the best taste! For more details, check the full recipe. You can use several alternatives for Parmesan cheese. Here are some great options: - Nutritional yeast for a cheesy flavor and vegan diet. - Pecorino Romano for a similar taste with a sharper bite. - Grana Padano, which is less salty and creamy. These substitutes work well in the Parmesan Roasted Cauliflower recipe. Just keep in mind the flavor may change slightly. Yes, you can prep this dish in advance! Here are some tips: - Cut the cauliflower into florets and store them in the fridge. - Mix the seasoning and cheese ahead of time. - Combine the cauliflower and seasoning just before roasting for the best flavor. This way, you save time and still enjoy a fresh, crunchy dish! Absolutely! Grilling adds a nice smoky flavor. Here’s how to do it: 1. Preheat your grill to medium-high heat. 2. Toss the seasoned cauliflower in a grill-safe basket or on skewers. 3. Grill for about 10-15 minutes, turning occasionally until tender and charred. This method gives you a tasty twist on the original recipe! You can easily lighten up this dish. Consider these changes: - Use less Parmesan cheese or a lower-fat version. - Swap olive oil for a cooking spray or reduce the amount used. - Add more veggies like bell peppers or zucchini for volume without many calories. These tweaks help you enjoy a delicious and healthy Parmesan Roasted Cauliflower! For the full recipe, check out the detailed cooking instructions. This blog post covered how to make Parmesan Roasted Cauliflower. We explored the main ingredients, seasonings, and garnishes needed for the dish. I also provided a step-by-step guide for preparation and roasting. Plus, I shared cooking tips and flavor variations to elevate your meal. In summary, with proper storage and reheating tips, you can enjoy this dish multiple times. Experiment with alternatives and enjoy the crispy, cheesy goodness of roasted cauliflower!](https://dailydishly.com/wp-content/uploads/2025/06/1026dd12-7014-4148-8186-1edda0f6a7e3-768x768.webp)
![- 6 large eggs - 1 cup fresh spinach, chopped - 1/2 cup cherry tomatoes, halved - 1/2 cup bell pepper, diced (any color) - 1/4 cup onion, finely chopped - 1/4 cup feta cheese, crumbled (optional) - 1 tablespoon olive oil - Salt and pepper to taste - 1/2 teaspoon garlic powder - 1/2 teaspoon dried oregano Each ingredient in these muffins brings a lot of good stuff. Eggs are full of protein and help build strong muscles. Spinach is packed with vitamins A and C, plus iron, which is great for energy. Cherry tomatoes add antioxidants, protecting your cells. Bell peppers provide vitamin C, which helps your body heal. Onions add flavor and may boost heart health. Feta cheese gives a nice taste and some calcium. Olive oil adds healthy fats and helps you absorb nutrients. Garlic powder and oregano bring extra flavor and may support your immune system. You can swap ingredients to fit your taste. Use egg whites instead of whole eggs for fewer calories. For a dairy-free option, try nutritional yeast or a plant-based cheese. If you don’t have fresh spinach, frozen spinach works too. Just make sure to thaw and drain it first. Other veggies like zucchini or mushrooms can replace bell peppers. You can even add spices like cumin or paprika for a twist. The full recipe lets you explore these fun options! Start by preheating your oven to 350°F (175°C). This temperature helps your muffins bake evenly. Next, grease a muffin tin with cooking spray or olive oil. This step prevents the muffins from sticking. In a large bowl, crack the six eggs. Whisk them well until they blend. Add salt, pepper, garlic powder, and dried oregano. Mix these ingredients until combined. Now, heat a tablespoon of olive oil in a skillet over medium heat. Add the chopped onion and diced bell pepper. Sauté them for about 3-4 minutes. You want them soft but not brown. Next, stir in one cup of chopped spinach. Let the spinach wilt for about 1-2 minutes. Remove the skillet from the heat. Add the sautéed veggies and half a cup of halved cherry tomatoes to the egg mixture. If you like, fold in a quarter cup of crumbled feta cheese. This adds a nice flavor. Evenly pour the egg and veggie mix into the muffin tin. Fill each cup about 3/4 full to allow room for rising. Bake the muffins in your preheated oven for 18-20 minutes. Keep an eye on them as they bake. The eggs should set and turn a light golden color. To check for doneness, insert a toothpick into the center of a muffin. If it comes out clean, your muffins are ready. If not, give them a few more minutes. Once cooked, remove the muffin tin from the oven. Let it cool for a few minutes. This step makes it easier to remove the muffins. Gently lift them out and place on a plate. Now, you have delicious and healthy spinach egg muffins! Enjoy them warm, or store them for later. For the full recipe, refer to the [Full Recipe]. You can make your muffins unique with different veggies. Try adding mushrooms or zucchini for more flavor. You can also switch the cheese. Swap feta for cheddar or goat cheese. If you're a spice lover, add a pinch of red pepper flakes for heat. You can even use herbs like basil or thyme to change the taste. These tweaks let you enjoy different flavors each time you make them. Sautéing your veggies before adding them to the eggs brings out their taste. This step softens the onions and bell peppers, making them sweet. You can also roast your tomatoes for a smoky flavor. Adding garlic while you sauté gives a nice aroma and taste. If you want a richer flavor, try using butter instead of olive oil. These small changes make a big difference in how your muffins taste. These muffins taste great with many sides. Serve them with a fresh salad for a light meal. You can also pair them with avocado slices for creaminess. A dollop of salsa on top adds a nice kick. For breakfast, a side of fruit complements the savory muffins well. Try them with a cup of yogurt or a smoothie for a balanced start to your day. You can find the full recipe [here](#). {{image_2}} You can easily make these muffins vegetarian or add meat. For a meat option, try diced ham or cooked bacon. You can mix in turkey sausage for extra protein. If you stick to veggies, load up on more colorful peppers. Zucchini or mushrooms add a nice touch too. Both options taste great and keep your muffins full of flavor. To make these muffins gluten-free, focus on the ingredients. The recipe already uses no flour. Make sure to check that all your add-ins, like cheese or meat, are gluten-free. You can even swap feta for a dairy-free cheese if needed. These simple changes let everyone enjoy your tasty muffins. Get creative with flavors! Fresh herbs like basil, parsley, or thyme can brighten your muffins. If you want cheese, try cheddar or goat cheese for a twist. Spice lovers can add red pepper flakes or smoked paprika. Each combination offers a new taste adventure. Explore different flavors to find your favorite mix. For the full recipe, check the details provided earlier. To keep your healthy spinach egg muffins fresh, let them cool first. Once cool, place them in an airtight container. You can store them in the fridge for up to five days. If you want them to last longer, freezing is a great option. To reheat your muffins, use the microwave or oven. If using a microwave, place one muffin on a plate. Heat it for about 30 seconds. If you prefer the oven, preheat to 350°F (175°C). Place the muffins on a baking sheet and heat for about 10 minutes. This helps keep them moist and tasty. Freezing is simple. Wrap each muffin in plastic wrap. Then, place them in a freezer-safe bag. Label the bag with the date. They will stay good for up to three months. When ready to eat, thaw them in the fridge overnight before reheating. You can enjoy these muffins anytime! For the full recipe, check out the Healthy Spinach Egg Muffins. To make your Healthy Spinach Egg Muffins fluffier, whisk the eggs well. You can also add a splash of milk or cream. This helps to create air bubbles in the eggs. Baking powder is another option. Just a teaspoon can lift the muffins up. Make sure not to overmix your batter. This keeps the muffins light. Yes, you can use frozen spinach. Just thaw it and squeeze out excess water. This prevents your muffins from becoming soggy. Frozen spinach is a great time-saver. It’s also nutrient-rich, just like fresh spinach. However, fresh spinach gives a brighter color and texture. Both options work well, so choose what you prefer. Spinach is full of vitamins and minerals. It contains vitamin K, which helps with bone health. Spinach is also rich in antioxidants. These help fight free radicals in your body. Eggs are a great source of protein. They help build and repair tissues. They also contain choline, which supports brain health. Together, spinach and eggs make a nutritious meal. Enjoy them in your Healthy Spinach Egg Muffins! For the full recipe, check out the section above. These healthy spinach egg muffins are easy to make and full of flavor. We covered the ingredients, their benefits, and tasty substitutions. You learned step-by-step tips for perfect baking and how to check for doneness. We discussed ways to customize your muffins and shared storage tips for freshness. Remember, variations allow you to cater to different diets and preferences. These muffins are not just delicious; they are also nutritious. Enjoy making and sharing them with friends and family!](https://dailydishly.com/wp-content/uploads/2025/07/77bd2bbd-3206-4841-bb2c-177ed70e9b7b-768x768.webp)