Ready for a fresh and flavorful dish that bursts with taste? My Avocado Black Bean Salad is just what you need! Packed with vibrant ingredients, it’s perfect for lunch or a side at dinner. You’ll love how easy it is to make and the healthy boost it offers. Let’s dive into this satisfying recipe and explore simple steps to create the perfect salad that everyone will enjoy!
Ingredients
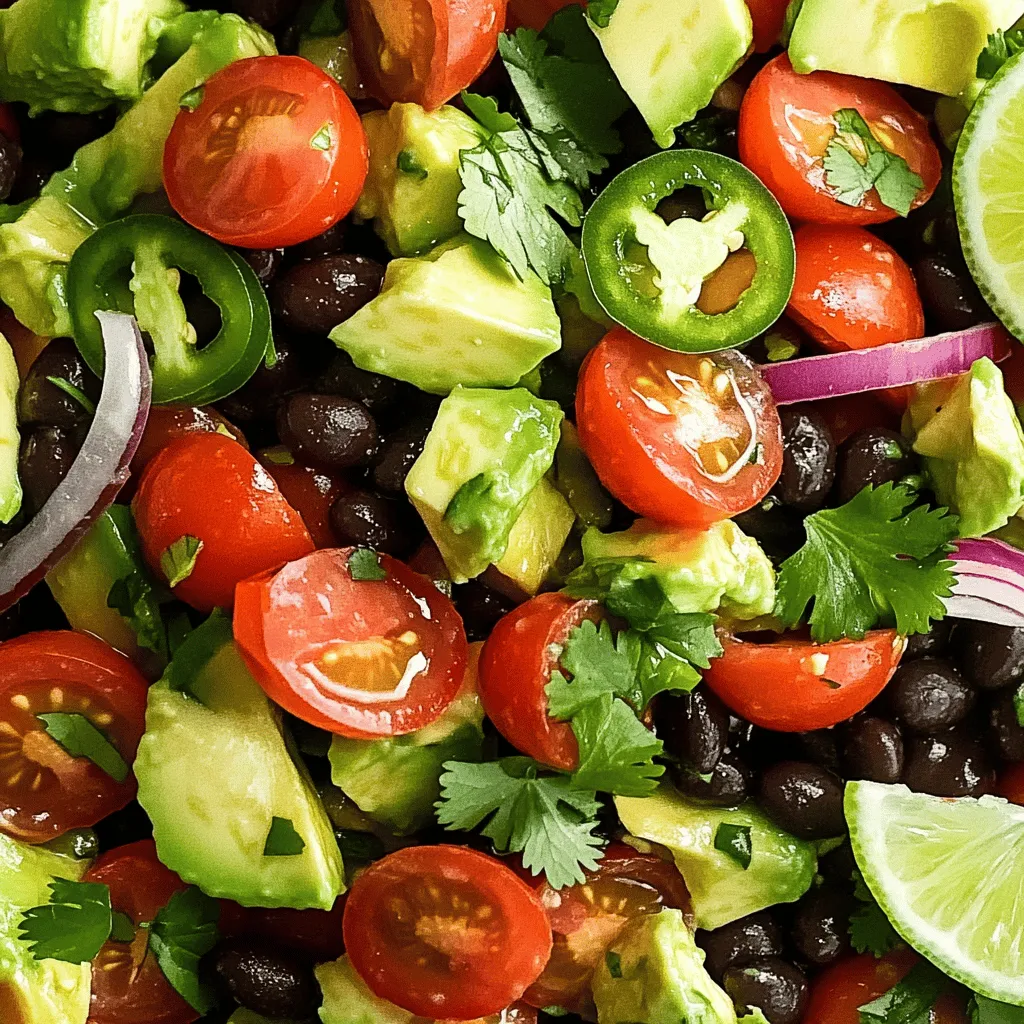
Fresh ingredients for Avocado Black Bean Salad
This salad shines with fresh ingredients. You will need:
– 2 ripe avocados, diced
– 1 cup cherry tomatoes, halved
– 1 small red onion, finely chopped
– 1 red bell pepper, diced
– 1 small jalapeño, finely chopped (optional for heat)
– 1/4 cup fresh cilantro, chopped
These fresh items give the salad a bright taste and color. The avocados add creaminess. The tomatoes bring sweetness, while the onion adds crunch. Bell peppers contribute a nice texture, and jalapeños can give a spicy kick if you like.
Pantry staples needed
For this salad, you also need a few pantry staples. These include:
– 1 can (15 oz) black beans, rinsed and drained
– Juice of 2 limes
– 3 tablespoons olive oil
– 1 teaspoon cumin
– Salt and pepper to taste
Black beans add protein and fiber. Lime juice gives a fresh zing. Olive oil helps blend all the flavors. Cumin adds a warm, earthy tone, while salt and pepper enhance taste.
Nutritional breakdown of key ingredients
Let’s look at the nutrition of some key ingredients:
– Avocados: They are rich in healthy fats. They help keep your heart healthy and keep you full longer.
– Black beans: These add protein and fiber. They support digestion and help maintain energy levels.
– Tomatoes: They are low in calories and packed with vitamins. They help keep your skin healthy.
This salad is not just tasty; it’s also good for you! It’s a fresh and flavorful dish that you can enjoy any time.
Step-by-Step Instructions
Preparation of salad ingredients
Start by gathering your ingredients. You will need ripe avocados, black beans, cherry tomatoes, red onion, red bell pepper, jalapeño, and fresh cilantro. First, dice the avocados into small cubes. Next, rinse and drain the black beans. Cut the cherry tomatoes in half. Finely chop the red onion and dice the red bell pepper. If you like heat, finely chop the jalapeño. Finally, chop the fresh cilantro. Place all these ingredients into a large bowl.
Making the dressing
In a small bowl, combine the lime juice, olive oil, cumin, salt, and pepper. Whisk these together until they blend well. This dressing will add flavor to your salad. You can adjust the salt and pepper to fit your taste. If you want it zesty, add more lime juice.
Combining everything together
Now, pour the dressing over the salad. Gently toss the salad so the dressing coats everything. Be careful not to mash the avocados. Then, add the chopped cilantro and toss again. Let the salad sit for about 10-15 minutes at room temperature. This waiting time lets all the flavors mix well.Enjoy your fresh and tasty avocado black bean salad!
Tips & Tricks
How to choose the perfect avocados
To pick the best avocados, look for ones that feel slightly soft. Gently press the skin with your thumb. If it gives a little, it’s ready to eat. Avoid avocados that are too mushy or have dark spots. Choosing ripe avocados makes your salad taste fresh and creamy.
Ensuring the salad stays fresh
To keep your salad fresh, add lime juice right before serving. The acid in lime juice helps slow down browning. You can also store the salad in an airtight container. If you have leftovers, try to eat them within two days for the best taste.
Adjusting for spice levels and flavor
If you like heat, add more jalapeño or try a dash of hot sauce. For milder flavors, skip the jalapeño entirely. You can also adjust the lime juice and salt to your taste. Experiment with spices like garlic powder or smoked paprika for extra flavor. This way, you can make the salad just how you like it!
Variations
Adding protein (chicken, shrimp, or tofu)
You can make this salad more filling by adding protein. Chicken, shrimp, or tofu work great. If you use chicken, grill or roast it first. Cut it into bite-sized pieces. For shrimp, sauté in olive oil with some spices. Tofu is a good choice for vegans. Press it to remove water, then cube and sauté until golden. Mix the protein into the salad right before serving.
Incorporating seasonal vegetables
Seasonal vegetables add color and flavor to your salad. In summer, try sweet corn or zucchini. In fall, roasted butternut squash can add a nice touch. You can also use diced cucumber for a crisp texture. Fresh herbs like basil or chives can brighten the dish too. Just chop them finely and mix them in.
Vegan and gluten-free options
This salad is naturally vegan and gluten-free! To keep it that way, ensure your dressing is free from dairy. Use lime juice and olive oil as your main flavors. If you want extra creaminess, add a dollop of avocado or a spoonful of vegan yogurt. This keeps the dish light and fresh while still being satisfying.
Storage Info
How to store leftovers
To store leftovers, place the salad in an airtight container. Cover it tightly to keep air out. This helps slow down browning, especially for the avocados. If you have extra dressing, store it separately. This keeps the salad fresh longer.
Reheating and refreshing tips
You don’t need to reheat this salad. It tastes best cold or at room temperature. If it seems dry, add a splash of lime juice or a drizzle of olive oil. Toss gently to mix in the new flavors. This brings back its fresh taste.
Shelf life and freezing recommendations
The salad lasts about two days in the fridge. After that, the avocados may brown and lose texture. I do not recommend freezing this salad. Freezing changes the avocados and tomatoes, making them mushy. Enjoy your Avocado Black Bean Salad fresh for the best flavor!
FAQs
Can I make Avocado Black Bean Salad ahead of time?
Yes, you can make this salad ahead of time. However, I suggest you keep the dressing separate until you’re ready to serve. This way, the avocados and other veggies stay crisp and fresh. If you mix it all together too early, the salad may become mushy. You can prepare the ingredients and store them in the fridge. Just toss everything together right before serving for the best taste.
What can I serve with this salad?
This salad pairs well with many dishes. You can serve it alongside grilled chicken or fish for a nice protein boost. It also goes great with tacos or burritos. If you want a lighter meal, enjoy it with some tortilla chips. You can even use it as a topping for nachos. The fresh flavors make it a hit at any gathering.
How can I prevent the avocados from browning?
To keep your avocados green, use lime juice. The acid in lime juice helps slow down browning. You can also store the salad in an airtight container. If you plan to have leftovers, cover the top with plastic wrap. Press it down so it touches the avocados. This reduces air contact and keeps them fresh longer. Remember, a little lime juice goes a long way!
In this post, we explored how to make a tasty Avocado Black Bean Salad. We discussed fresh ingredients, pantry staples, and key nutrition facts. You learned step-by-step instructions for preparing the salad and making the dressing. I also shared tips on choosing avocados, keeping your salad fresh, and customizing flavors.
This dish is flexible, letting you add proteins and seasonal veggies. Remember to store leftovers properly to enjoy them later. Enjoy making this bright and healthy salad your own!


