Avocado Lime Ranch Dip Flavorful and Easy Recipe

Looking for a dip that’s creamy, tangy, and bursting with flavor? You’re in the right place! This Avocado Lime Ranch Dip combines ripe avocados with Greek yogurt, lime juice, and fun seasonings. Whether you’re hosting a party or just want a tasty snack, this easy recipe has got you covered. Let’s dive in and make a dip that will impress everyone!
Ingredients
Main Ingredients
– 2 ripe avocados
– 1 cup Greek yogurt
– 1/4 cup mayonnaise
Seasonings and Garnishes
– 1 tablespoon lime juice
– 1 teaspoon garlic powder
– 1 teaspoon onion powder
– 1 teaspoon dried dill
– 1/2 teaspoon salt
– 1/2 teaspoon black pepper
– 1/4 teaspoon paprika
– Fresh cilantro, chopped for garnish
When I make Avocado Lime Ranch Dip, I focus on using fresh and ripe ingredients. The avocados should be soft but not brown. Greek yogurt gives the dip a creamy base. It adds a nice tang and protein too. Mayonnaise adds richness and helps the dip stay smooth.
For seasonings, lime juice brings bright flavor. Garlic powder and onion powder add depth. Dried dill gives it a fresh taste. Salt and black pepper enhance all the flavors. A pinch of paprika adds a warm touch.
Finally, I love to garnish with fresh cilantro. It looks great and adds more flavor. This dip is not only tasty but easy to make. You can serve it with chips, veggies, or crackers. Enjoy every bite!
Step-by-Step Instructions
Preparing the Avocados
– Cut avocados in half and remove the pit.
– Scoop out the avocado flesh into a mixing bowl.
Start by taking two ripe avocados. Use a sharp knife to cut them in half. Be careful not to cut too deep. Once you have two halves, twist gently to separate them. Use a spoon to remove the pit. Next, scoop out the green flesh with a spoon. Place all the flesh in a medium-sized mixing bowl.
Mixing the Ingredients
– Add Greek yogurt and mayonnaise.
– Squeeze lime juice and add seasonings.
Now, it’s time to mix in the creamy ingredients. Add one cup of Greek yogurt and a quarter cup of mayonnaise to the bowl. The yogurt adds tang, while mayonnaise gives creaminess. Next, squeeze a tablespoon of fresh lime juice over the mixture. This will brighten the flavors. Then, sprinkle in one teaspoon each of garlic powder, onion powder, and dried dill. Finally, add half a teaspoon of salt, half a teaspoon of black pepper, and a quarter teaspoon of paprika for a bit of warmth.
Blending the Mixture
– Blend until creamy with some chunks.
– Taste and adjust seasoning as needed.
Use a fork or a hand mixer to blend all the ingredients. Mix until the dip is creamy but still has some avocado chunks. This texture adds to the fun! After blending, taste your dip. If you want more flavor, adjust the seasoning. You can add more salt, pepper, or lime juice based on your taste.
After you finish, transfer the dip to a serving bowl. For a nice touch, sprinkle chopped fresh cilantro on top. This adds color and flavor. Enjoy your tasty avocado lime ranch dip!
Tips & Tricks
Enhancing Flavor
To make your dip even better, try these tips:
– Adjust Seasonings: You can add more salt or lime juice for a zesty kick. If you like it spicy, add a pinch of cayenne pepper or chopped jalapeños. Taste as you go so you get it just right.
– Pick Ripe Avocados: A ripe avocado feels slightly soft when you press it gently. Look for a dark green skin and avoid any with brown spots. If your avocados are hard, leave them out for a few days to ripen.
Presentation Ideas
Serving your dip well makes it more fun!
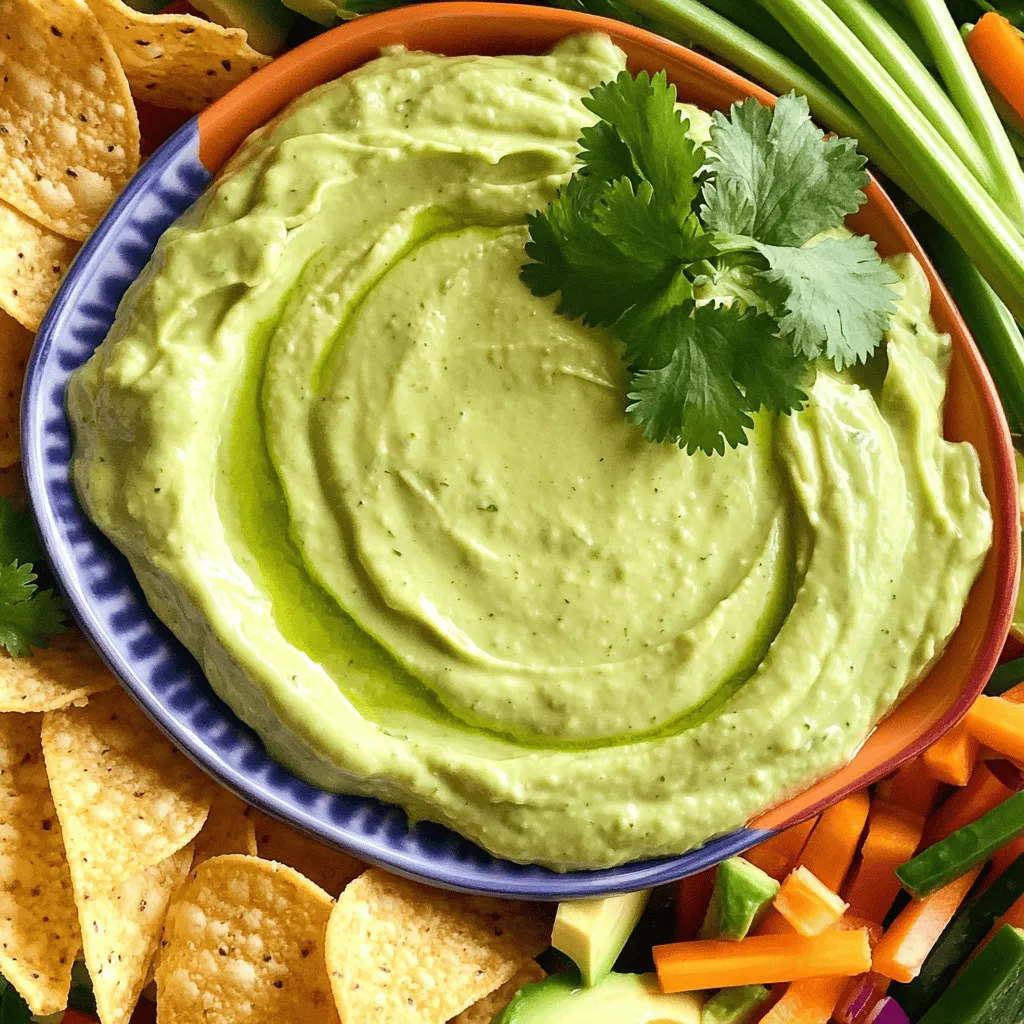
– Best Options: Serve your avocado lime ranch dip with tortilla chips or crunchy veggie sticks like carrots and cucumbers. These pair nicely and add color to your spread.
– Creative Garnishes: Add extra chopped cilantro on top for a fresh look. You can also place lime wedges around the dip for a pop of color. Using a bright platter makes everything more appealing.

Variations
Spicy Avocado Lime Ranch Dip
You can make your dip spicy by adding jalapeños or hot sauce. Start with one diced jalapeño. Mix it in with the other ingredients. If you like even more heat, add a few dashes of your favorite hot sauce. Taste as you go to find the right heat level for you.
Dairy-Free Version
If you need a dairy-free version, swap Greek yogurt and mayonnaise. Try using coconut yogurt and vegan mayo. These options give a creamy texture without dairy. This change keeps the flavor bold and fresh.
Additional Flavor Combinations
You can add different herbs or spices for more flavor. For a cilantro lime twist, mix in fresh chopped cilantro and an extra squeeze of lime juice. If you prefer a smokier taste, try adding chipotle powder. Each of these adjustments will create a unique dip that fits your taste.
Storage Info
Properly Storing the Dip
To keep your Avocado Lime Ranch Dip fresh, store it in an airtight container. This helps prevent air from getting in, which can cause browning. You can also press plastic wrap directly onto the dip’s surface before sealing the container. This ensures it stays creamy and bright green. Place the container in the refrigerator. It will stay fresh for up to three days.
Freezing Instructions
If you want to freeze the dip, start by placing it in a freezer-safe container. Leave some space at the top for expansion. You can also use ice cube trays for smaller portions. When you want to use it, transfer the dip to the fridge to thaw overnight. Avoid refreezing after it’s been thawed for best taste.
Shelf Life Information
For optimal quality, enjoy your Avocado Lime Ranch Dip within three days when stored in the fridge. If frozen, it maintains good taste for about two months. After that, the flavor may change. Always check for any signs of spoilage before eating.
FAQs
Common Questions About Avocado Lime Ranch Dip
Can I make this dip in advance?
Yes, you can make this dip ahead of time. I like to prepare it a few hours before serving. This gives the flavors time to mix and deepen. Just cover it tightly and keep it in the fridge until you’re ready to serve.
How long does the dip last in the fridge?
The dip stays fresh for about three to five days in the fridge. Make sure to store it in an airtight container. If you see any browning on top, just stir it before serving.
What can I serve with this dip?
You can serve this dip with many things! Tortilla chips are a classic choice. Veggie sticks like carrots and celery work well too. Crackers also pair nicely, or you can use it as a spread on sandwiches. Get creative with your choices!
This blog post covered how to make a delicious Avocado Lime Ranch Dip. We discussed the key ingredients, like ripe avocados, Greek yogurt, and seasonings. You learned step-by-step instructions for preparation, mixing, and blending. I shared tips on flavor enhancement and presentation ideas, plus variations to fit your taste. Finally, we talked about storage tips for freshness.
Now, you can enjoy this tasty dip anytime. Have fun creating and sharing it!


![- 1 pound large shrimp, peeled and deveined - 1/4 cup honey - 3 cloves garlic, minced - 2 tablespoons soy sauce - 1 tablespoon fresh lemon juice For the best flavor, fresh ingredients work wonders. When I use large shrimp, they soak up the marinade well. Honey adds sweetness, while garlic brings a rich taste. Soy sauce provides a savory kick, and lemon juice balances the flavors. - 1 tablespoon olive oil - 1 teaspoon crushed red pepper flakes - Salt and pepper to taste - Skewers (soaked in water if wooden) Olive oil helps the shrimp cook well on the grill. The red pepper flakes add a bit of heat, so adjust them based on your spice preference. Always season with salt and pepper to enhance the dish. If you use wooden skewers, soaking them prevents burning while grilling. - Lemon wedges - Fresh parsley Lemon wedges brighten the dish and make it look appealing. Fresh parsley adds a pop of color and freshness. These garnishes make your skewers not just tasty but also beautiful. For the full recipe, check out the details above. First, gather your marinade ingredients. In a bowl, mix together the honey, minced garlic, soy sauce, lemon juice, olive oil, crushed red pepper flakes, salt, and pepper. Whisk this mixture well until it’s blended. Next, add your peeled and deveined shrimp to the bowl. Make sure each shrimp gets coated with the marinade. Cover the bowl with plastic wrap and place it in the fridge. Let it marinate for at least 30 minutes. This helps the shrimp soak up all that yummy flavor. While the shrimp marinates, it's time to get your grill ready. Preheat the grill to medium-high heat. If you use wooden skewers, soak them in water for about 30 minutes. This step is key. It stops the skewers from burning while grilling. Now for the fun part! Start by threading the marinated shrimp onto the skewers. Leave a little space between each shrimp to help them cook evenly. Place the skewers on the grill. Cook the shrimp for about 2-3 minutes on each side. You’ll know they’re done when they turn pink and opaque. During cooking, brush any extra marinade over the shrimp. This gives them an extra burst of flavor. Once cooked, remove the skewers from the grill and let them rest for a minute. Enjoy these delicious Honey Garlic Shrimp Skewers! For the full recipe, check out the details above. To get the best Honey Garlic Shrimp Skewers, set your grill to medium-high heat. This temperature cooks the shrimp nicely without burning them. You want the grill hot enough to sear the shrimp but not so hot that they turn dry. Leave a little space between each shrimp on the skewers. This helps them cook evenly. If they are too close, they will steam instead of grilling. Proper spacing lets the heat circulate around each piece. Want to spice things up? You can add extra herbs like cilantro, basil, or even a pinch of cumin. These will give your skewers a unique twist. If you want a touch of sweetness, try adding a bit of orange juice or zest. For a different flavor, you can swap the marinade. Try teriyaki sauce for a sweet and savory taste. Or use a spicy chili paste for heat. The options are endless, and each twist can create a new favorite. Pair your Honey Garlic Shrimp Skewers with fresh sides. A light salad with mixed greens and a citrus dressing works great. You can also serve them with a side of grilled vegetables for added color and flavor. For presentation, arrange the skewers on a large platter. Add lemon wedges and sprigs of parsley for a pop of color. This not only makes it look appealing but adds freshness to each bite. Don’t forget to have extra dipping sauce on the side for your guests! {{image_2}} You can change the main protein in this recipe. If you want to swap shrimp for chicken, use boneless chicken breast cut into bite-sized pieces. For a plant-based option, tofu works great too. Just press the tofu to remove excess water before marinating. You can also switch the sweetener. If honey is not your thing, try maple syrup or agave. These options will add a unique twist to the flavor. You can cook these shrimp in different ways. Grilling adds a smoky taste, which makes the dish special. However, if you don’t have a grill, you can bake the shrimp in the oven. Set your oven to 400°F (200°C) and cook for about 10-12 minutes. Another great option is to use a skillet on the stovetop. Heat a bit of oil and cook the shrimp for 2-3 minutes on each side until they turn pink and opaque. To enhance the taste, you can add tropical elements. Pineapple chunks or shredded coconut can give your skewers a fun twist. Don’t be afraid to experiment with herbs! Fresh cilantro, basil, or mint can add freshness and depth. Try adding a mix of herbs to see what suits your taste best. For the full recipe, check out the Honey Garlic Shrimp Skewers section. After you enjoy your honey garlic shrimp skewers, store any leftovers in the fridge. Place them in a clean, airtight container. This will keep them fresh and safe to eat. Try to eat them within three days for the best taste. If you want to keep them longer, you can freeze them. Wrap the skewers tightly in plastic wrap or foil, then put them in a freezer bag. Cooked shrimp skewers can last up to three months in the freezer. When it's time to eat your leftovers, reheating them properly is key. The oven works best for this. Preheat your oven to 350°F. Place the skewers on a baking sheet and cover them with foil. Heat for about 10-15 minutes until warm. If you're in a rush, you can use the microwave. Place the shrimp on a microwave-safe plate and cover it with a damp paper towel. Heat in short bursts of 30 seconds until warmed. To keep the shrimp juicy, avoid overheating them. Cooked honey garlic shrimp skewers can last in the fridge for about three days. After that, the shrimp may spoil. Signs of spoilage include a sour smell, a slimy texture, or discoloration. If you notice any of these signs, it's best to throw them away. Always prioritize your health and safety when it comes to food storage. For the best flavor, marinate the shrimp for at least 30 minutes. This time allows the shrimp to soak up the sweet and savory notes of the marinade. If you have time, marinating for up to 2 hours enhances the taste even more. Just remember not to exceed this time, as shrimp can become mushy. Yes, you can use frozen shrimp. To prepare frozen shrimp, first, thaw them in the fridge overnight. If you need them quicker, place the shrimp in a sealed bag and submerge it in cold water for about 15-20 minutes. Once thawed, rinse them under cold water and pat dry before marinating. Several sides pair well with Honey Garlic Shrimp Skewers. Try serving them with: - Steamed rice or quinoa for a filling base. - Grilled vegetables like zucchini or bell peppers for a colorful plate. - A fresh salad with mixed greens and a light vinaigrette for crunch. - Garlic bread to soak up any extra sauce. Yes, you can make Honey Garlic Shrimp Skewers in the oven. Preheat your oven to 400°F (200°C). Place the skewers on a baking sheet lined with foil. Bake for about 8-10 minutes, flipping halfway through. The shrimp should be pink and opaque when done. This method is perfect if you don’t have a grill. For more details, check the [Full Recipe]. This blog post covers all you need for perfect Honey Garlic Shrimp Skewers. You learned about the key ingredients, including shrimp, honey, and garlic. I shared step-by-step grilling instructions and useful tips for a better cook. Plus, I offered variations for different tastes and storage advice for leftovers. Now you can make delicious skewers with confidence. Enjoy trying new flavors and impressing your friends and family with this recipe!](https://dailydishly.com/wp-content/uploads/2025/07/c236e5ff-bf7a-4bb5-97d9-fa918dc47393-768x768.webp)


