Bakery-Style Maple Walnut Coffee Cake Delightful Treat

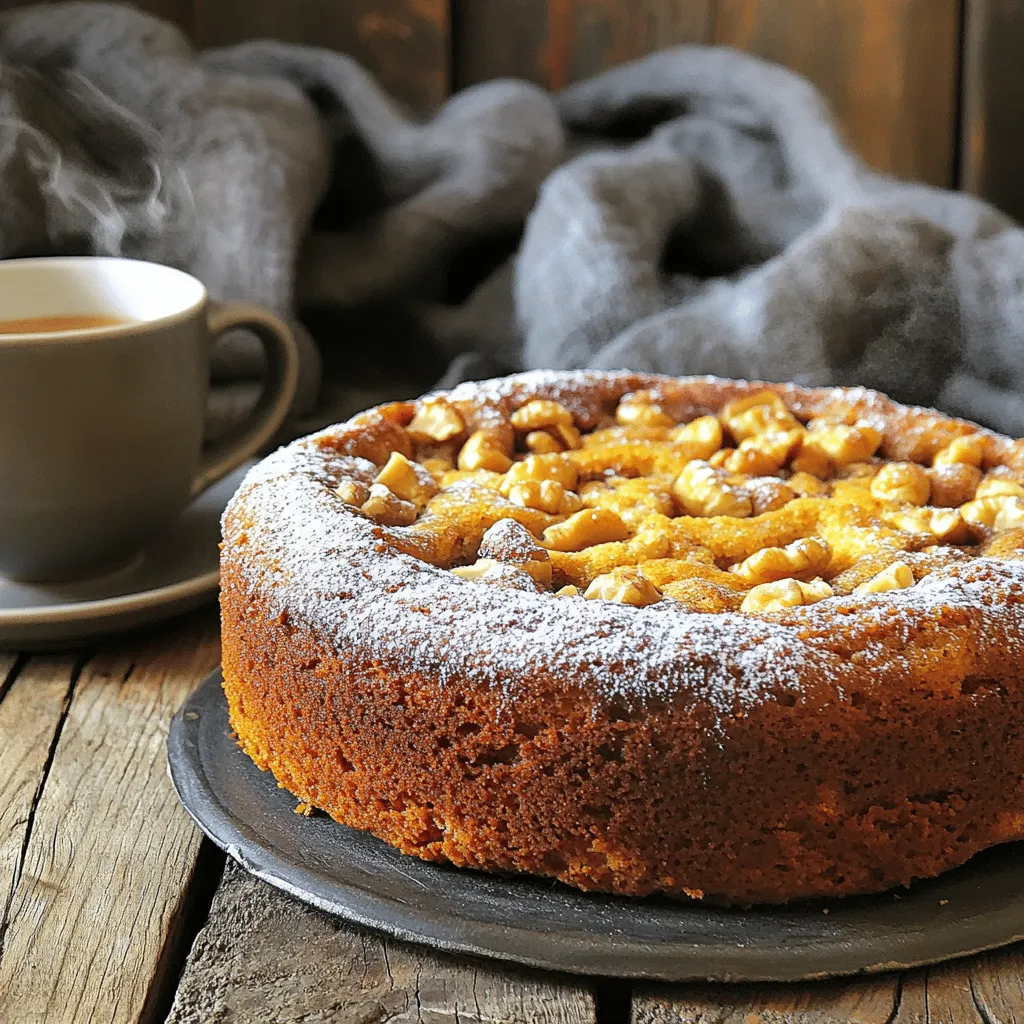
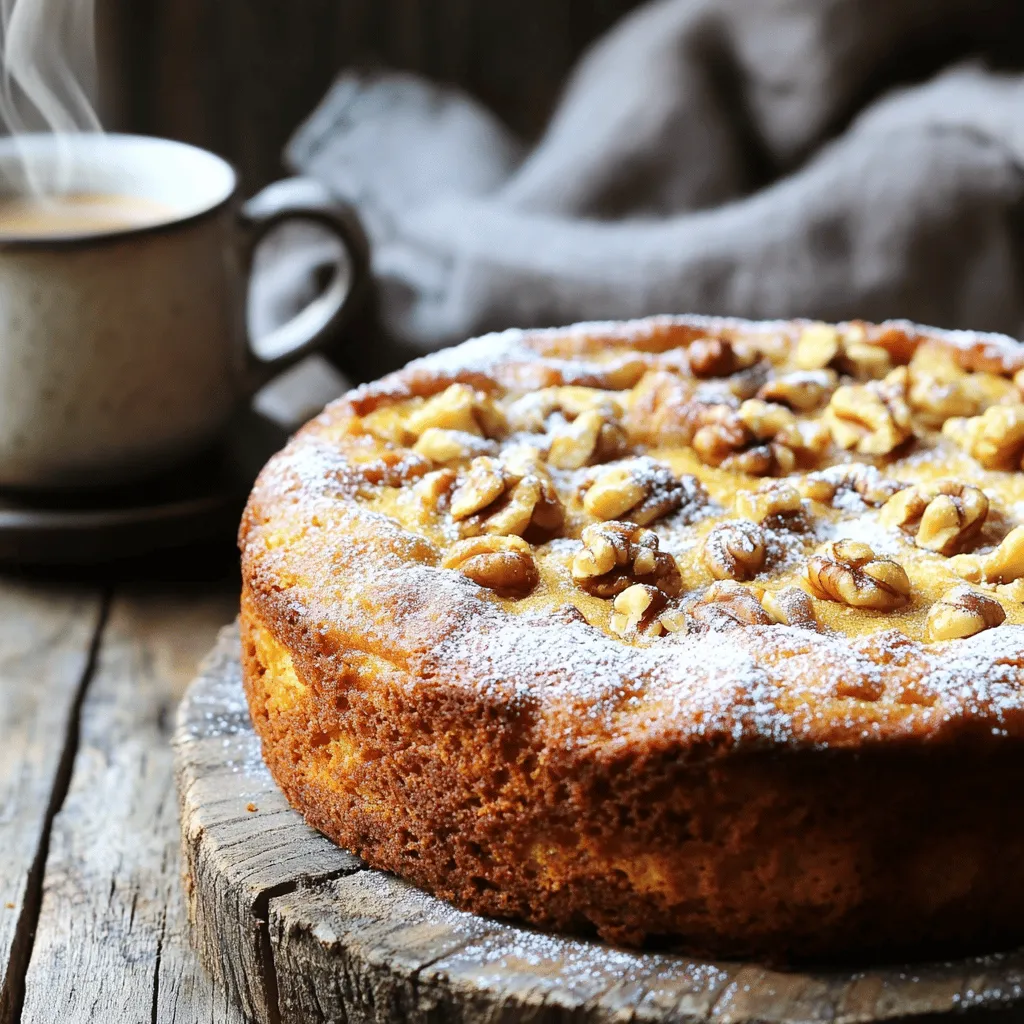
Do you crave the warm, comforting flavor of maple and nuts in a cake? If so, you’re in for a treat! My Bakery-Style Maple Walnut Coffee Cake is simple to make and bursting with taste. Whether you wish to impress guests or enjoy a cozy coffee break, this delightful recipe will satisfy your sweet tooth. Let’s dive into the ingredients that create this delicious masterpiece!
Ingredients
Key Ingredients for Bakery-Style Maple Walnut Coffee Cake
This coffee cake uses simple ingredients. Here’s what you will need:
– 2 cups all-purpose flour
– 1 cup granulated sugar
– 1/2 cup brown sugar, packed
– 1 cup unsalted butter, softened
– 3 large eggs
– 1/2 cup buttermilk
– 1/4 cup pure maple syrup
– 2 teaspoons baking powder
– 1 teaspoon baking soda
– 1 teaspoon vanilla extract
– 1/2 teaspoon salt
– 1 1/2 cups walnuts, chopped (lightly toasted)
– 1 teaspoon cinnamon
These ingredients create a moist, flavorful cake. The maple syrup adds sweetness, while the walnuts provide crunch.
Tools You’ll Need
To make this cake, gather these tools:
– Mixing bowls
– Whisk
– Hand or stand mixer
– Measuring cups and spoons
– Baking pan (9×13 inch)
– Spatula
– Wire rack
Having the right tools makes baking easier and more fun.
Baking Substitutes
You can swap some ingredients if needed:
– Use coconut oil instead of butter for a dairy-free option.
– Substitute almond milk for buttermilk if you need a non-dairy choice.
– If you don’t have walnuts, try pecans or hazelnuts.
These changes can still keep your cake delicious and enjoyable.
Step-by-Step Instructions
Preheat and Prepare the Baking Pan
First, preheat your oven to 350°F (175°C). This step is important for even baking. Next, grease and flour a 9×13 inch baking pan. You can also line it with parchment paper for easy removal later.
Mixing Dry Ingredients
In a medium bowl, whisk together the dry ingredients. Combine 2 cups of all-purpose flour, 2 teaspoons of baking powder, 1 teaspoon of baking soda, 1/2 teaspoon of salt, and 1 teaspoon of cinnamon. Set this mixture aside for later.
Creaming Butter and Sugars
In a large mixing bowl, beat 1 cup of softened unsalted butter, 1 cup of granulated sugar, and 1/2 cup of brown sugar. Use a hand or stand mixer for about 3-4 minutes. You want the mixture to be light and fluffy.
Incorporating Eggs and Flavorings
Add 3 large eggs to your butter mixture. Add each egg one at a time, mixing well after each. Then, mix in 1 teaspoon of vanilla extract and 1/4 cup of pure maple syrup. Make sure everything is well combined.
Combining Wet and Dry Ingredients
Gradually add the dry mixture to the wet mixture. Alternate this with 1/2 cup of buttermilk. Start and end with the dry mix. Mix just until combined. Be careful not to overmix, as this can affect the cake’s texture.
Folding in Walnuts
Gently fold in 1 1/2 cups of chopped walnuts. If you like, you can lightly toast them for more flavor. Make sure the walnuts are evenly spread throughout the batter.
Baking the Coffee Cake
Pour the batter into your prepared baking pan. Smooth the top with a spatula. Bake for 30-35 minutes. Use a toothpick to check for doneness. If it comes out clean, your cake is ready.
Cooling and Adding Optional Maple Glaze
Let the coffee cake cool in the pan for about 10 minutes. After that, remove it from the pan and cool it on a wire rack. If you want to add a sweet touch, mix 1 cup of powdered sugar with 2-3 tablespoons of maple syrup. Drizzle this over the cooled cake for added flavor.
Tips & Tricks
Achieving the Perfect Texture
To make the best coffee cake, start with soft butter. It should feel like a pillow when you touch it. Cream the butter and sugars until they are light and fluffy. This step is key for a moist cake. When mixing the wet and dry ingredients, do not overmix. Stop as soon as you see no flour. Folding in the walnuts gently keeps their crunch. Lastly, let the cake cool before cutting. This helps it hold its shape.
Common Mistakes to Avoid
One common mistake is using cold butter. Cold butter does not cream well. This can lead to a dense cake. Another mistake is overmixing the batter. This will make your cake tough instead of soft. Be sure to measure your flour correctly. Too much flour can also make your coffee cake dry. Lastly, check your oven temperature. Ovens can vary, and yours might bake faster or slower.
Serving Suggestions and Pairings
Serve your coffee cake warm for the best flavor. A light dusting of powdered sugar adds a nice touch. Fresh fruit, like berries or sliced bananas, pairs well with the cake. For drinks, a hot cup of coffee or tea works great. You can also serve it with a scoop of vanilla ice cream for a treat. This cake is perfect for brunch or a cozy afternoon snack.

Variations
Adding Different Nuts or Fruits
You can switch out walnuts for other nuts. Pecans add a great taste. Almonds can also work well, giving a nice crunch. If you want to add fruits, try blueberries or chopped apples. They add moisture and a sweet bite. You can mix and match to find your favorite combo. Just keep the same amounts to ensure the cake bakes evenly.
Gluten-Free Options
To make this cake gluten-free, swap the all-purpose flour for a gluten-free blend. Look for one that includes xanthan gum. This helps with texture, making the cake rise nicely. You can also try almond flour for a nutty flavor. Just remember to adjust baking time, as gluten-free cakes can bake faster.
Alternative Sweeteners
If you want to cut down on sugar, you can use honey or agave syrup. They will give a different sweetness and flavor. You can also try coconut sugar, which has a lower glycemic index. This makes it a better choice for some diets. Just use the same amount as the brown sugar in the recipe.
Storage Info
How to Store Leftover Coffee Cake
To keep your leftover coffee cake fresh, wrap it tightly in plastic wrap. You can also place it in an airtight container. This keeps the cake moist and flavorful. Store it at room temperature for up to three days. If you want to keep it longer, consider freezing it.
Freezing Instructions
To freeze your coffee cake, first let it cool completely. Cut it into squares for easy serving later. Then, wrap each piece in plastic wrap. Place the wrapped pieces in a freezer bag or an airtight container. The coffee cake can stay in the freezer for up to three months. When you’re ready to enjoy it, just thaw it in the fridge overnight.
Reheating Tips
For the best taste, reheat your coffee cake in the oven. Preheat your oven to 350°F (175°C). Place the cake on a baking sheet and cover it with foil. Heat it for about 10-15 minutes. This warms it through without drying it out. If you prefer the microwave, heat a piece for about 20-30 seconds, but be careful not to overdo it. Enjoy your warm coffee cake with a nice cup of coffee!
FAQs
Can I use other types of flour?
Yes, you can use other flours. Almond flour or whole wheat flour work well. Just remember, these flours might change the cake’s texture. You might need to adjust your liquid too.
What’s the best way to measure flour?
The best way to measure flour is by spooning it into the cup. Avoid scooping directly from the bag. This keeps your flour light and fluffy, giving you a perfect cake.
How can I make this recipe dairy-free?
To make this cake dairy-free, replace butter with coconut oil or a plant-based butter. Use almond milk or oat milk instead of buttermilk. These swaps will keep the flavor rich and tasty.
What can I substitute for buttermilk?
You can make a quick buttermilk substitute. Mix one cup of milk with one tablespoon of lemon juice or vinegar. Let it sit for about five minutes. This will give you that tangy flavor you need.
Can I make this ahead of time?
Yes, you can make this cake ahead of time. Bake it and let it cool completely. Wrap it tightly in plastic wrap and store it in the fridge for up to three days. You can also freeze it for a month. Just thaw before serving.
You learned about making a delicious maple walnut coffee cake. We covered key ingredients, tools, and helpful substitutes. I shared step-by-step instructions to ensure success. You also learned tips to get great texture and avoid common mistakes.
In the end, baking can be fun and rewarding. Enjoy experimenting with flavors and variations. This cake may just become a favorite in your kitchen.


 for more details. To start, gather your ingredients. You'll need rolled oats, almond milk, apples, maple syrup, and spices. Preheat your oven to 350°F (175°C). Grease a 9x9-inch baking dish with cooking spray. In a large bowl, mix the oats, almond milk, maple syrup, vanilla, baking powder, cinnamon, nutmeg, and salt together. Stir until everything is blended. Now, fold in the diced apples and any nuts or dried fruit you want. Pour this mix into the baking dish. Spread it out evenly. Baking time is key. Bake for 30 to 35 minutes. Look for a golden top. A toothpick should come out clean from the center. If you want a softer texture, add more almond milk. For a firmer bake, use less. This recipe works well with different nuts or fruits, too. Feel free to experiment and find your own perfect texture. Once your bake is out of the oven, let it cool for about 10 minutes. This helps it set up nicely. Cut it into squares. I love to serve it warm with a drizzle of maple syrup and a sprinkle of cinnamon. You can also add yogurt or ice cream for a sweet touch. Try this recipe for a comforting breakfast or snack. For the full details, check the full recipe. To get a creamy texture in your cinnamon apple oatmeal bake, use rolled oats. They soak up the liquid well. Almond milk adds a nice creaminess too. If you want it richer, use full-fat milk. Mixing the wet ingredients first helps everything blend nicely. Stir until everything is combined, but don’t overmix. For even cooking, spread the oatmeal mixture evenly in your baking dish. Make sure your oven is preheated to the right temperature. This helps your bake cook through evenly. Check it a few minutes before the timer goes off. If the top looks golden brown, it’s likely done. A toothpick should come out clean when inserted. You can store any leftovers in an airtight container. Keep them in the fridge for up to five days. To reheat, place a square in the microwave for about 30 seconds. You can add a splash of milk to keep it moist. For a warm treat, you might also bake it for 10 minutes at 350°F. Enjoy your cinnamon apple oatmeal bake any time! For the full recipe, check above. {{image_2}} You can switch up the apples for other fruits. Pears work well and add a sweet touch. You can also use berries, like blueberries or raspberries. These fruits add a nice color and flavor. Feel free to experiment with bananas too. Just slice them and mix them in. Each fruit brings its unique taste, making this dish fun and fresh. If you want a nut-free version, skip the walnuts. You can replace almond milk with oat or soy milk. This keeps the recipe vegan and delicious. You might also add seeds, like sunflower or pumpkin seeds. They add crunch without nuts. Enjoy your creamy bake while keeping it allergy-friendly. Besides cinnamon, you can use other spices. Cardamom adds a floral note that is lovely. Ginger gives a spicy kick that pairs well with apples. You can even add a bit of cocoa powder for a chocolatey twist. Mixing in these flavors can change the whole dish. It allows you to find your perfect blend that excites your taste buds. For the full recipe, check out the details above. Cinnamon Apple Oatmeal Bake is both tasty and healthy. Each serving has about 200 calories. This dish offers a good mix of macronutrients. You get around 6 grams of protein, 4 grams of fat, and 38 grams of carbs. The oats are the main source of carbs, giving you energy for your day. The nuts add healthy fats and protein. Using almond milk helps keep the calories low. The ingredients in this bake are full of health benefits. - Oats: They are great for heart health and digestion. Oats can help lower cholesterol levels. - Apples: They add fiber and vitamins. Eating apples can help keep your heart healthy. - Walnuts: They are high in omega-3 fatty acids. This helps reduce inflammation in the body. - Cinnamon: It may help regulate blood sugar levels. Plus, it gives a warm flavor that brightens the dish. These ingredients make this oatmeal bake a smart choice for breakfast or a snack. This recipe serves about 6 to 8 people. It is easy to adjust the serving sizes. If you want a smaller portion, cut the bake into squares. Each square can be a healthy snack or breakfast. If you have leftovers, store them in an airtight container. Reheat in the microwave for a quick meal. With its balanced nutrients, you can enjoy this dish any time of the day. For the full recipe, check out the details above. Yes, you can make Cinnamon Apple Oatmeal Bake ahead of time. Prepare your mixture and place it in the baking dish. Cover it with plastic wrap and store it in the fridge. You can bake it the next day. This makes for an easy breakfast on busy mornings. To store leftovers, let the bake cool completely. Cut it into squares and place them in an airtight container. You can keep it in the fridge for up to five days. To reheat, simply place a square in the microwave for about 30 to 45 seconds. You can also warm it in the oven at 350°F for around 10 minutes. You can serve this oatmeal bake with a drizzle of maple syrup. A sprinkle of cinnamon adds great flavor, too. For extra creaminess, add a dollop of yogurt on top. A scoop of ice cream makes it a treat! You can also pair it with fresh fruit for a colorful plate. For the complete recipe, check out the Full Recipe. Cinnamon Apple Oatmeal Bake is easy to make and full of flavor. We covered key ingredients, preparation steps, and cooling methods to get it just right. I shared tips for a creamy texture and cooking evenly. Plus, you learned fun variations and storage advice. Embrace your creativity in the kitchen. This dish is versatile and healthy, making it a great choice for any meal. Enjoy exploring different flavors and combinations. Happy baking!](https://dailydishly.com/wp-content/uploads/2025/06/ad0fc4db-106a-47e6-9ea2-42d3ddbbc125-768x768.webp)
![- 200g dark chocolate (70% cocoa), chopped - 3 tablespoons unsalted butter - 3 large eggs, separated - 1/4 cup granulated sugar - 1 teaspoon vanilla extract - 1 cup heavy cream - A pinch of salt To make a great chocolate mousse, we need high-quality ingredients. The star of this dessert is dark chocolate, which gives it rich flavor. I always choose chocolate with at least 70% cocoa. This ensures a deep, intense taste. Next, we add unsalted butter. It helps the chocolate melt smoothly. Eggs are crucial, too. They add structure and richness. Separating them allows us to whip the whites for a light texture. Granulated sugar sweetens the mousse, while vanilla extract adds warmth. Heavy cream is essential for that luscious, creamy mouthfeel. Lastly, a pinch of salt balances the flavors. - Whipped cream - Chocolate shavings - Fresh berries While the mousse is delightful on its own, garnishes can elevate it. Whipped cream adds a fluffy touch. Chocolate shavings bring a nice crunch and more chocolate flavor. Fresh berries add color and a slight tartness. These toppings make your dessert even more appealing. For the full recipe, check [Full Recipe]. Melt Chocolate Start by chopping 200g of dark chocolate. Place it in a heatproof bowl with 3 tablespoons of unsalted butter. Put this bowl over a pot of simmering water. Stir it gently until the chocolate and butter melt and blend into a smooth mix. Once melted, take it off the heat and let it cool. Whisk Egg Yolks In another bowl, take 3 large egg yolks. Add 1/4 cup of granulated sugar. Whisk these together until the mix turns pale and creamy. Next, pour in the cooled chocolate and butter blend. Add 1 teaspoon of vanilla extract and mix until combined. Whip Egg Whites In a clean bowl, add 3 large egg whites with a pinch of salt. Beat them until soft peaks form. Now, slowly add the remaining sugar while beating until stiff peaks form. This will give your mousse a light texture. Fold Egg Whites into Chocolate Mixture Gently fold one-third of the whipped egg whites into the chocolate mix. This lightens it. Then, carefully fold in the remaining egg whites. This step is key to keeping your mousse fluffy. Incorporate Whipped Cream In a separate bowl, whip 1 cup of heavy cream until soft peaks form. Now, fold this whipped cream into the chocolate mixture. Do this slowly to avoid deflating the mousse. Spoon into Serving Cups Once everything is combined, spoon the mousse into serving cups. You can use bowls or fancy glasses. Chill Time Cover the cups and place them in the fridge. Chill for at least 2 hours, or until the mousse is set. This step is vital for the best texture. For the full recipe, check the detailed instructions above. Enjoy your creamy and decadent dessert! To get the best texture, I recommend using the right ingredients. Start with high-quality dark chocolate, about 70% cocoa. This gives your mousse a rich flavor. Room temperature ingredients are also key. Eggs and butter blend better when they are not cold. One common mistake is overwhipping the cream or egg whites. This can make your mousse grainy instead of smooth. Aim for soft peaks when whipping. Another pitfall is not cooling the chocolate properly. If you add hot chocolate to eggs, it can cook them. Let the melted chocolate cool a bit before mixing. By following these tips, you can create a mousse that is creamy and decadent. For a full recipe, check out the detailed instructions. {{image_2}} To make your chocolate mousse even more exciting, try adding some fun flavors. You can add espresso powder for a coffee twist. Just mix in one teaspoon of espresso powder with the melted chocolate. This gives the mousse a rich, coffee flavor that pairs well with chocolate. Another idea is to infuse your mousse with orange zest or mint. For orange, add one teaspoon of fresh zest to the chocolate mix. This adds a bright, citrus taste. For mint, use a few drops of mint extract. It creates a refreshing flavor that feels special. If you follow a vegan diet, you can still enjoy this dessert! Use aquafaba instead of eggs. Aquafaba is the liquid from canned chickpeas. It whips up just like egg whites. Replace the three egg whites with 1/2 cup of aquafaba. This keeps your mousse fluffy and light. For those looking for sugar-free options, try using sweeteners like erythritol or stevia. These substitutes can replace the granulated sugar in the recipe. Just follow the package instructions for the right amount. This way, you can enjoy a guilt-free treat without the extra sugar. These variations keep the mousse fun and fit for everyone. For the full recipe, check out the detailed instructions above. After you make the mousse, you can store leftovers in the fridge. Place the mousse in airtight containers. This keeps it fresh and prevents it from absorbing other smells. It lasts about 3 to 4 days in the fridge. Make sure to cover it well. If you want to keep it safe, place plastic wrap over the top of the container. You can freeze chocolate mousse if you want it to last longer. Use a freezer-safe container and fill it to leave some space. The mousse will expand as it freezes. It can stay in the freezer for up to 2 months. To thaw the mousse, take it out and place it in the fridge for several hours. This keeps the texture nice. Avoid using a microwave, as it may change the mousse's creamy feel. Once thawed, use it within a couple of days for the best taste. If you want the full recipe, check it out here: [Full Recipe]. Chocolate mousse can last about 3 to 5 days in the fridge. Make sure to cover the mousse well to keep it fresh. After a few days, the texture might change, but it should still taste good. Yes, you can make chocolate mousse ahead of time. It’s a great dessert for parties. Just make sure to chill it for at least 2 hours. You can prepare it a day before serving. This allows the flavors to develop fully. If you need a substitute for heavy cream, you can use coconut cream or full-fat yogurt. These options will change the flavor a bit but will still give a creamy texture. You can also whip silken tofu for a dairy-free alternative. Using raw eggs can be safe if they are pasteurized. Pasteurized eggs reduce the risk of foodborne illness. If you are concerned, you can use whipped aquafaba instead of egg whites. Aquafaba is the liquid from canned chickpeas and works well in this mousse. For the full recipe, check out the recipe section above. This blog post covers how to make a simple and delicious chocolate mousse. I shared key ingredients and easy steps to create the perfect dessert. Remember to avoid common mistakes, like overwhipping cream. You can also try different flavors or adjust for dietary needs. In the end, this mousse is a treat you can make any time. With practice, you'll impress everyone. Enjoy making it, and have fun with the toppings!](https://dailydishly.com/wp-content/uploads/2025/06/b5ca571b-81f1-451e-9d8a-f7e9dc6262da-768x768.webp)