Broccoli Cheddar Soup Slow Cooker Creamy Delight

Are you craving a warm and cheesy dish that warms your heart? My Broccoli Cheddar Soup in the slow cooker is just what you need! This creamy delight is easy, comforting, and packed with flavor. Plus, you can customize it to suit your taste. In this post, I’ll guide you through simple steps, useful tips, and even some fun variations. Get ready to enjoy a bowl of happiness!
Ingredients
List of Ingredients
For this creamy broccoli cheddar soup, gather these fresh and simple ingredients:
– 4 cups fresh broccoli florets
– 1 medium onion, diced
– 3 cloves garlic, minced
– 4 cups vegetable broth
– 2 cups sharp cheddar cheese, shredded
– 1 cup heavy cream (or full-fat coconut milk for a lighter option)
– 1 teaspoon Dijon mustard
– 1 teaspoon dried thyme
– Salt and pepper to taste
– 2 tablespoons olive oil
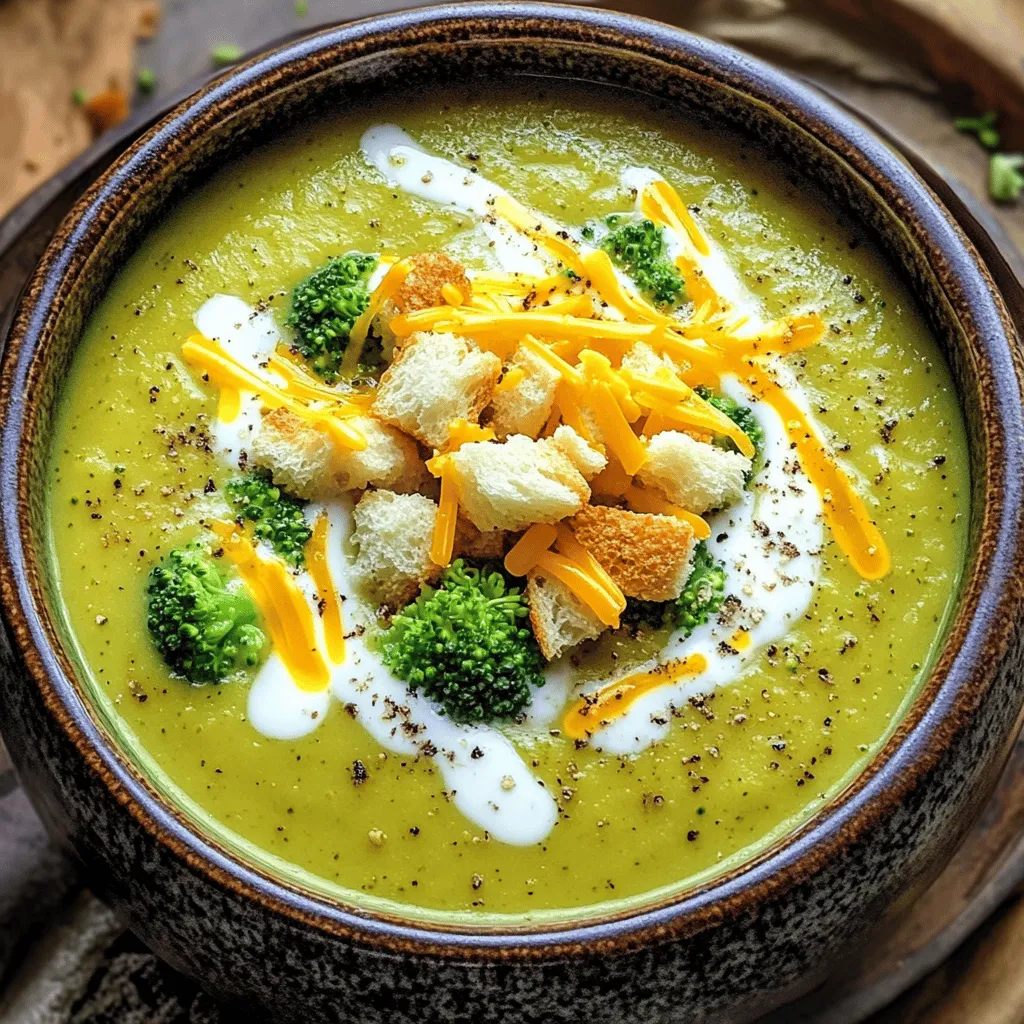
Optional Toppings
To make your soup even better, try these tasty toppings:
– Croutons for crunch
– Extra cheese for richness
Ingredient Substitutions
You can swap ingredients to fit your needs:
– Use chicken broth instead of vegetable broth for a different flavor.
– Swap heavy cream with full-fat coconut milk for a lighter soup.
– If you want it spicy, add a pinch of cayenne pepper.
– For a vegetarian option, skip the cheese or use plant-based cheese.
By mixing and matching these options, you can create a soup that fits your taste and diet.
Step-by-Step Instructions
Sautéing the Aromatics
First, we need to build great flavor. Heat the olive oil in a skillet over medium heat. Add the diced onion. Sauté it for about five minutes. You want the onion to turn translucent. Next, stir in the minced garlic. Cook it for one more minute. The garlic should smell amazing!
Combining Ingredients in the Slow Cooker
Now, transfer the onion and garlic mix to the slow cooker. Add the fresh broccoli florets next. Pour in the vegetable broth, then add the Dijon mustard and dried thyme. Don’t forget to season with salt and pepper. Stir everything together well. Cover the slow cooker and set it to cook. Choose low for four to five hours, or high for two to three hours. The broccoli should be tender when done.
Blending and Finishing Touches
Once the broccoli is soft, it’s time to blend. Use an immersion blender to mix the soup until smooth. If you don’t have one, you can use a regular blender in batches. After blending, stir in the heavy cream and shredded cheddar cheese. Mix until the cheese melts and the soup is creamy. Taste it and adjust the seasoning if needed. Now your soup is ready to serve!
Tips & Tricks
How to Avoid Overcooked Broccoli
To keep your broccoli bright and firm, cook it just right. Set your slow cooker to low and let the soup simmer for 4 to 5 hours. If you are in a hurry, you can set it to high for 2 to 3 hours. Check the broccoli at the 2-hour mark if on high. The goal is tender but not mushy. Overcooked broccoli loses its flavor and nutrients. Remember, it will continue to cook a bit after blending.
Achieving the Perfect Creaminess
For that rich, creamy texture, use heavy cream or full-fat coconut milk. Stir it in after blending the soup. This step helps to mix the cream fully. If you prefer a lighter soup, coconut milk works well. You can adjust the cream based on your preference. If you want a thicker soup, add more cheese slowly as you blend. This will give your soup a velvety finish that is hard to resist.
Gluten-Free and Dairy-Free Modifications
To make this soup gluten-free, ensure your vegetable broth is certified gluten-free. For a dairy-free version, swap heavy cream for full-fat coconut milk and use dairy-free cheese. Many brands offer delicious options that melt well. This way, you can enjoy the same creamy delight while sticking to your diet. Adjust the seasoning slightly, as dairy-free cheese can vary in taste. Enjoy your dish without worry!

Variations
Adding Proteins (e.g., Chicken or Bacon)
You can make this soup heartier by adding proteins. Chicken and bacon are great choices. For chicken, use cooked, shredded chicken. Stir it in during the last 30 minutes of cooking. If you like bacon, cook it crispy first. Crumble it and add it just before serving. This adds a nice crunch and smoky flavor.
Flavor Additions (e.g., Spices and Herbs)
Spices and herbs can really boost the taste of your soup. Try adding a pinch of cayenne pepper for heat. It gives your soup a nice kick. Fresh herbs like parsley or chives make it bright. You can also sprinkle some nutmeg for a warm flavor. Just remember, start small. You can always add more, but you can’t take it out!
Using Different Cheeses
Cheese is key to a great broccoli cheddar soup. While sharp cheddar is my go-to, other cheeses can work too. Gruyère adds a nutty taste, while Monterey Jack gives a creamy texture. You could even mix different cheeses for a fun twist. Just make sure they melt well for that creamy delight!
Storage Info
How to Store Leftover Soup
Storing leftover soup is simple and smart. First, let the soup cool to room temperature. Then, pour it into airtight containers. Make sure to leave some space at the top, as soup can expand when frozen. Label the container with the date. This way, you can enjoy your creamy delight later!
Freezing Broccoli Cheddar Soup
You can freeze broccoli cheddar soup for up to three months. To freeze, use freezer-safe containers. Again, leave some space at the top. You can also use freezer bags. Just press out the air before sealing them. When you’re ready to enjoy it, take it out of the freezer and let it thaw in the fridge overnight.
Reheating Instructions
Reheating your soup is easy. You can use the stovetop or microwave. For the stovetop, pour the soup into a pot. Heat it over medium heat, stirring often until warm. If you use a microwave, place the soup in a microwave-safe bowl. Heat it in short bursts, stirring in between until hot. Always taste and adjust the seasoning if needed. Enjoy your creamy soup warm!
FAQs
Can I make this soup ahead of time?
Yes, you can make this soup ahead of time. I often prepare it the day before. Just store it in the fridge after it cools. When you are ready to eat, reheat it gently on the stove. This way, the flavors meld and deepen overnight.
How do I thicken slow cooker soup?
To thicken slow cooker soup, you can use a few methods. One simple way is to blend a portion of the soup. Use an immersion blender or a regular blender. This gives it a creamy texture. Another option is to add a cornstarch slurry. Mix one tablespoon of cornstarch with two tablespoons of cold water. Stir it into the soup and cook for a few more minutes.
What can I serve with broccoli cheddar soup?
Broccoli cheddar soup pairs well with a few sides. I love to serve it with crusty bread or a fresh salad. You can also add croutons on top for some crunch. A grilled cheese sandwich makes a great match too. This combo warms you up on chilly days.
In this blog post, we explored the key ingredients for broccoli cheddar soup and offered tips for perfecting your dish. You learned how to sauté aromatics, combine ingredients, and achieve a creamy texture. We also shared variations, storage info, and answered common questions.
Embrace your creativity with this simple soup. Experiment with toppings and flavors. You can make this dish your own while enjoying the comforting taste it offers. Enjoy cooking and sharing each delicious bite!


![For a rich and hearty Chicken and Wild Rice Soup, gather these key ingredients: - 1 lb boneless, skinless chicken breasts, diced - 1 cup wild rice, rinsed - 1 medium onion, chopped - 2 carrots, diced - 2 celery stalks, diced - 3 cloves garlic, minced - 6 cups chicken broth (low sodium) - 1 cup heavy cream or coconut milk for a dairy-free option - 1 teaspoon dried thyme - 1 teaspoon dried rosemary - 1 teaspoon paprika - Salt and pepper to taste - 2 tablespoons olive oil - Fresh parsley, chopped (for garnish) Adding a few garnishes can elevate your soup. Consider these options: - Crusty bread on the side - Extra chopped parsley for color - A sprinkle of black pepper for spice - A drizzle of olive oil for richness If you need to swap out some ingredients, here are my suggestions: - Chicken: Use rotisserie chicken for quicker prep. - Rice: Substitute with brown rice or quinoa if you prefer. - Cream: Almond milk or cashew cream can work as dairy-free options. - Herbs: Fresh herbs can replace dried ones for a fresh taste. These swaps keep the soup delicious while catering to your needs. For the full recipe, check out the detailed instructions. 1. Start by gathering all your ingredients. This makes cooking easier. 2. Dice the chicken into small pieces. This helps it cook evenly. 3. Chop the onion, carrots, and celery. Aim for similar sizes for even cooking. 4. Rinse the wild rice under cool water. This removes any dust or debris. 5. Mince the garlic. Fresh garlic gives the best flavor in this soup. 1. In a large pot, heat 2 tablespoons of olive oil over medium heat. 2. Add the chopped onions, carrots, and celery. Sauté these for about 5 minutes. 3. Stir in the minced garlic and let it cook for one minute. 4. Now, add the diced chicken to the pot. Cook it until there is no pink, about 5-7 minutes. 5. Next, stir in the rinsed wild rice, chicken broth, thyme, rosemary, paprika, salt, and pepper. 6. Bring this mixture to a boil. Once boiling, reduce the heat to low. 7. Cover the pot and let the soup simmer for 45-50 minutes. The rice should be tender when done. 8. Once the wild rice is cooked, stir in the heavy cream or coconut milk. Heat for another 5 minutes. 9. Taste and adjust the seasoning if you need to. 1. Serve the soup hot in rustic bowls. 2. Garnish with fresh parsley for color and flavor. 3. Pair the soup with crusty bread for dipping. 4. For a twist, try adding a squeeze of lemon juice before serving. You can find the full recipe [here]. Enjoy your comforting chicken and wild rice soup! To make your chicken and wild rice soup truly special, use fresh ingredients. Start with quality chicken and fresh herbs. They add great flavor. Don't rush the cooking process. Let the soup simmer gently. This brings out the best taste. Stir in cream or coconut milk at the end. This keeps it rich and smooth. Always taste your soup before serving. Adjust the salt and pepper if needed. Store your soup in an airtight container. This keeps it fresh for up to five days in the fridge. If you want to save it for longer, freezing is a great option. Let the soup cool down before you freeze it. Use freezer-safe containers or bags. It can last up to three months in the freezer. When you're ready to eat, thaw it in the fridge overnight. When serving your soup, use rustic bowls for a cozy feel. A sprinkle of fresh parsley adds color and flavor. Pair it with crusty bread for dipping. This makes the meal even more comforting. You can also add a squeeze of lemon for a bright touch. Enjoy your soup hot for the best experience. For the full recipe, follow the instructions above. {{image_2}} If you want a dairy-free soup, try using coconut milk. It gives a nice, creamy texture. You can also use almond milk or soy milk. Just skip the heavy cream in the recipe. This way, you still enjoy a rich flavor without dairy. You can change the protein in this soup. Instead of chicken, use turkey for a lighter taste. If you're vegetarian, try adding chickpeas or lentils. They add protein and make the soup hearty. You can also use tofu for a great texture and flavor. Adding more veggies makes the soup even better. Try spinach, kale, or peas for a pop of color. You can also add mushrooms for a nice earthy taste. Bell peppers or zucchini work well too. Just chop them small so they cook evenly. To keep your Chicken and Wild Rice Soup fresh, place it in an airtight container. Make sure the soup cools to room temperature before sealing it. Store it in the fridge for up to three days. If you want to keep it longer, freezing is a great option. To freeze your soup, use freezer-safe containers. Leave about an inch of space at the top for expansion. You can also use freezer bags. Make sure to squeeze out the air before sealing. The soup can last in the freezer for up to three months. When you’re ready to enjoy your soup again, thaw it overnight in the fridge. To reheat, pour the soup into a pot over medium heat. Stir often until it is hot. You can also use a microwave. Heat it in a bowl, stirring every minute to warm it evenly. Enjoy your comforting meal! For the full recipe, check out the complete guide. To make Chicken and Wild Rice Soup gluten-free, choose gluten-free chicken broth. Most wild rice is already gluten-free. Always check the labels on your broth and any added ingredients. Avoid any flour thickeners or other gluten items. Yes, you can use rotisserie chicken. It saves time and adds great flavor. Just shred the chicken and add it when the soup is nearly done. This keeps it tender and warm without overcooking. To freeze Chicken and Wild Rice Soup, cool it completely first. Use airtight containers or freezer bags. Leave some space for expansion. Label the bags with the date. It can last up to three months in the freezer. To reheat, thaw overnight in the fridge and heat on the stove. Add a splash of broth or water if it thickens too much. In this blog post, we explored how to make Chicken and Wild Rice Soup. We learned about key ingredients, step-by-step preparation, and cooking methods. I shared tips for perfecting your soup and storing leftovers. We also discussed variations, like dairy-free options and added proteins. This soup can be a warm, comforting meal for anyone. Use these ideas and instructions to create your own tasty version. Enjoy every delicious bite!](https://dailydishly.com/wp-content/uploads/2025/06/ba29d031-2d2c-4923-bda3-eccafd61a64a-768x768.webp)

![To make garlic butter mushroom rice, you will need: - 1 cup jasmine rice - 2 cups vegetable broth - 2 tablespoons unsalted butter - 1 tablespoon olive oil - 3 cups mushrooms, sliced - 4 cloves garlic, minced - 1 small onion, diced - 1 teaspoon dried thyme - Salt and pepper to taste - Fresh parsley, chopped These ingredients work together to create a rich and tasty dish. Jasmine rice gives a lovely aroma and texture. The mushrooms add depth, while garlic brings a bold flavor. You can switch some ingredients if you want: - Use brown rice, basmati, or quinoa instead of jasmine rice. - Try different mushrooms like shiitake or portobello for a new taste. - Use vegan butter if you prefer a dairy-free option. These swaps let you enjoy the dish your way! Want to take your dish up a notch? Consider these ideas: - Add grated Parmesan cheese for a creamy finish. - A splash of soy sauce or Worcestershire sauce adds umami. - Crushed red pepper flakes give a nice kick of heat. These enhancements let you customize the flavor to suit your taste. For the full recipe, check out the details above! - Rinse jasmine rice until water runs clear. This step helps make the rice fluffy. - In a medium pot, bring vegetable broth to a gentle boil. Add the rinsed rice. Stir once, lower the heat, and cover. Let it simmer for about 15 minutes. The rice will absorb the broth. After that, let it sit for 5 more minutes with the lid on. - While the rice cooks, heat olive oil and 1 tablespoon of butter in a large skillet over medium heat. - Add diced onion and sauté until it turns translucent, about 3-4 minutes. This brings out the sweet flavor of the onion. - Then, stir in sliced mushrooms. Cook for about 5-7 minutes until they turn golden brown. This step enhances the mushrooms' taste and texture. - Next, add minced garlic and dried thyme to the skillet and cook for about 1 minute. You want the garlic to become fragrant but not burn. - Once the rice is done, fluff it with a fork. Then, add it to the skillet with the mushroom mixture. Stir everything together. - Add the remaining tablespoon of butter and mix well. Season with salt and pepper to taste. Make sure the butter melts and coats the rice evenly. - Now, you can serve this dish hot. For extra flair, garnish with freshly chopped parsley. For the full recipe, check out the instructions above! To make your rice fluffy, rinse it first. Rinse jasmine rice under cold water until the water runs clear. This step removes excess starch. It helps keep the rice from being sticky. When you cook the rice, use vegetable broth. This adds flavor. Bring it to a gentle boil before adding the rice. Stir once, then cover and reduce heat. Let it simmer for about 15 minutes. After that, let it sit for 5 more minutes. This resting time is key for fluffiness. For the mushrooms, choose fresh ones. I like cremini and button mushrooms for their taste. Sauté them until they are golden brown. This usually takes 5 to 7 minutes. Make sure to cook them in olive oil and butter. This combo gives them great flavor. When you add garlic and thyme, cook for just one more minute. This brings out their aromas. Serve garlic butter mushroom rice with grilled chicken or fish. The flavors complement each other well. You can also pair it with steak or vegetable stir-fry. It works as a side dish or a main meal. The rice adds a nice texture to your plate. Presentation matters! Garnish your dish with fresh parsley for color. It makes the dish look appealing. Use a large bowl for family-style serving. This helps everyone to help themselves easily. For extra flair, add some whole sautéed mushrooms on top. It makes your dish look even more special. The bright colors will catch everyone’s eye. For the full recipe, check out the details above. {{image_2}} You can boost your garlic butter mushroom rice by adding protein. Cooked chicken, shrimp, or tofu work great. For a meaty option, grilled chicken adds flavor and texture. Shrimp brings a nice seafood twist, while tofu is perfect for a vegetarian or vegan meal. For a vegan dish, use firm tofu and sauté it until golden. It absorbs flavors well. This keeps your meal hearty without losing the rice's charm. Change up your vegetable game with seasonal swaps. In spring, add fresh peas for a pop of color. In summer, sweet corn brings sweetness and crunch. You can also experiment with herbs. Try fresh basil in summer or rosemary in winter for a new twist. These small changes make the dish exciting and fresh. Take your rice on a global journey! For Asian flavors, add ginger or sesame oil. This gives the dish warmth and richness. If you prefer an Italian flair, sprinkle in extra herbs like oregano or thyme. A bit of Parmesan cheese can also elevate the dish. Mixing cultures opens up a world of taste and creativity. Feel free to explore these variations to fit your taste. Each option brings its own twist to the dish while keeping it simple and flavorful. For the full recipe, check out the [Full Recipe]. To store leftover garlic butter mushroom rice, let it cool first. Place it in an airtight container. This helps keep the rice fresh. Store it in the fridge for up to four days. When reheating, add a splash of broth or water. This keeps the rice moist and flavorful. Heat it in a skillet over medium heat or in the microwave. Garlic butter mushroom rice is great for freezing! Let the rice cool completely before packing it. Use freezer-safe bags or containers. Remove as much air as possible to prevent freezer burn. It can last up to three months in the freezer. To thaw, place it in the fridge overnight. You can reheat it straight from frozen, but add a bit of liquid. In the fridge, your garlic butter mushroom rice lasts about four days. In the freezer, it can stay fresh for up to three months. Check for signs of spoilage before using. If it smells sour or has a change in color, it’s best to toss it. Keeping track of how long it’s stored helps reduce waste. Enjoy your delicious dish without worry! Yes, you can make this dish ahead of time. Cook the rice and mushroom mixture separately. Let them cool, then store in the fridge. When ready to serve, reheat them together in a skillet. This keeps the rice fluffy and the mushrooms fresh. No broth? No problem! You can use water instead. For added flavor, add a splash of soy sauce or a few herbs. You can also make a quick homemade broth. Boil water with onion, garlic, and herbs for about 20 minutes. Strain and use it in the recipe. To make this dish gluten-free, use gluten-free vegetable broth. Always check labels on broth and seasonings. You can also add gluten-free soy sauce or tamari for that extra flavor. Absolutely! Rinse the rice and add it to the rice cooker with broth. Follow your rice cooker's instructions. While the rice cooks, sauté the mushrooms and garlic in a skillet on the stove. Once the rice is done, mix it with the mushroom mixture for a delicious meal. In this post, we explored a simple recipe for Garlic Butter Mushroom Rice. You learned about the ingredients, step-by-step cooking instructions, and various tips to make it better. I shared ways to adjust the recipe, add protein, and make it seasonal. Remember, you can store leftovers well and enjoy them later. This dish is tasty and easy to customize. With a few changes, it can fit any meal. Cooking at home can be fun and rewarding, so give it a try!](https://dailydishly.com/wp-content/uploads/2025/07/29514873-f8b8-4454-af35-97a6bac317ac-768x768.webp)
