Craving a meal that warms your heart and fills your belly? Look no further than these buttery herb chicken drumsticks! This deeply flavorful dish is easy to make and pairs perfectly with any side. In this post, I will guide you through the simple steps to create juicy, tasty drumsticks that your whole family will love. Let’s get cooking and turn a few basic ingredients into a delightful feast!
Why I Love This Recipe
- Flavorful Herb Blend: The combination of rosemary, thyme, and parsley creates a fragrant and delicious aroma that elevates the taste of the chicken.
- Simple Preparation: This recipe requires minimal effort, making it easy to prepare a hearty meal without spending hours in the kitchen.
- Perfectly Juicy Chicken: Baking the drumsticks at a high temperature ensures they are cooked through while remaining moist and tender.
- Versatile Serving: These drumsticks pair wonderfully with various sides, making them a great choice for any occasion, from casual dinners to festive gatherings.
Ingredients
List of Ingredients
– 8 chicken drumsticks
– 1/2 cup unsalted butter, melted
– 2 tablespoons olive oil
– 4 cloves garlic, minced
– 1 tablespoon fresh rosemary, chopped
– 1 tablespoon fresh thyme, chopped
– 1 tablespoon fresh parsley, chopped
– 1 teaspoon paprika
– Salt and pepper to taste
– Lemon wedges for serving
Let’s dive into what makes buttery herb chicken drumsticks so tasty. First, you need chicken drumsticks. They give that rich, juicy flavor that you want. Next, unsalted butter is key. It adds creaminess and depth. Olive oil helps keep things moist and adds a nice touch.
Garlic is a must. It brings a fragrant note that pairs well with the chicken. Fresh herbs like rosemary, thyme, and parsley add bright flavors. Each herb shines through and makes the dish special. Paprika adds a hint of warmth and color.
Don’t forget salt and pepper. They enhance all the other flavors. Finally, lemon wedges are perfect for serving. They add a fresh, zesty kick that brightens the dish.
Gather these ingredients, and you’re ready to make a deeply flavorful meal that impresses!

Step-by-Step Instructions
Preheat the Oven
Start by preheating your oven to 425°F (220°C). I find that lining a baking sheet with aluminum foil or parchment paper makes cleanup easy. This step is key to keeping your kitchen tidy while cooking!
Prepare the Butter Mixture
In a large bowl, combine the melted butter and olive oil. Add four cloves of minced garlic, one tablespoon each of chopped rosemary, thyme, and parsley. Sprinkle in one teaspoon of paprika along with salt and pepper to taste. Stir the mixture until it is well combined. This buttery herb mix is the heart of the dish!
Coat the Chicken
Next, add the chicken drumsticks to the bowl. Toss them well in the buttery herb mix. Make sure each drumstick gets coated evenly. This ensures every bite is packed with flavor!
Bake the Drumsticks
Place the coated drumsticks on your prepared baking sheet. Make sure to space them out for even cooking. Bake them in the preheated oven for 35 to 40 minutes. Turn the drumsticks halfway through cooking. This helps them brown evenly and reach that golden perfection. Check that the internal temperature hits 165°F (75°C) before taking them out.
Resting and Serving
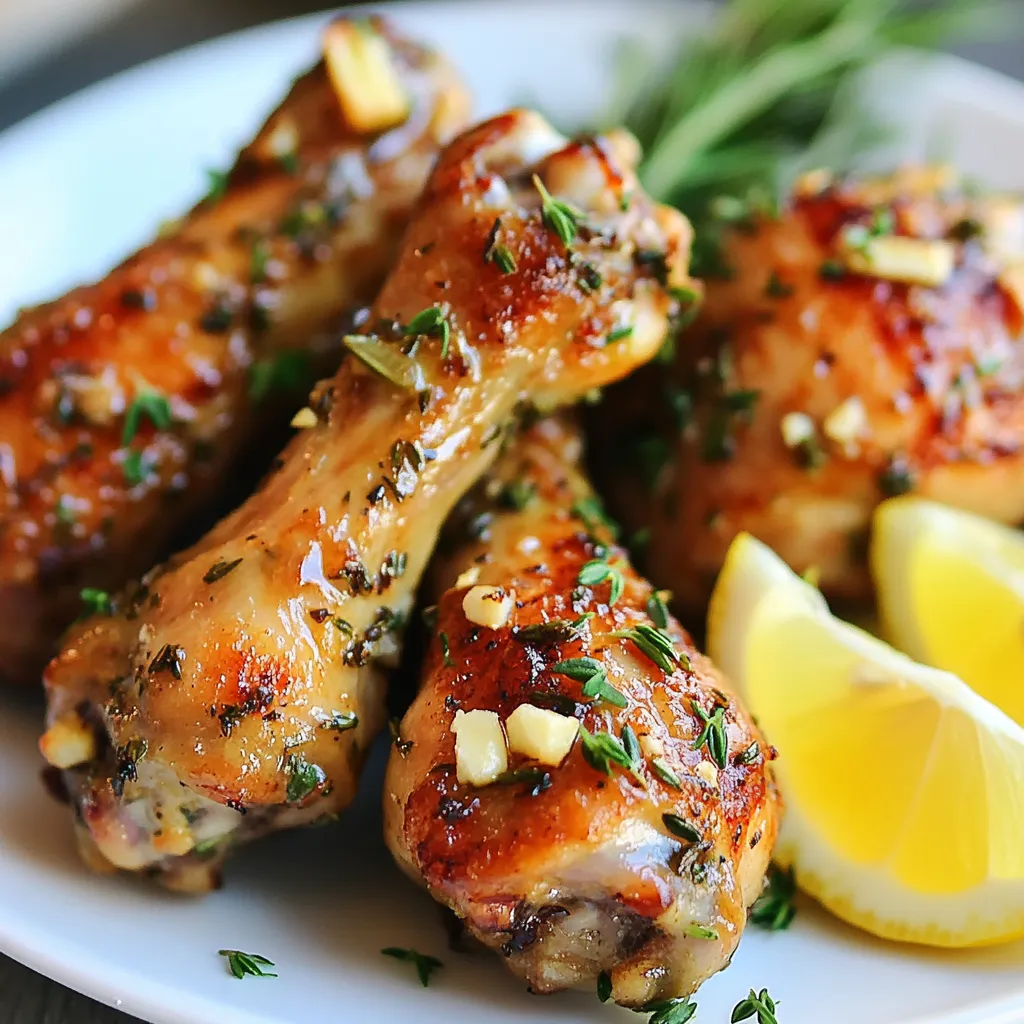
Once done, remove the drumsticks from the oven. Allow them to rest for about five minutes. This helps the juices settle, making the meat tender. For serving, arrange the drumsticks on a rustic wooden board or platter. Garnish with fresh herbs and add lemon wedges for a bright touch. Just a squeeze of lemon enhances the flavors beautifully!
Tips & Tricks
Achieving Perfect Chicken
To get that golden brown color, start with high heat. Preheat your oven to 425°F (220°C). This heat helps the skin crisp up nicely. You want to coat the chicken drumsticks evenly in the buttery herb mix. Space them out on the baking sheet. This allows hot air to circulate around each piece. Turn the drumsticks halfway through cooking. This step ensures even browning on all sides.
Flavor Enhancements
Feel free to play with the herbs in this recipe. If you love basil, use it instead of thyme. Oregano works great too. For a bit of zing, add some crushed red pepper flakes. You can also try using dried herbs if fresh ones are not available. Use about a third of the amount. Mix and match until you find a blend that excites your taste buds.
Cooking at Different Temperatures
If you prefer grilling, this recipe works well too. Preheat your grill to medium-high heat. Cook the drumsticks for about 25-30 minutes, turning often. This helps them cook evenly and prevents burning. For broiling, set your oven to broil and cook for about 15-20 minutes. Keep a close watch so they do not burn. Always check the internal temperature; it should be 165°F (75°C) for safe eating.
Pro Tips
- Use Room Temperature Chicken: Let the drumsticks sit at room temperature for about 15-20 minutes before cooking. This helps them cook more evenly.
- Marinate for Extra Flavor: For an even more flavorful dish, marinate the chicken in the buttery herb mixture for a few hours or overnight in the refrigerator.
- Check Internal Temperature: Use a meat thermometer to ensure the chicken reaches an internal temperature of 165°F (75°C) for safe consumption.
- Rest Before Serving: Allow the drumsticks to rest for a few minutes after baking. This helps the juices redistribute, keeping the meat tender and juicy.
Variations
Spicy Version
To add heat, mix in chili flakes or hot sauce. This spice boosts flavor while keeping the dish fun and lively. You can start with a teaspoon of chili flakes and adjust to your taste. A spicy version pairs well with the buttery notes of the chicken.
Herb Mix Variations
Feel free to change the herbs in this recipe. Using basil, oregano, or even dill can bring new flavors. Each herb has its charm and adds a unique twist. You can use dried herbs if fresh ones are not available. Just remember to use less, as dried herbs are more potent.
Gluten-Free Adaptation
If you want a gluten-free option, this recipe is easy to adapt. Simply ensure that your butter and any added sauces are gluten-free. You can serve the drumsticks with gluten-free sides, like rice or quinoa, for a complete meal. Always check labels to avoid hidden gluten in sauces.
Storage Info
Storage Instructions
To store your buttery herb chicken drumsticks, let them cool first. Place the leftovers in an airtight container. You can keep them in the fridge for up to three days. If you want to prevent drying out, add a bit of broth to the container before sealing. This keeps the chicken moist and tasty.
Reheating Tips
For the best reheating, use your oven. Preheat it to 350°F (175°C). Place the drumsticks on a baking sheet. Cover them with foil to keep the moisture in. Heat for about 15-20 minutes, until they are warm and juicy. You can also use a microwave, but this may make the skin less crispy.
Freezing Guidelines
To freeze the chicken, wrap each drumstick tightly in plastic wrap. Then place them in a freezer bag. You can store them for up to three months. When ready to eat, thaw them in the fridge overnight. After thawing, reheat them in the oven for the best taste.
FAQs
What can I serve with buttery herb chicken drumsticks?
You can serve buttery herb chicken drumsticks with many sides. Here are some ideas:
– Mashed potatoes
– Roasted vegetables
– Green salad
– Rice or quinoa
– Garlic bread
Each of these pairs well with the flavors of the chicken. Mashed potatoes soak up the buttery sauce. Roasted veggies add color and crunch. A green salad brings freshness to the plate.
Can I use other cuts of chicken for this recipe?
Yes, you can use other cuts of chicken. Bone-in thighs or breasts work well. Adjust cooking time based on the cut you choose. Thicker pieces may need longer. Make sure the internal temperature reaches 165°F (75°C) for safety.
How do I know when the chicken is fully cooked?
Check the chicken’s internal temperature with a meat thermometer. It should read 165°F (75°C). If you don’t have a thermometer, cut into the thickest part. The juices should run clear, not pink. Always ensure chicken is safe to eat.
Can I marinate the chicken overnight?
Yes, marinating overnight is a great idea. It allows the flavors to soak in deeply. Use the buttery herb mixture as a marinade. Just cover the chicken and refrigerate. This step adds even more taste to your drumsticks.
You can create a delicious meal with the right ingredients and steps. We covered the main tips, from baking drumsticks to adding tasty herbs. Remember to rest your chicken for the best flavor. You can mix things up with spice or herbs. Store leftovers properly to enjoy later. Don’t forget to serve with fresh lemon for extra zest. Enjoy your cooking journey and impress your guests with these easy tip


