Caprese Chicken Stuffed Peppers Flavorful Dinner Idea

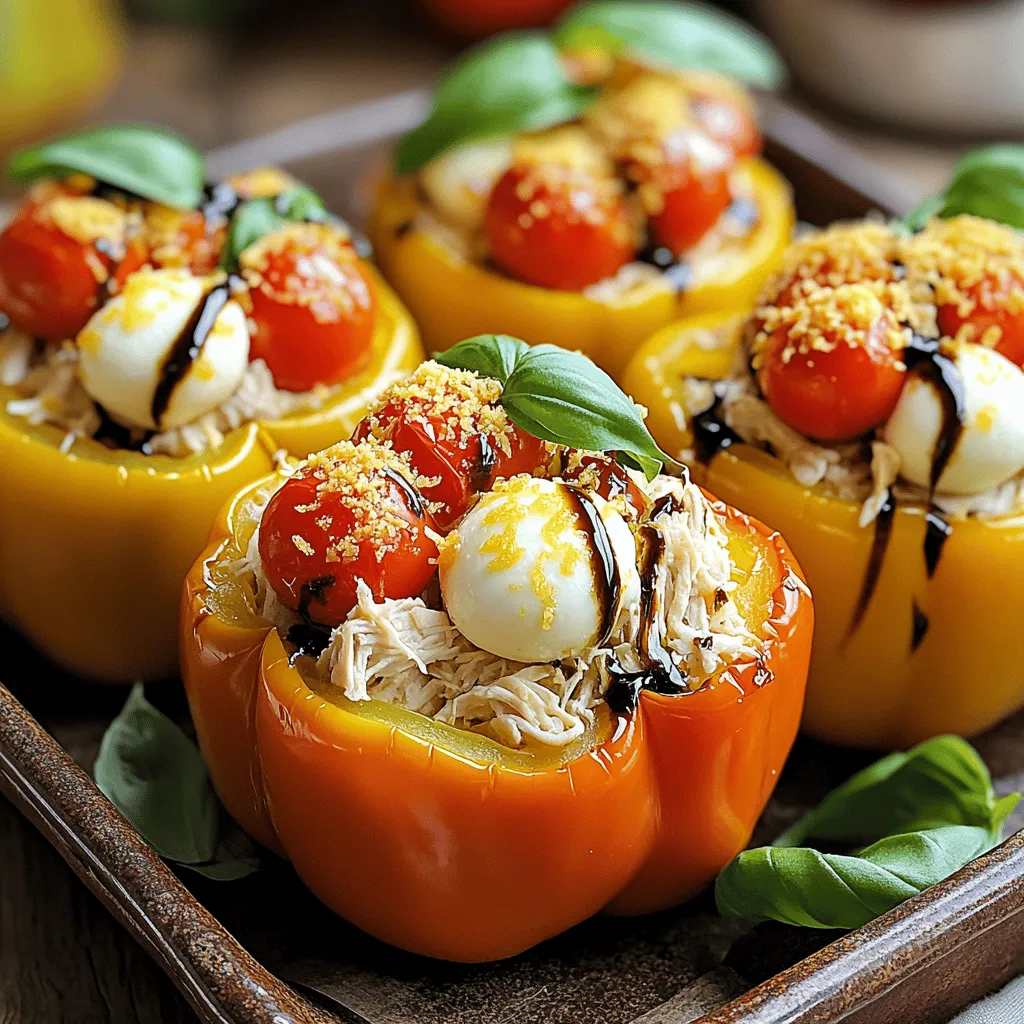
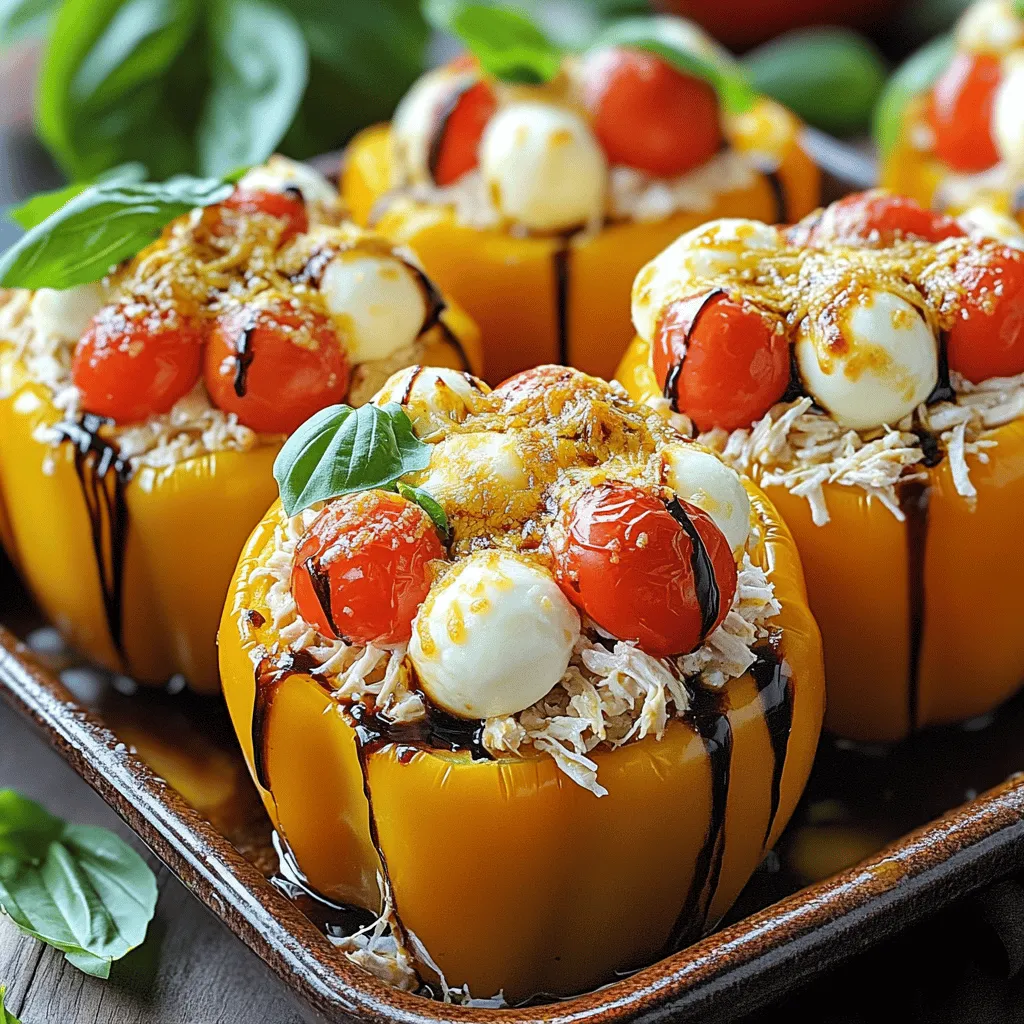
Looking for a tasty, easy dinner idea? Caprese Chicken Stuffed Peppers might be just what you need. Imagine juicy chicken, fresh basil, and gooey cheese all packed into vibrant peppers. This dish is not only colorful but also brings the classic Caprese flavors to your table. I’ll guide you through simple steps, helpful tips, and some fun variations. Let’s dive into this flavor-packed recipe that everyone will love!
Ingredients
List of Essential Ingredients
To make tasty Caprese Chicken Stuffed Peppers, gather these key items:
– 4 large bell peppers (any color)
– 2 cups cooked shredded chicken
– 1 cup cherry tomatoes, halved
– 1 cup fresh mozzarella balls, halved
– 1/2 cup fresh basil leaves, chopped
– 1 tablespoon balsamic glaze
– 1 tablespoon olive oil
– Salt and pepper to taste
– 1 teaspoon Italian seasoning
– 1/2 cup grated Parmesan cheese
These ingredients come together to create a delicious meal. The bell peppers serve as a tasty, colorful bowl. The chicken adds protein, while the tomatoes and mozzarella bring fresh flavors.
Optional Ingredients for Customization
You can change this recipe to fit your taste by adding:
– Cooked spinach or kale for greens
– Sliced olives for a briny touch
– Diced jalapeños for some heat
– Cooked quinoa or rice for extra texture
Feel free to mix and match these items. This flexibility lets you tailor the dish to your liking.
Suggested Seasonings and Herbs
Adding herbs and spices can boost the flavor. Here are some suggestions:
– Fresh oregano for a bright taste
– Crushed red pepper for heat
– Garlic powder for depth
– Lemon zest for a citrus pop
Experiment with these seasonings. They will help you create a unique and flavorful dish.
Step-by-Step Instructions
Prepping the Peppers
Start by preheating your oven to 375°F (190°C).
Next, take four large bell peppers. You can use any color you like.
Slice off the tops of the peppers and remove the seeds.
Make sure to clear out the membranes too.
Now, lightly brush the outside of each pepper with olive oil.
Place the peppers upright in a baking dish. This helps them stay filled.
Making the Chicken Filling
In a mixing bowl, gather your cooked shredded chicken.
Add in one cup of halved cherry tomatoes.
Next, toss in one cup of halved fresh mozzarella balls.
Chop up half a cup of fresh basil leaves and add that too.
Pour in one tablespoon of balsamic glaze for extra flavor.
Sprinkle in one teaspoon of Italian seasoning, along with salt and pepper.
Mix everything well until it’s all combined.
This filling is colorful and packed with flavor.
Baking Instructions
Carefully stuff each pepper with the chicken mixture.
Press down gently to pack the filling tight.
Top each pepper with half a cup of grated Parmesan cheese.
This will create a nice golden crust as it bakes.
Cover your baking dish with foil and place it in the oven.
Bake for 25 minutes, then remove the foil.
Bake for an additional 10 to 15 minutes.
Look for tender peppers and bubbly cheese.
Once done, take them out and let them cool for a few minutes.
You can garnish with extra basil if you want.
Tips & Tricks
Best Practices for Stuffing Peppers
When stuffing bell peppers, make sure they are fresh. Choose peppers that are firm and bright. Cut the tops off carefully. Remove the seeds and membranes gently. This helps the filling stick better. Pack the filling tightly but don’t overfill. This keeps the peppers intact during cooking. Brush the outside with olive oil for extra flavor and a nice shine.
How to Achieve Perfectly Melted Cheese
To get that gooey, melted cheese on top, use fresh mozzarella. It melts beautifully and adds great taste. Sprinkle the grated Parmesan evenly on each pepper. Cover with foil while baking to keep moisture in. This helps the cheese melt evenly. Remove the foil near the end of baking. Let the cheese get a little golden and bubbly for the best look.
Time-Saving Tips for Meal Preparation
Prep ahead to save time. Cook and shred the chicken the day before. You can also chop the vegetables ahead of time. Store them in the fridge. When you’re ready to cook, just mix everything in a bowl. Using pre-cooked chicken cuts down on cooking time. This way, you can enjoy your meal faster without losing any flavor.

Variations
Alternative Fillings for Different Flavors
You can switch up the filling for new tastes. Try using ground turkey or beef instead of chicken. You can also mix in black beans for a hearty option. For a spicy kick, add jalapeños or crushed red pepper. These changes keep the dish exciting and fun.
Vegetarian or Vegan Substitutions
If you want a vegetarian version, use quinoa or rice in place of chicken. You can mix in sautéed mushrooms for texture. For a vegan option, replace mozzarella with vegan cheese. Make sure to use a balsamic glaze with no added sugar. These swaps make the dish plant-based and still delicious.
Different Cooking Methods (e.g., Instant Pot, Grilling)
You can cook stuffed peppers in various ways. The Instant Pot saves time and keeps them moist. Just set it to high pressure for about 10 minutes. Grilling gives a smoky flavor. Wrap the peppers in foil and place them on the grill. Baking is still the classic method, and it lets the cheese melt beautifully. Each method offers a unique taste and texture.
Storage Information
How to Store Leftover Stuffed Peppers
To store leftover stuffed peppers, wait until they cool down. Place each pepper in an airtight container. You can keep them in the fridge for up to four days. If you want to keep them longer, freezing is a great option.
Reheating Instructions for Maximum Freshness
When you are ready to eat, reheat the stuffed peppers. Preheat your oven to 350°F (175°C). Place the peppers in a baking dish. Cover them with foil to keep them moist. Bake for about 20 minutes. You can also use the microwave. Heat them for 2-3 minutes, checking every minute. Make sure they are hot all the way through.
Freezing Options and Tips
If you choose to freeze stuffed peppers, wrap each one tightly in plastic wrap. Then, place them in a freezer-safe bag. They can last for up to three months. When you are ready to eat, let them thaw overnight in the fridge. Then, reheat as mentioned above. This way, you can enjoy your Caprese chicken stuffed peppers anytime!
FAQs
Can I use different types of peppers?
Yes, you can use any type of pepper. Bell peppers are popular, but try poblanos or even jalapeños for heat. Each type adds its own flavor and texture. Just make sure they are sturdy enough to hold the filling.
What can I serve with Caprese Chicken Stuffed Peppers?
Caprese chicken stuffed peppers pair well with a simple salad. A side of garlic bread also complements the meal. You can add roasted veggies for extra color and nutrients. Consider a light pasta as a fun side dish, too.
How do I ensure my chicken is properly cooked?
Cook your chicken to an internal temperature of 165°F (75°C). Use a meat thermometer for accuracy. If you shred pre-cooked chicken, it’s already safe. When baking, monitor the cooking time to keep everything tender.
You learned how to make tasty stuffed peppers. We covered essential and optional ingredients, plus seasonings. I shared steps for prepping, filling, and baking your peppers. You picked up tips for stuffing and achieving melted cheese. I also offered ideas for variations, storage, and reheating.
These tips will make your cooking easier and more fun. Try new fillings and methods! Enjoy your delicious creation!


![- 4 chicken thighs (bone-in, skin-on) - 2 tablespoons jerk seasoning - 1 tablespoon olive oil - Salt and pepper to taste - 1 ripe pineapple, diced - 1 red bell pepper, diced - 1 small red onion, finely chopped - 1 jalapeño, deseeded and minced - Juice of 1 lime - Fresh cilantro, chopped (for garnish) To start, take your chicken thighs. In a bowl, mix the jerk seasoning with olive oil, salt, and pepper. Coat the chicken well in this mix. Cover the bowl with plastic wrap. Refrigerate for at least 1 hour. For more flavor, marinate overnight. Next, grab another bowl. Dice the ripe pineapple, red bell pepper, and red onion. Mince the jalapeño after removing its seeds. Squeeze the juice of one lime into the bowl. Mix everything gently. Let the salsa sit for at least 15 minutes. This helps the flavors blend well. Now, preheat your grill or grill pan over medium-high heat. Take the chicken out of the marinade. Grill the thighs for 6-8 minutes on each side. Make sure the internal temperature reaches 165°F (75°C). The skin should look nicely charred and crispy. To get those perfect grill marks, place the chicken on the grill and leave it alone for a few minutes. Flip it only once. Maintain a steady medium-high heat for best results. You can add more spices to the jerk seasoning if you like heat. Fresh herbs, like thyme, can also boost flavor. Aim for at least 1 hour for marination to make each bite delicious. When serving, place the jerk chicken on a rustic wooden board. Spoon the fresh pineapple salsa on top. Garnish with chopped cilantro for a pop of color. Serve with lime wedges and extra pineapple chunks for a tropical touch. Feel free to try different marinades. You can use spicy BBQ sauce for a twist. If you want something lighter, try a lemon-garlic mix. Fish or tofu can also work well with jerk flavors. Mix in diced mango or avocado for a sweet twist in the salsa. Adjust the spice by adding more jalapeño or even a dash of hot sauce. This makes the dish customizable to your taste. Store leftover jerk chicken and salsa in airtight containers. Keep them in the fridge for up to 3 days. If you want to freeze, wrap the chicken tightly in foil. Place the salsa in a freezer-safe container. Thaw in the fridge overnight before reheating. Aim for at least 1 hour. Longer is better for deep flavor. Yes, chicken breasts work, but thighs stay juicier. Serve with rice, beans, or a fresh salad for balance. Yes, make it a day early for easier prep. Store it in the fridge. Check out the [Full Recipe] for detailed steps to enjoy this dish! This post shared an easy way to make jerk chicken with pineapple salsa. You learned about key ingredients, step-by-step cooking, and smart tips for grilling. Simple variations let you customize the flavor or try other proteins. Plus, I covered how to store leftovers to keep them fresh. Remember, great meals start with simple steps. Enjoy experimenting and sharing! Happy cooking!](https://dailydishly.com/wp-content/uploads/2025/06/27cc5104-89a5-4e73-8f97-3d018bc709fa-768x768.webp)


![- 1 lb (450g) flank steak, sliced thinly against the grain - 2 cups broccoli florets - 1 red bell pepper, thinly sliced - 3 cloves garlic, minced - 1 inch ginger, grated - 3 tablespoons soy sauce - 2 tablespoons oyster sauce (optional) - 1 tablespoon cornstarch - 1 tablespoon sesame oil - 2 tablespoons vegetable oil - Cooked jasmine rice, for serving - Sesame seeds, for garnish - Green onions, sliced, for garnish The flank steak is key to this dish. It cooks fast and stays tender. When you slice it against the grain, you get a nice, soft bite. Broccoli adds crunch and bright green color. The red bell pepper brings sweetness and color, making it look great. Garlic and ginger provide a warm, aromatic flavor that makes your dish shine. Soy sauce adds saltiness and umami. Oyster sauce, if you choose to use it, gives a rich depth. Cornstarch helps thicken the sauce. Sesame oil adds a nutty flavor to finish it off. For the best flavor, choose fresh, high-quality flank steak. Look for a nice, bright red color with good marbling. Fresh broccoli should be bright green, firm, and not wilted. When choosing bell peppers, look for ones that are firm and shiny. Fresh garlic and ginger can make a big difference in taste. Use low-sodium soy sauce for a healthier option. If you can, find a good-quality oyster sauce. Finally, use pure sesame oil for the best flavor. Each ingredient plays a role in making your Beef and Broccoli Stir-Fry delicious. Check the [Full Recipe] for more detailed cooking steps. To start, you want to make the beef tender and tasty. Take 1 pound of flank steak and slice it thinly. Slice against the grain for the best texture. In a medium bowl, mix the sliced beef with 3 tablespoons of soy sauce, 2 tablespoons of oyster sauce (if you like), and 1 tablespoon of cornstarch. Make sure all the beef is coated well. Let it sit for 15 minutes. This step makes a big difference in flavor. While the beef marinates, it’s time to prep the broccoli. Grab 2 cups of broccoli florets. Bring a pot of water to a boil. Once boiling, add the broccoli and blanch it for 2 minutes. This keeps the broccoli bright and crisp. After 2 minutes, put the florets in an ice bath to stop cooking. Drain the broccoli and set it aside. This step ensures the broccoli stays green and crunchy. Now, let’s get cooking! Heat a large pan or wok over medium-high heat. Add 2 tablespoons of vegetable oil once it's hot. Next, add the marinated beef in a single layer. Cook for about 2 to 3 minutes until it turns brown. Remove the beef and set it aside. In the same pan, add 3 cloves of minced garlic and 1 inch of grated ginger. Sauté for 30 seconds until it smells great. Then, add the red bell pepper and your blanched broccoli. Stir for another 2 to 3 minutes. Finally, return the beef to the pan. Pour in 1 tablespoon of sesame oil. Stir everything together and cook for 2 more minutes. This helps the flavors mix well. Taste your stir-fry and add more soy sauce if you want. Serve it hot over jasmine rice. Don’t forget to garnish with sesame seeds and sliced green onions for an extra touch. For the full recipe, check the details above. To get tender beef, choose flank steak. Slice it thinly against the grain. This helps break down tough fibers. Marinate the beef for at least 15 minutes. Use soy sauce and cornstarch for extra tenderness. The cornstarch creates a nice coating that locks in juices. Don't cook the beef too long. Just 2-3 minutes in a hot pan will do. Remove it quickly to keep it tender. For bright green, crisp broccoli, blanch it first. Boil water and add the florets for 2 minutes. This softens them but keeps their color. After boiling, quickly transfer them to an ice bath. This stops the cooking and keeps the crunch. Stir-fry the blanched broccoli for just a few minutes. This will make it hot without losing its color or texture. To boost flavor, add garlic and ginger when cooking. These ingredients bring a strong, fresh taste. You can also add red bell pepper for sweetness. If you want a richer taste, use oyster sauce. Just a tablespoon can add depth. Taste your dish before serving. If it needs more saltiness, add extra soy sauce. A sprinkle of sesame seeds and green onions on top adds a nice touch. For the detailed recipe, check the Full Recipe. {{image_2}} You can switch beef for other proteins. Chicken works great in this dish. You can also use shrimp or tofu for a different taste. Each choice brings its own flavor and texture. Try marinating them the same way. This keeps the dish simple and tasty, just like the Full Recipe. Feel free to add more veggies for color and taste. Carrots, snap peas, or mushrooms can enhance the dish. Just chop them up and toss them in with the broccoli. They will cook quickly, adding crunch and nutrition. If you need a gluten-free version, use tamari instead of soy sauce. For a vegan meal, replace the beef with tofu or seitan. You can also skip the oyster sauce or use a vegan version. This way, you can enjoy a delicious meal while meeting your dietary needs. To keep your beef and broccoli stir-fry fresh, store it in an airtight container. Let the dish cool down to room temperature before sealing it. Place the container in the fridge and eat the leftovers within three days. This helps maintain flavor and quality. When you're ready to enjoy your leftovers, reheat them in a pan. Add a splash of water or broth to avoid drying out the meal. Heat on medium until warm, stirring often. You can also use the microwave. Cover the dish and heat in short bursts, stirring in between. This ensures even heating. If you want to freeze your stir-fry, first let it cool completely. Portion it into freezer bags or containers. Remove as much air as possible before sealing. Label the bags with the date. You can freeze it for up to three months. When you’re ready to eat, thaw it overnight in the fridge before reheating. This method preserves taste and texture well. For the full recipe, check out the Beefy Broccoli Bonanza. Making Beef and Broccoli Stir-Fry takes about 30 minutes. This time includes prep and cooking. You will spend 15 minutes prepping the ingredients and marinating the beef. The cooking process will take about 15 minutes. This quick time makes it perfect for busy weeknights. Yes, you can use frozen broccoli. Frozen broccoli is convenient and saves time. It also cooks quickly, which fits well with stir-frying. Just make sure to thaw it before use. Drain any excess water to avoid sogginess in your dish. Beef and Broccoli Stir-Fry pairs well with jasmine rice. This rice soaks up the savory sauce nicely. You can also serve it with noodles for a different twist. Adding spring rolls or dumplings makes it a complete meal. For a fresh touch, include a side salad with crisp greens. Check out the Full Recipe for more ideas! Beef and broccoli stir-fry is simple and fun to make. You learned about key ingredients and best cooking practices. I offered tips for tender beef and tasty broccoli. You can also try different proteins and some easy swaps. Lastly, I explained how to store leftovers well. Enjoy this dish tonight or any night. It fits any table and delights many tastes. Your kitchen will shine with this easy recipe!](https://dailydishly.com/wp-content/uploads/2025/06/c1b8a640-846d-4588-a3be-4e7860c53d8e-768x768.webp)