Caramel Apple Nachos Delightful and Easy Snack Idea

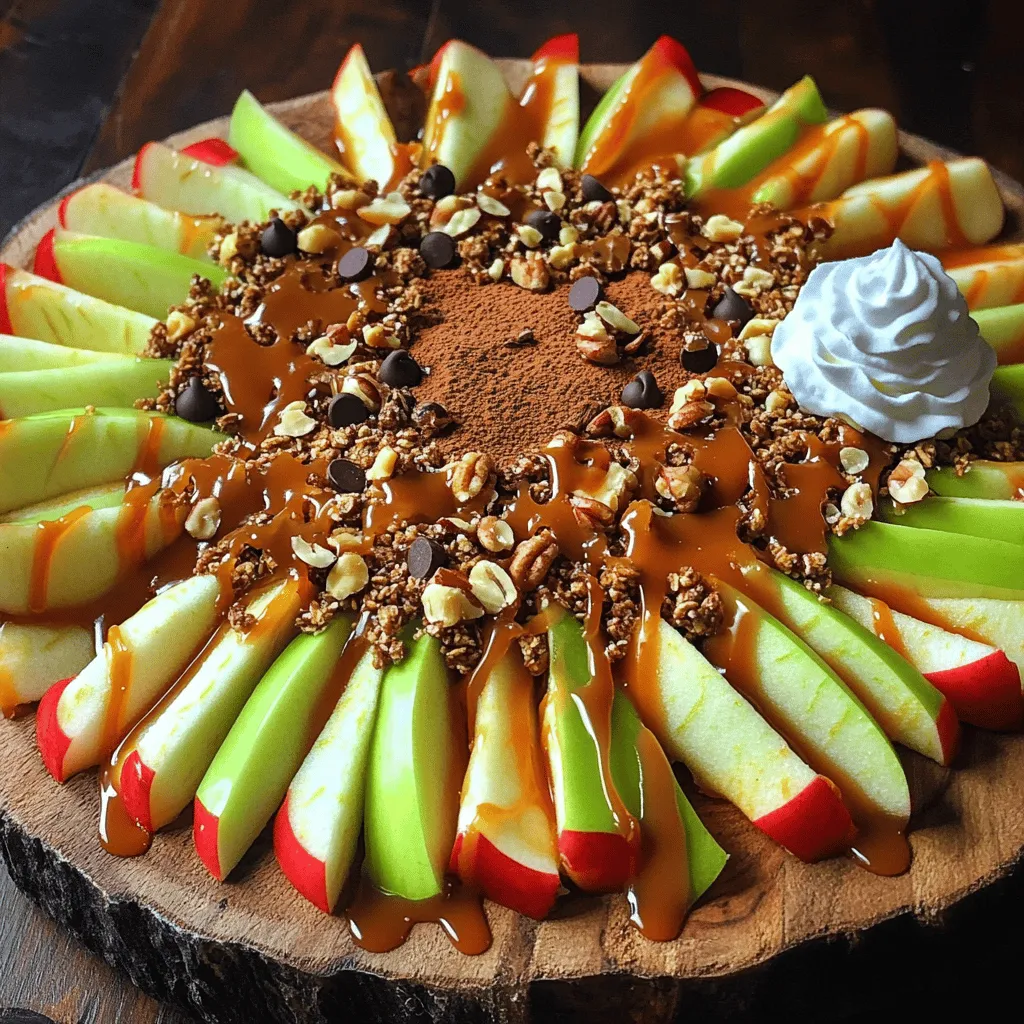
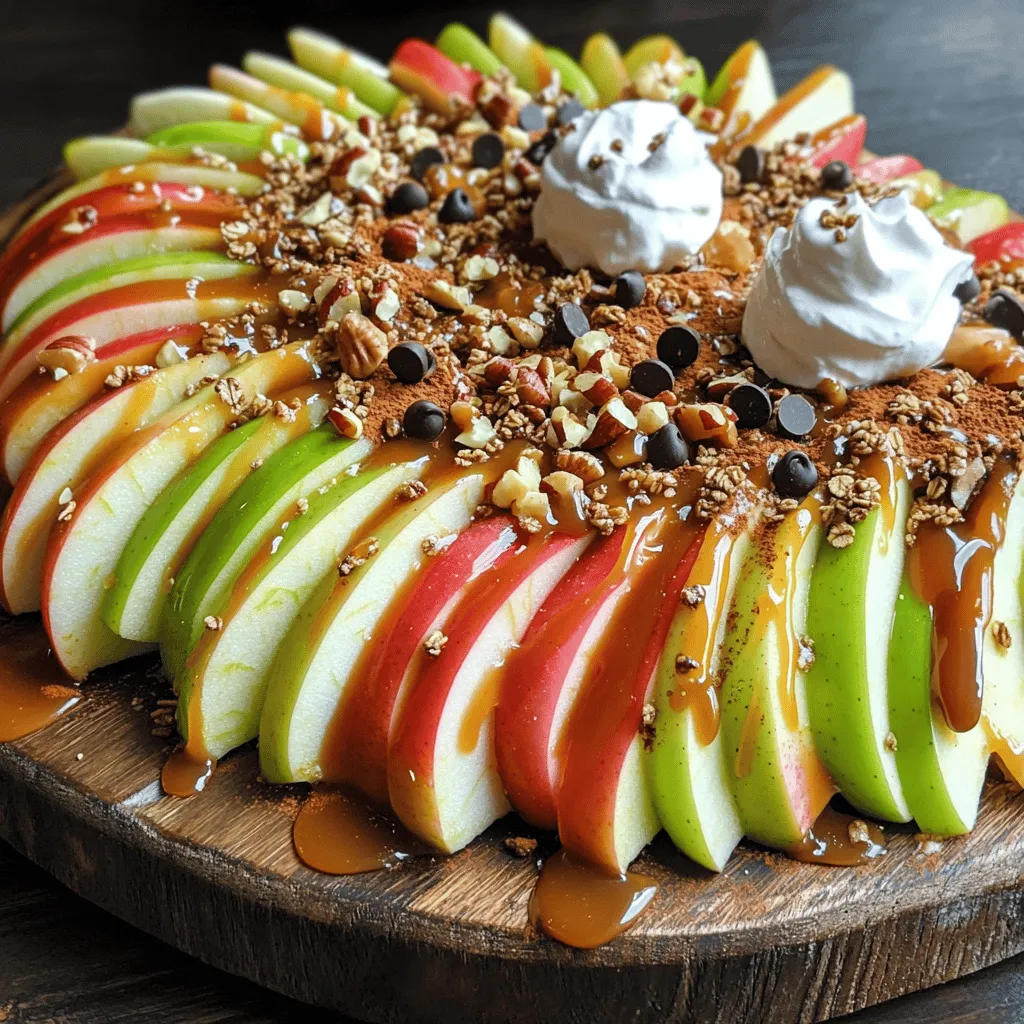
Looking for a fun and easy snack that’s perfect for any occasion? Let me introduce you to Caramel Apple Nachos! This tasty treat combines sweet apples, creamy caramel, crunchy granola, and chocolate chips into a delicious snack you can make in minutes. Whether you’re hosting a party or just treating yourself, this recipe is a hit. Let’s dive into the simple instructions and tasty variations!
Ingredients
List of Required Ingredients
– Apples
– Granola
– Mini chocolate chips
– Caramel sauce
– Chopped nuts
– Cinnamon
– Optional: Whipped cream
Ingredient Substitutions
You can swap apples for pears or bananas if you prefer. Both fruits add a nice sweetness. Choose granola with your favorite flavor, like honey or chocolate. For caramel sauce, you can use chocolate syrup or a fruit sauce as an alternative.
Recommended Topping Ideas
To take your nachos up a notch, add sliced strawberries or blueberries. These fruits add color and a fresh taste. You can also sprinkle some shredded coconut for a tropical twist. For a fun and festive look, arrange the nachos in a circle and drizzle the caramel in zig-zag lines. This makes it look more appealing and fancy!
Step-by-Step Instructions
Preparation Steps
1. Start by washing the apples. Use cold water to clean them well.
2. Slice the apples into thin rounds. Remove the core and seeds as you slice.
3. Next, arrange the apple slices on a large platter. A parchment-lined baking sheet works too.
Assembly of Nachos
1. Sprinkle a little cinnamon over the apple slices. This adds a warm flavor.
2. Drizzle caramel sauce generously on top of the apples. Make sure it fills the gaps.
3. Evenly distribute the granola. This adds a nice crunch to your nachos.
4. Next, sprinkle mini chocolate chips. They will melt slightly into the warm caramel.
5. Add the chopped nuts on top. Walnuts, pecans, or almonds work great here.
Final Touches
1. Drizzle more caramel on top if you want extra sweetness.
2. Serve right away. You can add whipped cream on the side for a creamy touch.Enjoy your tasty caramel apple nachos!
Tips & Tricks
How to Choose the Best Apples
When picking apples for your nachos, consider sweetness and tartness. Sweet apples like Honeycrisp bring a nice flavor. Tart apples, like Granny Smith, add a nice zing. Both types work well together. Look for firm apples with a shiny skin. Soft apples may not hold up well.
Perfecting the Caramel Drizzle
To melt caramel evenly, use low heat. Stir slowly to avoid burning. You can add a splash of milk to make it smoother. If the caramel gets too thick, just warm it slightly. To avoid a sticky mess, drizzle carefully. Use a spoon or squeeze bottle for easy control.
Enhancing the Flavor
To boost flavor, try adding a pinch of cinnamon or nutmeg. These spices add warmth and depth. You might also add a splash of vanilla extract. This will make your nachos even more delicious. Balance the sweetness of the apples and caramel with some tartness from the apples. A mix of flavors keeps each bite exciting.

Variations
Themed Variations
You can change your caramel apple nachos for the season. For fall, try adding pumpkin spice to the mix. It gives a warm, cozy flavor. You can also use themed plates for holidays. For Halloween, add some candy corn or spooky sprinkles. For Christmas, use red and green toppings like cranberries and mint.
Dietary Adjustments
If you want a vegan version, use dairy-free caramel sauce. You can find many brands at stores or make your own. For a gluten-free option, choose gluten-free granola. This way, everyone can enjoy the treat.
Flavor Combinations
Mixing spices can give a fun twist. Try adding a pinch of nutmeg or cardamom to the cinnamon. You can also experiment with different nuts. Pecans add a rich taste, while almonds bring a nice crunch. Granola can be swapped too; look for unique flavors like maple or coconut to make your nachos special.
Storage Info
Best Practices for Storing
To store leftovers, place them in an airtight container. Make sure to cover the nachos well to keep them fresh. If you have extra apple slices, store those separately. This keeps them from getting mushy. To ensure freshness, eat the nachos within two days. The longer they sit, the more soggy they get.
Reheating Guidelines
You can serve caramel apple nachos warm or cold. If you want them warm, use the microwave. Heat them in short bursts, about 15 seconds at a time. This helps avoid sogginess. You can also serve them cold, straight from the fridge. Cold nachos can be refreshing on a hot day!
Shelf Life of Components
Each ingredient has a different shelf life. Apples can last about a week in the fridge. Granola stays fresh for up to three months, while chocolate chips last even longer. Caramel sauce can stay good for about two weeks once opened. If you notice any off smells or changes in texture, it’s best to throw it away.
FAQs
What types of apples are best for caramel apple nachos?
I recommend using Granny Smith or Honeycrisp apples. These apples have a nice crunch and balance sweetness with tartness. Granny Smith offers a sharp flavor, while Honeycrisp is sweeter and juicier. Both types hold up well when sliced.
Can I make caramel apple nachos in advance?
You can prepare some parts in advance. Slice the apples and store them in water with lemon juice. This keeps them fresh for a few hours. However, wait to drizzle the caramel and add toppings until just before serving. This keeps everything crisp and tasty.
How do I keep the apples from browning?
To prevent browning, soak the apple slices in a mix of water and lemon juice. Use one tablespoon of lemon juice for every cup of water. Soak the slices for about 5-10 minutes, then drain and dry them. This simple step helps keep your nachos looking fresh.
Is it possible to make this recipe without nuts?
Yes, you can make caramel apple nachos without nuts. Just skip the chopped nuts in the recipe. You can add extra granola or mini chocolate chips for more crunch and flavor. There are plenty of tasty options to make your nachos fun.
Can I use homemade caramel sauce for this recipe?
Absolutely! Homemade caramel sauce works great in this recipe. It adds a personal touch and can be made to your taste. If you prefer a richer flavor, try making your own. Just remember to let it cool slightly before drizzling.
What other toppings can I add to enhance my nachos?
You can get creative with toppings! Try adding mini marshmallows, coconut flakes, or even dried fruit. A sprinkle of sea salt enhances the sweet and salty balance. You can also add some whipped cream on the side for a creamy dip. The options are endless!
In this article, we explored how to make delicious caramel apple nachos. We covered the essential ingredients, preparation steps, and helpful tips to create the perfect dish. Remember to choose the right apples for sweetness and texture. You can try different toppings and adjust for dietary needs. With these ideas, you can impress friends and family. Enjoy this fun treat anytime, whether for a party or a cozy night at home. Happy cooking!


![To make these vegan chocolate chip cookies, you will need a few key ingredients. Each one plays a special role in creating the perfect texture and flavor. Here’s the list of ingredients: - 1 cup almond flour - 1 cup all-purpose flour - 1/2 teaspoon baking soda - 1/2 teaspoon baking powder - 1/4 teaspoon salt - 1/2 cup coconut sugar - 1/2 cup maple syrup - 1/3 cup coconut oil, melted - 1 teaspoon vanilla extract - 1/2 cup vegan chocolate chips - 1/4 cup chopped walnuts (optional) Almond flour adds a nice, nutty flavor and keeps the cookies soft. All-purpose flour gives the cookies structure. Baking soda and baking powder help them rise. Coconut sugar sweetens the cookies while adding a hint of caramel flavor. Maple syrup adds moisture and sweetness. Coconut oil gives a lovely richness and helps with texture. Vanilla extract enhances the flavor of the chocolate chips. Vegan chocolate chips are a must for that classic taste. If you like nuts, walnuts add a crunchy touch. For the full recipe, follow the instructions carefully, and you’ll create cookies that everyone will love! 1. Preheating the oven First, set your oven to 350°F (175°C). This step helps the cookies bake evenly. While the oven heats, get your baking sheet ready by lining it with parchment paper. 2. Mixing dry ingredients In a big bowl, combine the almond flour, all-purpose flour, baking soda, baking powder, and salt. Use a whisk to blend them well. This ensures the leavening agents work when baking. 3. Combining wet ingredients In another bowl, mix the melted coconut oil, coconut sugar, maple syrup, and vanilla extract. Stir until it looks smooth. This mixture brings sweetness and flavor to your cookies. 1. Mixing wet and dry ingredients Pour the wet mix into the dry mix. Stir until no flour streaks show. The dough should be slightly sticky. This texture helps the cookies hold together. 2. Folding in chocolate chips and walnuts Gently fold in the vegan chocolate chips and walnuts if you choose to use them. Make sure they are evenly spread throughout the dough. This adds a delightful crunch and flavor. 1. Shaping the cookies Scoop tablespoon-sized portions of the dough. Roll them into balls and place them on your prepared baking sheet, leaving space between each ball. They will spread as they bake. 2. Baking time and tips for doneness Press each ball down gently with your palm to flatten it a bit. Bake for 10 to 12 minutes. Look for lightly golden edges. The cookies will seem soft but will firm up as they cool. Enjoy the aroma wafting through your kitchen! For the complete recipe, check out the Full Recipe. To get the best texture, start with room-temperature ingredients. When your coconut oil is melted but not hot, it blends well. Cold ingredients can lead to uneven mixing and odd textures. Use baking soda for a nice spread and chewiness. Baking powder adds lift but may make cookies puffier. You want a balance, so stick with 1/2 teaspoon of each, as this recipe suggests. To make your cookies pop, think about adding extracts or spices. A little cinnamon or a dash of nutmeg can elevate the flavor. You can also try almond or orange extract for a fun twist! If you're feeling adventurous, swap out chocolate chips. Try peanut butter chips, white chocolate, or even dried fruit. Each choice brings a new taste to the classic cookie. If your cookies spread too much, check your oven temperature. An oven that runs hot can cause this problem. You can also chill the dough for about 30 minutes before baking. This helps the dough hold its shape better. For cookies that are too crumbly, make sure to measure your flour correctly. Too much flour can lead to a dry texture. Add a small splash of almond milk to bring the dough together if needed. {{image_2}} If you want a gluten-free version of these cookies, you can use different flours. Try using all almond flour or a mix of almond and oat flour. You can also use a gluten-free flour blend. This keeps the texture nice and soft while making it safe for those with gluten sensitivities. Switching up the chocolate chips can bring new life to your cookies. You can use dark chocolate chips, white chocolate chips, or even peanut butter chips. You can also add fruits like dried cranberries or chopped bananas for a twist. If you enjoy nuts, consider adding chopped pecans or hazelnuts for a crunchy bite. Get creative with seasonal flavors! For fall, try adding pumpkin spice to the dough. This gives your cookies a warm and cozy taste. During the holidays, consider using peppermint extract or festive sprinkles. You can even shape the cookies into fun holiday designs. This makes them a perfect treat for any celebration! For the full recipe, check out the [Full Recipe]. To keep your vegan chocolate chip cookies fresh, store them in an airtight container. This method helps retain moisture and keeps them soft. You can place a slice of bread in the container to absorb any excess air. This trick works wonders for keeping cookies fresh longer. If you plan to eat them in a few days, simply store them at room temperature. For longer storage, freezing cookies is a great choice. Let the cookies cool completely before freezing. Place them in a single layer on a baking sheet. Once frozen solid, transfer them to a freezer-safe bag or container. Label the bag with the date. Frozen cookies can last up to three months. When you crave a treat, just pull one out and let it thaw. To enjoy leftover cookies, reheating is key. Preheat your oven to 350°F (175°C). Place the cookies on a baking sheet and warm for about 5 to 8 minutes. This will restore their soft, gooey texture. Alternatively, you can microwave them for 10-15 seconds. Just be careful not to overheat, or they may get tough. Enjoy every bite of those delicious cookies! Can I use regular flour instead of almond flour? Yes, you can use regular flour. However, almond flour adds a nice nutty taste. It also makes the cookies moist. If you swap it out, use a little less all-purpose flour. How long do these cookies last? These cookies can last up to a week in an airtight container. If you want them fresher, store them in the fridge. You can also freeze them for up to three months. Can I substitute maple syrup with another sweetener? Yes, you can use agave syrup or brown sugar. Both will work well. Just remember, each sweetener has its own taste and may change the cookie's texture a bit. What can I use instead of coconut sugar? You can use brown sugar or cane sugar as a substitute. Coconut sugar has a rich flavor, but the others will work in a pinch. Just keep in mind the sweetness level might change slightly. Do I need to chill the dough before baking? No, chilling the dough is not necessary. Chilling can help if you want thicker cookies. But for these cookies, you can bake them right after mixing. Can I add additional toppings to these cookies? Absolutely! You can add nuts, dried fruit, or even more chocolate chips. Feel free to get creative and experiment with flavors. You can create delicious vegan chocolate chip cookies with simple steps and great ingredients. We covered how to mix your dry and wet items, shape your cookies, and bake them perfectly. I shared tips for the best texture and flavor, along with common issues you might face. You now have options for gluten-free variations and how to store your cookies. Bake these cookies and enjoy every bite!](https://dailydishly.com/wp-content/uploads/2025/07/ef525e3c-3cc1-498f-b5ee-30e7bbeeb1ea-768x768.webp)

