Are you ready to make a treat that combines sweet and salty in the best way? In this article, I’ll guide you through making a Caramel Pretzel Chocolate Chip Cookie Skillet that will wow your family and friends. It’s simple, fun, and full of flavor. Plus, I’ll share tips, variations, and ways to store leftovers. Let’s dive in and create this delicious dessert together!
Ingredients
List of Ingredients
– 1 cup all-purpose flour
– 1/2 teaspoon baking soda
– 1/4 teaspoon salt
– 1/2 cup unsalted butter, softened
– 1/2 cup brown sugar, packed
– 1/4 cup granulated sugar
– 1 large egg
– 1 teaspoon vanilla extract
– 1/2 cup chocolate chips (semi-sweet or milk chocolate)
– 1/2 cup crushed pretzels
– 1/4 cup caramel sauce (store-bought or homemade)
– Sea salt, for topping
Important Notes on Ingredients
When choosing your flour, all-purpose works best for this recipe. It gives the cookie the right texture. Baking soda helps the cookie rise, so don’t skip it. Use unsalted butter for better control of salt levels. Softened butter is key for mixing easily with sugars. For the sugars, brown sugar adds moisture and a rich flavor, while granulated sugar helps with crispness. The egg binds everything together, giving the cookie a nice structure. The vanilla adds warmth, while chocolate chips bring that classic sweet taste. Crushed pretzels add a salty crunch, making the flavor pop. Finally, caramel sauce adds a sweet, gooey layer that ties it all together.
Optional Ingredients for Customization
Feel free to switch up the chocolate chips. You can use dark chocolate or even white chocolate for a twist. If you like nuts, try adding chopped pecans or walnuts. You can also use different types of pretzels, like chocolate-covered ones, for extra fun. Want a richer flavor? Use homemade caramel sauce instead of store-bought. If you want more sweetness, drizzle extra caramel on top before serving.
Step-by-Step Instructions
Prepping the Ingredients
First, gather all your ingredients. You need:
– 1 cup all-purpose flour
– 1/2 teaspoon baking soda
– 1/4 teaspoon salt
– 1/2 cup unsalted butter, softened
– 1/2 cup brown sugar, packed
– 1/4 cup granulated sugar
– 1 large egg
– 1 teaspoon vanilla extract
– 1/2 cup chocolate chips
– 1/2 cup crushed pretzels
– 1/4 cup caramel sauce
– Sea salt for topping
Next, preheat your oven to 350°F (175°C). This step is key for even baking. In a small bowl, whisk the flour, baking soda, and salt. This mix helps the cookie rise and stay soft. Set this bowl aside.
Making the Cookie Dough
In a large bowl, cream the softened butter with the brown and granulated sugar. Mix until it is light and fluffy, about 2-3 minutes. This will make your cookie dough tasty and soft. Add the egg and vanilla extract, mixing until everything is well combined.
Now, take your flour mixture and slowly add it to the wet mix. Stir gently until it just combines. Do not overmix, or your cookies may become tough. Next, fold in the chocolate chips and crushed pretzels. Make sure they are evenly spread throughout the dough.
Assembling the Skillet Cookie
Take about half of your cookie dough and press it into the bottom of a cast-iron skillet or an oven-safe pan. This forms a nice base. Drizzle half of the caramel sauce over the dough. It adds a sweet layer.
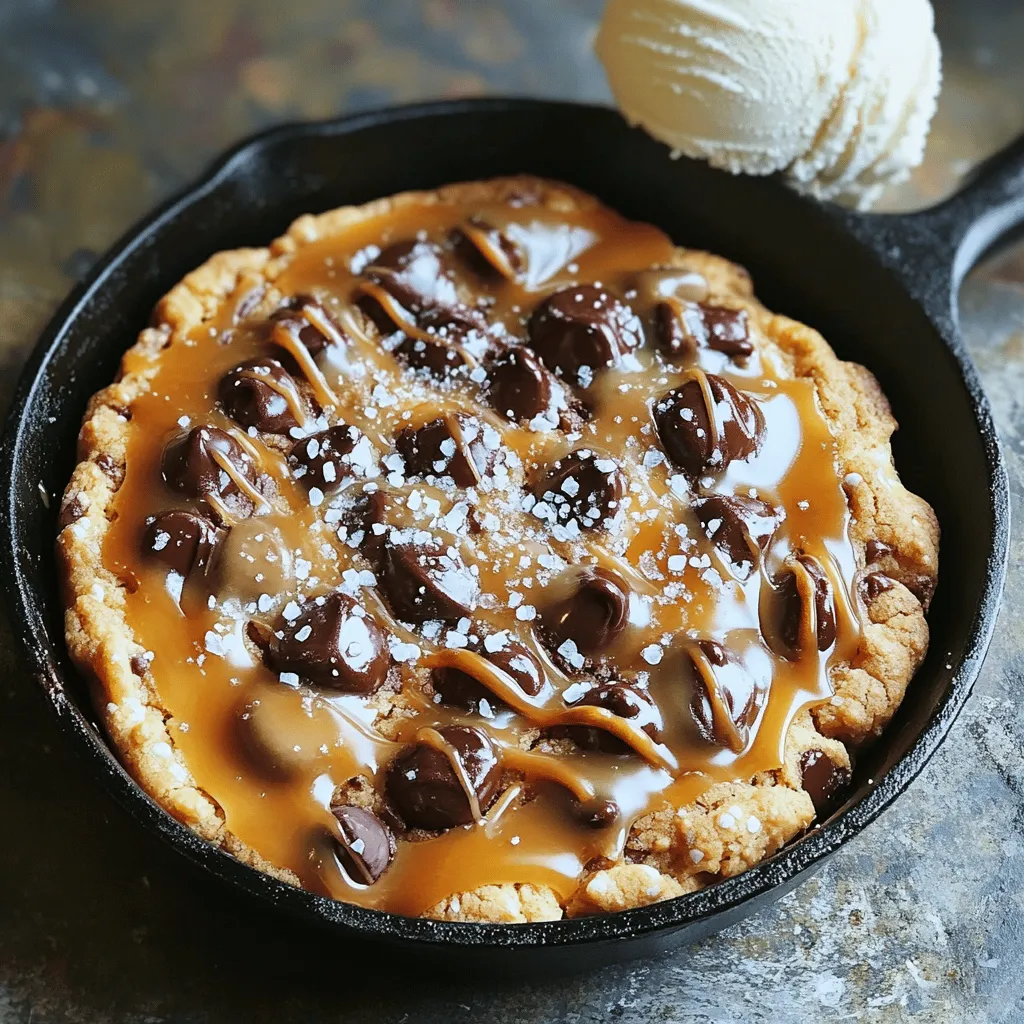
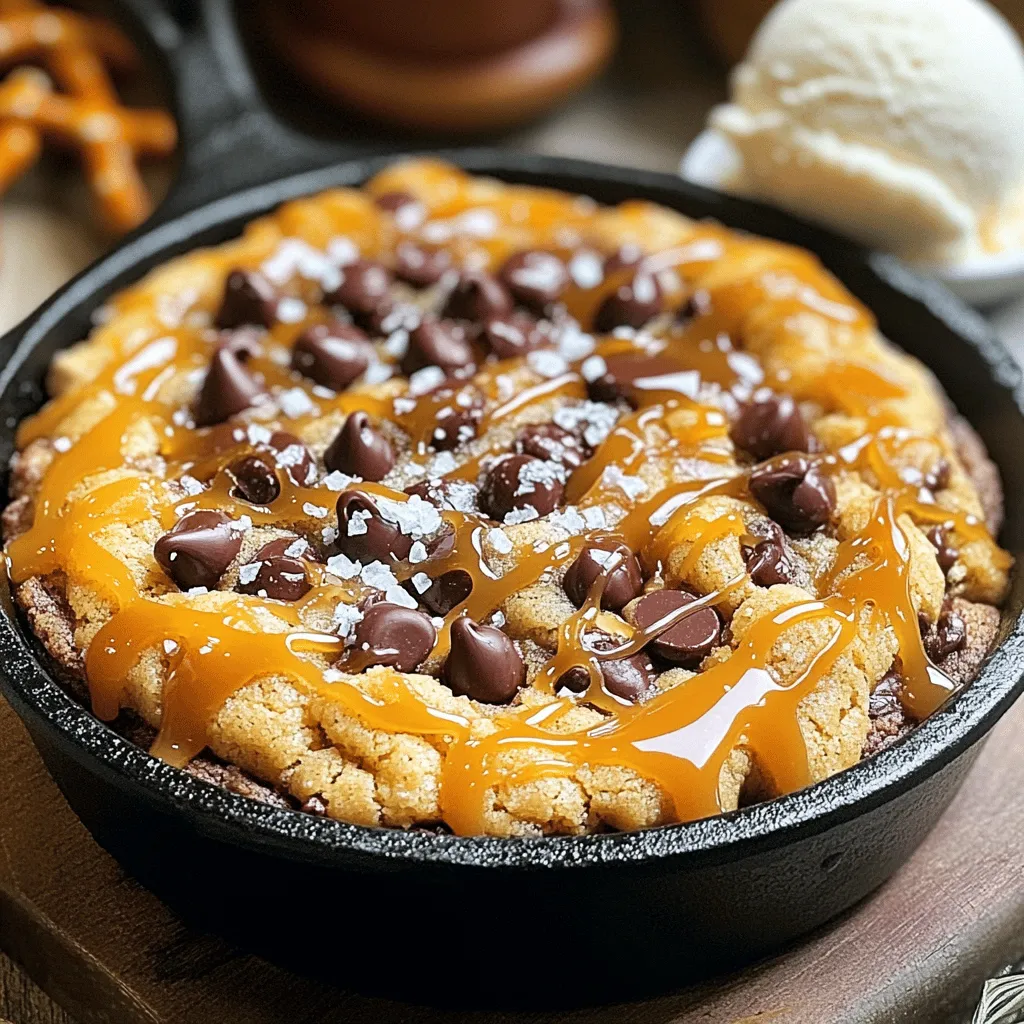
Now, crumble the rest of the dough on top of the caramel layer. Drizzle the remaining caramel sauce over this layer, too. Finally, sprinkle a pinch of sea salt on top. This touch enhances the flavors and adds a bit of crunch.
Bake your skillet cookie in the oven for 20-25 minutes. Look for golden edges and a set center. After baking, let it cool slightly before serving. Enjoy your Caramel Pretzel Chocolate Chip Cookie Skillet warm, topped with ice cream if you like!
Tips & Tricks
Tips for Perfecting Texture
To get the best texture, use softened butter. This helps create a light and fluffy dough. Mix the ingredients well, but don’t overmix. Overmixing can lead to tough cookies. For a gooier center, bake just until the edges turn golden.
Ideal Oven Settings and Timing
Set your oven to 350°F (175°C). Keep an eye on your cookie skillet while it bakes. Start checking around 20 minutes. The edges should be golden, and the center should look set but soft. Let it cool for a few minutes before slicing.
Recommendations for Serving
Serve the skillet warm straight from the oven. A scoop of vanilla ice cream on top makes it extra special. You can drizzle more caramel sauce for added sweetness. For a salty-sweet twist, sprinkle a bit of sea salt over the ice cream.
Variations
Substituting Ingredients
You can swap ingredients to suit your needs. For flour, use whole wheat flour. It adds more fiber. You can also try almond flour for a gluten-free version. Instead of unsalted butter, use coconut oil. It gives a unique flavor. If you want less sugar, reduce the brown and granulated sugar by a quarter.
Alternative Caramel Options
For caramel, you have choices. Use store-bought caramel sauce if you’re short on time. You can make homemade caramel with sugar and cream for a richer taste. If you like it spicier, try adding a touch of cinnamon to the caramel. For a chocolate twist, mix chocolate sauce with caramel.
Flavor Modifications for Different Palates
To change the flavor, think about mix-ins. Add nuts like walnuts or pecans for crunch. You can use white chocolate chips instead of semi-sweet. If you love peanut butter, mix in a spoonful. For a fruity note, add dried cranberries or cherries. These changes can make the cookie skillet your own!
Storage Info
How to Store Leftovers
After you make the Caramel Pretzel Chocolate Chip Cookie Skillet, let it cool. Cover it tightly with plastic wrap or aluminum foil. You can keep it at room temperature for up to two days. For longer storage, put it in the fridge, where it will last up to a week.
Reheating Tips for Best Taste
To enjoy your skillet cookie again, preheat your oven to 350°F (175°C). Place a slice of the cookie on a baking sheet. Heat it in the oven for about 10 minutes. This warms it through and makes it nice and soft again. You can also microwave a slice for about 20-30 seconds, but it may not be as good.
Freezing Options
If you want to save some for later, freezing is a great choice. Cut the cookie into slices. Wrap each slice in plastic wrap and then put them in a freezer bag. They can stay in the freezer for up to three months. When you’re ready, just thaw them in the fridge overnight before reheating.
FAQs
Can I make this cookie skillet without pretzels?
Yes, you can make this skillet without pretzels. If you skip the pretzels, the cookie will still taste great. You might want to add nuts for crunch. Chopped almonds or walnuts can work well. Just remember, pretzels add that salty touch, so think about how to replace it.
How do I know when the skillet cookie is done baking?
You can tell when the skillet cookie is done by checking the edges. They should be golden brown. The center may look soft, and that’s okay. It will firm up as it cools. A toothpick can also help. If it comes out clean, your cookie is ready.
Can I use a different type of chocolate?
Absolutely! You can use any chocolate you like. Dark chocolate adds a rich flavor. White chocolate gives a sweet and creamy touch. Mix and match to find your favorite blend. Just keep the amount the same for the best results.
This article covered the key steps to make a tasty skillet cookie. We explored the essential ingredients and how to customize them for your taste. I shared tips for perfecting the texture and baking it right, along with great serving ideas. You can also try variations and learn how to store your leftovers. Remember, you can switch out ingredients or flavors to suit your preferences. Enjoy your baking journey, and make it your own!


