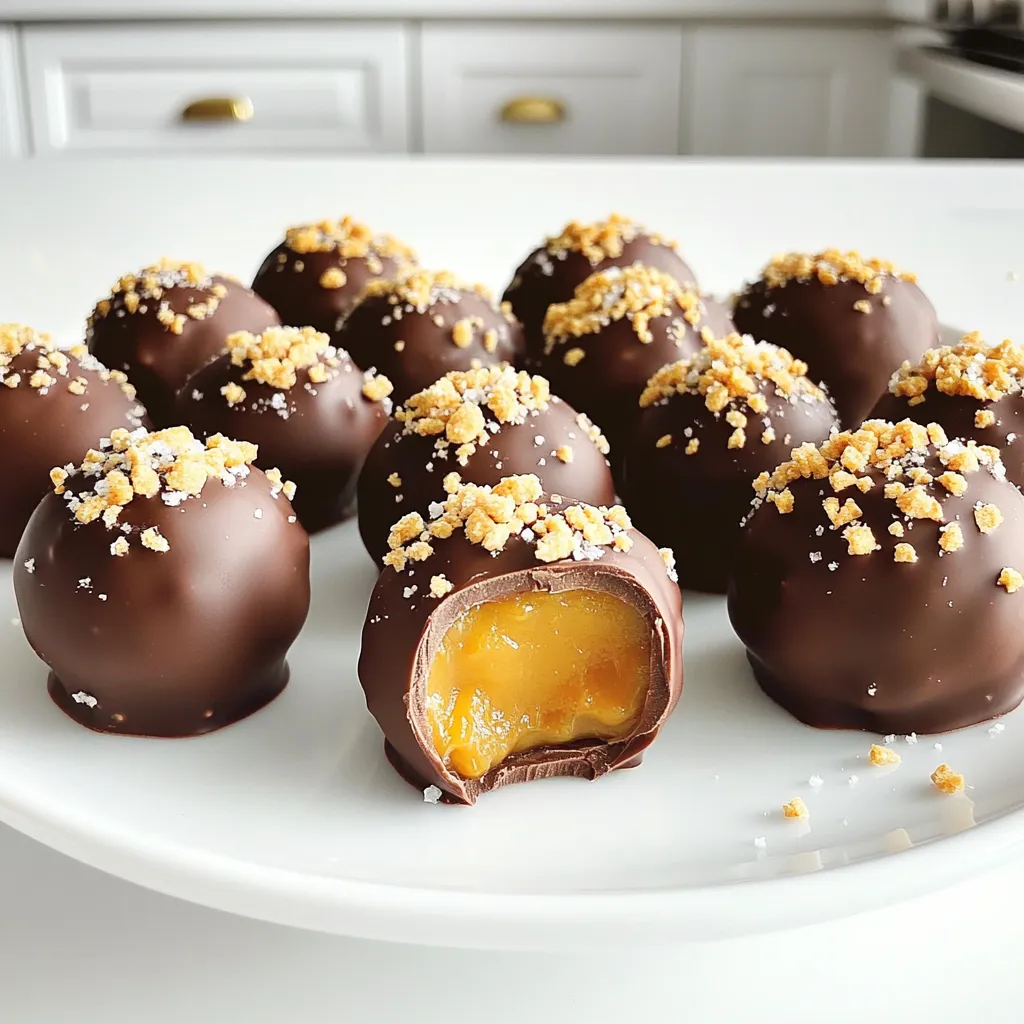
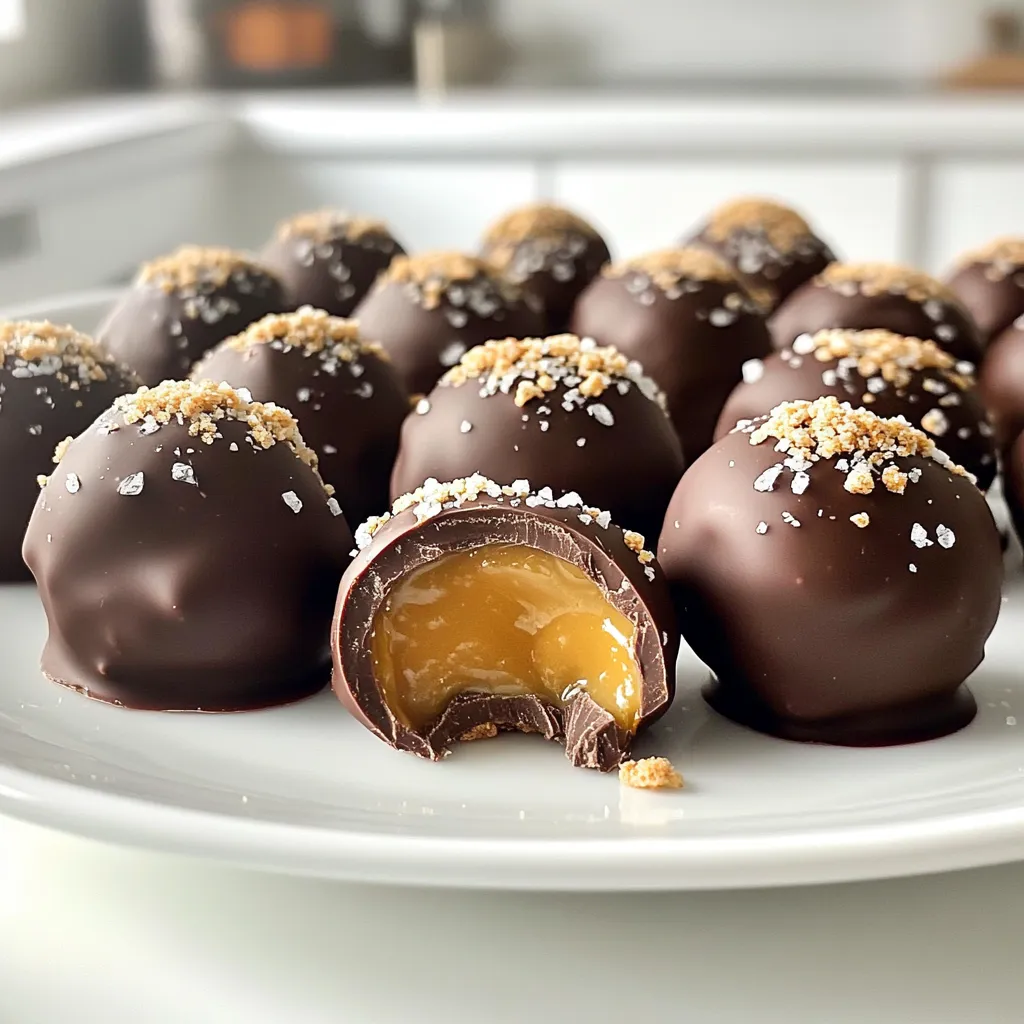
Fall flavors bring joy, and these Caramel Pumpkin Truffles are a must-try! With creamy pumpkin and rich caramel, they make the perfect treat for cozy evenings. In this guide, I’ll walk you through each step to create these delightful truffles. You’ll learn about the best ingredients, tips for success, and fun variations to try. Get ready to impress your friends and family with your new favorite fall dessert!
Ingredients
Detailed Ingredient List
– 1 cup pumpkin puree
– 1/2 cup cream cheese, softened
– 1 cup powdered sugar
– 1 teaspoon vanilla extract
– 1 teaspoon ground cinnamon
– 1/2 teaspoon ground nutmeg
– 1/4 teaspoon ground ginger
– 1/8 teaspoon salt
– 1 cup caramel sauce (store-bought or homemade)
– 1 cup crushed graham crackers
– 1 cup dark chocolate chips (for coating)
– Sea salt for garnish
These ingredients create a tasty blend of flavors. Pumpkin puree gives the truffles a smooth base. Cream cheese adds creaminess, while powdered sugar sweetens the mix. Vanilla, cinnamon, nutmeg, and ginger bring warmth and spice. The caramel sauce adds richness. Crushed graham crackers provide a delightful crunch. Dark chocolate chips coat the truffles, making them decadent. A sprinkle of sea salt enhances the sweet and salty contrast.
Alternative Ingredients and Substitutions
You can switch some ingredients based on your needs. For a dairy-free option, use vegan cream cheese. Instead of powdered sugar, try coconut sugar for a hint of caramel flavor. If you want a different spice mix, use pumpkin pie spice instead of individual spices. You can also use white chocolate chips if you prefer a sweeter coating. For a gluten-free treat, use gluten-free graham crackers.
Nutritional Information
Each truffle contains around 100 calories. They have about 6 grams of fat, mostly from cream cheese and chocolate. The truffles have around 10 grams of sugar, which gives them their sweet flavor. They also provide some fiber from the pumpkin and graham crackers. This treat is great for special events or fall gatherings. Enjoy in moderation, as they are rich and sweet!
Step-by-Step Instructions
Preparation Steps Overview
To make caramel pumpkin truffles, start with simple steps. Gather your ingredients first. Mix pumpkin puree, cream cheese, powdered sugar, vanilla, cinnamon, nutmeg, ginger, and salt in a bowl. Stir until the mix is smooth. Next, fold in the caramel sauce gently. Refrigerate this mixture for about 2 hours. It should be firm enough to scoop.
Key Cooking Techniques
The key here is chilling and rolling. Chilling helps the mixture set. Once chilled, scoop tablespoon-sized portions. Roll them into balls with your hands. Place the balls on a baking sheet lined with parchment paper. Freeze them for another 30 minutes. This helps with dipping later. Melt dark chocolate chips in a bowl using short bursts in the microwave. Stir until smooth.
Tips for Perfect Truffles
For perfect truffles, coat each ball well with chocolate. Use a fork to dip them, then tap off excess. Before the chocolate sets, roll the truffles in crushed graham crackers. This adds a nice crunch. Don’t forget to sprinkle a little sea salt on top for flavor. Let them harden at room temperature or in the fridge for quick results.
Tips & Tricks
Common Mistakes to Avoid
When making caramel pumpkin truffles, avoid these common mistakes:
– Overmixing the pumpkin mixture: This can make your truffles tough. Mix until smooth, but don’t overdo it.
– Using warm caramel: Warm caramel can melt your truffle mixture. Always let caramel cool before mixing it in.
– Not chilling enough: If the mixture isn’t firm, rolling the truffles will be hard. Chill for at least two hours.
Best Practices for Chilling and Coating
Chilling is key to great truffles. Here are some best practices:
– Use parchment paper: Line your baking sheet with parchment. This helps the truffles release easily.
– Freeze before coating: Freeze the truffles for 30 minutes after rolling. This makes them firm and easy to dip.
– Melt chocolate in stages: Melt chocolate in intervals. Stir after each interval for smoothness.
Suggestions for Serving and Presentation
Presenting your truffles can make them even more delightful. Try these tips:
– Use decorative liners: Place truffles in small paper liners. This adds a nice touch to your serving tray.
– Sprinkle with sea salt: A tiny pinch of sea salt on top enhances the flavor and beauty of each truffle.
– Pair with drinks: Serve with hot apple cider or coffee for a cozy fall treat.
Variations
Flavor Variations
You can change the flavor of your caramel pumpkin truffles easily. Add different spices for a twist. Instead of cinnamon, try using allspice or cardamom. These spices will give your truffles a warm flavor. You can also mix in a bit of cocoa powder for a chocolatey taste. This adds richness and depth. If you want a hint of citrus, add some orange zest for brightness.
Dietary Variations
Making these truffles vegan or gluten-free is simple. For a vegan option, swap cream cheese for a vegan cream cheese. Use coconut cream for a rich texture. Choose a vegan caramel sauce to keep it plant-based. To make it gluten-free, ensure your graham crackers are gluten-free. You can also use crushed nuts instead of graham crackers for crunch.
Seasonal Additions
Seasonal ingredients can make your truffles even better. In fall, add chopped pecans or walnuts for a nutty crunch. Dried cranberries can add a sweet and tart flavor. You can also mix in some chopped dates for extra sweetness. These additions bring fun textures and flavors, making your truffles unique.
Storage Info
How to Store Homemade Truffles
To keep your truffles fresh, place them in an airtight container. Line the container with parchment paper. This helps prevent sticking. Make sure to layer the truffles carefully. You can store them in the fridge for up to five days. If you prefer a chilled treat, enjoy them cold.
Freezing Guidelines for Long-term Storage
If you want to save your truffles for later, freezing works great. First, freeze the truffles on a baking sheet for about 30 minutes. Once firm, transfer them to a freezer-safe bag. Squeeze out as much air as possible. The truffles can last for up to three months in the freezer. When you want to enjoy them, just thaw them in the fridge.
Shelf Life and Freshness Tips
Homemade truffles are best when fresh but can last a bit. In the fridge, they stay good for about five days. If you freeze them, they can be tasty for up to three months. Always check for any changes in smell or texture. If something seems off, it’s best to toss them for safety.
FAQs
Can I use fresh pumpkin instead of canned?
Yes, you can use fresh pumpkin. Start by roasting a small pumpkin. Cut it in half, scoop out the seeds, and place the halves face down on a baking sheet. Roast it at 400°F for about 45 minutes or until tender. Let it cool, then scoop out the flesh. Puree it until smooth. This fresh pumpkin gives your truffles a rich flavor and unique texture.
How do I make homemade caramel for the truffles?
To make homemade caramel, you need sugar, butter, and cream. Start by heating 1 cup of sugar in a pot over medium heat. Stir it until it melts and turns golden brown. Remove it from heat and quickly add 6 tablespoons of butter. Stir until smooth. Then, slowly add 1/2 cup of cream while stirring. Be careful, as it can bubble up. Allow it to cool before using it in your truffles.
Where can I buy premade Caramel Pumpkin Truffles?
You can find premade Caramel Pumpkin Truffles at specialty candy shops or gourmet stores. Check online retailers as well. Many local bakeries also sell seasonal treats, especially in fall. Look for shops that focus on handmade candies. This way, you can enjoy these treats without making them yourself.
How do I make the truffles ahead of time?
You can make these truffles up to a week ahead. After rolling them into balls, freeze them for about 30 minutes. Then, store them in an airtight container in the fridge. When ready to serve, simply coat them in chocolate and let them set. This makes it easy to enjoy homemade treats without the rush!
This blog post covered how to make delicious truffles with various ingredients and techniques. You learned about key steps, tips to avoid mistakes, and how to serve your treats. Remember to play with flavors and consider dietary needs. Store your truffles properly for the best taste. I hope you feel ready to create your own unique truffles, impressing friends and family with your skills. Enjoy the process, and let your creativity shine!