Skip to content
About
Contact
Cookie Policy
Copyright Policy
Disclaimer
Search
Home
Dinner
Appetizer
Desserts
Drinks
About
Contact
Privacy Policy
Toggle Menu
Home
/
Appetizer
- Page 21
Appetizer
24. Tomato Basil Bruschetta Easy and Flavorful Snack
60. Garlic Butter Steak Bites Tasty and Simple Recipe
Roasted Beet and Goat Cheese Salad Flavorful Delight
Creamy Avocado Toast Simple Flavorful Delight
Cheesy Spinach and Artichoke Dip Irresistible Snack
Buffalo Chicken Sliders Tasty and Easy Recipe
Garlic Parmesan Air Fryer Wings Crispy and Flavorful
Roasted Red Pepper Hummus Wraps Tasty and Easy Meal
Fiesta Corn Black Bean Salad Flavorful and Easy Recipe
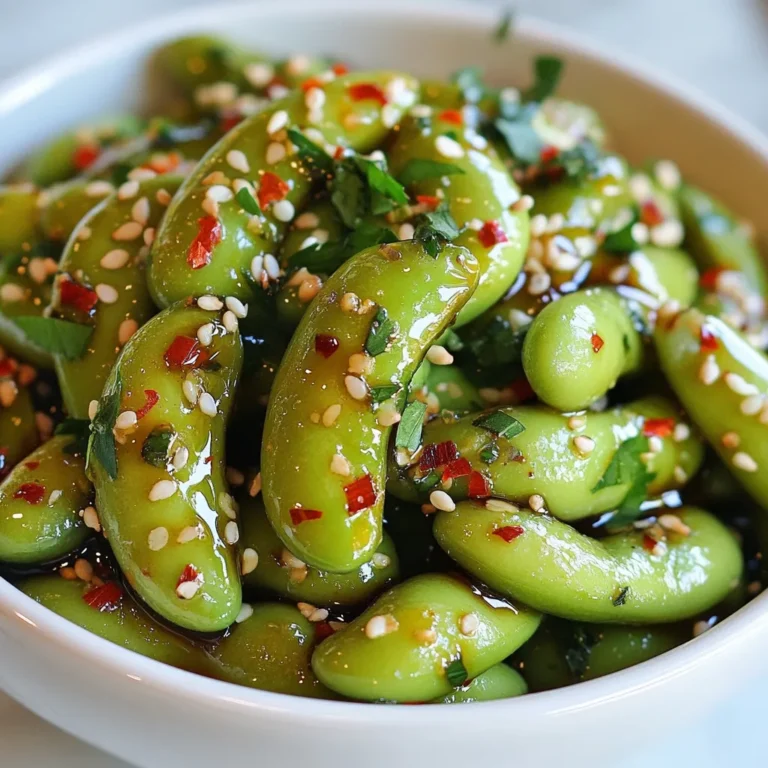
Spicy Garlic Edamame Flavorful and Easy Snack Recipe
Page navigation
Previous Page
Previous
1
…
19
20
21
22
Next Page
Next
Home
Dinner
Appetizer
Desserts
Drinks
About
Contact
Privacy Policy
Toggle Menu Close
Search for:
Search


![For the best garlic butter steak bites, I recommend using sirloin steak. Sirloin is tender and flavorful, making it perfect for this dish. Cut the steak into 1-inch cubes. This size cooks quickly and evenly. Make sure to pat the steak dry with paper towels. This step removes moisture and helps achieve a nice sear. The flavors come alive with fresh herbs. I use 1 teaspoon of fresh rosemary and 1 teaspoon of fresh thyme. You can also use dried herbs if you prefer. Just use half the amount. Don't forget salt and pepper! Season the steak well on all sides to enhance its natural taste. You’ll need 4 tablespoons of unsalted butter and 5 cloves of minced garlic. The butter adds richness, and the garlic brings a wonderful aroma. Finally, garnish with fresh parsley for a pop of color. This simple ingredient list makes the garlic butter steak bites shine. For the full recipe, check out the [Full Recipe]. First, you need to prepare the steak. Take 1 lb of sirloin and cut it into 1-inch cubes. Pat these cubes dry with paper towels. This step helps to make a great sear. Now, season the cubes with salt and pepper on all sides. Use enough seasoning, so the flavor shines through. Next, heat a large skillet over medium-high heat. Add 2 tablespoons of unsalted butter. Wait until the butter is foamy and starts to brown. Then, add half of the steak cubes to the skillet. Sear the steak bites for about 2-3 minutes on each side. Look for a nice brown color. Once done, take them out and set them aside. Repeat for the other half, adding more butter if needed. Now it's time to bring it all together. Lower the heat to medium-low and return all the steak bites to the skillet. Add 5 minced garlic cloves, 1 teaspoon of chopped fresh rosemary, and 1 teaspoon of chopped fresh thyme. Cook for 1-2 minutes while stirring often. You want the garlic to be fragrant but not burnt. Finally, remove the skillet from heat. Stir in the last tablespoon of butter until it melts and mixes well with the steak bites. Adjust the seasoning if needed. Garnish with chopped fresh parsley before you serve. For a complete guide, check the Full Recipe. To get a great sear, start with dry steak cubes. Patting them dry helps. Next, heat your skillet until it’s hot. Add butter when the skillet is ready and foamy. Place the steak cubes in the skillet without crowding them. This allows each piece to brown well. Cook for about 2-3 minutes on each side. Look for a nice brown color. This gives you that tasty crust. To boost the flavor, use fresh herbs like rosemary and thyme. Chop them finely and add them to the skillet with garlic. The garlic adds a lovely aroma. You can also add a splash of Worcestershire sauce for extra depth. Adjust salt and pepper to your taste. Don’t forget to garnish with fresh parsley before serving. This adds a pop of color and freshness. Cooking steak bites to the right temperature is key. For medium-rare, aim for about 130°F. Use a meat thermometer to check. If you prefer medium, go for 140°F. Remember, the steak will keep cooking after you take it off the heat. Let it rest for a few minutes. This helps the juices settle. Enjoy your garlic butter steak bites with the perfect doneness! For the complete recipe, check out the [Full Recipe]. {{image_2}} You can use many cuts of steak for this dish. Sirloin is great, but try ribeye for more flavor. Tenderloin offers a soft bite, while flank steak gives a nice chew. Each cut brings a unique texture and taste. Just remember, adjust the cooking time based on the cut. Thicker cuts need longer cooking, while thinner ones cook faster. The seasonings can change the taste of garlic butter steak bites. Want a spicy kick? Add red pepper flakes or smoked paprika. For a sweeter touch, try a bit of honey or brown sugar. You can swap out rosemary and thyme for herbs like oregano or basil. Each herb adds its own twist, so feel free to experiment. If you want a vegetarian version, use mushrooms instead of steak. Portobello or cremini mushrooms work well. They soak up the garlic butter and give a rich flavor. You can also use tofu or tempeh for plant-based protein. Just make sure to press out any extra water before cooking. This helps them get crispy and tasty. For the full recipe, check out the Garlic Butter Steak Bites section. Store leftover garlic butter steak bites in an airtight container. Make sure they cool first. They will last for 3 to 4 days in the fridge. If you plan to eat them later, try to separate them from the sauce. This keeps the steak from getting too soggy. To reheat, place the steak bites in a skillet over low heat. Add a splash of beef broth or water to keep them moist. Stir often for about 5 minutes until heated through. You can also use a microwave. Heat in short bursts, about 30 seconds each, checking often. You can freeze garlic butter steak bites for up to 3 months. Place them in a freezer-safe container. Make sure to label the container with the date. When you’re ready to eat, thaw them in the fridge overnight. Reheat as mentioned above for the best taste. If you want the full recipe, check the link for more details! It takes about 20 minutes to cook garlic butter steak bites. The prep time is 10 minutes, and cooking takes around 10 minutes. You want to sear the steak for about 2-3 minutes on each side. This gives it a nice brown color. Adjust the time for more doneness if needed. Yes, you can use frozen steak, but it needs to be thawed first. Thaw the steak overnight in the fridge for best results. This keeps the meat juicy and tender. If you hurry, you can use the microwave to defrost it. Just be careful to avoid cooking the edges. Garlic butter steak bites go well with many sides. Try these options: - Sautéed vegetables - Mashed potatoes - Rice pilaf - Crispy roasted potatoes - Fresh salad These sides add flavor and balance to your meal. Feel free to mix and match! For the full recipe, check the earlier section. In this blog post, we covered how to make garlic butter steak bites. We discussed choosing the right meat and using tasty herbs. I shared step-by-step instructions for getting that perfect sear and mixing in garlic butter. We also looked at tips to enhance flavors and suggested variations for different diets. Remember to store leftovers properly and reheat them well. Now you have all the tools to enjoy this simple dish. Cooking is fun, so try it out!](https://dailydishly.com/wp-content/uploads/2025/06/daf37226-e56f-491f-87e9-6665894a306e-768x768.webp)