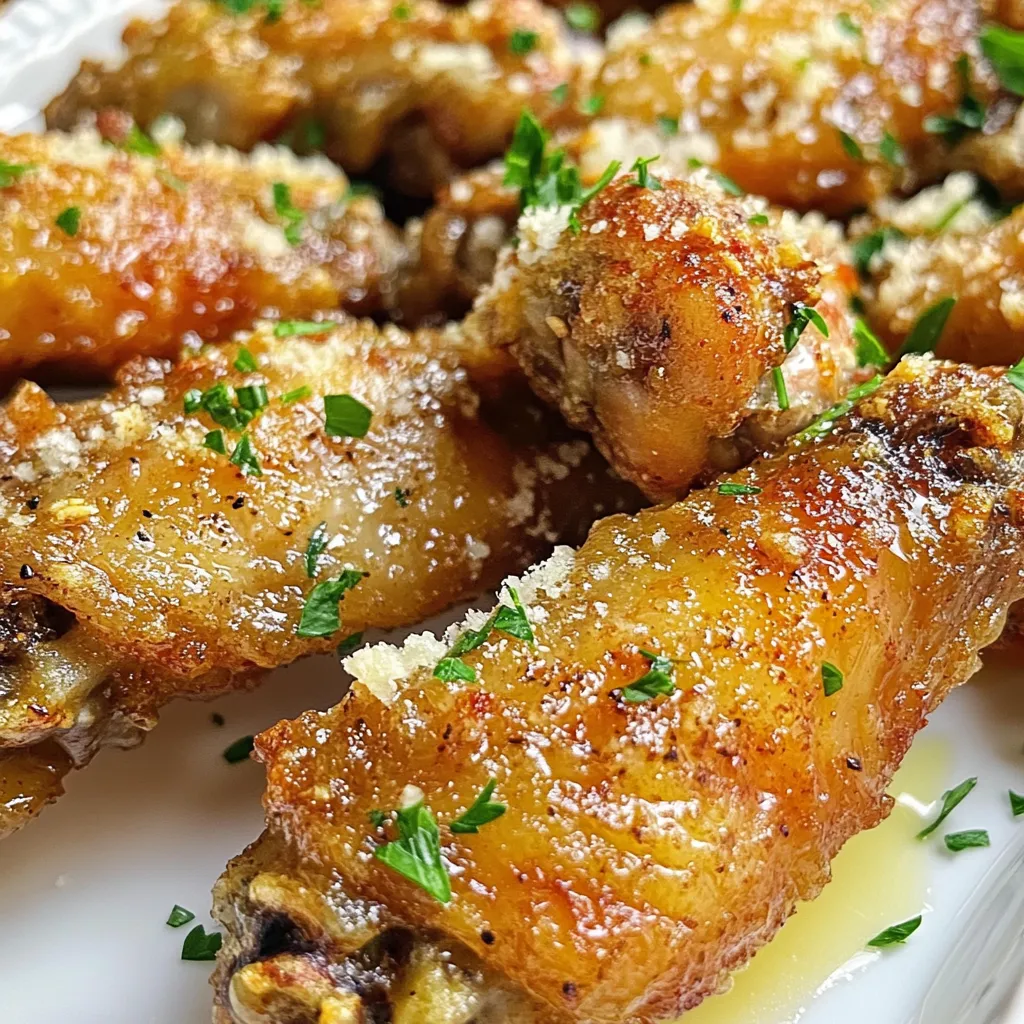
Are you ready to treat your taste buds? My Garlic Parmesan Air Fryer Wings are crispy, savory, and full of flavor. In this article, I’ll guide you step-by-step on how to make these delicious wings at home. Whether you want to impress friends or enjoy a tasty snack, these wings are easy to whip up and sure to please. Let’s dive into the recipe and unlock the secrets to the perfect wing!
Why I Love This Recipe
- Quick and Easy: This recipe allows you to whip up delicious wings in under an hour, making it perfect for busy weeknights or last-minute gatherings.
- Crispy Texture: The air fryer gives the wings a perfectly crispy exterior without the need for deep frying, making them a healthier option.
- Flavor Packed: The combination of fresh garlic, spices, and Parmesan cheese creates an irresistible flavor profile that will impress your guests.
- Customizable: You can easily adjust the seasonings or add your favorite sauces to personalize the wings to your taste, making them versatile for any occasion.
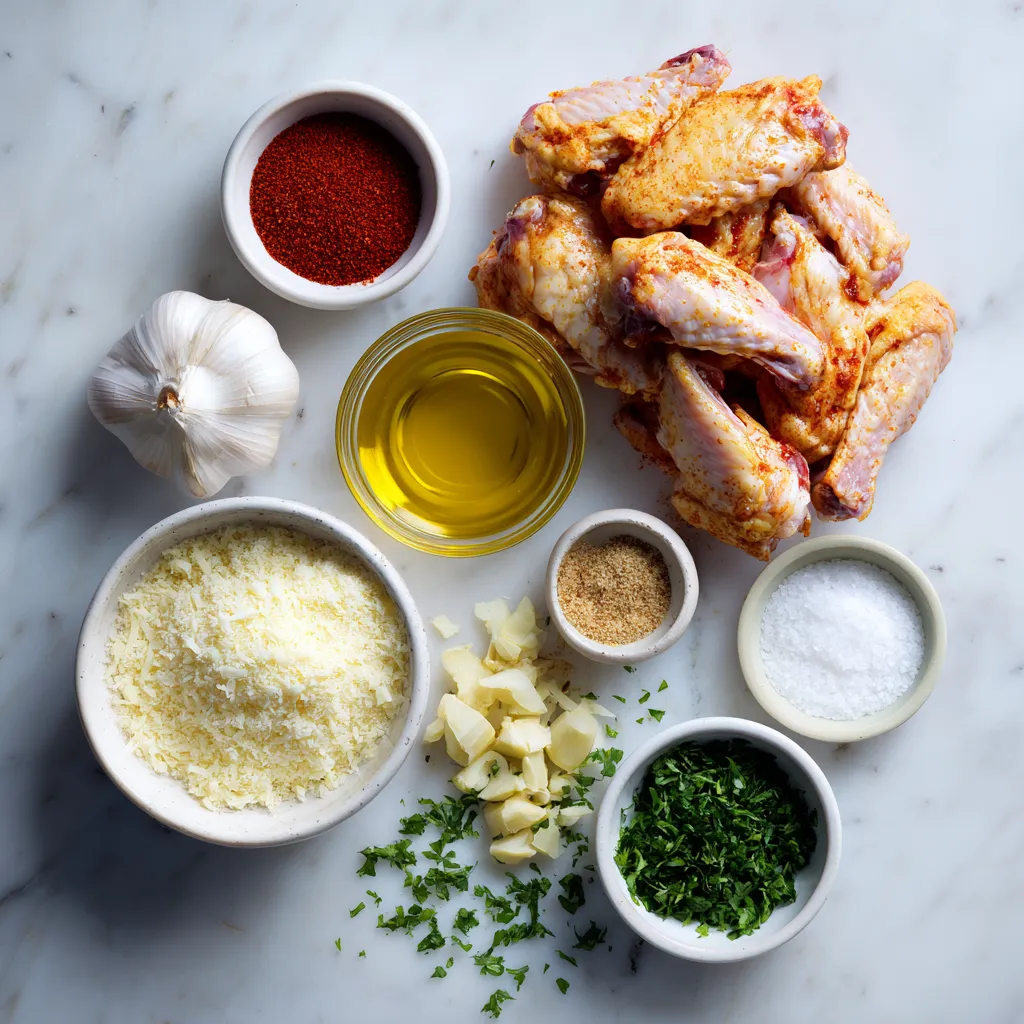
Ingredients
Chicken Wings
To make these tasty Garlic Parmesan Air Fryer Wings, you need:
– 2 lbs chicken wings
Marinade Ingredients
The marinade gives flavor to the wings. You will need:
– 4 tablespoons olive oil
– 4 cloves garlic, minced
– 1 teaspoon garlic powder
– 1 teaspoon onion powder
– 1 teaspoon paprika
– 1/2 teaspoon black pepper
– 1 teaspoon salt
Garnishes
Garnishes add a fresh touch. Use:
– 1/2 cup grated Parmesan cheese
– Fresh parsley, chopped (for garnish)
Each ingredient plays a key role in creating crispy, flavorful wings. The garlic offers a bold taste, while the Parmesan gives a rich, cheesy finish. Don’t skip the parsley; it brightens the dish. Make sure to gather everything before you start cooking for a smooth process.
Step-by-Step Instructions
Preparing the Wings
First, rinse your chicken wings under cold water. This step helps remove any residue. Pat them dry using paper towels. This keeps the wings crispy. Next, place the wings in a large mixing bowl. This bowl allows you to mix in the marinade easily.
Marinating Process
In a small bowl, mix four tablespoons of olive oil with four minced garlic cloves. Add one teaspoon each of garlic powder, onion powder, and paprika. Then, add half a teaspoon of black pepper and one teaspoon of salt. Whisk these ingredients together until you have a smooth mixture. Pour this marinade over the wings. Toss the wings well, ensuring they are fully coated. For the best flavor, let them marinate for at least 30 minutes. If you have time, marinate them overnight in the fridge.
Air Frying Instructions
To start, preheat your air fryer to 380°F (193°C). Once heated, place the marinated wings in the basket. Make sure to lay them in a single layer. You may need to cook them in batches if your air fryer is small. Air fry the wings for 25 to 30 minutes. Halfway through cooking, shake the basket or flip the wings. This step ensures even cooking. When they are done, they should look golden brown and crispy. Remove the wings from the air fryer and toss them in a bowl with half a cup of grated Parmesan cheese. Make sure they are well-coated. Finally, transfer the wings to a serving platter and garnish with chopped fresh parsley for a pop of color.
Tips & Tricks
Achieving Perfectly Crispy Wings
To get crispy wings, start with drying them well. Remove excess water with paper towels. This step helps the skin crisp up in the air fryer. Use enough olive oil to coat each wing. The oil helps with browning and adds flavor. Cook the wings in a single layer. Crowding them leads to soggy wings. Shake the basket or flip the wings halfway through cooking. This helps them cook evenly and stay crispy.
Marination Time Recommendations
For the best flavor, marinate the wings for at least 30 minutes. If you have more time, marinate them overnight. The longer they soak in the garlic and spices, the better they taste. Keep the wings in the fridge while they marinate. This keeps them fresh and safe to eat.
Alternative Cooking Methods
If you don’t have an air fryer, you can bake the wings in the oven. Preheat your oven to 400°F (204°C). Spread the wings on a baking sheet lined with parchment paper. Bake for 40-45 minutes, flipping them halfway through. This method also gives you crispy wings. Another option is frying them in oil on the stove. Heat oil in a pot and fry the wings until golden brown, about 10-12 minutes. Be careful with hot oil!
Pro Tips
- Marinate for Maximum Flavor: Allowing the wings to marinate for at least 30 minutes enhances the flavor. For the best results, marinate them overnight in the refrigerator.
- Don’t Overcrowd the Basket: Air fry the wings in a single layer to ensure they cook evenly and become crispy. If necessary, cook them in batches.
- Check for Crispiness: The wings should be golden brown and crispy when done. Adjust cooking time based on your air fryer model, as some may cook faster or slower.
- Enhance with Extra Toppings: Before serving, consider adding a sprinkle of extra Parmesan and a drizzle of hot sauce for an extra flavor kick!
Variations
Spicy Garlic Parmesan Wings
Want a kick? Add heat to your garlic Parmesan wings. Mix in 1-2 teaspoons of cayenne pepper or red pepper flakes. This spice pairs well with the garlic and cheese. You can also toss the wings in hot sauce after cooking. The result is a bold flavor that will excite your taste buds.
Lemon Herb Garlic Wings
For a fresh twist, try lemon herb garlic wings. Add the zest and juice of one lemon to the marinade. Mix in herbs like thyme or oregano for extra flavor. This brightens the dish and adds a refreshing taste. These wings are perfect for summer gatherings or any time you crave a light flavor.
Vegan Alternative with Cauliflower
You can make a vegan version using cauliflower. Cut the cauliflower into bite-sized florets. Follow the same marinade recipe, then coat the florets. Air fry them at the same temperature for about 15-20 minutes. The result is a crunchy, tasty snack that everyone will enjoy. Whether you’re vegan or not, these wings are a hit!
Storage Info
How to Store Leftovers
After enjoying your garlic Parmesan air fryer wings, let them cool completely. Place the wings in an airtight container. Store them in the fridge for up to three days. Ensure the container seals tightly to keep the wings fresh and tasty.
Reheating Instructions
To reheat the wings, preheat your air fryer to 350°F (175°C). Place the wings in a single layer in the basket. Heat for about 5-7 minutes, shaking the basket halfway through. This will help keep them crispy. You can also use an oven set to 350°F (175°C) for about 10-15 minutes.
Freezing for Future Use
If you want to save wings for later, freezing is easy. First, let the wings cool down. Next, arrange them in a single layer on a baking sheet. Freeze until solid, then transfer them to a freezer-safe bag. They can last up to three months in the freezer. When ready to eat, simply thaw in the fridge overnight and reheat as mentioned above.
FAQs
How long should I marinate the wings?
You should marinate the wings for at least 30 minutes. This helps the flavors soak into the chicken. For even better taste, marinate them overnight in the fridge. This extra time lets the garlic and spices work their magic.
What temperature do I set the air fryer?
Set your air fryer to 380°F (193°C). This temperature cooks the wings perfectly. It gives them a nice golden color and crispy texture. Always preheat your air fryer before adding the wings. This ensures even cooking.
Can I use frozen wings?
Yes, you can use frozen wings. Just make sure to thaw them first. You can do this by placing them in the fridge overnight or using cold water. Once thawed, follow the same marinating and cooking steps. Adjust the cooking time if needed, as frozen wings may take a bit longer.
You now know how to make delicious chicken wings. We covered ingredients like marinades and garnishes. I provided step-by-step instructions for preparing, marinating, and air frying the wings. Remember the tips for crispy wings and the different cooking methods. We explored tasty variations and how to store leftovers. Using these tips, your wings will shine at any gathering. Enjoy your cooking and impress your friends with your new skill


