Creamy Avocado Toast Simple Flavorful Delight

Are you ready to elevate your brunch game? My creamy avocado toast is simple yet packed with flavor. Not only is it easy to make, but this dish also brings countless health benefits. In this post, I’ll share everything you need: ingredients, step-by-step instructions, and tips for perfection. Plus, discover fun variations and storage tips. Let’s dive in and make this delightful treat together!
Ingredients
List of Required Ingredients
– 4 ripe avocados
– 8 slices of whole grain bread
– 1 tablespoon lemon juice
– ½ teaspoon garlic powder
– ½ teaspoon smoked paprika
– Salt and black pepper, to taste
– 1 cup cherry tomatoes, halved
– Fresh basil leaves for garnish
Optional Ingredients for Added Flavor
– Feta cheese
– Red chili flakes
– A drizzle of balsamic glaze
Nutritional Benefits of Avocados
Avocados are a superfood packed with nutrients. They are high in healthy fats. These fats help keep your heart healthy. One avocado carries a lot of fiber. Fiber helps with digestion and keeps you full. Avocados also have vitamins C, E, and K. These vitamins boost your immune system and skin health. They have potassium, too, which helps control blood pressure. Eating avocados can lower bad cholesterol and improve overall health. So, enjoy them on your creamy avocado toast!
Step-by-Step Instructions
Preparation of Ingredients
First, gather your ingredients. You need four ripe avocados, eight slices of whole grain bread, and some spices. Make sure to have lemon juice, garlic powder, and smoked paprika ready. You will also need salt, black pepper, and cherry tomatoes. Lastly, grab fresh basil leaves for a nice touch.
Toasting the Bread
Next, toast the slices of whole grain bread. Set your toaster to a medium setting. Toast until the bread is golden brown and crispy. This step is key. The crunchy toast provides a great base for the creamy topping.
Creating the Creamy Avocado Mixture
Now, let’s make the avocado mixture. Cut the avocados in half and remove the pits. Scoop the green flesh into a mixing bowl. Add one tablespoon of lemon juice and the spices. Use garlic powder and smoked paprika for flavor. Don’t forget to add salt and black pepper. Mash everything together with a fork. Keep it creamy but slightly chunky. This gives your toast texture and taste.
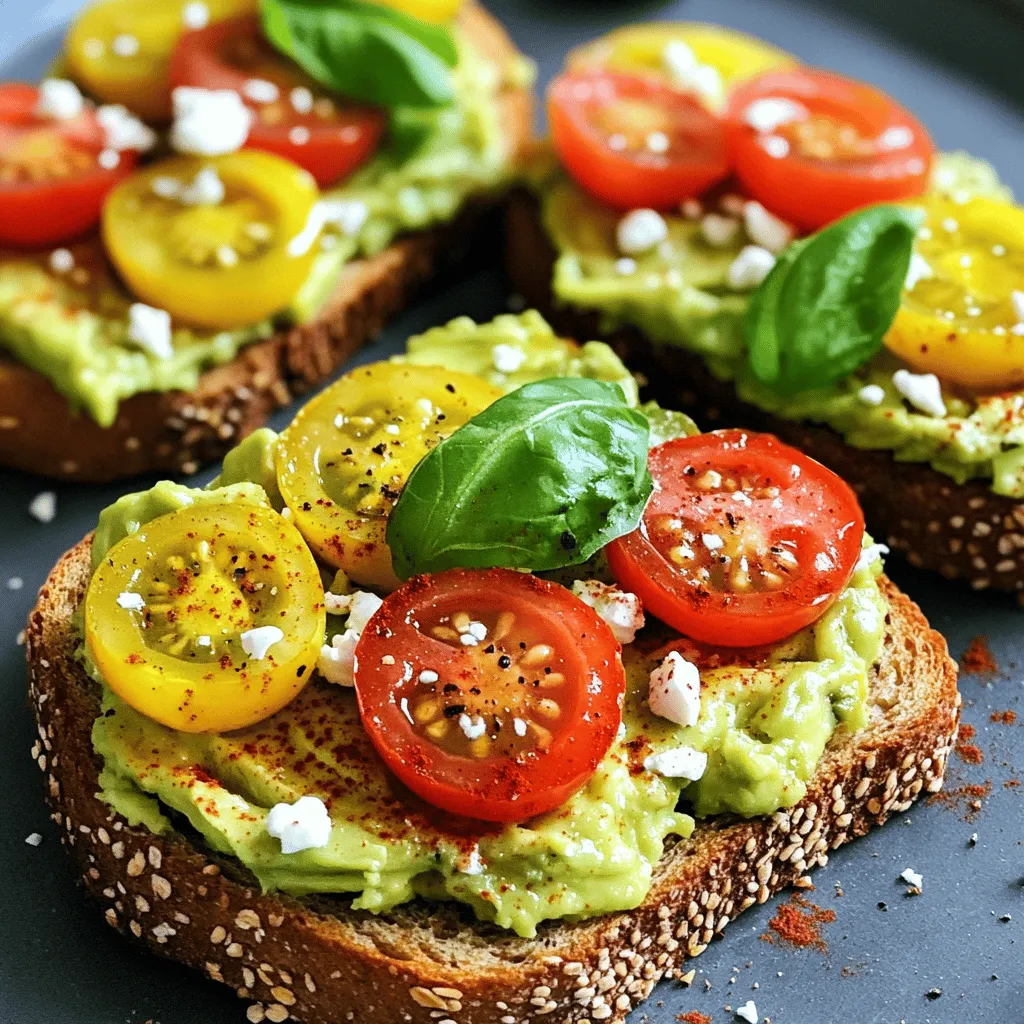
Spread the creamy avocado mixture generously on each slice of toast. Then, top with halved cherry tomatoes. Finally, sprinkle fresh basil leaves on top. You can add feta cheese, red chili flakes, or balsamic glaze for extra flavor. Enjoy your creamy avocado toast right away.
Tips & Tricks
How to Choose Ripe Avocados
To pick the best avocados, look for a dark green color. Gently press on the skin. If it feels soft but not mushy, it’s ripe. Avoid avocados that are too hard or have dark spots. These signs mean they are overripe or spoiled. Always check the stem area. If it comes off easily, the avocado is ready to eat.
Best Toasting Techniques for Bread
For perfect toast, use whole grain bread for added flavor and texture. Preheat your toaster or oven for even cooking. Toast until golden brown and crispy. This adds a nice crunch to your creamy avocado spread. You can also use a skillet for toasting. Just add a little oil or butter for extra flavor.
Ways to Achieve Extra Creaminess
To make your avocado even creamier, add a splash of lemon juice and some garlic powder. This not only enhances flavor but also keeps the color bright. You can also mix in a bit of Greek yogurt or sour cream for a richer texture. If you want a twist, try blending in a few tablespoons of cream cheese. This will make every bite smooth and delightful.

Variations
Unique Toppings to Enhance Flavor
You can boost your creamy avocado toast with fun toppings. Try adding feta cheese for a salty kick. Red chili flakes give it heat, while balsamic glaze adds sweetness. You can also mix in sliced radishes for crunch or even a poached egg for protein. Each topping brings a new taste and texture. Experiment with what you enjoy.
Different Bread Options for Avocado Toast
While whole grain bread is classic, other options work well, too. Sourdough has a tangy flavor that pairs nicely with avocado. Rye bread adds a robust taste, and gluten-free bread is great for those with allergies. Even bagels can be a fun twist! Choose what you love to make it your own.
Combining Other Ingredients for Flavor Profiles
You can mix different ingredients into your avocado. For a fresh twist, add diced onions or chopped cilantro. Crumbled bacon gives a smoky crunch, while lime juice can brighten the flavor. Adding nuts like walnuts or almonds gives a satisfying bite. The key is to play with flavors until you find your favorite combination.
Storage Info
How to Store Leftovers Properly
To keep your creamy avocado toast fresh, store it right. Place leftover toast in a sealed container. Cover it tightly to prevent air exposure. If you have extra avocado mixture, put it in a separate container. Use plastic wrap to cover the surface. This helps stop browning from air contact.
Reheating Toast vs. Storing Toppings
It’s best to reheat the toast, not the toppings. When you warm the bread, it stays crispy. You can heat the toast in a toaster or oven for a few minutes. After reheating, spread the avocado mixture on top. This keeps the texture nice. Store cherry tomatoes and any other toppings separately.
Freezing Avocado Mixture: Do’s and Don’ts
You can freeze the avocado mixture, but there are some rules. Use a freezer-safe container and leave space for expansion. Add a little lemon juice to help with browning. Avoid freezing the mixture with toppings, as they don’t freeze well. When ready to use, thaw overnight in the fridge. Mix it again before serving for the best flavor.
FAQs
How long does it take to make creamy avocado toast?
Making creamy avocado toast is quick and easy. It takes about 10 minutes to prep. You need another 10 minutes for cooking and assembling. In total, you can enjoy this dish in just 20 minutes.
Can I make avocado toast in advance?
You can prepare some parts ahead of time, but it’s best to serve it fresh. You can mash the avocado and store it in the fridge. Just add a splash of lemon juice to keep it green. Toast the bread right before serving for the best taste and texture.
What are some good substitutes for avocados?
If you can’t find avocados, try these substitutes:
– Hummus for a creamy base
– Mashed peas for a fresh twist
– Cream cheese for a richer flavor
– Ricotta cheese for a light and fluffy option
These choices can give you a similar creamy texture and taste.
Creamy avocado toast is simple and fun to make. We covered the basics, from ingredients to variations. You learned about choosing ripe avocados and toasting bread just right. Plus, I shared tips for extra creaminess and tasty toppings. Remember, proper storage keeps your leftovers fresh.
Enjoy trying new flavors and making your own versions. Each bite can be exciting with different choices. Embrace the easy steps and enjoy your delicious avocado toast today!


![- 2 cups cooked chicken, shredded - 1 cup shredded cheddar cheese - 1 cup shredded Monterey Jack cheese - 1/2 cup cream cheese, softened - 1/4 cup sour cream The star of this dish is cooked chicken. I love using rotisserie chicken for its ease and flavor. You can shred it quickly. Next, we have the cheeses. Cheddar adds a nice sharpness, and Monterey Jack brings creaminess. Cream cheese and sour cream add richness and help bind everything together. - 1 medium red bell pepper, diced - 1 medium green bell pepper, diced - 1 small red onion, finely chopped For the veggies, I pick bright bell peppers and a red onion. They add color and crunch. Dicing these finely helps them mix well into the filling. You can use other peppers if you like. Feel free to experiment! - 1 tablespoon taco seasoning - 8 large flour tortillas Taco seasoning gives the quesadillas a zesty kick. It’s easy to make your own or buy it pre-made. The tortillas hold all the goodness together. I recommend large flour tortillas for a sturdy base. You can find the full recipe with all the steps right here: [Full Recipe]. Shredding the chicken Start by shredding 2 cups of cooked chicken. I often use rotisserie chicken for this. It saves time and adds great flavor. Use two forks to pull apart the meat into bite-sized pieces. Preparing the vegetables Next, chop up your veggies. Dice 1 medium red bell pepper and 1 medium green bell pepper. Finely chop 1 small red onion. These veggies add color and crunch. Set them aside for later. Layering the filling In a large bowl, mix the shredded chicken with cheese, cream cheese, sour cream, and the chopped veggies. Add 1 tablespoon of taco seasoning to bring it all together. Stir until everything combines well. Creating the quesadilla stacks Lay out 4 large flour tortillas on a flat surface. Spread the chicken filling evenly over each tortilla. Make sure to cover the edges for a tasty bite. Place another tortilla on top of each filled tortilla. Preheating the oven Preheat your oven to 400°F (200°C). This will ensure the quesadillas cook evenly and get that nice golden color. Time and temperature for baking Line a large baking sheet with parchment paper. Carefully transfer the quesadilla stacks to the sheet. Brush the tops with 1 tablespoon of olive oil. Bake for 15-20 minutes until golden brown and the cheese melts. For the full process, check out the Full Recipe. To achieve the right crunch, use high-quality tortillas. Flour tortillas are soft and easy to handle. They also crisp up nicely in the oven. Brush the tops with olive oil before baking. This helps them brown evenly. Bake until golden brown, about 15 to 20 minutes. Let the quesadillas cool for a few minutes. This helps the filling set a bit before you cut them. If you want to mix it up, you can change the protein. Shredded beef or pork works great too. You can even try black beans for a vegetarian option. For cheese, feel free to switch to pepper jack for some heat. You can also use gouda or feta for a different flavor. Just make sure to keep the same amount of cheese. Serve your quesadillas with salsa and guacamole for a fresh touch. You can also add sour cream for extra creaminess. Fresh cilantro makes a great garnish. It adds a pop of color and flavor. Try adding some pickled jalapeños for a spicy kick. These simple sides make your meal even better. Want more ideas? Check out the Full Recipe for more tips! {{image_2}} You can easily change up the taste of your cheesy sheet pan chicken quesadillas. Start by adding spices or herbs. A pinch of cumin or smoked paprika can give a warm, smoky flavor. Fresh herbs like cilantro or parsley add brightness. Try garlic powder for a bold kick. These simple additions can make your dish stand out. Not everyone loves chicken, and that’s okay! You can swap the chicken for beans or veggies. Black beans or pinto beans work great as a protein. Use mushrooms, zucchini, or even spinach for a fresh twist. These vegetarian alternatives are healthy and tasty. You’ll get a whole new dish while keeping it easy and fun. Tortillas don’t have to be boring. You can mix it up by using different types. Try corn tortillas for a gluten-free option. Whole wheat tortillas add extra fiber. You can even use flavored tortillas, like spinach or sun-dried tomato, to add color and taste. These fun twists keep your meal exciting while still being simple to prepare. For the full recipe, be sure to check out the complete details! To keep your cheesy sheet pan chicken quesadillas fresh, store them in an airtight container. Let them cool completely before sealing. This helps prevent sogginess. You can keep them in the fridge for about 3 to 4 days. If you want to enjoy them later, make sure to label the container with the date. If you want to freeze your quesadillas, it’s best to do this before baking. After assembling the quesadillas, wrap each one tightly in plastic wrap. Place the wrapped quesadillas in a freezer bag or container. They can last for up to 3 months in the freezer. When you’re ready to eat, thaw them in the fridge overnight before baking. The best way to reheat quesadillas is in the oven. Preheat your oven to 350°F (175°C). Place the quesadillas on a baking sheet and heat for about 10-15 minutes, or until warm and crisp. You can also use a skillet on the stove. Just heat over medium heat for about 3-4 minutes on each side. This keeps the quesadilla crispy. Avoid using a microwave, as it can make them soggy. Yes, you can use frozen chicken. To thaw it quickly, place the chicken in a sealed bag. Then, submerge the bag in cold water for about 30 minutes. Change the water every 10 minutes to speed up the process. Once thawed, cook the chicken fully before using it in your quesadillas. To make gluten-free quesadillas, use gluten-free tortillas. Many brands offer good options made from corn or rice. Always check the package to ensure they meet your needs. You can find these tortillas at most grocery stores. Quesadillas taste great with many dips. Consider serving them with salsa, guacamole, or sour cream. You can also try a zesty cheese dip for an extra treat. Each dip adds a fun flavor that enhances your meal. Yes, you can make quesadillas ahead of time. Assemble them and store them in the fridge for a day. You can also freeze them for longer storage. Just remember to use parchment paper between layers to keep them from sticking. When ready to eat, just bake them directly from the fridge or freezer. Enjoy your easy dinner delight! For the full recipe, check out the earlier section. In this blog post, I shared how to make delicious quesadillas. We covered the key ingredients like cooked chicken, cheeses, and vibrant veggies. You learned to prep, assemble, and bake your quesadillas perfectly. I also shared tips for crunch, substitutions, and serving ideas. Always remember, you can switch ingredients to suit your taste. Enjoy experimenting with flavors and textures. With these steps, you’ll create satisfying quesadillas that everyone will love. Happy cooking!](https://dailydishly.com/wp-content/uploads/2025/07/9e515845-1856-4bb5-82ee-80ca33afd87d-768x768.webp)

![- 1 can (15 oz) chickpeas, drained and rinsed - 1/2 cup sun-dried tomatoes, chopped - 1/4 cup red onion, finely chopped - 1/2 cucumber, diced Chickpeas are the star of this salad. They add protein and fiber. Sun-dried tomatoes bring a burst of flavor and a bit of sweetness. Fresh veggies, like cucumber and red onion, add crunch and color. Together, they make a hearty base. - 2 tablespoons olive oil - 1 tablespoon lemon juice - 1 teaspoon dried oregano - Salt and pepper to taste The dressing is simple yet full of taste. Olive oil adds richness, while lemon juice gives a bright kick. Oregano adds an earthy note. Salt and pepper round out the flavors nicely. - 1/4 cup feta cheese, crumbled - 2 tablespoons fresh parsley, chopped Feta cheese adds a creamy, tangy element. Fresh herbs like parsley give a burst of freshness. You can add these if you want more flavor and texture. If you want the full recipe, check it out [Full Recipe]. - Combine Key Ingredients Start by taking a large mixing bowl. Add one can of drained and rinsed chickpeas. Then, toss in half a cup of chopped sun-dried tomatoes. Next, add a quarter cup of finely chopped red onion and half a diced cucumber. Finally, sprinkle in a quarter cup of crumbled feta cheese. - Whisk the Dressing In a small bowl, mix two tablespoons of olive oil with one tablespoon of lemon juice. Then, add one teaspoon of dried oregano. Season with salt and pepper to taste. Whisk these ingredients together until well combined. This dressing is key to bringing out the flavors. - Toss Ingredients Together Pour the dressing over the salad mix. Gently toss everything together to coat the ingredients evenly. Be careful not to mash the chickpeas or feta. You want everything to stay nice and whole. - Letting Flavors Meld Once tossed, let the salad sit for at least 15 minutes. This time helps the flavors blend. You can cover it and set it aside. It will taste even better after it rests. - Chilled or Room Temperature You can serve this salad chilled or at room temperature. Both options work well. It makes a great side dish or a light lunch. Enjoy the freshness of the sun-dried tomatoes and the crunch of the cucumber. You can save time by preparing ingredients in advance. Chop the cucumbers, red onions, and sun-dried tomatoes the day before. Store them in airtight containers in your fridge. This way, when you're ready to make the salad, it’s quick and easy. You can also mix the dressing ahead of time. Just give it a good shake before using it. To boost flavor, let the salad marinate. After mixing all the ingredients, cover the bowl. Place it in the fridge for at least 30 minutes. This waiting time helps the flavors blend well. You can also add some balsamic vinegar to the dressing for a deeper taste. Seasoning matters! Use fresh herbs like basil or mint for a bright taste. You can also try adding a pinch of red pepper flakes for a bit of heat. Always taste the salad before serving. Adjust salt and pepper to suit your liking. If you prefer a creamier salad, add more feta cheese or a dollop of Greek yogurt. For a lighter version, reduce the olive oil. You can also add more lemon juice for extra zing. Feel free to adjust the chickpeas too; add more for a heartier salad. {{image_2}} You can boost your Sun-Dried Tomato Chickpea Salad by adding proteins. One great choice is grilled chicken. Just cook the chicken until it’s golden and slice it thin. Add the slices right on top of your salad. This makes it heartier and perfect for lunch. Another option is incorporating tuna. Drain a can of tuna and mix it in. The tuna adds a nice flavor and a bit of richness. Both options give you a tasty way to enjoy the salad. For a vegetarian twist, try non-dairy cheese options. There are many brands that mimic feta well. Crumble it on top like regular feta. This keeps the creaminess without dairy. If you prefer a vegan version, consider other legumes. Black beans or kidney beans work well. They add protein and fiber while keeping the salad filling and delicious. As the seasons change, you can mix in fresh veggies. In summer, consider adding bell peppers. They add crunch and color. You can also toss in cherry tomatoes for extra sweetness. For fall, think about adding roasted squash or sweet potatoes. These ingredients bring warmth and earthiness to the salad. Each season offers new flavors to explore in your Sun-Dried Tomato Chickpea Salad. How long will it last? This salad stays fresh in the fridge for about three days. Make sure to store it in an airtight container. This keeps the flavors locked in and the veggies crisp. Can I freeze the salad? I do not recommend freezing this salad. The fresh veggies and feta do not hold up well after freezing. If you freeze it, the texture will change, and it may become mushy. What are the best practices for serving leftovers? You can enjoy this salad cold right from the fridge. If you prefer it warm, gently heat it in the microwave for about 30 seconds. Stir it well to ensure even heating. Just remember, warm is nice, but cold is better for this dish! To make this salad, you start with simple steps. The full recipe shows you how. First, gather your ingredients. You need chickpeas, sun-dried tomatoes, red onion, cucumber, and feta cheese. 1. In a bowl, mix the chickpeas, sun-dried tomatoes, diced cucumber, red onion, and feta cheese. 2. For the dressing, whisk olive oil, lemon juice, dried oregano, salt, and pepper in a small bowl. 3. Pour this dressing over the salad and mix gently. 4. Add chopped parsley and toss once more. 5. Let it sit for at least 15 minutes. This helps the flavors blend. You can serve it cold or at room temp. Yes, you can use dried chickpeas! However, you need to prepare them first. - Soak the dried chickpeas overnight in water. This helps them soften. - The next day, drain and rinse them. - Cook them in boiling water for about 1 to 1.5 hours until they are tender. - Once cooked, drain and cool them before using in your salad. This salad pairs well with many dishes. Here are some ideas: - Serve it alongside grilled chicken for a protein boost. - Pair it with some crusty bread for a tasty meal. - Enjoy it as a side with fish or a light pasta dish. - It also works great as a filling for wraps or pita pockets. Feel free to mix and match! In this post, we explored the sun-dried tomato chickpea salad. We looked at key ingredients, like chickpeas and fresh veggies. We also discussed making a tasty dressing with olive oil and lemon juice. You learned how to prepare and assemble the salad, plus tips for flavor and storage. This salad is both simple and flexible. You can customize it to your taste. Enjoy your delicious creation!](https://dailydishly.com/wp-content/uploads/2025/07/f0fe0f85-1842-4358-ad7f-ac591425fdaf-768x768.webp)
