Skip to content
About
Contact
Cookie Policy
Copyright Policy
Disclaimer
Search
Home
Dinner
Appetizer
Desserts
Drinks
About
Contact
Privacy Policy
Toggle Menu
Home
/
Dinner
- Page 24
Dinner
Crispy Chickpea Tacos Flavorful and Easy Meal Guide
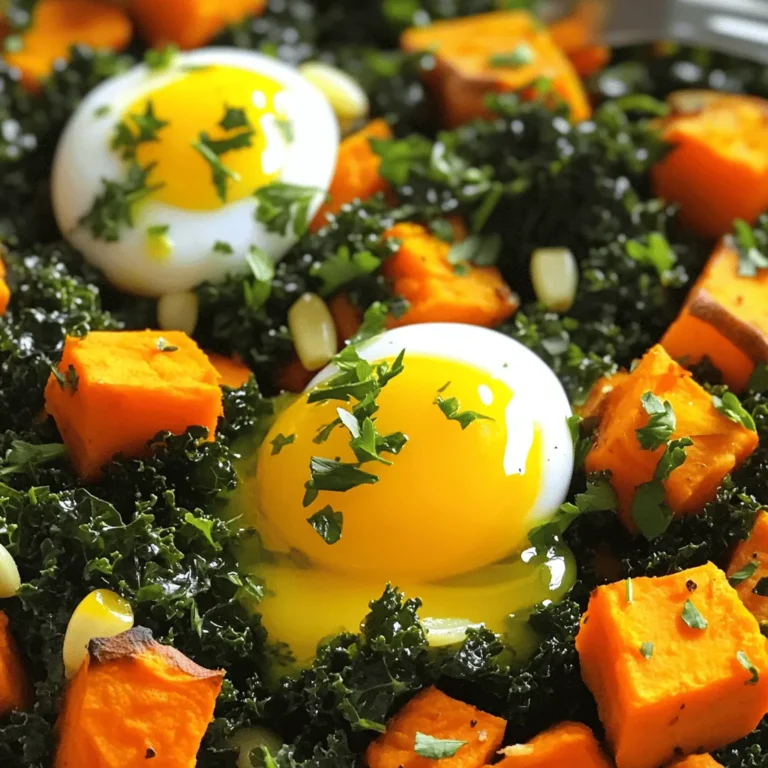
Savory Sweet Potato and Kale Hash for Healthy Meals
Savory Sesame Ginger Chicken Stir-Fry Recipe
Maple Cinnamon Roasted Sweet Potatoes Flavor Burst
Spicy Lentil Soup Flavorful and Healthy Recipe Guide
Butternut Squash Risotto Creamy and Flavorful Dish
Spinach and Feta Stuffed Peppers Delightful Recipe
Thai Basil Chicken Stir-Fry Flavorful and Easy Meal
BBQ Pulled Pork Sandwiches Simple and Flavorful Dish
Teriyaki Salmon with Broccoli Tasty Dinner Idea
Page navigation
Previous Page
Previous
1
…
22
23
24
25
26
…
29
Next Page
Next
Home
Dinner
Appetizer
Desserts
Drinks
About
Contact
Privacy Policy
Toggle Menu Close
Search for:
Search

![To make crispy chickpea tacos, you need the following main ingredients: - 1 can (15 oz) chickpeas, drained and rinsed - 1 tablespoon olive oil - 1 teaspoon paprika - 1 teaspoon cumin - ½ teaspoon garlic powder - ½ teaspoon chili powder - Salt and pepper to taste - 6 small corn tortillas - 1 cup shredded cabbage - ½ cup diced tomatoes - ¼ cup diced red onion - ½ avocado, sliced - Fresh cilantro for garnish - Lime wedges for serving Chickpeas are the star of this dish. They provide protein and fiber. The spices add depth and flavor. The tortillas hold all the goodness together. Fresh toppings bring crunch and color. You will need a few simple tools for this recipe: - Baking sheet - Mixing bowl - Dry skillet Using these tools makes the cooking process smooth. A baking sheet helps the chickpeas get crispy. A mixing bowl lets you combine ingredients easily. A dry skillet warms the tortillas just right. Here’s a quick look at the nutritional facts for one serving of these tacos: - Calories: About 200 - Protein: 8g - Carbohydrates: 30g - Fat: 7g These tacos are filling yet light. They are great for lunch or dinner. You get a good balance of protein, carbs, and healthy fats. For the full recipe, check out the other sections. 1. Preheating the oven Start by preheating your oven to 400°F (200°C). This will help the chickpeas get nice and crispy. 2. Tossing chickpeas with seasoning In a mixing bowl, add the drained and rinsed chickpeas. Pour in olive oil, then sprinkle paprika, cumin, garlic powder, chili powder, salt, and pepper. Toss everything well until the chickpeas are coated with the spices. This step is key for great flavor. 1. Spreading chickpeas on a baking sheet Take a baking sheet and spread the seasoned chickpeas in a single layer. Make sure they are not piled on top of each other. This helps them crisp up nicely. 2. Baking time and techniques for crispiness Bake the chickpeas in the oven for about 20 to 25 minutes. Halfway through, shake the pan to ensure even cooking. You'll know they are done when they are golden brown and crispy. 1. Heating tortillas While the chickpeas bake, heat your corn tortillas in a dry skillet over medium heat. Cook them for about 30 seconds on each side until they are warm and flexible. 2. Layering ingredients for optimal flavor Once your chickpeas are crispy, it’s time to assemble the tacos. Place a generous scoop of chickpeas in each tortilla. Add shredded cabbage, diced tomatoes, red onion, and avocado slices on top. For the final touch, sprinkle fresh cilantro and squeeze some lime juice over everything. This adds a fresh burst of flavor! For the full recipe, you can refer to the detailed instructions included earlier. Enjoy these tasty tacos! To get the best crunch from your chickpeas, rinse and dry them well. This step removes extra starch and moisture. Use a clean kitchen towel to pat them dry. This helps them crisp up nicely in the oven. When baking, spread the chickpeas out on the sheet. Give them space to breathe and cook evenly. Bake at 400°F (200°C) for 20-25 minutes. Shake the pan halfway through to ensure they get crispy all around. You can make your chickpeas even tastier! Try adding smoked paprika or cayenne pepper for a kick. Adjust the seasonings based on your taste. For toppings, think beyond the usual. Add fresh corn, diced jalapeños, or pickled radishes for a zesty touch. These will boost flavor and add crunch to your tacos. These tacos pair well with fresh sides. Try serving them with a simple avocado salad or black bean salsa. These sides add color and more flavor. For presentation, use a bright platter. Arrange the tacos neatly and add lime wedges on the side. This makes the meal more inviting. You can drizzle a bit of light ranch or yogurt dressing over the tacos for creamy goodness. For the full recipe, check out the earlier section. Enjoy your crispy chickpea tacos! {{image_2}} You can easily make these tacos fit your diet. For gluten-free options, use corn tortillas. They are tasty and safe for those who avoid gluten. You can also try lettuce wraps for a fresh twist. If you're vegan, this recipe is already perfect for you! The chickpeas provide protein and flavor without any animal products. Just make sure to check any additional toppings you use. Get creative with spices! Try adding curry powder or smoked paprika for a different taste. You can mix in some cayenne pepper for a spicy kick. Adjust the amounts to fit your spice level. Toppings are where you can really shine. Add jalapeños for heat or mango salsa for sweetness. Pickled onions can add a tangy crunch. You can even sprinkle some feta cheese on top for a creamy finish. Use seasonal vegetables for a fresh touch. In summer, add sweet corn or diced bell peppers. In fall, roasted butternut squash or pumpkin can add warmth. You can switch up the veggies based on what you find at the market. Don’t forget about dressings! In warmer months, a light lime vinaigrette works wonders. In cooler months, you might enjoy a creamy avocado dressing. Adjust based on what you have on hand or what’s in season. For the full recipe, check out the Crispy Chickpea Tacos section! To keep leftover chickpeas fresh, store them in an airtight container. Place them in the fridge. They will stay good for about three to four days. If you want to recook them, heat the chickpeas in a skillet. Add a splash of olive oil and your favorite spices. This helps restore their crispy texture. If you want to assemble your tacos in advance, do so carefully. Keep the ingredients separate until you are ready to eat. Store the chickpeas in one container and the toppings in another. For tortillas, wrap them in foil or wax paper. This keeps them soft. When you are ready to serve, warm the tortillas in a skillet for the best taste. Yes, you can freeze cooked chickpeas! Place them in a freezer-safe bag. Remove as much air as possible before sealing. They will stay fresh for up to three months. As for assembled tacos, I do not recommend freezing them. The tortillas become soggy when thawed. However, you can freeze the chickpeas and toppings separately. Just thaw and reheat when you’re ready to enjoy. For the full recipe, refer back to the beginning of this article. To make crispy chickpea tacos, start by preheating your oven to 400°F (200°C). Rinse one can of chickpeas and drain them well. In a bowl, toss the chickpeas with one tablespoon of olive oil and a mix of spices: one teaspoon of paprika, one teaspoon of cumin, half a teaspoon of garlic powder, and half a teaspoon of chili powder. Add salt and pepper to taste. Spread the seasoned chickpeas on a baking sheet in a single layer. Bake them for 20 to 25 minutes. Shake the pan halfway through. This gives them a nice crunch. While they bake, heat six small corn tortillas in a dry skillet over medium heat for about 30 seconds on each side. Once the chickpeas are crispy and golden, fill each tortilla with them. Add fresh toppings like shredded cabbage, diced tomatoes, diced red onion, and avocado slices. Finish with fresh cilantro and a squeeze of lime juice for a bright taste. For the full recipe, check out the [Full Recipe]. Chickpea tacos benefit from fresh and crunchy toppings. Here are some great options: - Shredded cabbage - Diced tomatoes - Diced red onion - Sliced avocado - Fresh cilantro - Lime wedges These toppings add color and flavor. You can also try pickled jalapeños for some heat or crumbled feta for a creamy touch. Mix and match to find your favorite combination! This recipe is already vegan-friendly! To keep it that way, ensure you use corn tortillas and skip any dairy toppings. For added creaminess, try using avocado or a vegan yogurt. You can also add a splash of hot sauce for extra flavor without any animal products. Crispy chickpea tacos pair well with various sides. Here are a few suggestions: - Mexican rice or quinoa - Black beans or refried beans - A simple green salad with lime vinaigrette - Chips and salsa or guacamole These sides not only complement the tacos but also make your meal more filling and satisfying. Enjoy! Crispy chickpea tacos are easy to make and pack great flavor. We covered the main ingredients, tools, and nutritional info to help you. You learned the step-by-step process, plus tips for crispiness and flavor. Don’t forget the variations and storage tips to keep your meals fresh. Experiment with different spices and toppings to find what you love. Enjoy creating your tacos and make them your own for delicious meals!](https://dailydishly.com/wp-content/uploads/2025/06/47f89152-e87e-483c-b85b-8fc38f5c57d2-768x768.webp)