Savory Sweet Potato and Kale Hash for Healthy Meals

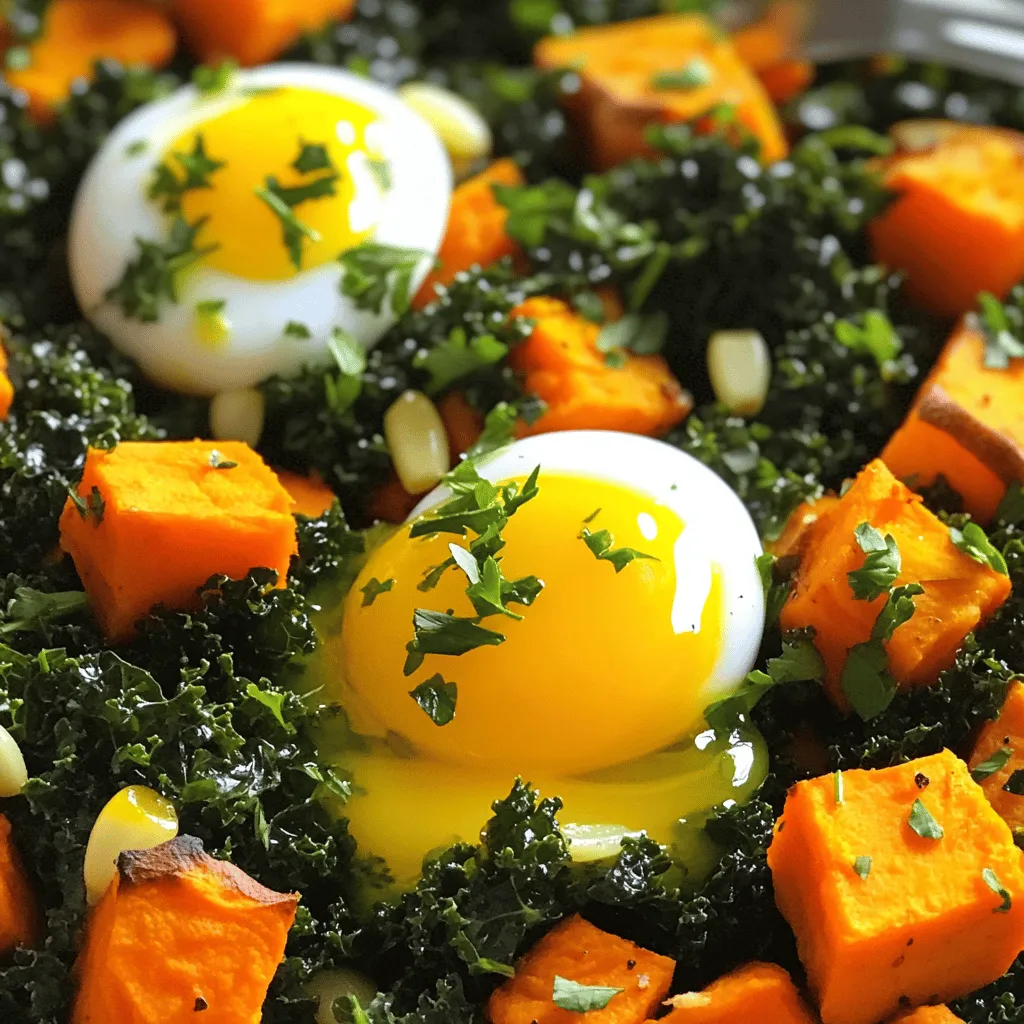
Are you ready to enjoy a tasty and healthy meal? This Savory Sweet Potato and Kale Hash is packed with flavor and nutrition. You don’t need fancy skills to whip it up. With just a few simple ingredients, you can have a colorful dish that warms you up and keeps you satisfied. Let’s dive into the recipe and learn how to make this healthy favorite!
Ingredients
List of Ingredients
– 2 medium sweet potatoes, peeled and diced
– 1 tablespoon olive oil
– 1 small onion, finely chopped
– 2 cloves garlic, minced
– 1 bell pepper (any color), diced
– 4 cups fresh kale, chopped
– 1 teaspoon smoked paprika
– 1/2 teaspoon cumin
– Salt and pepper to taste
– 2 large eggs (optional)
– Fresh parsley, chopped (for garnish)
Recommended Measurements
When cooking, I always measure carefully to get the best flavor. For the sweet potatoes, medium-sized ones work well. If they are too large, they can overpower the dish. Use just enough olive oil to coat the pan. One tablespoon is perfect. Adjust the spices to your taste, but start with the amounts listed.
Fresh vs. Frozen Ingredients
Using fresh ingredients makes a big difference. Fresh sweet potatoes and kale have better flavor and texture. Frozen kale can work in a pinch, but it may not hold up as well in the hash. If using frozen sweet potatoes, make sure they are fully thawed. This ensures they cook evenly. Always choose fresh when possible for the best results in your sweet potato and kale hash.
Step-by-Step Instructions
Preparation Steps
First, gather your ingredients. You will need sweet potatoes, onion, garlic, bell pepper, kale, and spices. Peel and dice the sweet potatoes into small cubes. Chop the onion and bell pepper finely. Mince the garlic. Rinse the kale and chop it into bite-sized pieces.
Cooking Instructions
1. Heat the olive oil in a large skillet over medium heat.
2. Add the diced sweet potatoes. Season them with salt and pepper. Cook for about 10-12 minutes. Stir them occasionally until they soften and lightly brown.
3. Next, add the chopped onion and bell pepper. Cook for another 5 minutes. The onion will become soft and clear.
4. Now, stir in the minced garlic, smoked paprika, and cumin. Cook for 1-2 minutes until the smell fills your kitchen.
5. Add the chopped kale to the skillet. Cook for a few minutes more until the kale wilts and becomes tender.
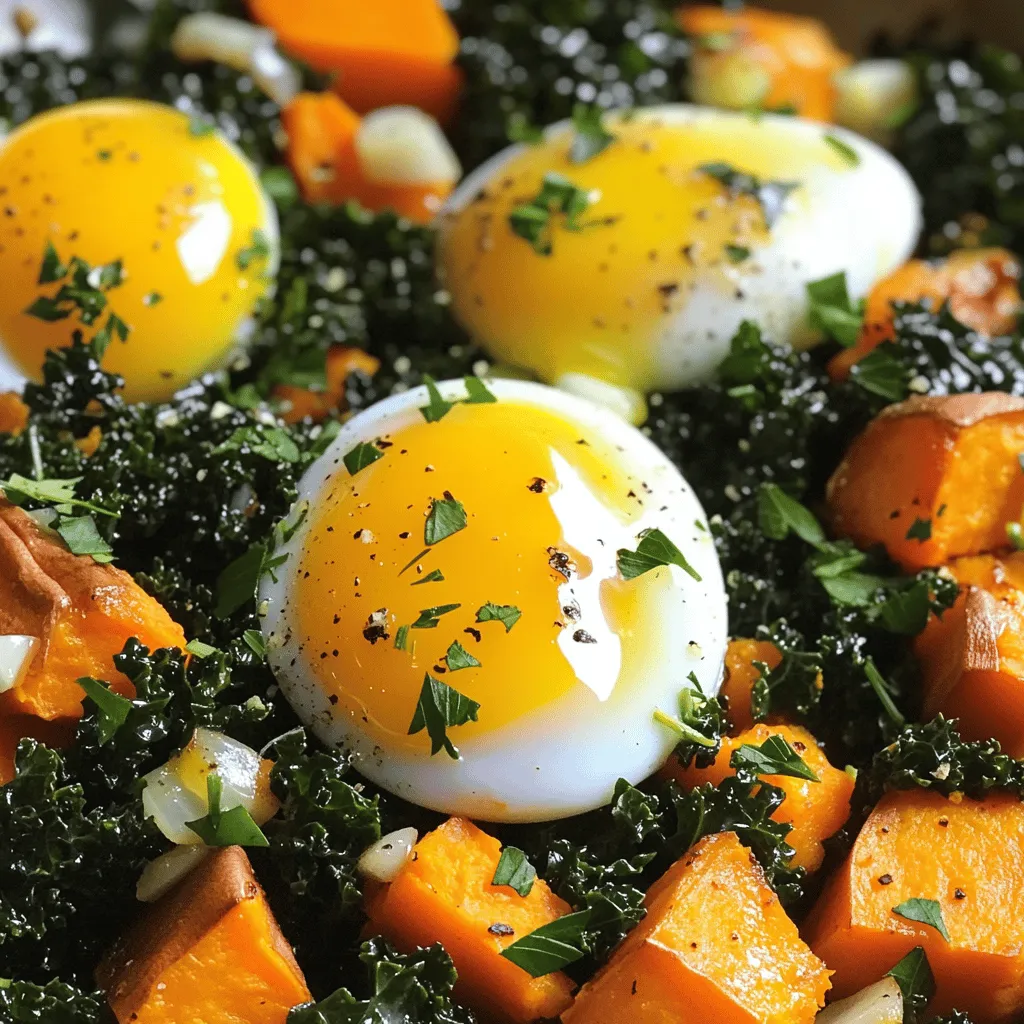
6. If you want, create small wells in the hash. Crack an egg into each well. Cover the skillet. Cook until the egg whites are set but the yolks remain runny, about 4-5 minutes.
7. Remove the skillet from heat. Adjust the seasoning with more salt and pepper. Garnish with fresh parsley before serving.
Tips for Perfecting the Hash
– Make sure to cut the sweet potatoes evenly. This helps them cook at the same rate.
– Stir often to prevent sticking and ensure even browning.
– Feel free to add more veggies like zucchini or mushrooms for extra flavor.
– Use fresh spices for the best taste.
– If you like a bit of heat, add some chili flakes for a kick.Enjoy your tasty dish!
Tips & Tricks
Cooking Techniques
To make your sweet potato and kale hash shine, focus on layering flavors. Start by cooking the sweet potatoes until they are soft and slightly golden. This step adds a nice caramelized taste. When you add the onion and bell pepper, cook them until soft. This helps to release their natural sweetness.
Adding spices like smoked paprika and cumin boosts the flavor. They bring warmth and depth to the dish. Use fresh garlic for a punch of flavor. You can also try adding a splash of lemon juice at the end. It wakes up the whole dish and adds brightness.
Common Mistakes to Avoid
One common mistake is overcooking the kale. It should be wilted but not mushy. If you cook it too long, it loses its vibrant color and nutrients. Another mistake is not seasoning enough. Taste as you cook! Adjust the salt and pepper to your liking.
Don’t rush the cooking process. Give each ingredient time to shine. Lastly, avoid crowding the pan. If you add too many ingredients at once, they will steam instead of brown.
Suggested Cooking Tools and Equipment
Here are some tools to make cooking easier:
– A large skillet or frying pan for even cooking.
– A sharp knife for chopping the sweet potatoes and veggies.
– A cutting board for safe and easy prep.
– A spatula to stir and flip the hash.
– A lid for the skillet, especially if you add eggs.
These tools will help you create a delicious sweet potato and kale hash.

Variations
Ingredient Substitutions
You can switch sweet potatoes for other root veggies. Try butternut squash or parsnips for a new taste. These choices bring their own unique flavor.
For greens, kale is great, but you can use spinach or Swiss chard too. Each option adds a fresh twist. Just chop them up and toss them in.
Add-ins and Toppings
Add-ins make the dish even better. You can mix in black beans or cooked quinoa for more nutrition. A sprinkle of cheese on top can add creaminess. Feta or cheddar works well.
Try adding spices like chili powder for heat. Fresh herbs like cilantro or green onions can brighten the dish.
Serving Suggestions
Serve the hash warm on a plate. Top it with a fried egg for a hearty meal. You can also pair it with avocado slices for creaminess.
This dish works well for breakfast, lunch, or dinner. Serve it with toast or tortillas for extra carbs.
Storage Info
Storing Leftovers
After making your sweet potato and kale hash, store leftovers in an airtight container. Let the hash cool down first. This keeps the flavors fresh and tasty. Place it in the fridge and eat it within three to four days. If you want to keep it longer, freezing is a great option.
Freezing the Hash
To freeze the hash, follow these steps. First, allow the dish to cool completely. Then, transfer it to freezer-safe bags or containers. Make sure to remove as much air as possible. Label each bag with the date. You can store it in the freezer for up to three months. When you’re ready to eat it, just thaw it in the fridge overnight.
Reheating Instructions
Reheating is simple. You can use a skillet or microwave. For a skillet, add a little olive oil over medium heat. Place the hash in the skillet and stir until heated through. This usually takes about five to seven minutes. For the microwave, place the hash in a bowl. Heat it in one-minute intervals, stirring in between. Ensure it’s hot all the way through before serving. Enjoy your flavorful meal again!
FAQs
How do I make Sweet Potato and Kale Hash?
To make this dish, start by heating olive oil in a skillet. Add diced sweet potatoes, salt, and pepper. Cook them for about 10-12 minutes. You want them to soften and get some brown spots. Next, add the chopped onion and bell pepper. Cook for another 5 minutes until the onion is clear. Then, mix in minced garlic, smoked paprika, and cumin. Stir for 1-2 minutes until it smells great. Finally, add chopped kale and cook until it wilts. If you want eggs, make small wells and crack one in each. Cover the skillet and cook until the egg whites are set. This whole process takes about 30 minutes.
Can I add protein to this dish?
Yes, you can add protein to your hash! It works well with many types. You can use cooked sausage, bacon, or chicken. You can also add beans or tofu for a plant-based option. Just cook the protein first, then mix it in when you add the kale. This change makes the dish more filling and tasty.
How do I adjust the recipe for meal prep?
To adjust for meal prep, you can make a larger batch. Double the ingredients, and follow the same steps. Once cooked, let it cool and then store it in containers. You can keep it in the fridge for up to five days. When you want to eat, just reheat it in the microwave or on the stove. This makes it easy to enjoy healthy meals all week!
This blog post covered a tasty sweet potato and kale hash recipe. We explored the best ingredients, precise measurements, and helpful cooking steps. You learned tips to enhance flavors and avoid mistakes. We also discussed fun variations and proper storage methods.
Now you can make this dish your own. Experiment with different ingredients or add protein. Enjoy your cooking and make a meal that brightens your day!


![To make this vibrant salad, you need fresh and colorful ingredients. Here’s what you will need: - 8 oz rice noodles (or your favorite noodle) - 1 cup red cabbage, shredded - 1 cup carrots, julienned - 1 cup bell peppers (mixed colors), sliced - 1 cup sugar snap peas, trimmed - 1 cucumber, julienned - 1 cup edamame, shelled - ¼ cup fresh cilantro, chopped - ¼ cup green onions, sliced - ¼ cup peanuts, crushed (optional for garnish) These ingredients bring crispness and bright colors to the dish. They also add a mix of textures that make every bite fun. The dressing ties all the flavors together. You will need these simple ingredients: - 3 tablespoons soy sauce (or tamari for gluten-free) - 2 tablespoons sesame oil - 1 tablespoon rice vinegar - 1 tablespoon honey (or maple syrup for vegan) - 1 teaspoon ginger, grated - 1 clove garlic, minced - 1 teaspoon chili paste (adjust to taste) Mixing these ingredients creates a tasty dressing that adds depth to the salad. The balance of salty, sweet, and a little spice is what makes this dish stand out. Want to make your salad even better? Here are some fun add-ins: - Sliced avocado for creaminess - Grilled chicken or tofu for protein - Sesame seeds for extra crunch - Fresh herbs like mint or basil for a fresh twist These additions can take your Rainbow Asian Noodle Salad to the next level. Feel free to mix and match based on your taste! For the complete recipe, check the [Full Recipe]. Start by boiling a pot of water. Use enough water to cover the noodles. Once the water boils, add 8 oz of rice noodles. Cook them according to the package instructions. I usually check for an al dente texture. This means they should be firm, not mushy. After cooking, drain the noodles in a colander. Rinse them under cold water. This step cools them and stops the cooking process. Set them aside for later. Grab a large mixing bowl. Add 1 cup of shredded red cabbage. Next, add 1 cup of julienned carrots. Then, toss in 1 cup of sliced bell peppers in mixed colors. Don't forget 1 cup of trimmed sugar snap peas. They add a nice crunch! Now, add 1 julienned cucumber and 1 cup of shelled edamame. Finally, mix in ¼ cup of chopped cilantro and ¼ cup of sliced green onions. These fresh veggies make your salad colorful and tasty. In a small bowl, combine the dressing ingredients. Start with 3 tablespoons of soy sauce. If you are gluten-free, use tamari instead. Next, add 2 tablespoons of sesame oil and 1 tablespoon of rice vinegar. Then, mix in 1 tablespoon of honey or maple syrup for a vegan option. Add 1 teaspoon of grated ginger and 1 clove of minced garlic. Finally, add 1 teaspoon of chili paste, adjusting to your spice level. Whisk all the ingredients together until well combined. Now, it’s time to bring everything together. Add the cooked noodles to your bowl of fresh vegetables. Pour the dressing over the top. Toss everything gently to mix. Make sure each noodle and veggie is coated well. This mixing helps all the flavors blend together for a delicious bite. After mixing, taste your salad. If you want it sweeter, add a little more honey. For extra spice, add more chili paste. Adjust the flavors to suit your liking. This salad should be a reflection of your taste. Feel free to experiment until it’s perfect for you. To make your Rainbow Asian Noodle Salad pop, use a large, shallow platter. This helps showcase the bright colors. Layer the noodles first, then pile on the veggies. Drizzle dressing on top, and finish with a sprinkle of cilantro and crushed peanuts. This creates a stunning look that draws everyone in. To keep your salad fresh, store it in an airtight container. Keep the dressing separate until you’re ready to eat. This prevents the noodles and veggies from getting soggy. You can also add a little lemon juice to the salad. This helps maintain color and crunch. Leftover salad is great for lunch! Consider adding protein like grilled chicken or tofu for a filling meal. You can also use the salad as a filling for lettuce wraps. Just scoop some salad into large lettuce leaves. This adds a fun twist and keeps it fresh. If you want to make it spicy, add more chili paste to the leftovers. {{image_2}} You can easily make this salad gluten-free. Just swap regular noodles for rice noodles. Use tamari instead of soy sauce. This keeps the flavor while avoiding gluten. If you want a vegan version, replace honey with maple syrup in the dressing. This simple swap keeps your salad sweet while staying plant-based. You can also add tofu for extra texture and protein. For those who want more protein, consider adding cooked chicken or shrimp. Both work well with the flavors in this salad. You can also use chickpeas or lentils for a hearty twist. Each option adds nutrition and keeps the dish filling. If you want the full recipe, you can find it above. To keep your Rainbow Asian Noodle Salad fresh, store it in the fridge. Place the salad in an airtight container. If you have leftover dressing, store it separately to prevent sogginess. This way, the noodles and veggies stay crisp. Use glass containers or high-quality plastic ones with tight lids. Glass is great because it does not stain or retain odors. Make sure the container is large enough to hold all the ingredients without squishing them together. Your salad can last for about 3 to 5 days in the fridge. The veggies will stay fresh, but the noodles may soften over time. To enjoy the best taste, eat it within the first few days. Always check for any changes in smell or texture before eating. For the full recipe, refer to the earlier sections. I love using rice noodles for their light texture. They soak up the flavors well. You can also use soba noodles or any thin pasta. Just cook them until they are al dente. Rinse under cold water to stop the cooking. This keeps them from getting mushy. Absolutely! You can prep the salad a day in advance. Just keep the dressing separate until you are ready to serve. This helps keep the veggies crisp. If you mix everything too early, the noodles may soak up the dressing. Yes, this salad is packed with veggies. Each ingredient adds nutrients. The colorful mix provides vitamins and minerals. You get fiber from the noodles and veggies too. This salad is a great option for a light meal or side dish. You can easily change the dressing to suit your taste. Add more honey for sweetness or extra chili paste for heat. You might try lime juice instead of rice vinegar for a zingy twist. Fresh herbs like mint or basil can add a bright flavor. Yes! Grilled chicken, shrimp, or tofu are great options. Just make sure to cook them first. Slice the meat thin before adding it to the salad. This adds protein and makes the dish more filling. You can check the Full Recipe for ideas on how to include them. You learned how to make a tasty Rainbow Asian Noodle Salad. We covered the key ingredients, from the noodles to the fresh veggies and zesty dressing. I shared easy steps to prepare and combine everything for the best flavor. You also found tips for presentation and storage to keep your salad fresh. Experiment with variations like gluten-free or vegan options. Remember, this dish is flexible and fun! Enjoy your colorful salad and make it your way.](https://dailydishly.com/wp-content/uploads/2025/06/34dc854e-6038-45bb-afdc-1af709707800-768x768.webp)

![- 4 salmon fillets (6 ounces each) - 1/4 cup soy sauce (low-sodium preferred) - 1/4 cup honey - 2 tablespoons rice vinegar - 1 tablespoon grated fresh ginger - 2 cloves garlic, minced - 1 teaspoon sesame oil The heart of this dish is the salmon. I love using fresh salmon fillets for their rich flavor and texture. They cook well and stay moist. For the sauce, soy sauce adds that umami punch. Low-sodium options are great if you want to cut down on salt. Honey gives a sweet touch, balancing the salty soy. Rice vinegar adds tang and depth. Fresh ginger and garlic bring warmth and spice to the marinade. - 2 green onions, finely chopped (for garnish) - 1 tablespoon sesame seeds (for garnish) Garnishes can elevate your dish. Chopped green onions add color and a mild onion flavor. Sesame seeds give a nice crunch and nutty taste. They make the dish look beautiful too. - Cooked jasmine rice - Steamed vegetables I recommend serving the teriyaki salmon over fluffy jasmine rice. The rice soaks up the sauce perfectly. Steamed vegetables are great on the side. They add color, texture, and nutrients to your meal. This combo makes a full and balanced plate. For the complete cooking process, check the Full Recipe. To start, you need to whisk the marinade. In a medium bowl, combine: - 1/4 cup soy sauce - 1/4 cup honey - 2 tablespoons rice vinegar - 1 tablespoon grated fresh ginger - 2 cloves garlic, minced - 1 teaspoon sesame oil Whisk them until smooth. This creates a sweet and salty blend. Next, marinate the salmon. Place the salmon fillets in a shallow dish. Pour the marinade over them. Cover the dish and refrigerate for at least 30 minutes. For a stronger flavor, marinate up to 2 hours. Now, it’s time to bake. Preheat your oven to 400°F (200°C). This step is key for even cooking. Line a baking sheet with parchment paper or foil. This makes for easy cleanup. After marinating, take the salmon out. Reserve the marinade for later. Place the fillets skin-side down on the sheet. Bake the salmon for 12-15 minutes. It’s done when it flakes easily with a fork. While the salmon bakes, prepare the sauce. Pour the reserved marinade into a small saucepan. Bring it to a boil over medium heat. Let it simmer for 3-5 minutes. This thickens the sauce nicely. Be careful not to over-reduce it. Once the salmon is ready, drizzle the thickened sauce on top. Garnish with: - Chopped green onions - Sesame seeds Now, serve your teriyaki salmon over fluffy jasmine rice for a complete meal. For the full recipe, check the section above. For the best teriyaki salmon, marination is key. I recommend marinating for at least 30 minutes. If you have time, go for 2 hours. This extra time allows the flavors to soak in. Balancing the flavors is also important. The soy sauce adds saltiness, while honey brings sweetness. Adjust these to fit your taste. You can even add a splash of lime juice for a zesty kick! You can cook the salmon in the oven or on the grill. If you use the oven, preheat it to 400°F (200°C). For grilling, heat your grill to medium-high. Both methods yield tasty results. Just make sure not to overcook the salmon. Cook it until it flakes easily with a fork. This usually takes about 12 to 15 minutes in the oven. If grilling, check often to avoid dryness. When plating, keep it simple and elegant. Place the salmon on a bed of fluffy jasmine rice. Drizzle it with the thickened teriyaki sauce. Garnish with green onions and sesame seeds for a pop of color. For sides, steamed vegetables work great. Try broccoli or snap peas for a fresh crunch. This makes your meal not just tasty but also beautiful! {{image_2}} You can swap out salmon for other fish. Try using trout or tilapia. Both have great flavors and cook well. For gluten-free options, use tamari instead of soy sauce. Tamari has a similar taste and works perfectly in this recipe. You can also use coconut aminos, a great soy sauce alternative. Want to change the taste? Add spices like black pepper or red pepper flakes. These spices give the dish a nice kick. You can also add citrus juice. Lime or lemon juice brightens up the flavors. Just mix it into the marinade for a fresh twist. You can grill the salmon for a smoky flavor. Just preheat your grill and cook the salmon for about 6-8 minutes each side. If you want a caramelized finish, try broiling. Place the salmon under a broiler for 2-3 minutes after baking. This gives a nice, crisp topping. This Easy Teriyaki Salmon recipe is flexible. Feel free to mix and match these ideas! For the full recipe, check out the [Full Recipe]. To store leftovers, let the salmon cool to room temperature. Place it in an airtight container. This keeps it fresh and prevents strong smells. The shelf life in the fridge is about 3 to 4 days. If you plan to eat it later, remember to check for any signs of spoilage before enjoying. You can freeze cooked salmon for up to 3 months. Wrap each piece tightly in plastic wrap, then place it in an airtight container or freezer bag. To reheat, thaw the salmon overnight in the fridge. You can warm it in the oven at 350°F (175°C) for about 10-15 minutes. This helps keep the texture nice and flaky. Use airtight containers for storing salmon. This prevents air from getting in and keeps it fresh longer. Avoid leaving cooked salmon out at room temperature for too long. Proper storage helps retain its rich flavor and juicy texture. Enjoy your Easy Teriyaki Salmon at its best! For the full recipe, check out the [Full Recipe]. I recommend marinating teriyaki salmon for at least 30 minutes. This allows the flavors to soak in. For a stronger taste, you can marinate it for up to 2 hours. Just don’t go over two hours, or the salmon may get too salty. Yes, you can use frozen salmon! Just be sure to thaw it first. To thaw, place the salmon in the fridge overnight. If you need it faster, seal it in a bag and submerge it in cold water for about an hour. After thawing, pat it dry before marinating. I love serving teriyaki salmon with fluffy jasmine rice. It soaks up the tasty sauce well. You can also pair it with steamed vegetables like broccoli or green beans. A fresh salad with a light dressing works great, too! Check out the Full Recipe for more ideas. In this post, we explored how to make easy teriyaki salmon using simple ingredients. We discussed key items like salmon fillets, soy sauce, honey, and fresh ginger. You learned step-by-step instructions for making the marinade, baking the salmon, and adding finishing touches. We also covered tips for perfecting the dish and how to customize it. Remember, you can store leftovers for later enjoyment. With these insights, you now have all the tools to create a delicious teriyaki salmon that impresses. Enjoy your cooking journey!](https://dailydishly.com/wp-content/uploads/2025/06/d319870b-f2b5-4b65-bbf7-0456604e94a9-768x768.webp)


