Chicken and Cheese Quesadilla Casserole Delight

Get ready to enjoy a new twist on a classic dish with my Chicken and Cheese Quesadilla Casserole Delight! This simple recipe combines juicy chicken, creamy cheese, and vibrant veggies all in one warm, cheesy casserole. Whether you’re a busy parent or just someone who loves good food, this dish is perfect for any night of the week. Stick around, and let’s dive into the ingredients and steps to make your new favorite meal!
Ingredients
To make a delicious Chicken and Cheese Quesadilla Casserole, you need the right ingredients. Here’s the list:
– 2 cups cooked chicken, shredded
– 1 cup black beans, rinsed and drained
– 1 cup corn kernels (fresh or frozen)
– 2 cups shredded Mexican cheese blend
– 1 cup salsa
– 8 large flour tortillas
– 1 teaspoon ground cumin
– 1 teaspoon chili powder
– 1/2 teaspoon garlic powder
– 1/2 teaspoon onion powder
– Salt and pepper, to taste
– 1/4 cup fresh cilantro, chopped (for garnish)
– Sour cream (for serving)
– Avocado, diced (for serving)
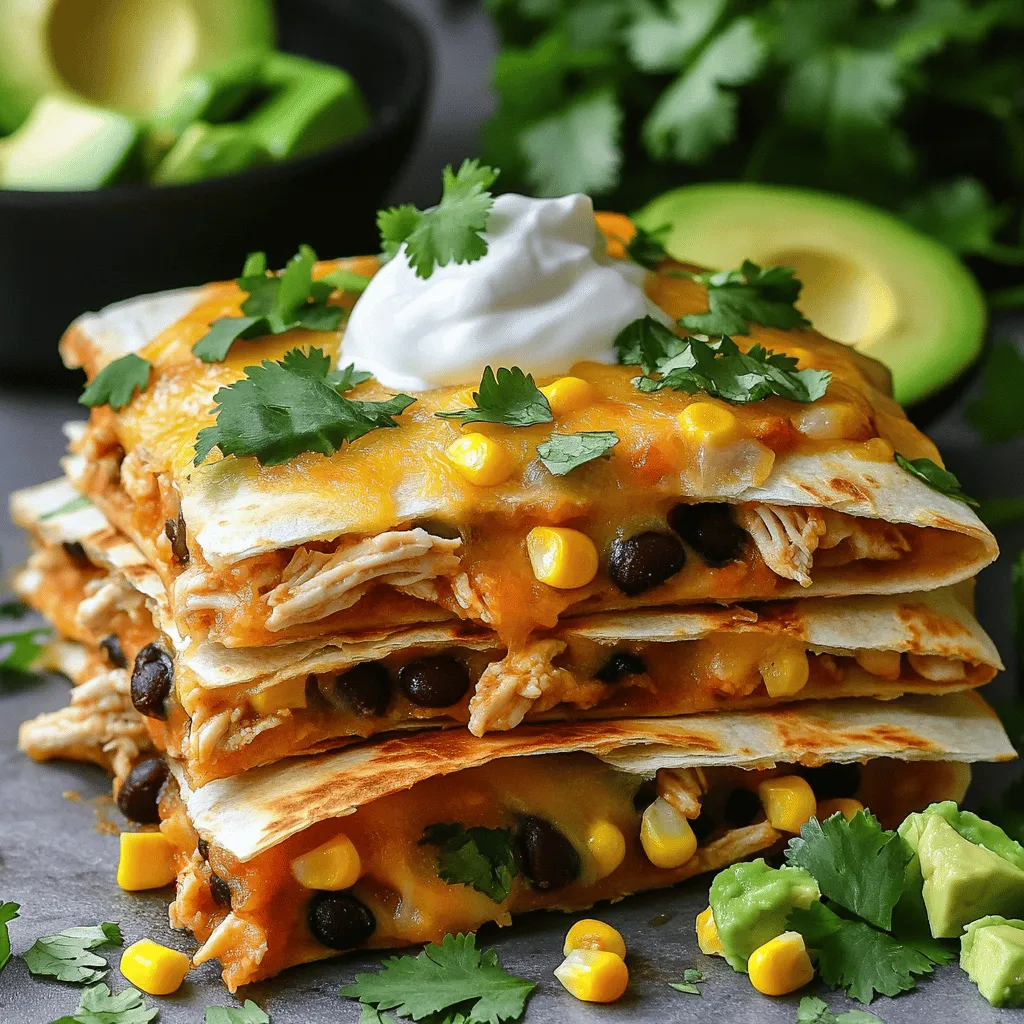
These ingredients create a burst of flavors. The chicken gives protein, while beans add fiber. Corn adds sweetness, and cheese brings that melty goodness we all love. Salsa adds a zesty kick. When you layer these in tortillas, it forms a cozy and tasty dish.Enjoy cooking this fun and easy meal!
Step-by-Step Instructions
Preparation Steps
First, gather your ingredients to make the process smooth. You need cooked chicken, black beans, corn, cheese, salsa, tortillas, and spices. In a large bowl, mix the shredded chicken, black beans, corn, 1 1/2 cups of cheese, salsa, cumin, chili powder, garlic powder, onion powder, salt, and pepper. Make sure everything blends well. This step adds great flavor to your casserole.
Next, prepare your baking dish. Grease a 9×13 inch dish with cooking spray or olive oil. This helps prevent sticking and makes cleanup easy.
Now, it’s time to layer the tortillas and the mixture. Place one tortilla in the dish. Spoon some of the chicken and cheese mix over it. Then, add another tortilla. Repeat this layering until you run out of ingredients. Always finish with a tortilla on top.
Baking Instructions
Now, sprinkle the remaining cheese on the top tortilla. This will create a nice, cheesy crust. Preheat your oven to 350°F (175°C). Cover the dish with aluminum foil and place it in the oven. Bake for 20 minutes.
After 20 minutes, remove the foil. Bake for another 10 to 15 minutes. Watch for a golden, bubbly top. That’s when you know it’s ready.
Final Touches
Let your casserole sit for about 5 minutes after baking. This helps it set. Then, cut it into squares. For a beautiful presentation, garnish with fresh cilantro. Serve with diced avocado and a dollop of sour cream on the side. These add flavor and color to your dish.Enjoy your Chicken and Cheese Quesadilla Casserole Delight!
Tips & Tricks
How to Perfect Your Casserole
To make your quesadilla casserole shine, use fresh ingredients. Fresh chicken adds great flavor. Shred it finely for even mixing. Ensure your tortillas are soft. If they are too stiff, they won’t layer well. Warm them for a few seconds in the microwave. This helps them bend without tearing. Spread the filling evenly between each layer. It allows every bite to taste amazing.
Suggested Garnishes
Garnishes can elevate your dish. Fresh cilantro adds a burst of color and flavor. Diced avocado gives a creamy texture. A dollop of sour cream adds richness. You can also add sliced jalapeños for some heat. Try serving it on colorful plates for a fun look. This makes your casserole more appealing and enjoyable.
Cooking Tips for Best Results
Cook your casserole at the right temperature. Preheat your oven to 350°F (175°C). Cover it with foil to keep moisture in. This ensures even cooking. Remove the foil to get a crispy top. Let it rest for five minutes after baking. This helps the layers set. Cut into squares for neat servings.Enjoy your cooking journey!

Variations
Add Protein Options
You can easily change the protein in this dish. Use shredded beef or pork instead of chicken. You can even try ground turkey or sausage for a different taste. If you want a plant-based option, use lentils or tofu. Each protein adds its unique flavor. Just make sure to cook it well before mixing it into the casserole.
Vegetarian Version
For a vegetarian twist, skip the chicken and add more beans. You can use pinto beans, chickpeas, or even tofu. Add veggies like bell peppers, zucchini, or spinach for extra nutrition. This keeps the dish filling and tasty. You won’t miss the meat when you enjoy this version.
Spice It Up
If you love heat, add jalapeños or chili flakes to the mix. You can also use spicy salsa or hot sauce. For a smoky flavor, try smoked paprika or chipotle powder. Adjust the spices to your liking, and feel free to mix and match. Each change gives you a new twist on this classic dish.
Storage Info
How to Store Leftovers
To store leftovers, let the casserole cool first. Place it in an airtight container. You can keep it in the fridge for up to four days. Make sure to cover it well to keep it fresh. If you want to enjoy it later, consider freezing it.
Reheating Instructions
Reheat leftover casserole in the oven for the best taste. Preheat your oven to 350°F (175°C). Place the casserole in a baking dish and cover it with foil. Heat for about 20 minutes or until warm. You can also microwave it, but the oven keeps it crispy.
Freezing Tips
To freeze the quesadilla casserole, cut it into squares. Wrap each square in plastic wrap. Place them in a freezer-safe bag or container. Make sure to label it with the date. You can freeze it for up to three months. When ready to eat, thaw it in the fridge overnight before reheating.
FAQs
Can I use different types of cheese?
Yes, you can use any cheese you like. Cheddar, Monterey Jack, or even mozzarella work well. Each cheese brings its own taste and meltiness. If you want a bit of spice, try pepper jack cheese. Mix and match your favorite types to create a unique flavor. Just remember to keep the total amount around two cups.
How do I make this dish gluten-free?
To make this dish gluten-free, swap the flour tortillas for corn tortillas. Corn tortillas are tasty and hold up well in the casserole. Check the labels on your ingredients to ensure they are gluten-free. Most salsa and canned beans are safe, but it’s good to verify.
Can I prepare this casserole in advance?
Absolutely! You can prepare the casserole a day ahead. Just follow the recipe until the baking step. Cover the dish well and store it in the fridge. When you’re ready to bake, add a few extra minutes to the cooking time. This makes it easy to serve on busy nights.
You’ve learned how to make a delicious casserole with simple ingredients. We covered key steps like prepping, baking, and adding final touches. Tips for perfecting your dish and variations let you customize to your taste. Proper storage advice ensures you enjoy every bite later.
With these insights, you can create a meal everyone will love. Have fun cooking!


![To make zucchini noodles with pesto, gather these main ingredients: - 3 medium zucchinis, spiralized into noodles - 1 cup fresh basil leaves - 1/4 cup pine nuts (toasted) - 1/4 cup grated Parmesan cheese (or nutritional yeast for a vegan option) - 2 garlic cloves, minced - 1/3 cup extra-virgin olive oil - Salt and pepper to taste These ingredients create a fresh and bright dish that is full of flavor. The zucchini noodles serve as a light base, while the pesto adds richness. You can enhance the dish with these optional ingredients: - 1/2 cup sun-dried tomatoes, chopped (in oil for extra flavor) - 1/4 teaspoon crushed red pepper flakes (optional) Adding sun-dried tomatoes gives a nice tang and sweetness. The red pepper flakes can add a bit of heat if you like spice. This dish is not just tasty; it also packs a healthy punch. Here’s a quick look at the nutritional benefits: - Zucchini: Low in calories, high in fiber, and rich in vitamins A and C. - Basil: Contains antioxidants and supports heart health. - Pine Nuts: Offer healthy fats and protein. - Parmesan Cheese: Adds calcium and flavor. - Olive Oil: A good source of healthy fats and antioxidants. Each serving is light yet filling, making it a great choice for lunch or dinner. You can find the full recipe [here]. To make fresh pesto, gather your ingredients. You will need basil leaves, toasted pine nuts, Parmesan cheese, minced garlic, and olive oil. Place these in a food processor. First, pulse the basil, pine nuts, cheese, and garlic together. Add a pinch of salt and pepper. While the processor runs, slowly pour in the olive oil. This helps achieve a smooth and creamy texture. After blending, taste your pesto. Adjust the seasoning to your liking. Set it aside for now. Next, grab your zucchinis. Spiralize them into noodle shapes. In a large skillet, heat a tablespoon of olive oil over medium heat. Add the zucchini noodles once the oil is hot. Sauté for about 2-3 minutes. Keep them slightly crunchy, or al dente. This step is key, as overcooking can make them mushy. Once cooked, remove the skillet from heat. Now, it’s time to mix everything together. Add the pesto to the skillet with the zucchini noodles. Stir well to coat the noodles evenly. This is where the magic happens! Next, add chopped sun-dried tomatoes for extra flavor. If you like spice, sprinkle in crushed red pepper flakes. Toss all the ingredients together until well mixed. Serve your dish right away. Presentation matters, so use a large bowl. Create a nest of zucchini noodles and drizzle extra pesto on top. Garnish with toasted pine nuts for a beautiful finish. Enjoy your flavorful and fresh Zucchini Noodles with Pesto! For the full recipe, check [Full Recipe]. When picking zucchini, look for firm ones that are bright in color. Avoid any with soft spots or wrinkles. Smaller zucchinis taste better and are less watery. Aim for ones about six to eight inches long. This ensures a nice, crisp bite in your dish. You can also check the stem; it should be fresh and green. To make your pesto extra creamy, use a good blender or food processor. Start by blending the basil, pine nuts, and garlic first. Then, slowly add the olive oil while blending. This helps to emulsify the oil, making it smooth. You can add a bit more cheese or even a splash of lemon juice. This brightens the flavor and keeps it fresh. One common mistake is cooking zucchini for too long. Zucchini cooks quickly, so aim for just 2-3 minutes. This keeps it al dente and tasty. Also, avoid adding too much salt at the start. Salt pulls out moisture, making your noodles soggy. Instead, season them lightly before adding your pesto. Finally, don’t overcrowd the pan; cook in batches if needed. For the full recipe, check out the [Full Recipe]. {{image_2}} You can easily make this dish vegan. Instead of Parmesan cheese, use nutritional yeast. This swap gives a cheesy flavor without dairy. You still get a creamy pesto. Blend the rest of the ingredients as usual. This keeps the dish rich and tasty. If you have other dietary needs, don't worry. You can switch out ingredients. For gluten-free options, use gluten-free pasta or spiralized veggies. If you need a nut-free recipe, skip the pine nuts. Use sunflower seeds instead. These simple swaps keep the dish enjoyable for everyone. Zucchini is great, but you can change things up. Try adding fresh herbs like parsley or mint. They give a new twist to the flavor. You can also mix in seasonal veggies. In summer, add cherry tomatoes for sweetness. In fall, try roasted butternut squash for warmth. Each season brings fresh options. Enjoy the tasty variety! Store any leftover zucchini noodles with pesto in an airtight container. You want to keep them fresh and tasty. Place the container in the fridge. They will stay good for about two days. Add a few drops of olive oil to prevent sticking. This keeps the noodles from clumping together. If you used sun-dried tomatoes, they can add extra moisture. So, check for sogginess before storing. To reheat your zucchini noodles, use a skillet. Heat it on low to medium heat. Add a little olive oil to the pan, then toss in the noodles. Stir for about two to three minutes. This warms them up without making them mushy. You can also use a microwave. Put the noodles in a bowl and cover it. Heat on medium for about a minute or two. Check and stir halfway through to ensure even heating. Freezing zucchini noodles is not ideal. They can become watery when thawed. However, you can freeze pesto easily. Put it in ice cube trays for easy use later. Once frozen, pop the cubes into a bag. You can use frozen pesto straight from the freezer. Just add it to hot noodles, and it will melt right in. This way, you can enjoy homemade flavor anytime! For the full recipe, check out the details above. Yes, you can use other veggies. Carrots, bell peppers, or squash work well. Spiralize them just like zucchini. They add nice colors and flavors too. Each will give a new twist to your dish. Just remember to cook them until tender, but not mushy. To make nut-free pesto, skip the pine nuts. Use sunflower seeds instead. They blend nicely and add a good texture. You can also use hemp seeds for a different taste. The rest of the pesto stays the same. Use fresh basil and garlic for that classic flavor. Zucchini noodles with pesto pair well with many sides. A fresh salad adds crunch and brightness. Garlic bread is a great choice for dipping. You could also serve grilled chicken or shrimp on top for protein. Enjoy this dish with a light white wine for a special touch. For more ideas, check the Full Recipe for inspiration. Zucchini noodles with pesto offer a tasty and healthy meal. We covered the key ingredients and how to make them. I shared steps for cooking, tips for selecting fresh zucchini, and variations to suit diets. Proper storage and reheating tips will keep leftovers tasty. Remember, experimenting with flavors makes cooking fun. Enjoy your meal, and don’t hesitate to try new things in the kitchen.](https://dailydishly.com/wp-content/uploads/2025/06/e06d07df-0eee-433f-a13f-76c167ac26ec-768x768.webp)
![To make Pineapple Teriyaki Meatballs, you need simple and fresh ingredients. Here’s the list: - 1 lb ground chicken or turkey - 1 cup breadcrumbs - 1/4 cup green onions, finely chopped - 1/4 cup fresh pineapple, finely diced - 1 egg, beaten - 2 cloves garlic, minced - 1 teaspoon ginger, grated - 1/4 cup soy sauce (low sodium preferred) - 1/4 cup teriyaki sauce - 1 tablespoon sesame oil - 1 tablespoon cornstarch (optional, for thickening) - Sesame seeds for garnish - Fresh cilantro for garnish These ingredients blend well, giving the meatballs a sweet and savory taste. The fresh pineapple adds a fruity twist, making them unique. You can find most of these items at your local grocery store. For the best flavor, use fresh ingredients whenever you can. Check out the Full Recipe for more details on how to combine these elements into a delicious dish. - Set your oven to 400°F (200°C). - Prepare a baking sheet by lining it with parchment paper. - In a large bowl, mix ground chicken or turkey with breadcrumbs. - Add in the chopped green onions, diced pineapple, beaten egg, minced garlic, and grated ginger. - Season with salt and pepper. Mix until well combined. - Use your hands to shape the mixture into meatballs, about 1 to 1.5 inches wide. - Place the meatballs on the prepared baking sheet. Space them out evenly. - Bake in the oven for 15 to 20 minutes, or until they turn golden brown. - While the meatballs bake, grab a small saucepan. - Combine soy sauce, teriyaki sauce, and sesame oil in the pan. - If you want to thicken it, mix cornstarch with water and add that too. - Heat the mixture over medium heat until it simmers, then reduce to low. Let it thicken for about 5 minutes. - Once the meatballs are done, take them out of the oven. - Drizzle the teriyaki sauce over the meatballs. Toss gently to coat them. - Transfer them to a serving platter and garnish with sesame seeds and fresh cilantro. For the full recipe, check out the [Full Recipe]. - Avoid overmixing the meat mixture for tenderness. Mixing too much can make meatballs tough. - Use a cookie scoop for uniform sizing. This helps them cook evenly and look great. - Adjust baking time based on oven type. Every oven heats differently, so watch your meatballs closely. - Use an instant-read thermometer for doneness. Aim for an internal temperature of 165°F (74°C) for safety and juiciness. - Experiment with additional spices or herbs. Try adding garlic powder or fresh basil for a new twist. - Consider adding a splash of citrus for brightness. A little lime or lemon juice can really lift the flavors. Feel free to explore the [Full Recipe] for more detailed steps on making these delicious Pineapple Teriyaki Meatballs! {{image_2}} You can switch up the protein in this recipe. Ground beef or pork works great. If you prefer plant-based meals, use lentils or meat substitutes. Each option adds its own flavor and texture. Each choice makes the dish unique. The teriyaki sauce can be customized. For a homemade version, mix soy sauce, brown sugar, and ginger. If you like heat, add chili paste or sriracha. You can also use a store-bought spicy teriyaki sauce. Each sauce brings a new twist to the dish. You can add vegetables to your meatballs. Bell peppers or zucchini add color and crunch. They boost nutrition too. For heat, consider crushed red pepper. This adds a nice kick. Feel free to get creative with your additions! To keep your Pineapple Teriyaki Meatballs fresh, store leftovers in an airtight container. This method helps lock in flavor and moisture. You can keep them in the fridge for up to 3-4 days. Make sure they cool down before sealing them up. This way, they won’t trap steam and become soggy. If you want to save some meatballs for later, freeze them! First, lay the meatballs out on a tray. Freeze them individually for about an hour. This step makes sure they don’t stick together. Once frozen, transfer them to a container or a freezer bag. Use them within 3 months for the best quality. Label the container with the date so you don’t forget! When you're ready to enjoy your frozen meatballs, reheating is simple. Use the oven or microwave for even heating. If using the oven, preheat to 350°F (175°C) and bake for about 15 minutes. For the microwave, place meatballs on a plate and add a splash of water. This helps keep them moist. Heat for about 2-3 minutes, checking to ensure they are hot all the way through. Enjoy your flavorful meal again! For the complete recipe, check out the Full Recipe section. Pineapple Teriyaki Meatballs take about 40 minutes total to cook. This includes 15 minutes for prep and 15 to 20 minutes for baking. Bake them at 400°F (200°C) until they turn golden brown. Yes, you can make these meatballs ahead of time. Prepare the meatball mixture and shape them into balls. Place them on a tray and cover with plastic wrap. You can keep them in the fridge for up to 24 hours. When ready, bake them as usual. These meatballs pair well with many sides. Try serving them with steamed rice or quinoa for a filling meal. You can also add a fresh salad or stir-fried veggies for balance. Pineapple fried rice works great too! Yes, this recipe is great for meal prep. You can cook a large batch and store them in containers. They keep well in the fridge for 3 to 4 days. You can also freeze them for later use. Just thaw and reheat when needed. Absolutely! To make the meatballs gluten-free, use gluten-free breadcrumbs. Make sure the soy sauce is gluten-free as well. This way, you can enjoy the same great taste without gluten. To boost the flavor of teriyaki sauce, try adding fresh ginger or garlic. A splash of rice vinegar adds a nice tang. For some heat, include red pepper flakes. These simple tweaks can make a big difference! You can find the full recipe [here]. These Pineapple Teriyaki Meatballs are easy to make and full of flavor. You learned about the key ingredients, helpful tips, and tasty variations. From different proteins to sauce options, the choices are endless. Remember to store leftovers properly to enjoy them later. Experimenting with this recipe will lead to new favorites. So, roll up your sleeves and create some delightful meatballs today!](https://dailydishly.com/wp-content/uploads/2025/07/2108c202-57e5-4a3c-8ec5-e482c7f00875-768x768.webp)
