Chicken and Rice Skillet Bake Simple One-Pan Meal

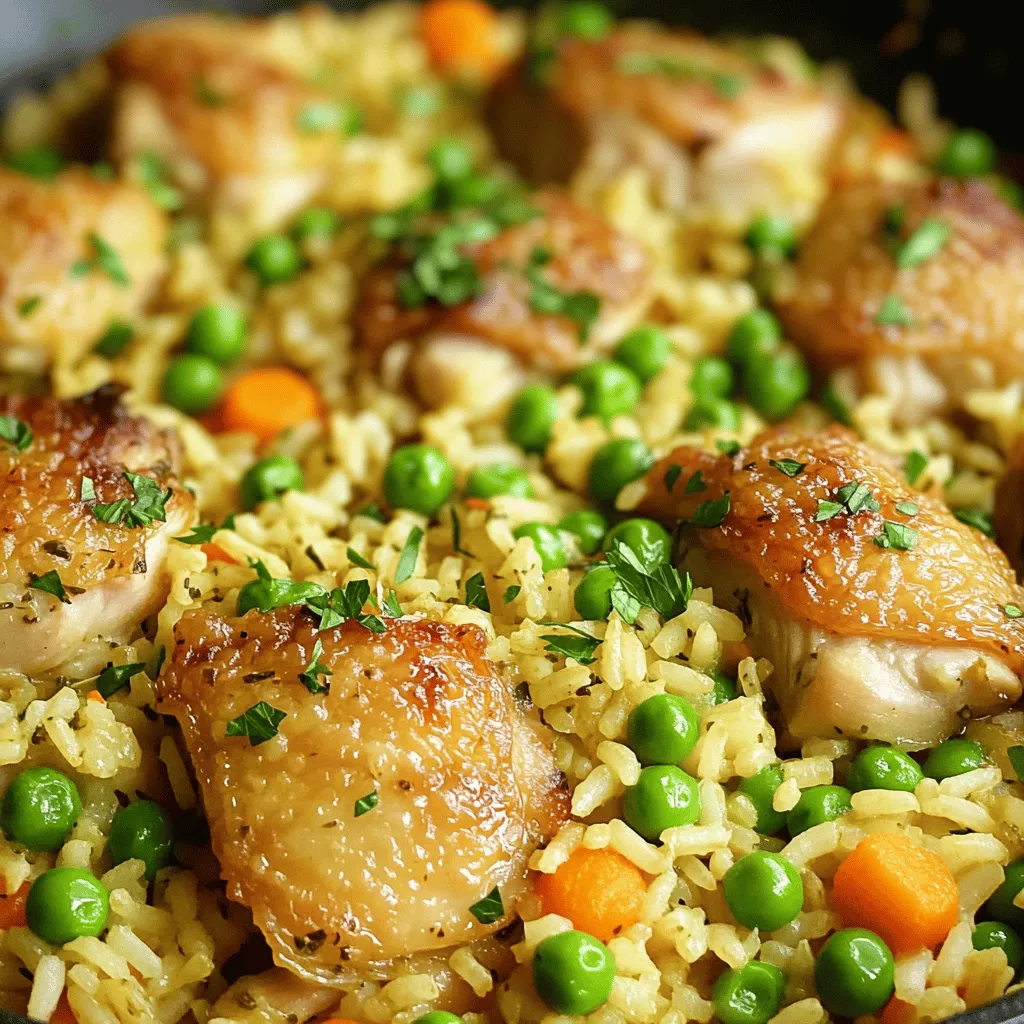
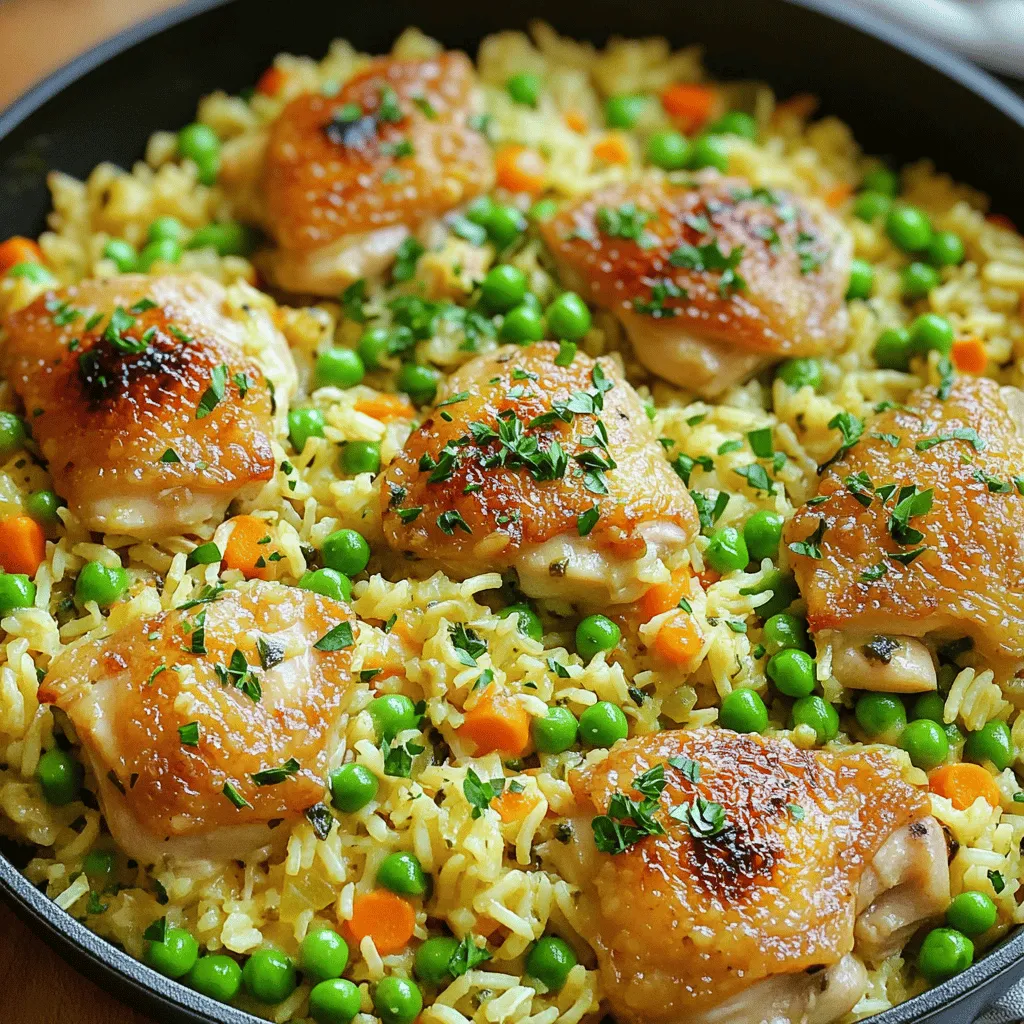
Looking for a meal that’s both quick and delicious? Try my Chicken and Rice Skillet Bake! This simple one-pan dish combines tender chicken, fluffy rice, and fragrant spices. It’s perfect for busy weeknights and a hit with the whole family. In this post, I’ll walk you through each step, share cooking tips, and even suggest fun variations. Let’s get cooking!
Ingredients
Complete Ingredients List
– Chicken ingredients
– 2 cups boneless, skinless chicken thighs, diced
– Rice and broth components
– 1 cup long-grain rice
– 2 cups low-sodium chicken broth
– Aromatics and seasoning details
– 1 medium onion, diced
– 2 cloves garlic, minced
– 1 cup frozen peas and carrots
– 1 tablespoon olive oil
– 1 teaspoon dried thyme
– 1 teaspoon paprika
– Salt and pepper to taste
– Fresh parsley, chopped (for garnish)
This Chicken and Rice Skillet Bake uses simple, fresh ingredients. The chicken thighs give it a rich flavor. Long-grain rice absorbs the broth well, creating a tasty dish. The onion and garlic add depth. Peas and carrots bring color and nutrition. Thyme and paprika enhance the overall taste. Olive oil helps in browning the chicken nicely.
Step-by-Step Instructions
Preparation Steps
1. Preheat the oven: Set your oven to 375°F (190°C). This makes sure it’s hot and ready for baking.
2. Sauté chicken: In a large oven-safe skillet, heat 1 tablespoon of olive oil over medium heat. Add 2 cups of diced chicken thighs. Season with salt, pepper, 1 teaspoon of dried thyme, and 1 teaspoon of paprika. Cook the chicken for 5-7 minutes until it turns golden brown.
3. Add aromatics: Next, stir in 1 medium diced onion and 2 minced garlic cloves. Cook for another 2-3 minutes until the onion softens and smells good.
4. Incorporate rice: Add 1 cup of long-grain rice to the skillet. Stir it for 1-2 minutes to mix it well with the chicken and onion.
5. Add broth and veggies: Pour in 2 cups of low-sodium chicken broth and mix in 1 cup of frozen peas and carrots. Let this mixture simmer gently.
Baking Process
1. Cover and transfer to the oven: Lower the heat to low. Cover the skillet with a lid or aluminum foil. Carefully move it to the preheated oven.
2. Baking time and temperature: Bake for 25-30 minutes. The rice should be fully cooked and the liquid mostly absorbed.
Final Steps
1. Rest and fluff: Once done, take the skillet out of the oven. Let it rest, covered, for 5-10 minutes. This helps the rice finish cooking. Fluff the rice gently with a fork.
2. Garnish and serve: Sprinkle chopped fresh parsley on top to add color and a fresh taste. Serve hot from the skillet, and enjoy this delicious meal.
Tips & Tricks
Cooking Tips
To ensure the perfect rice texture, rinse your rice before cooking. This removes excess starch and helps prevent it from becoming sticky. Use a 2:1 ratio of broth to rice for fluffy grains. Adjusting seasoning levels is key for flavor. Start with salt and pepper. Taste as you go, and add more spices if needed. You can always add more, but you can’t take it out.
Equipment Recommendations
For this recipe, a heavy-bottomed skillet works best. A cast-iron skillet retains heat well and gives nice browning. Make sure it is oven-safe for best results. Use a sharp knife for chopping ingredients quickly. A sturdy cutting board also helps with safe food prep. An instant-read thermometer can help you ensure your chicken is cooked properly.
Serving Suggestions
Serve this dish with a simple green salad. A light vinaigrette pairs nicely with the rich flavors of the chicken and rice. If you enjoy wine, a chilled white like Sauvignon Blanc is a great choice. For something non-alcoholic, try sparkling water with a slice of lemon. This adds a refreshing touch to your meal.

Variations
Ingredient Substitutions
You can change the protein in this dish for variety. Instead of chicken, try turkey or tofu. Turkey gives a similar taste but is leaner. For a plant-based option, tofu works well and soaks up flavors. Just make sure to press the tofu to remove excess moisture.
You can also switch up the vegetables. Instead of peas and carrots, use bell peppers, broccoli, or zucchini. Fresh veggies add color and nutrients. Just be sure to chop them into small pieces for even cooking.
Flavor Enhancements
To boost flavors, add spices or herbs. Try cumin or oregano for a warm taste. You can also add a pinch of cayenne for some heat. Fresh herbs like basil or cilantro add brightness, too. Add them right before serving for the best flavor.
Sauce variations can change the whole dish. A splash of soy sauce or teriyaki sauce adds depth. For a creamy touch, stir in a bit of sour cream or cream cheese before baking. These small changes make the meal exciting and new.
Feel free to explore these variations to make the dish your own.
Storage Info
Refrigeration Guidelines
To store leftovers, let the dish cool down first. Place the chicken and rice in an airtight container. Make sure to cover it well. Store it in the fridge for up to three days. When you are ready to eat, reheat it on the stove or in the microwave.
Freezing Instructions
You can freeze the chicken and rice for later use. After the dish cools, scoop portions into freezer-safe bags or containers. Squeeze out as much air as you can to prevent freezer burn. Label the bags with the date. It can last up to three months in the freezer. To reheat, thaw it overnight in the fridge. Warm it up in a pan or microwave until hot.
Shelf Life and Tips
For best taste and safety, eat the dish within three days if stored in the fridge. Frozen meals are best used within three months. Always check for signs of spoilage before eating. If it smells off or looks strange, throw it away. Keeping your food fresh ensures you enjoy every bite!
FAQs
Common Preparation Questions
Can I use brown rice instead of white rice?
Yes, you can use brown rice. Just remember, brown rice takes longer to cook. You might need more broth and a longer baking time. I suggest cooking it for about 45-50 minutes instead of 25-30 minutes.
How can I make this recipe gluten-free?
To make this dish gluten-free, use gluten-free chicken broth. Check the rice brand to ensure it is gluten-free too. Most long-grain rice is safe, but it is good to double-check.
Cooking Method Inquiries
Can I cook this on the stovetop instead?
Yes, you can cook this on the stovetop. After sautéing the chicken and veggies, add the rice and broth. Bring it to a boil, then lower the heat. Cover and let it simmer until the rice is tender, about 20-25 minutes.
Nutritional Information
This dish is rich in protein and fiber. The chicken provides lean protein. The rice gives you energy, and the peas add vitamins. One serving has about 400 calories. It is a balanced meal with carbs, protein, and veggies. Enjoy it as a healthy family dinner!
This blog covered how to make a delicious chicken and rice dish. We explored ingredients, cooking steps, and helpful tips. You learned about variations and how to store leftovers. Remember, perfect rice starts with proper technique and seasoning adjustments. Feel free to swap in different proteins or veggies. This recipe is versatile, so get creative! Keep your meals fresh and safe with smart storage practices. Enjoy your cooking!


![- 300g spaghetti - 6 cloves garlic, thinly sliced - 1/2 teaspoon red pepper flakes - 1/4 cup extra-virgin olive oil - Zest and juice of 1 lemon - 1/2 cup fresh parsley, chopped - Salt to taste - Freshly grated Parmesan cheese (optional) - 1 cup cherry tomatoes, halved To make Spaghetti Aglio e Olio, you need simple and fresh ingredients. The garlic is key. It adds depth and flavor. Thinly sliced garlic cooks fast, so watch it closely. Red pepper flakes give the dish a bit of spice. You can add more or less based on your taste. Extra-virgin olive oil is the base for the sauce. It should be high quality for the best flavor. The lemon zest and juice brighten up the dish. Fresh parsley adds color and freshness. Salt enhances all the flavors, so don’t skip it. If you like cheese, sprinkle on some Parmesan at the end. The cherry tomatoes are a fun addition. They bring sweetness and juiciness. You can use them or leave them out. They add a nice twist to the classic recipe. Check out the Full Recipe for more details on how to prepare this dish. - Protein options (shrimp, chicken) - Seasonal vegetables - Other herbs and spices To make the meal heartier, think about adding proteins. Shrimp or chicken cook quickly and add great flavor. Seasonal vegetables like spinach or zucchini can also bring in extra nutrients. Herbs like basil or oregano can enhance the taste too. Feel free to get creative with what you have! To start, boil water in a large pot. Add salt to the water. This step adds flavor to the spaghetti. Once the water reaches a rolling boil, add 300g of spaghetti. Cook according to package instructions until it is al dente. This usually takes around 8 to 10 minutes. After cooking, reserve 1 cup of pasta water. This is key for the sauce. Drain the spaghetti but do not rinse it. In a large skillet, pour in 1/4 cup of extra-virgin olive oil. Heat it over medium heat. Add 6 cloves of sliced garlic. Sauté the garlic until it turns golden, about 2 minutes. Be careful not to burn it. Next, stir in 1/2 teaspoon of red pepper flakes. This adds a nice kick to the dish. Allow the flakes to cook for about 30 seconds. Then, add 1 cup of halved cherry tomatoes. Cook these for 3 to 4 minutes. They should soften and become juicy. Now it’s time to combine! Toss the drained spaghetti into the skillet. Mix it well to coat it with the garlic and oil. Add the zest and juice of 1 lemon. Also, add half of the chopped parsley. If the pasta looks dry, add some reserved pasta water. Keep mixing until you reach your desired creaminess. Finally, season with salt to taste. Remove the skillet from heat. Your delicious Spaghetti Aglio e Olio is ready to enjoy! For the full recipe, check out the detailed guide. To get great flavor, focus on sautéing garlic just right. Use medium heat and watch it closely. Garlic cooks fast and can burn easily. Sauté it for about two minutes until golden, but not brown. This gives a nice, sweet flavor. Next, balance spice and acidity with lemon. The zest adds a fresh burst, while the juice brightens the dish. Add lemon juice right before serving. This keeps the flavor fresh and lively. For al dente pasta, cook spaghetti for 8-10 minutes. Check the package for exact times, as brands vary. You want it to be firm but not hard. Timing is key for adding ingredients. Toss in cherry tomatoes after the garlic. Cook them for 3-4 minutes until they soften. This keeps them fresh and juicy. Don't forget to reserve some pasta water before draining. It helps bind the dish together later. When plating Spaghetti Aglio e Olio, use shallow bowls. This makes the dish look inviting. Add a drizzle of olive oil on top for shine. Garnish with parsley for color. A lemon wedge on the side adds a nice touch. You can also sprinkle freshly grated Parmesan cheese for extra flavor. Enjoy your beautiful, tasty dish! For the full recipe, check out the link provided. {{image_2}} You can easily add proteins like shrimp or chicken to make your dish heartier. This small change can turn a light meal into a filling feast. You can also incorporate seasonal vegetables, like zucchini or asparagus, for a fresh taste. These add color and nutrition to your plate, making your meal even better. To make your dish pop, try infusing extra-virgin olive oil with herbs. You can use rosemary, thyme, or basil. This simple step adds rich flavors without much effort. Another great idea is to use different types of cheese for depth. Pecorino Romano or a tangy goat cheese can bring new taste sensations to your Spaghetti Aglio e Olio. If you want to simplify your cooking, try the one-pot spaghetti method. Cook everything together for a quick meal with less cleanup. Just toss the raw pasta, garlic, and oil into the pot with water and let it cook. You can also make a baked version. This way, your pasta gets crispy edges while remaining soft inside, offering a delightful contrast. For the full recipe, visit [Full Recipe]. To store leftover spaghetti, let it cool first. Place it in an airtight container. Make sure to refrigerate it. Leftovers can last up to three days in the fridge. If you want to keep it longer, you can freeze spaghetti for up to three months. To reheat spaghetti, the stovetop is best. Heat a pan over medium heat. Add a splash of water or olive oil. This helps keep the pasta moist. Stir occasionally until warm. You can also use the microwave. Place the spaghetti in a bowl, cover it, and heat in short bursts. Check often to avoid drying it out. Enjoy your meal! Yes, you can! If you skip the cheese, the dish remains tasty. You might add a splash of cream for a creamy texture. Another option is to use nutritional yeast. It gives a cheesy flavor without dairy. Salads go great with this dish. A simple green salad with lemon dressing works well. Garlic bread is also a fantastic choice. It complements the garlic flavor in the pasta. To serve more people, just multiply the ingredients. For example, double everything for eight servings. Keep the cooking times the same, but check the pasta for doneness. You may need a larger pot for boiling. If you lack olive oil, use avocado oil or sunflower oil. Both have a mild taste that works well. Grapeseed oil is another option, as it has a light flavor too. You can find the full recipe [here](Full Recipe). It has all the steps and tips to make this dish perfect. Spaghetti Aglio e Olio is simple yet delicious. We covered key ingredients, cooking steps, and tips to enhance flavor. You can customize this dish by adding proteins and veggies. Remember to balance the garlic and lemon for taste. If you store leftovers, keep them moist while reheating. Enjoy your cooking adventure and try the variations for a fresh twist. You’ll impress anyone with this dish!](https://dailydishly.com/wp-content/uploads/2025/06/f6e5d00b-504d-4d52-a053-c2bbef60ee08-768x768.webp)


![- 2 cups cooked chicken, shredded - 2 cups enchilada sauce (homemade or canned) - 1 can black beans, drained and rinsed - 1 cup corn kernels (fresh, frozen, or canned) - 1 red bell pepper, diced - 1 cup chopped onions - 2 cups shredded cheddar cheese - 8 corn tortillas, cut into strips - 1 teaspoon cumin - 1 teaspoon chili powder - ½ teaspoon garlic powder - Salt and pepper to taste - Fresh cilantro for garnish - Sour cream (optional) for serving You can swap chicken for other proteins. Turkey works well too. If you prefer plant-based options, try tofu or beans. For the enchilada sauce, you can use low-sodium canned sauce. Homemade sauce is another great choice. Just mix tomatoes, spices, and broth. If you follow a gluten-free diet, use corn tortillas. They add a nice crunch. For a vegetarian version, skip the chicken. Add more beans or vegetables. This way, you keep all the flavor without meat. You can also use vegan cheese if you want a plant-based option. 1. Preheat the oven to 350°F (175°C). This step helps cook the casserole evenly. 2. Prepare your baking dish. Use a 9x13 inch dish, as it fits all the layers well. 3. Sauté the vegetables. In a large skillet, heat over medium. Add the chopped onions and diced bell pepper. Cook until soft, about 5 minutes. 4. Combine with chicken. Stir in the cooked chicken, black beans, corn, cumin, chili powder, garlic powder, salt, and pepper. Cook for 3-4 more minutes until heated through. 1. Start with enchilada sauce. Spread a thin layer at the bottom of your baking dish. 2. Add tortilla strips. Layer half of the strips over the sauce. This creates a solid base. 3. Add chicken mixture. Spoon half of the chicken mix on top of the tortillas. This ensures each bite is flavorful. 4. Sprinkle cheese. Add a cup of shredded cheddar cheese on top of the chicken mixture. The cheese melts beautifully in the oven. 5. Repeat the layers. Add more enchilada sauce, the rest of the tortilla strips, the remaining chicken mixture, and finish with the remaining cheese. Even distribution of flavors matters for a tasty casserole. 1. Cover the casserole. Use aluminum foil to cover the dish. This helps steam the ingredients while baking. 2. Bake for 25 minutes. This allows the flavors to meld and the cheese to start melting. 3. Uncover and bake again. Remove the foil and bake for an additional 10-15 minutes. You want the cheese to be bubbly and slightly golden. 4. Check for doneness. Look for a golden top and warm filling. Let it cool for a few minutes before cutting. Garnish with fresh cilantro for a lovely finish. For the complete recipe, check out the [Full Recipe]. To shred chicken well, use two forks. Hold one fork steady and pull the chicken apart with the other. This method gives you nice, even shreds. If you have a stand mixer, you can use it too. Just place the cooked chicken in the bowl and mix on low for a few seconds. When sautéing vegetables, heat the pan first. Add a splash of oil, then toss in the chopped onions and bell peppers. Stir them often until they are soft, about five minutes. This method brings out the sweet flavors and keeps the veggies bright. Boost flavor with garnishes. Fresh cilantro adds a fresh taste. A dollop of sour cream gives a nice creamy touch. You can also add sliced jalapeños for some heat. Pair chicken enchilada casserole with sides like rice, beans, or a simple salad. These add color and balance to the meal. You can serve tortilla chips for a fun crunch. To reheat leftovers, use the oven for the best results. Preheat it to 350°F (175°C). Place the casserole in a baking dish, cover it with foil, and heat for about 20 minutes. If you're in a hurry, the microwave works too. Just heat in short bursts, stirring in between. This helps keep the texture nice. Avoid overheating, as it can dry out the dish. {{image_2}} You can easily change the flavor of your Chicken Enchilada Casserole. Add spices like jalapeños or cayenne for extra heat. These spices can bring a nice kick to the dish. If you love cheese, try using pepper jack or Monterey Jack. These cheeses melt well and add a creamy texture. You can also switch up the style of your casserole. For a vegetarian version, use black beans and your favorite veggies. This version is healthy and full of flavor. You can even try a green enchilada sauce instead of the red. This gives the dish a fresh twist that many enjoy. If you're on a keto diet, you can make some changes. Use cauliflower rice instead of tortillas. This keeps the carbs low. For vegan options, swap chicken for plant-based proteins like lentils or chickpeas. Both options work well and keep the dish hearty and filling. For the full recipe, check out the Cheesy Chicken Enchilada Casserole. To store your Chicken Enchilada Casserole, let it cool first. Then, place it in an airtight container. I recommend using glass or plastic containers with tight lids. This keeps the casserole fresh and prevents any spills in your fridge. If you want to freeze portions, cut the casserole into squares. Wrap each piece tightly in plastic wrap, then place them in a freezer bag. This method saves space and protects the flavors. When ready to eat, take a piece out and thaw it in the fridge overnight. Reheat in the oven at 350°F until warm. In the refrigerator, Chicken Enchilada Casserole lasts about 3 to 4 days. If you freeze it, it can last up to 3 months. Just remember to label your containers with the date. This helps you keep track of freshness. You can swap chicken for many tasty options. If you want a vegetarian dish, use black beans or lentils. For a vegan choice, try jackfruit or tofu. Shredded mushrooms can also add nice texture. If you prefer meat, turkey is a great substitute. You can also use shredded beef or pork for a different flavor. Yes, you can prepare the Chicken Enchilada Casserole in advance! Assemble it in the baking dish, cover it, and store it in the fridge for up to 24 hours. When you're ready, just bake it straight from the fridge. If you want to freeze it, wrap it well and store for up to three months. Thaw it overnight in the fridge before baking. To make a complete meal, pair your casserole with simple sides. A fresh green salad adds crunch. You can serve rice or quinoa for a hearty touch. Guacamole and tortilla chips are also fun options. For a cooling effect, try a dollop of sour cream on the side. Chicken Enchilada Casserole comes from Mexican cuisine. Enchiladas are rolled tortillas filled with meat and sauce. The casserole form makes it easier to serve. It blends flavors from different regions, showcasing spices and fresh ingredients. This dish brings families together at the table and is a favorite for gatherings. This blog post covered how to make a tasty Chicken Enchilada Casserole. We started with a list of ingredients, including different proteins and sauces. Next, we shared easy step-by-step instructions for preparation, layering, and baking. We explored tips for cooking and serving, as well as variations to suit dietary needs. Lastly, we discussed storage options and common questions. Enjoy making this dish your own. It's simple, flexible, and full of flavor!](https://dailydishly.com/wp-content/uploads/2025/07/9970a47c-7c3f-446c-bbbe-f15e5a47e982-768x768.webp)
